
Do you suddenly find that the spell check, grammar check or autocorrect function on Google Docs is not working?
Google Docs is an incredibly nifty word-processing app that has slowly risen in popularity. The app is very easy to use and very intuitive in the matter as it combines the familiarity of other apps/software while adding to it that will make creating and editing documents significantly more manageable.
The tools the app comes equipped with, make creating documents quick and efficient, as you also have the capacity to share and edit your documents with other people in real-time. But going back to the basics, the spell checker is a handy tool while editing documents, as it helps you take care of any spelling and grammar mistakes.
Google Docs’ spell checker has its limits, however, as the tool can sometimes stop working all of a sudden, making you miss out on crucial spelling and grammar errors. This issue can persist throughout the entire time you edit your document, affecting your time and productivity.
Types of Google Docs Spell Check, Grammar Check or Autocorrect Errors
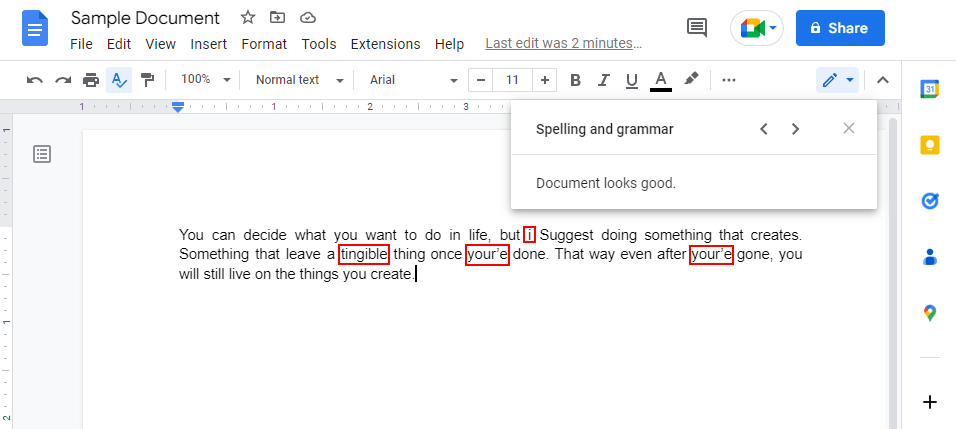
Google Doc users have been found to report that the spell checker of the aforementioned is not working. Users usually see this problem with obviously misspelled words not getting underlined or the spell checker not detecting any errors and marking the documents clear of any errors. The feature can also misbehave where it doesn’t automatically fix simple mistakes such as the capitalization of “i” and several syntax errors.
Any instance of the spell checker not working all goes down to an error with either the spell checker function or the browser you are using.
There are several factors that come into play for this problem which is why we have prepared this guide with 6 reasons why your spell checker in Google Docs is not working and 9 fixes that you can try out.
The fixes we’ll be covering will range from simple and easy fixes to fixes that need a bit more steps to finish. With everything in mind, let’s start doing some fixes!
Why is the Google Docs Spell, Grammar Checker or Autocorrect Not Working?
1. The Spell Checker Function Was Turned Off
A possible reason why you might find the spell checker in Google Docs to not be working might be because the feature might’ve been disabled by you. Spell-checking suggestions for misspelled words and grammatically incorrect sentences are only available if the feature isn’t turned off.
It is possible that the spell checker was disabled by you previously or was automatically disabled at some point because of an error from Google. Regardless, it is never a bad idea to check and re-enable the spell checker feature in Google Docs (Step 1), as the feature might’ve been disabled, making it impossible to use.
2. Spell Checker Configuration Was Not Set Properly
One reason why the spell checker in Google Docs might not be working might be because the configuration for your spell checker isn’t properly set. Similar to the first reason, it is possible that the settings related to spell checking aren’t set to the right one making it hard or impossible to use in Google Docs.
You can fix this problem by setting and enabling your internet browser to basic spell-checking (Step 2) and setting the language of your document in Google Docs to the language you want your spell checker to use (Step 3) if it isn’t English (default option).
3. Conflicting Languages for your Spell Checker
One of the nifty things about Google Docs’ spell checker is that the feature isn’t limited to the English language. Although English is the default language, Google Docs supports a wide selection of languages that the spell checker can identify.
The downside to this is that you need to properly set the language and remove any potential languages that might conflict with the language you are typing as in your document in Google Docs. The language isn’t only limited to your selection within Google Docs but can also extend to the language in your browser.
With this in mind, you can opt to set the language of your document in Google Docs (Step 3) and remove any extra language your browser is set to (Step 4).
4. Incompatibility between Browser Add-ons and Extensions
Another common reason you might not be able to use the spell checker in Google might come from an incompatibility between any add-ons and extensions you have running in your browser.
Although Google Docs’ spell checker is generally great on its own, we tend to have additional tools to help improve our online chatting and messages. The problem with these tools is that they can get in the way of writing documents and proofreading in Google Docs as they’ll conflict with the spell checker feature.
In this case, we recommend disabling or removing browser extensions and add-ons that fall under clerical work and proofreading (Step 5) while using Google Docs, as this will cause fewer issues with compatibility between the Google Docs’ spell checker.
5. Document Formatting Error in Google Docs
A unique quirk that users have found in Google Docs and most word processing apps/software is that the spell checker function can sometimes fail against specific formatting options. This failure of the feature is usually a result of bugs and glitches that make it impossible for the spell checker to function in certain formatted parts of the document.
There are 2 ways you can go about fixing this issue the first one through copy and pasting the document in a fresh and clean one but without the formatting present (Step 6), and the second one is creating a copy of the document (Step 7) which allows you to preserve the formatting and such.
6. Performance Issues in your Browser
The last reason why the spell checker in your Google Docs document might not be working can be a direct result of any performance issues your internet browser might have. Since Google Docs is readily available through an internet browser, its performance relies solely on your browser’s speed and capacity.
Suppose your browser is experiencing heavy performance drops. In that case, you can expect Google Docs to struggle with some features, such as its spell checker becoming unusable due to the lack of resources.
You can fix this problem by boosting the performance of your browser either by updating to the latest version (Step 8) or cleaning up any cookies, cache, and data your browser might have (Step 9).
9 Fixes for When the Google Docs Spell Check, Grammar Check or Autocorrect Feature Is Not Working
1. Turn On the Spell Checker Function in Google Docs
When you first use Google Docs, the spell checker function is usually enabled by default, along with certain convenience features such as the underlined words that indicate a mistake. It is possible that the quality might’ve been accidentally turned off and disabled, which is why it is never a bad idea to check it and enable it again. Here’s what you can do.
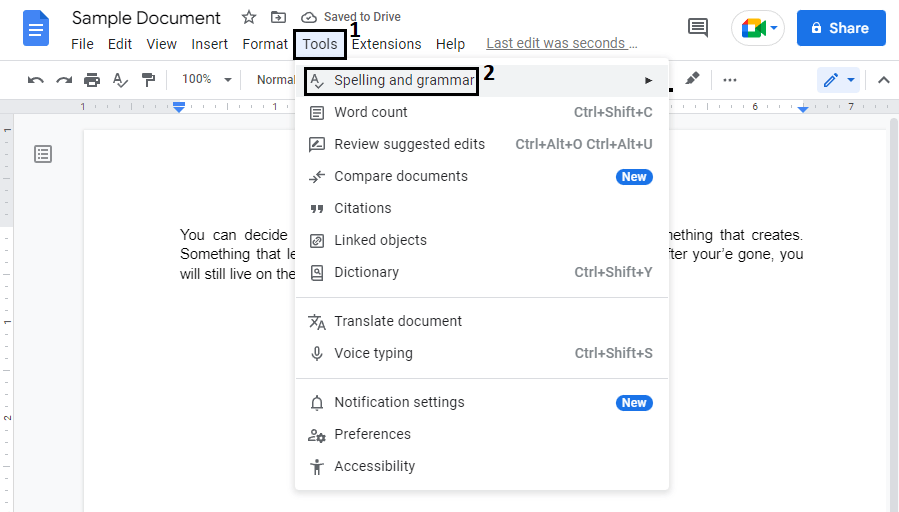
- In your Document in Google Docs, click on “Tools” in your menu and then “Spelling and Grammar”.
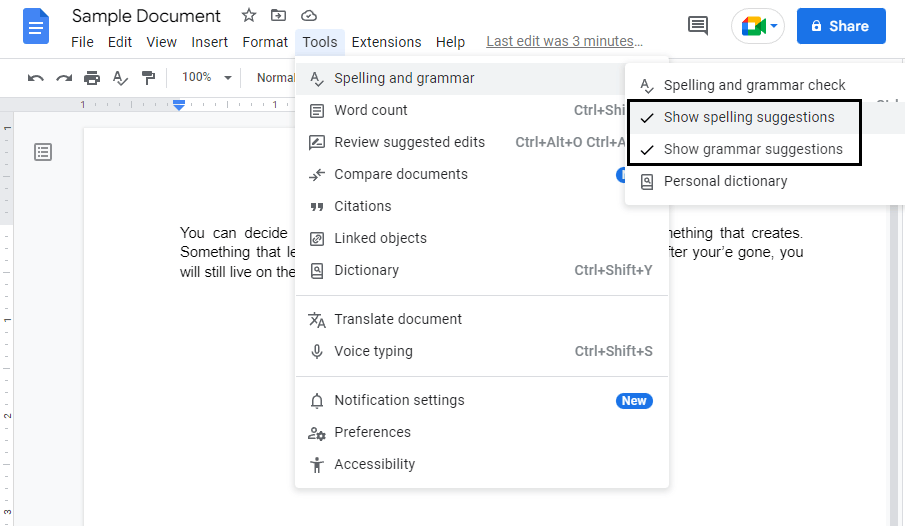
- Click and enable “Show Spelling Suggestions” and “Show Grammar Suggestions”.
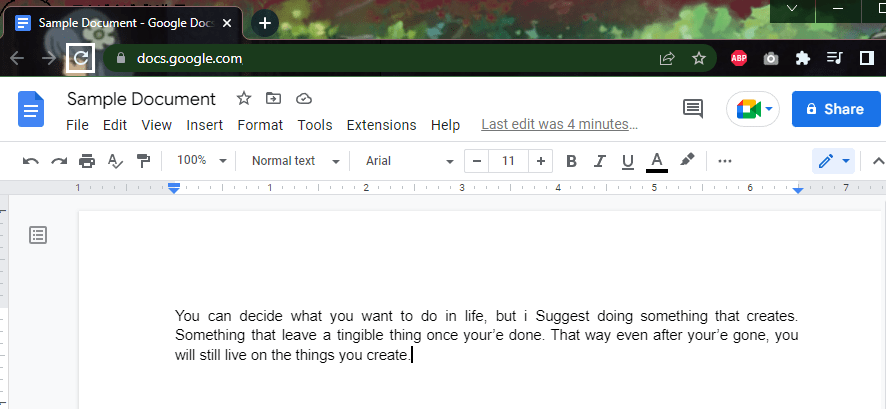
- Refresh 🔄 your Google Docs and check if the spell checker is fixed and working.
Following the steps above will enable the Spell Checker in Google Docs for your account. These settings will be followed in any computer with the same account logged in for Google Docs, so you only need to do this once.
2. Use Basic Spell Checker in Your Browser
Many browsers tend to have their spell checker for when you are typing messages and documents on websites. Google Docs is no exception to this most of the time and will often conflict with your browser’s spell checker, especially if you are using the more comprehensive option.
Switching to the basic spell-checker function in your browser is a way to alleviate the effects of this, as it will allow the spell-checker in Google Docs to make better suggestions. Here’s how you can do it through these steps:
- Open your Browser’s Settings ⚙️ through its menu and click on “Settings” or “Browser Settings”.

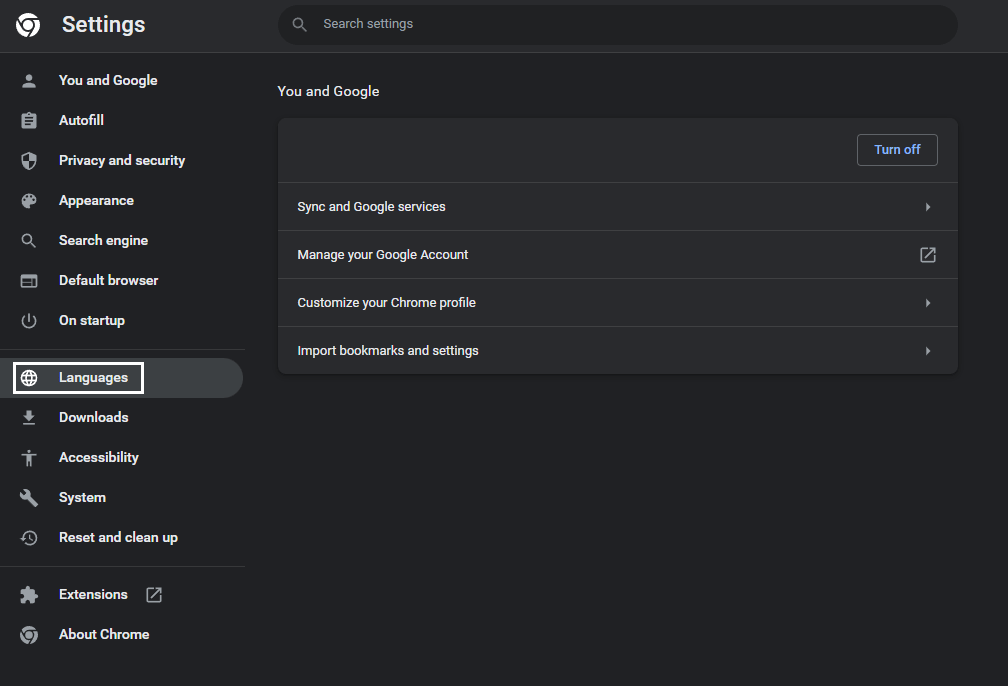
- Find and click on the “Languages” 🌐 option/category in your Browser’s Settings.
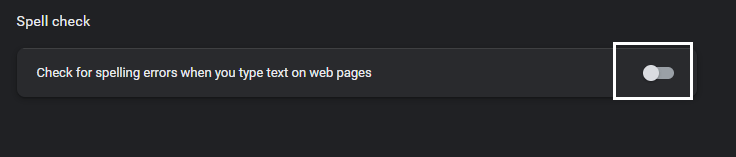
- Enable “Check for Spelling Errors when you type text on Web Pages”.
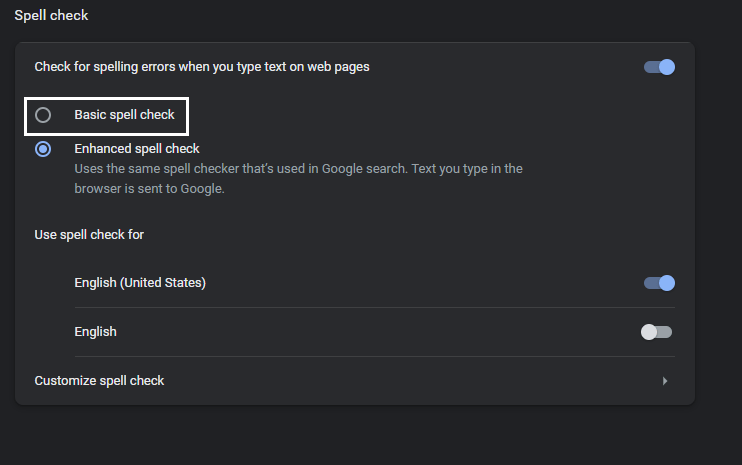
- Find the Spell Checker category of your Language Settings and click on “Basic Spell Checker”.
The steps above will set your browser to use a basic spell-checker function which will also be applied to Google Docs. This will prevent your browser and Google Docs from conflicting with one another, which will lead to fewer problems.
3. Set Your Document Language in Google Docs
The spell checker in Google Docs supports various languages and even allows for spelling and words from other languages in a document containing words from entirely different languages without causing any errors.
While this feature is nifty, it can become problematic when you have to write a document in a certain language and avoid having words from other languages whenever possible. You can set the language the document will be used by following these steps:
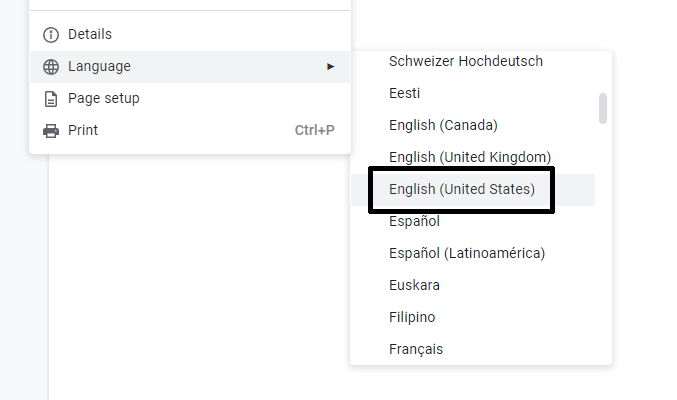
- In your Document in Google Docs, click on “Files” in the menu and then “Language” 🌐.
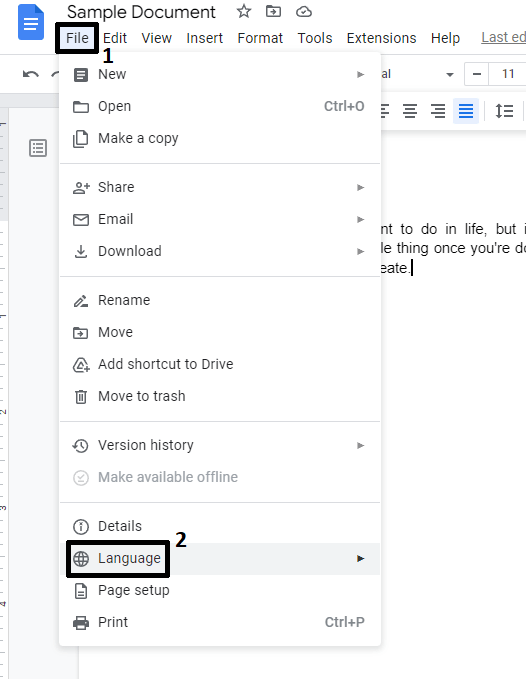
- Find and click the language you are using and type in the Document (e.g. English).
Following the steps above will set the language in your Google Docs to the specified language and, in turn, configure the spell checker to check for mistakes in the context of the document language instead of its default settings.
We also recommend following the next step (Step 4) to improve your experience with the spell checker, as it will reduce the number of conflicting spell checks.
4. Remove Extra Languages in Your Browser
Browsers tend to support a large variety of languages which serves as the basis for the general look and navigation of its UI and the content displayed. Your language selection will also play an important role in spell-checking different websites and web apps, including Google Docs.
Having too many languages in your browser aside from your most common one (or the one you are typing) will tend to cause too many errors in the spell checker and eventually cause it to stop functioning due to the number. Removing any extra languages will help lessen the load and allow the spell checker to focus on the right words to check and fix. Here’s how you can do it:
- Open your Browser’s Settings ⚙️ through its menu and click on “Settings” or “Browser Settings”.
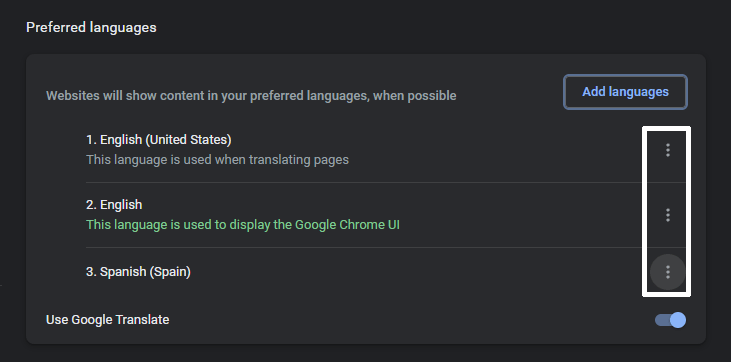
- Find and click on the 🌐 “Languages” option/category in your Browser’s Settings.
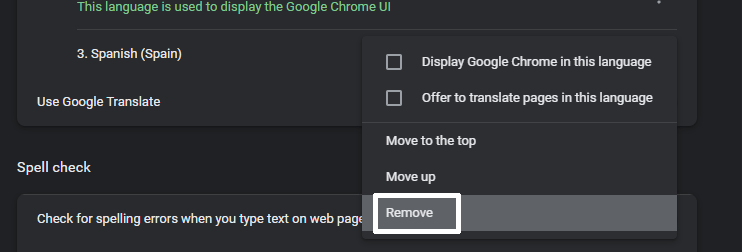
- Under Preferred Languages in your Language Settings, click on the three vertical dots of the language/s you want removed.
- After clicking the three vertical dots, click on “Remove”.
5. Disable Any Browser Add-Ons and Extensions
Most of the time, third-party add-ons and extensions will usually not cause any harm to the websites you enter. In the instance it does, it will usually make the website become inaccessible or have specific functions not work correctly.
Google Docs is no exception, as the spell checker feature cannot work properly if you have similar add-ons and extensions that do the same function. Disabling these add-ons and extensions while using Google Docs will allow you to use the spell checker function and avoid any incompatibilities that might arise with both apps being used in conjunction.
You can remove and disable any browser extensions and add-ons through these steps:
For Google Chrome
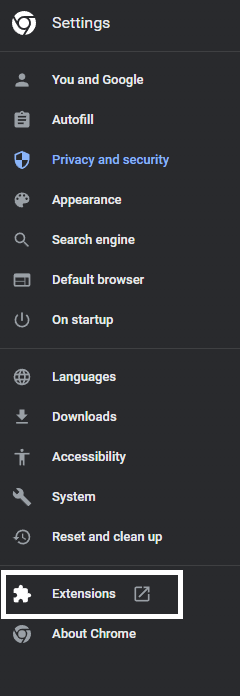
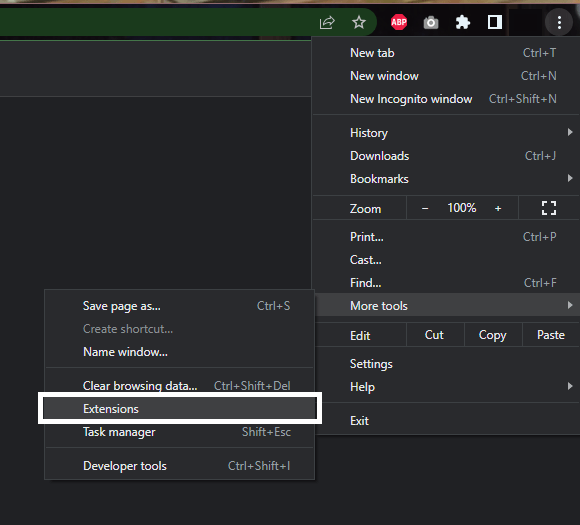
- Open the “Extensions” tab of your browser. This can be done through numerous means, such as opening your Browser Settings ⚙️ and selecting “Extensions” 🧩.
Or through a series of menus by opening your browser menu and navigating through your “Tools”.
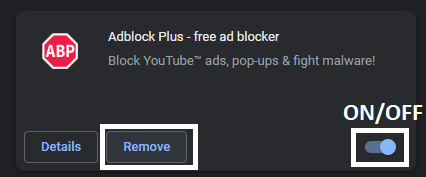
- In your Browser’s Extension tab, you can opt to “Remove” or disable the extension from working by toggling it ON or OFF.
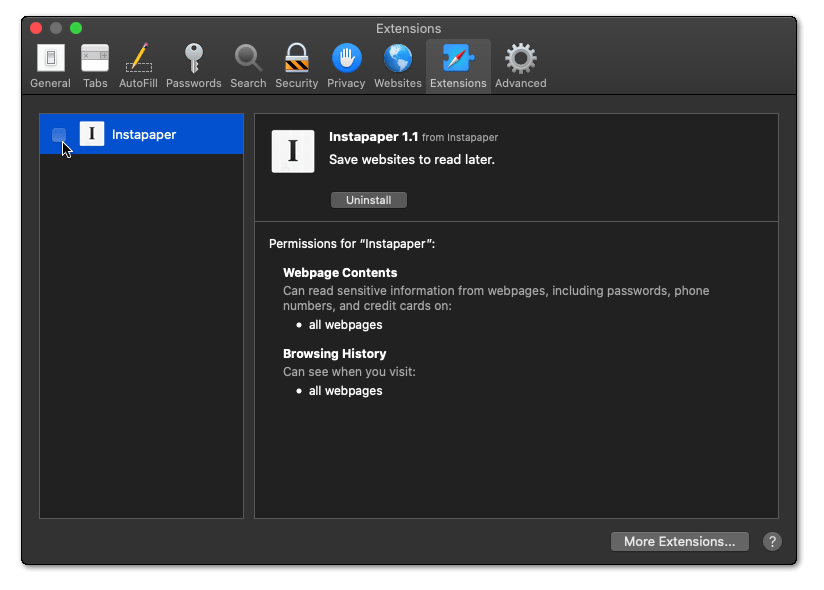
For Safari (macOS)
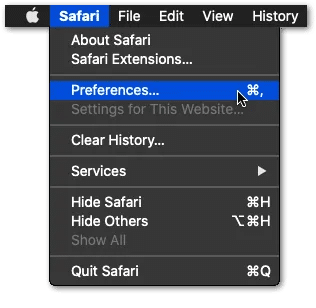
- To do so, click on the Safari option in the Apple Menu and choose the Preferences option from the dropdown menu.
- Then, select the Extensions (
 ) option to get a list of all the web extensions installed in your Mac’s Safari.
 - Once you’ve moved to the Extensions section, start disabling all the extensions one by one by deselecting the box next to them.
Repeat the steps for any additional extensions you need to disable. You can test and check yourself which extension conflicts and doesn’t conflict with Google Docs until you are satisfied with your extension/add-on line-up in your Browser.
6. Copy and Paste the Document Without Formatting
Formatting can play a significant role in being able to spell-check certain parts of the document. The spell checker in Google Docs and many other word-processing apps can sometimes struggle with identifying and checking words that have been formatted. It is never a bad idea to check the content before formatting them.
Copy and paste your document without the formatting applied is a great and fast way to check for spelling and grammar mistakes, as the spell checker can quickly identify them. You can follow through with this plan by the steps below:
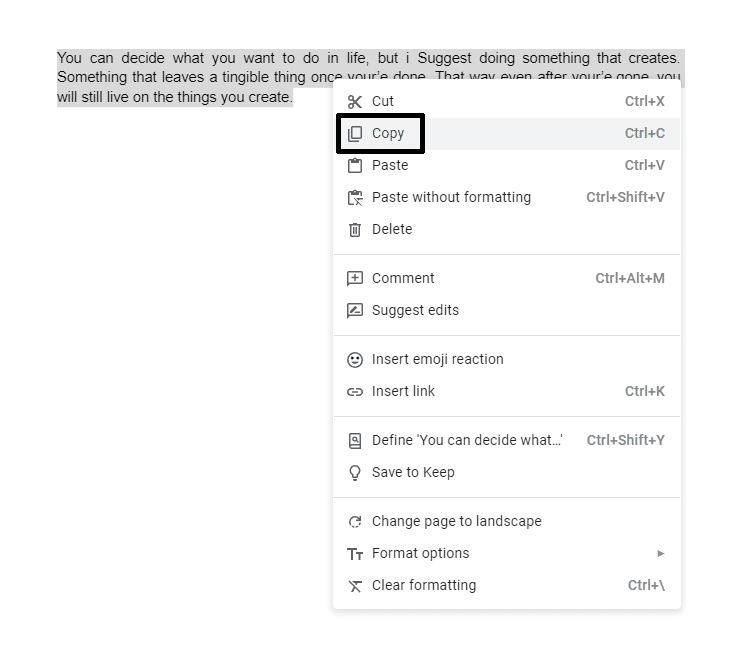
- Select the entire document. This can be done by highlighting the whole content or through a keyboard shortcut such as CTRL+A.
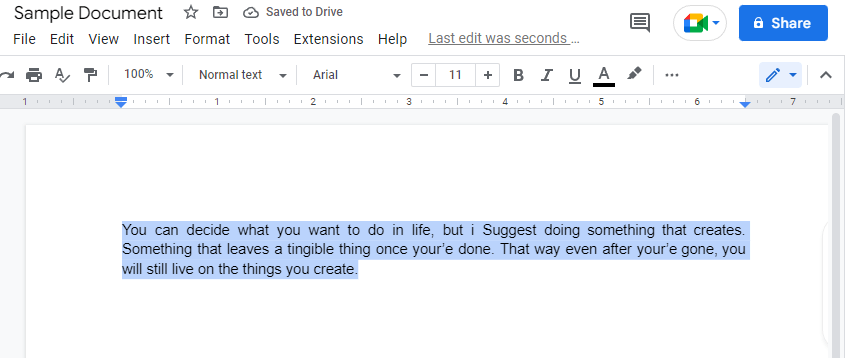
- Copy the highlighted document through the classic CTRL+C or Copy action.
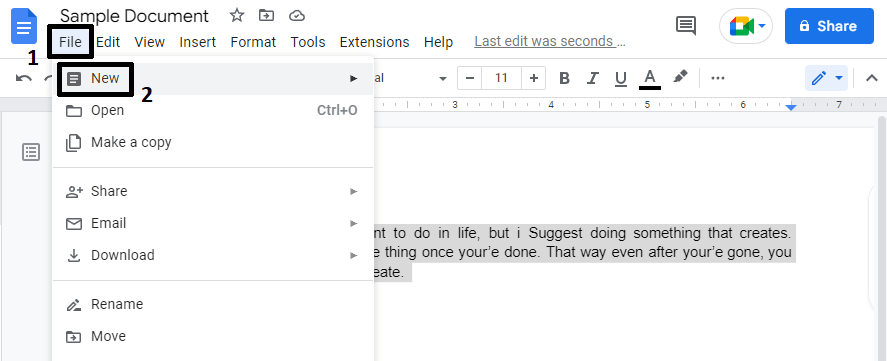
- Click “File” in the Google Docs menu and then “New” to make a new document.
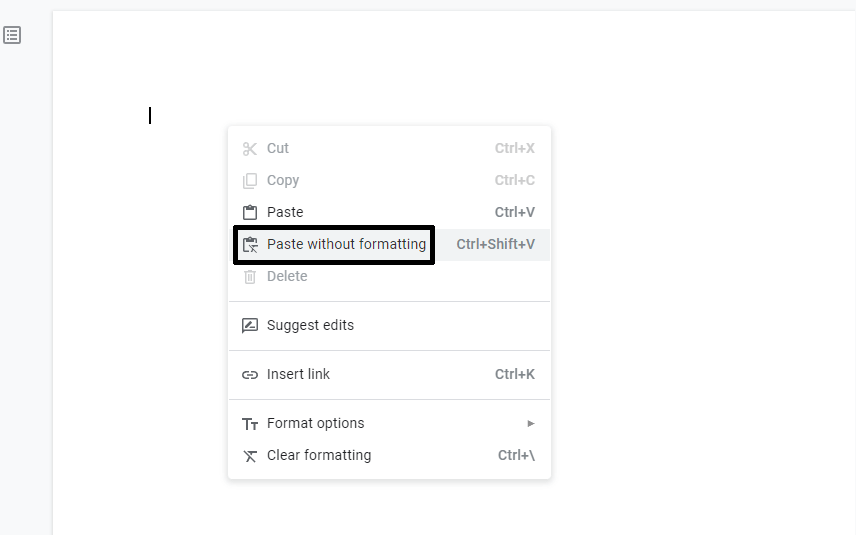
- Paste the document you copied using the keyboard shortcut CTRL+SHIFT+V or the “Paste without Formatting” option by right-clicking on the new document.
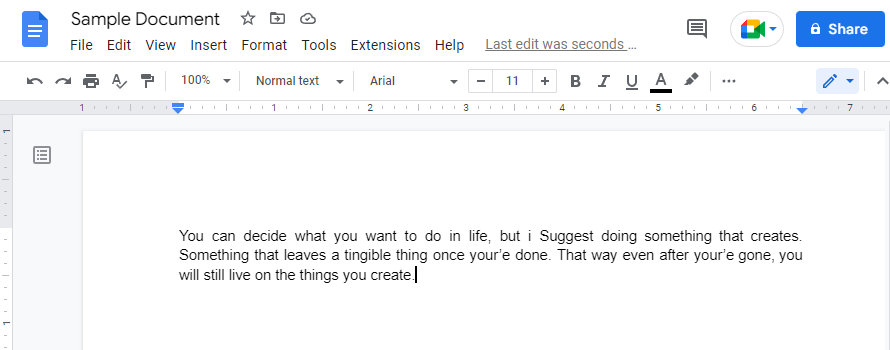
Following the steps above will paste the documents without any formatting options (bullets, indents etc). You can use this opportunity to test and check any spelling and grammar mistakes that were inaccessible due to formatting in your document.
7. Make a Copy of the Document
Similar to the previous fix, the spell checker might not work in the specific document you are writing due to bugs and glitches alongside any formatting issues. The best way to keep your progress without starting the whole paper over is by making a new document copy.
A fresh and clean copy of the document allows you to keep any formatting changes you made while avoiding any bugs and issues you faced previously that made using spell checker impossible. Here’s how you can make a clean copy of your document in Google Docs:
- Open the document you want to check the spelling of and check.
- Click on “File” from the Google Doc’s menu of your document and click on “Make a Copy”.
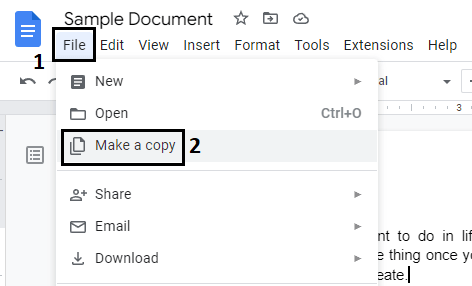
The steps above will create an exact copy of your document, usually prefaced with “Copy of…”. This document will contain the exact content from the previous document, including pictures and formatting.
8. Update Your Internet Browser
Google Docs is made available to a large variety of internet browsers and not just Google Chrome. The app can be accessed from other internet browsers like Firefox, Microsoft Edge and Opera GX, which have their ways of updating to the latest version, if not automatically.
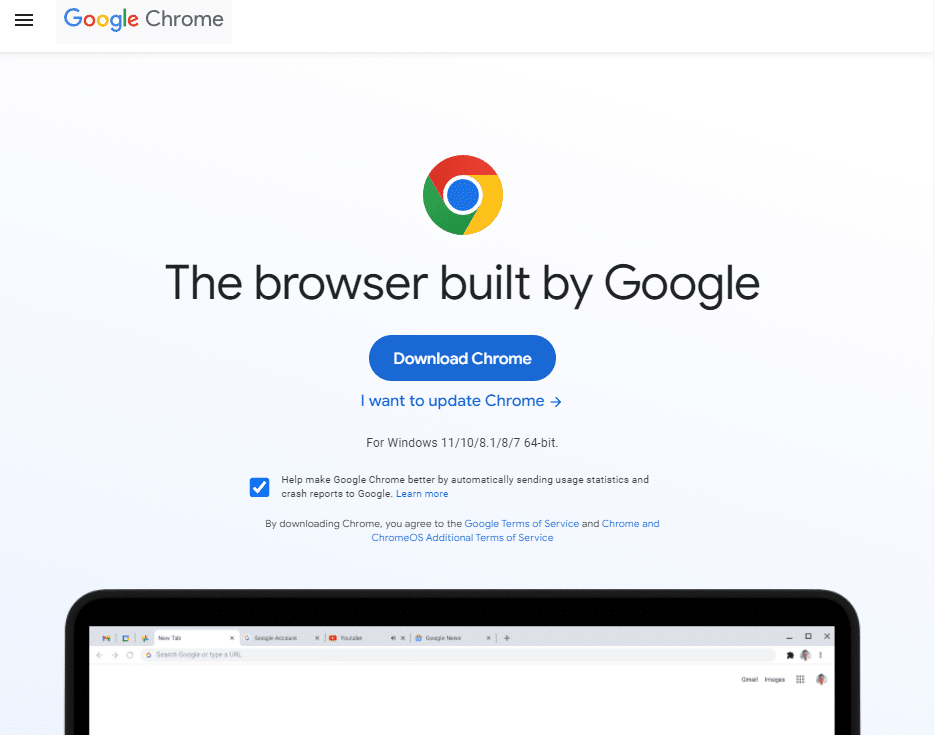
The best way to check and update your browser is by visiting your internet browser’s website like Google Chrome, Firefox and Opera GX and downloading then installing the latest version. The installation will usually notify you that you are at the newest version or will proceed as expected if not.
Keeping your browser updated is essential when using apps like Google Docs, as it helps you avoid any performance issues and hiccups. This will also improve the quality and experience with the spell checker as you are updated with the latest quirks in writing and spelling.
Steps to Check for Pending Updates on Your Web Browser
To start, we recommend visiting the updatemybrowser.org website, which will instantly check if you’re running the latest version of your web browser.
For Google Chrome
- For starters, launch Google Chrome on your device.
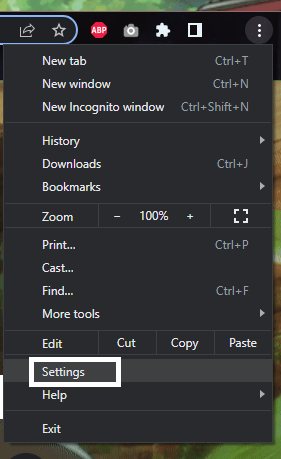
- Then, look at the More icon on the top-right corner.
- Next, check if pending updates are available. If an update is pending, the icon will be colored. The color of the icon indicates how long the update has been released.

- Subsequently, if an update is available, click on the More icon.
- Finally, click Update Google Chrome. If you can’t find this button, your browser is up-to-date.

For Microsoft Edge and Mozilla Firefox
- First, launch the web browser.
- Then, click on the main menu button in the top right corner.
- Next, select Help (Firefox) or Help & Feedback (Edge).

- After that, click About Mozilla Firefox or About Microsoft Edge.

- From there, the browser will automatically check and download the available updates.

For Safari (macOS)
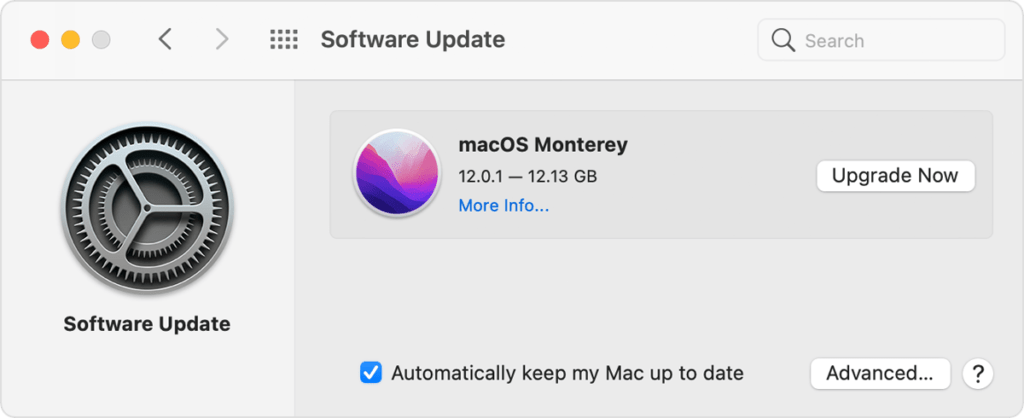
To update the Safari web browser on macOS you just have to make sure you’re running the latest macOS updates. So, the latest version of macOS will also include the most recent version of Safari.
Once the browsers are updated, don’t forget to relaunch the web browser to configure the updates.
9. Clear Browser Cache, Data, and Cookies
The performance issues with internet browsers usually result from too many files to load and keep track of in one go. Removing these files manually allows your browser a lesser workload to keep up with and boosts its performance to a certain degree.
Here’s how you can go about clearing your browser cache and cookies:
For Google Chrome
- Open your Internet Browser’s Settings ⚙️. This is usually underneath a menu that varies depending on your browser.
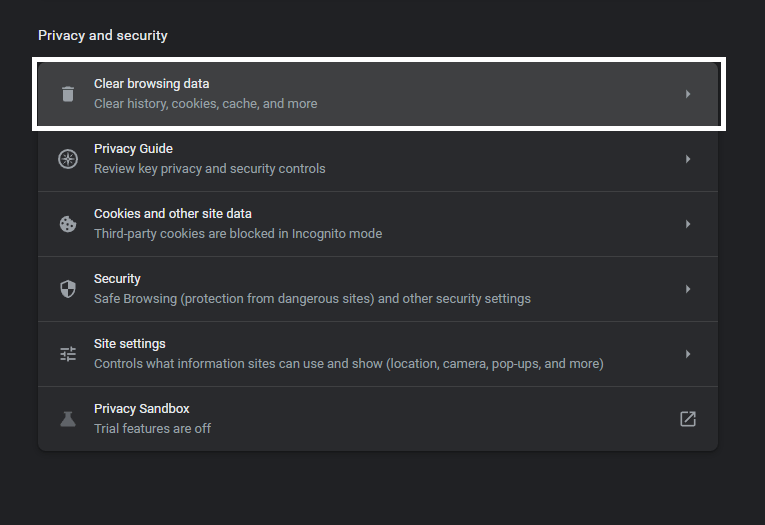
- Find the “Clear Browsing Data” 🗑️ option for your browser. This is usually underneath “Privacy and Security” in many browsers.
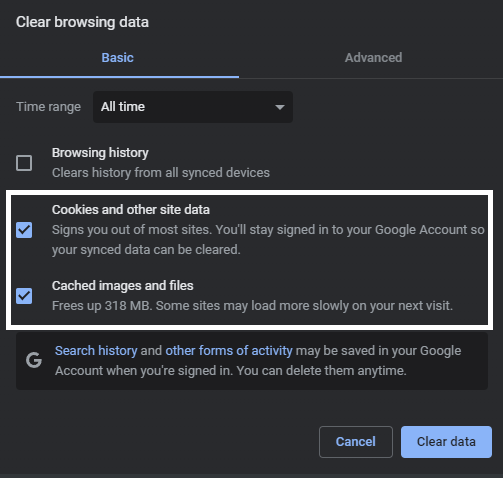
- If you are only cleaning up your cache and data, select the appropriate option and deselect other things, such as your browser history.
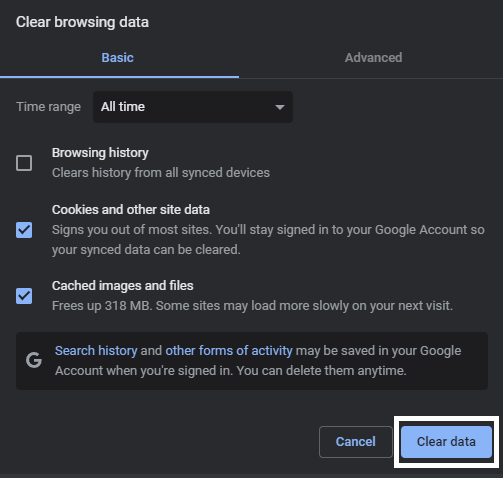
- Click on “Clear Data” to start the cleaning process.
Once you are finished with the steps above and the cleaning process, your browser will be free from any of the selected data and significantly boost speed and performance. You might need to re-login to several of your accounts on Google and other websites as a result of cleaning up your data.
For Safari (macOS)
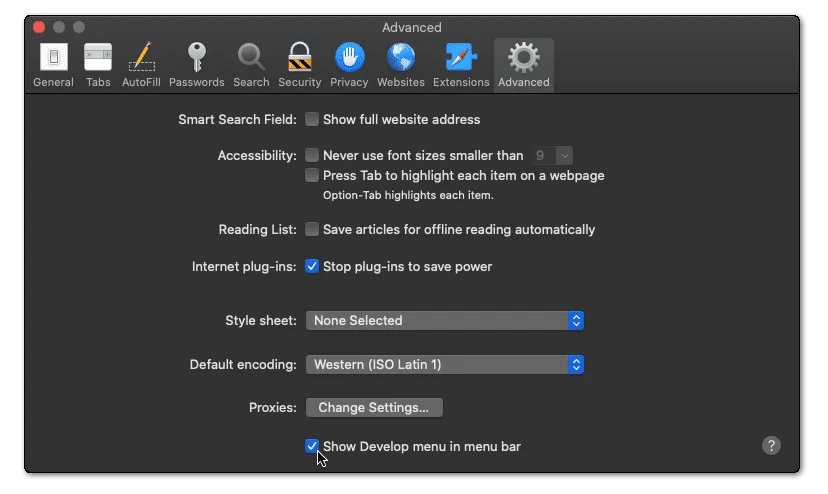
- First, with Safari launched, from the Menu Bar, click Safari and select “Preferences…”
- At the following window, choose Advanced from the top bar, and tick the box next to “Show Develop menu in bar.”
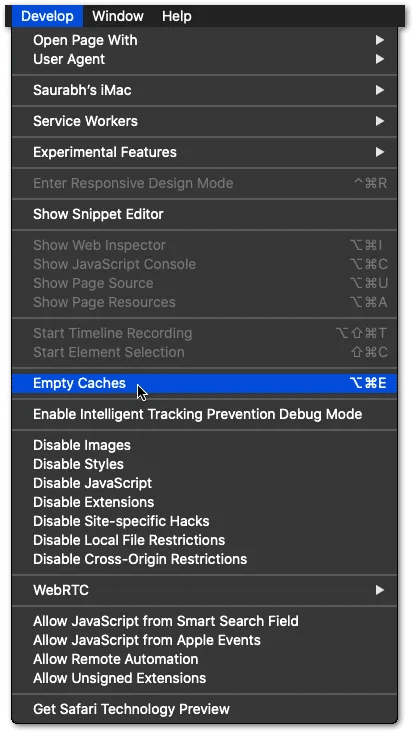
- Subsequently, from the Menu Bar, click Develop, and select Empty Caches.
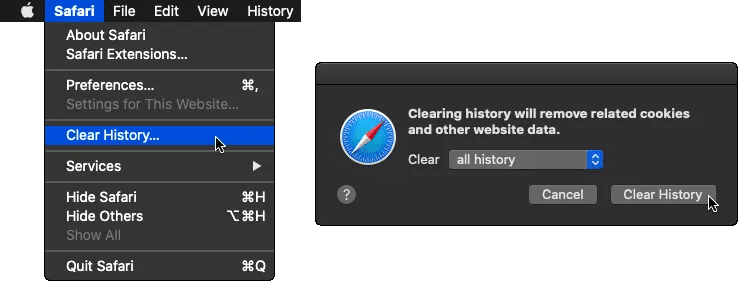
- After that, you can clear your search history and even more Site Data and Cookies. To do this, from the Menu Bar, click Safari, and choose “Clear History…”.
- Lastly, click Clear History at the following window.
Conclusion
Google Docs is an incredibly nifty tool that allows for the easy creation and collaboration of various documents. It is incredibly familiar and easy to use while having an arsenal of features that aren’t available to other word-processing apps and software.
Proofreading is essential to making the perfect document, and the spell-checker is a great tool that helps with this. It can shave off a great amount of time and catch any mistakes you overlook. This is why many people often rely on it to improve their document’s quality and get frustrated if it’s not working properly.
The 6 reasons and 9 fixes we have in this document are all geared toward helping you get back to productivity in your documents if you encounter any issues with the spell checker in Google Docs. It is always important to take a breather when solving these types of problems so that you can get back to finishing them the fastest.
Let us know down below 👇 in the comments:
- If you find this guide useful and informative about the problem?
- Which of the following fixes has worked best for you?
- What do you like most about Google Docs compared to other apps?
- Any additional fixes we missed that you can share and add?
Feel free to share this article with anyone struggling with getting their spell checker to work in Google Docs.