Are you tired of seeing your iRobot Roomba encountering the “charging error 5” 🥱? Don’t worry; we will provide you with a variety of fixes to get rid of this error. 🥳
The Roomba by iRobot is an impressive selection of cleaning robots, but since they are the first of their kind, they are prone to glitches and problems. One of the most commonly reported issues is the Roomba charging error 5, which signals a breakdown in the charging system of the device.
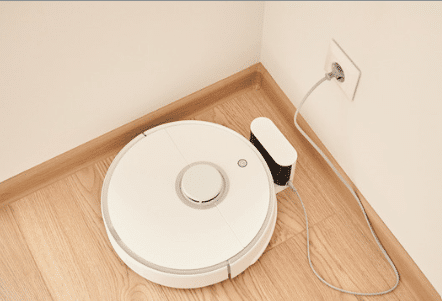
Charging Error 5 is an error that occurs when a Roomba robot vacuum cleaner fails to charge when placed in its charging dock. This error can be due to a number of different issues ranging from a damaged charging dock, a bad battery, or a defective power cord.
To troubleshoot this error, it is important to check the power connection and ensure the cord is securely plugged in and the outlet is receiving power. If the outlet receives power, the next step is to check the charging dock. Ensure the connectors are properly aligned, and the dock is securely connected to the Roomba. If the charging dock is still not charging the Roomba, it is likely that the battery is defective and needs to be replaced.
We will explain how to troubleshoot and fix the “Charging Error 5” message on iRobot Roomba robotic vacuum cleaners. If you are experiencing this issue with your Roomba, this article will help you identify the cause of the problem and provide steps to resolve it. So without further ado, let’s dive deep into the topic. 👇🎉

Why is My Roomba Showing a “Charging Error 5” Message?
A “Charging Error 5” message on a Roomba indicates that the robot vacuum has detected an abnormal voltage or current while attempting to charge. Following are some of the different factors:
- The power supply needs to provide the correct voltage or current. Check the power supply and ensure it provides the correct voltage and current as specified in the Roomba manual.
- The charging contacts on the Roomba are dirty or damaged. Clean or replace the charging contacts.
- The charging dock is damaged or malfunctioning. Check the charging dock and replace it if necessary.
- The battery is dead or damaged. Replace the battery.
- The Roomba software needs to be updated. Update the Roomba software to the latest version.
9 Fixes For the Charging Error 5 on Your iRobot Roomba
Error 5 on Roomba 900, 800, 700, 600, and 500 series devices is displayed differently.
- The 900 series displays: “Charging error five (5). Please open the iRobot app for help.”
- The other series Roomba 500, 600, 700 and 800, display: “Charging error five (5).”
- Additionally, the battery indicator and Troubleshoot or Clean indicator blink while the Roomba is charging.
To fix this error, 9 quick solutions have been discussed.
1. Remove The Yellow Label
Roomba Charging Error 5 is an error indicating that the robot vacuum cleaner is not charging properly. To fix this error, the first step is to remove the yellow label from the robot’s charging port.
The yellow label is usually located on the bottom of the robot, and it contains important information about the product and its warranty. Removing the yellow label will allow Roomba to recognize the charging port and start charging.
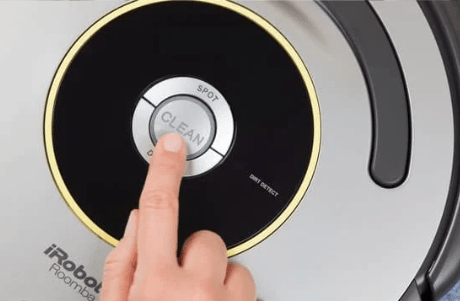
2. Restart Your Roomba
Restarting your Roomba can help solve Roomba Charging Error 5 in several ways. Error 5 is a charging error that can occur when your Roomba’s charging system is malfunctioning. It usually occurs when the Roomba’s battery is disconnected from the charging system. Restarting your Roomba can help correct the charging system and restore normal operation.
For S and I Series Models
- First, press and hold the “Clean” and “Spot” buttons at the same time for 20 seconds until the “white LED ring” on the top of the bin’s lid begins to rotate clockwise.
- Then release the buttons.
- After that, reconnect the Roomba to the charging station and power cord.
- At least, Press the “Clean” button to restart the Roomba.
For the 700, 800 and 900 Series
- First, “Disconnect” the Roomba from the charging station and power cord.
- Then press and hold the “Clean” button and wait until you hear a beep. Allow the Roomba a few minutes to begin the cleaning cycle again.
- Now release the buttons and connect the Roomba to the charging station and power cord.
- At least, Press the “Clean” button to restart the Roomba.
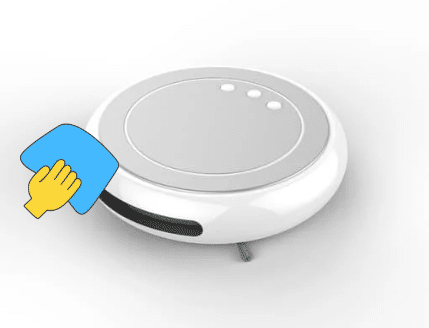
3. Clean The Battery And Charging Contacts
Cleaning the Battery and Charge Contacts is a process that helps to solve the Roomba Charging Error 5. Roomba Charging Error 5 occurs when the battery contacts are dirty or corroded. This can prevent the Roomba from charging properly or even from charging at all. Cleaning the battery contacts is a simple process that can restore the Roomba’s charging capabilities.
Clean the Battery and Charge Contacts to solve Roomba Charging Error 5:
- First, unplug the Roomba from the wall outlet and open the Roomba’s battery compartment.
- To open the battery door ;
For 900 and 800 series devices, loosen the two screws at the bottom of the device.
For 700, 600 and 500 series devices, undo the four screws at the bottom.
- Then inspect the battery terminals and contact points for corrosion or dirt buildup.
- Use a cotton swab to clean any corrosion or dirt buildup on the battery terminals and contact points.
- Clean up any remaining residue with a dry cloth or paper towel.
- After that, check that the contacts are firmly connected to the battery and the Roomba.
- Close the battery compartment and plug the Roomba back into the wall outlet.
- Finally, turn on the Roomba and check to see if the charging error has been resolved.
4. Check The Charging Cable
If your Roomba is experiencing Charging Error 5, it may be caused by a faulty charging cable. This error is usually caused by the cable being damaged, defective, or not properly connected. To solve this issue, you should first check the charging cable to make sure it is properly connected and undamaged.
- First, check the Roomba charging cable. Ensure that the cable is securely connected to both the Roomba and the wall outlet. Inspect the cable for any damage, such as cuts, frays, or other signs of wear.
- If the cable appears to be in good condition, unplug it from the wall outlet and plug it back in. Make sure the outlet is working by testing another appliance in it.
- If the cable is damaged, replace it with a new Roomba charging cable.
5. Reset The Battery
Resetting the Roomba battery can help resolve charging error 5, which is caused by a faulty connection between the Roomba’s battery and charging contacts. This error can prevent the Roomba from charging or running at all.
For 500 or 600 Series
- To reset your Roomba, press the “Clean” button.
- Then press and hold the “Spot” and “Dock” buttons for 15 seconds until a beep is heard.
- Afterwards, plug your Roomba into a charger until the “Clean” button turns green.
For 700 Series
- To reset the battery on your Roomba, attach it to the charging dock or use a cable to connect it to a power source.
- Then, press and hold the “Clean” button for 10 seconds until the words “r5t” appear on display. Once the beep is heard, stop pressing the button.
- Finally, to complete the reset process, allow the Roomba to charge for a minimum of 15 hours before using it again.
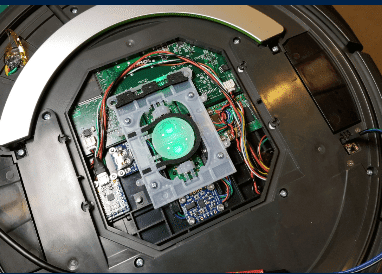
6. Roomba’s Electric Board Issue
The most common cause of the issue is a faulty electric board. The electric board is responsible for controlling the power supply to the Roomba. If it is not operating correctly, it can prevent the Roomba from charging or cause the charging to be slow.
- First, “Unplug” and remove the Roomba from the charging station.
- Then take off the bottom plate of the Roomba.
- Locate the electric board, which is a small, rectangular circuit board located in the centre of the Roomba’s interior.
- After that, check the electric board for any signs of damage, such as a broken or burned component.
- Then look for any loose or disconnected wires.
- Now check the connection between the electric board and the battery. Make sure the connection is secure and that there is no corrosion or corrosion damage to the battery terminals.
- Replace the electric board if necessary.
- Finally, put the bottom plate back on the Roomba and plug it back into the charging station.
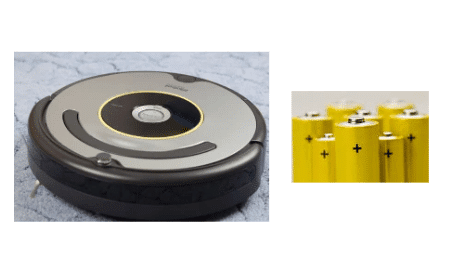
7. Change The Battery
The Roomba Charging Error 5 is a common problem with the Roomba robotic vacuum cleaner. This error is caused when the battery is too low to charge the Roomba. To solve this problem, the battery must be replaced with a new one.
Following are the steps to change the battery to solve the Roomba Charging Error 5:
- First, “Unplug” the Roomba from the wall outlet and turn it off.
- Then lift up the Roomba and remove the screws located on the bottom of the unit.
- To open the battery door ;
For 900 and 800 series devices, loosen the two screws at the bottom of the device.
For 700, 600 and 500 series devices, undo the four screws at the bottom.
- Now carefully lift the top cover to access the battery compartment.
- After that, remove the old battery and install the new one. Make sure the new battery is compatible with your Roomba model.
- Then reassemble the Roomba and plug it back into the wall outlet.
- Finally, turn the Roomba on and check if the charging error has been resolved.
8. Perform a Factory Reset
A Factory Reset is a process that wipes all data stored on a device, returning it to its original factory settings. This process is often used to solve technical issues and problems, such as errors related to charging. In the case of Roomba charging error 5, a factory reset can help to restore the device to its original settings, which can potentially resolve the issue.
For factory resetting on a Roomba:
- First, the device should be powered off.
- Then, press and hold the “CLEAN” and “SPOT” buttons simultaneously for approximately 10 seconds.
- The device will then begin its Factory Reset process, which can take up to a few minutes to complete.
- Once it is finished, the Roomba should be ready to use again.
9. Contact Support
If you are experiencing error 5 when trying to charge your Roomba, you should contact the Roomba support team. The support team can provide you with instructions on how to troubleshoot the issue. Usually, this involves checking the power cord, battery, and charger for any damage. They may also suggest resetting the Roomba or replacing the battery or charger. All of the steps for these fixes are given above.
If that does not fix the issue, the support team may ask for the Roomba model number and serial number so they can investigate further. Additionally, they may be able to provide you with a replacement charger or battery if needed.
Conclusion
The Roomba charging error 5 can be fixed by resetting the robot and making sure it is connected to a working power source. You should also check the battery compartment and ensure that the cables are properly connected. Following these steps should help resolve the charging error and get your Roomba back up and running again.
Lastly, let us know in the comments section below:
- How do you deal with the Roomba charging error 5? Are they helpful?
- Have any of the above solutions been useful to you?
- What other good fixes do you know of for resolving this issue?
Hope you find this guide helpful 😀 do share it with your friends 🧑🤝🧑 to help them in resolving this issue, and let us know in the comment section below 👇 which fix best suits you.