This is a complete guide encompassing fixes for all sorts of issues you may be encountering with the Apple Music platform, when you find that the streaming service isn’t working, connecting or playing songs correctly. So, let’s jump right into it!
With over 100 million users, Apple Music is said to have topped the charts as one of the best music streaming services. It’s said to be even better than Spotify! Unfortunately, the service is still far from perfect, especially with the increase in demand. Recently we have received many reports and complaints from Apple Music users revolving around various issues. Some problems even surfaced after the latest iOS and iPadOS updates.
Perhaps you’re one of those users frustrated by this issue. Well, you have come to the right place! We’ve prepared this thorough guide covering 17 problems reported by Apple Music users. We also included 30 troubleshooting methods to try on your end when Apple Music isn’t working correctly.
Note: This guide provides pictures and steps taken from the Apple Music web player or installed app on Windows, macOS, Android, iPhone, and iPad.
Types of Reported Apple Music Problems and How to Fix Them
1. Apple Music App Won’t Launch
One of the problems Apple users found when trying to stream music from the Apple Music app is that the app won’t open when clicked from the home screen. The cause of this issue may be due to an underlying app bug causing the app icon to be unresponsive. Perhaps you encountered this issue on your device. You can restart the Apple Music app (Step 8) if it’s already open.
If that doesn’t work, you can try a different method to launch Apple Music to proceed with subsequent fixes:
- First, open Settings.
- Then, proceed to click Music.
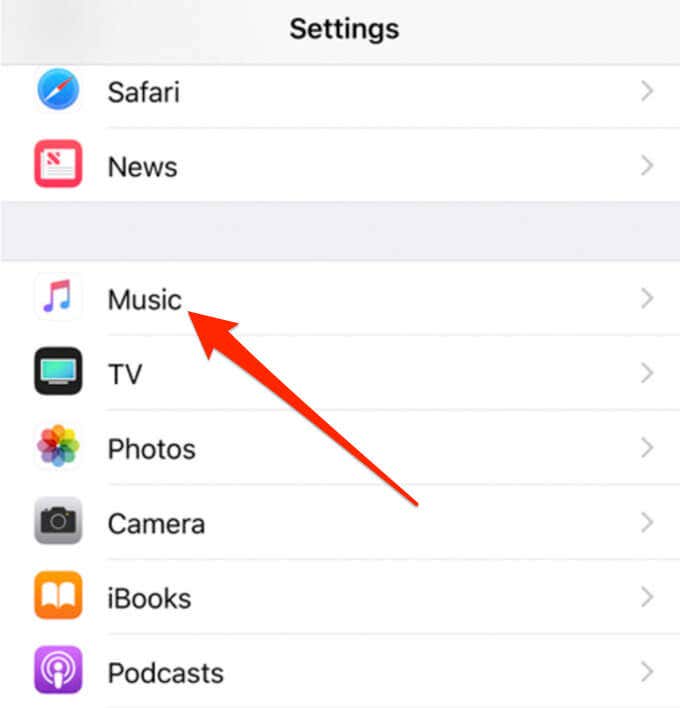
- From there, tap Join Apple Music to launch the app.
You can also connect your device to your computer and launch iTunes. Suppose you don’t have access to a computer. You can approach an Apple Retail Store or Apple Authorized Service Provider for help.
2. Apple Music is Unable to Play Music
If you find that your Apple Music cannot play music, here are two things to verify before moving on to more technical fixes. For starters, we recommend inspecting the file format of the music you’re trying to play.
The reason is that Apple Music can only play MPEG-4 AAC files. Hence, it won’t allow you to play music files that were not created or downloaded from the iTunes Store. As a result, this may also land you with the “This media format is not supported” error.

However, suppose you’re trying to play music not purchased from iTunes. In that case, apart from incorrect file formats, your computer may not be authorized to play that music. To get around this issue, there are a few nifty fixes you can attempt:
- De-authorize the device you wish to use and re-authorize it.
- Enter the Apple ID username and password of the person who shared the songs you purchased in a playlist or shared libraries.
From there, if the issue persists, here are some general troubleshooting methods worth giving a try:
- Sign out and back into iTunes and App Store (Fix 9)
- Restart the Apple Music app (Fix 8)
- Update the Apple Music app (Fix 10)
- Reboot your device (Fix 12)
- Reset your network settings (Fix 13)
- Re-add the album or song that can’t be played (Fix 23)
- Reinstall the Apple Music app (Fix 27)
3. Apple Music Activity is Draining iPhone Battery
Subsequently, many users have complained that Apple Music is draining a large amount of their iPhone battery even when not used. One of the users detailed that his device was fully charged when he went to bed, but he woke up with only 25% battery left on his device. Another folk mentioned that his iPhone battery drained much quicker, followed by overheating after updating to iOS 13.5.1.
After some digging, we found that the battery drain issue on iPhones running on iOS 15 and above is caused by Apple Music’s background activity even when the app is idle. To check if your device is affected by this bug, you can first open Settings > Battery. Then, inspect if the Music app consumes a massive percentage of your battery when running in the background.

If you’re experiencing the same situation here, you can first try to disable Background App Refresh for unused apps. To do so, follow these steps:
- First, head over to Settings and tap General.
- Next, select Background App Refresh and locate the Apple Music app.
- Finally, toggle the switch to the OFF position.
Additionally, these general troubleshooting methods should also help you:
- Turn on low power mode on your iPhone from the Battery Settings.
- Restart the Apple Music app
- Close any unused apps
- Restart or reboot your device
- Reset all your device’s settings
4. Apple Music Song is Not Available
Furthermore, Apple Music users also commonly file reports having Apple Music items that are grayed out, unavailable, and cannot be played. To begin with, there are various reasons behind this problem. For one, you may not be connected to the iCloud Music Library or the song is yet to be made available in your current country or region. Occasionally, it may also be due to decisions on the producer’s end, like making changes to the artist’s album or playlist.
For the causes that are within our control, here’s how we can fix them:
- Turn off iCloud Music Library and back on again.
- Re-login to your Apple ID.
- Deauthorize and re-authorize your computer.
- Change the country to the original one where you purchased the music.
5. Apple Music Search Function is Not Working on iOS
Did you know that on a device that runs on iOS 12 and above, you can search for music on Apple Music by the lyrics? 🤯 All you need to do is type a few lines of the lyrics of a song into the lyric search function, and Apple Music will do the rest for you.
Unfortunately, some problems have been reported about this feature as well. Some found that their searches get stuck or don’t yield any results. Others describe that the feature only works for music that you have added to your favorites. In any case, if you encounter a problem with the search function, you can utilize these steps to get it up and running again:
- Ask a friend to send you a link to an Apple Music item, or you can utilize this link. Subsequently, open the link in Safari.
- Try using Siri to search for a song or album.
6. Can’t Repeat Songs or Shuffle Doesn’t Work
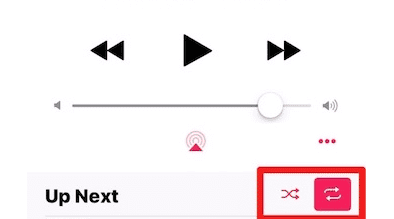
What if your problem with Apple Music is the shuffle feature on the app? We’ve had several users on iOS 10 that found that they can’t access the shuffle and repeat controls on their iPhones. After some inspection, we realized it wasn’t a technical error but a poor user interface design for Apple Music on iOS 10. As such, there isn’t a direct fix to solve this issue, but there is a way to access the shuffle feature:
In the music app, suppose you’re viewing the song full screen. In that case, to locate the controls for the shuffle and repeat function, scroll down slightly below the volume by dragging the screen up.
7. Apple Music Audio Stuttering After iOS Update
Moreover, several users have reported that their Apple Music audio suffers from stuttering after they upgraded their iPhone to iOS 11.4. This problem was later fixed in a patch released during the iOS 11.4.1 update. Unfortunately, the problem seems to be coming back with the latest iPadOS and iOS updates. To overcome this problem, some users found some success by reinstalling the Apple Music app (Step 27).
8. Apple Music is Unable to Download Songs
When you find that you cannot download songs on Apple Music, two main factors contribute directly to this problem. One, you may not have enough storage space left on your device to download more songs. Secondly, your internet connection may be unstable or too slow to download content from Apple Music. With that said, to target these two cases, we suggest:
- Testing and improving your internet connection.
- Clearing up some storage space on your device.
However, you can also attempt more general troubleshooting methods such as:
- Re-login to your Apple ID account.
- Toggle iCloud Music Library off and on again.
- Remove tracks that have download issues from the library.
- Reboot your device.
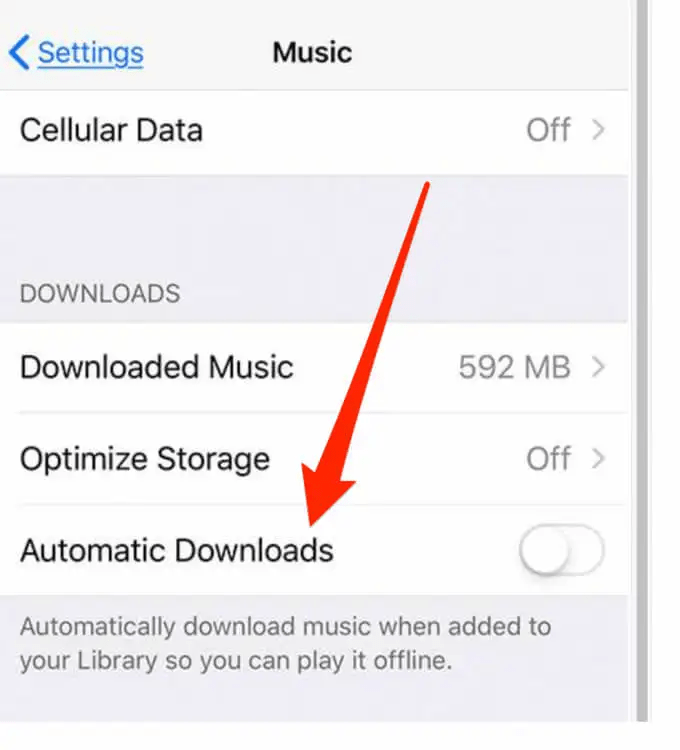
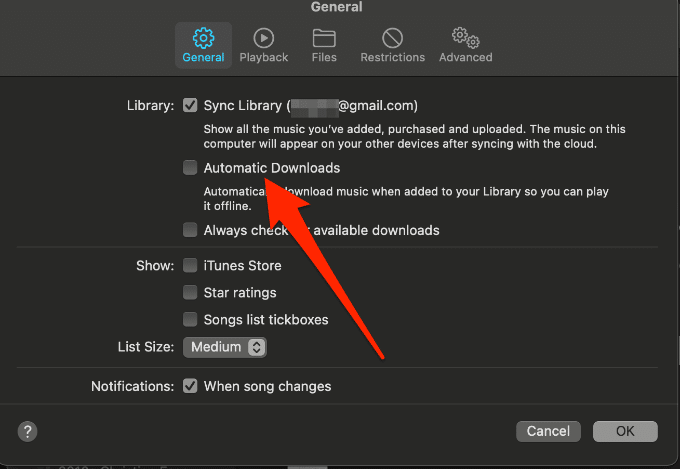
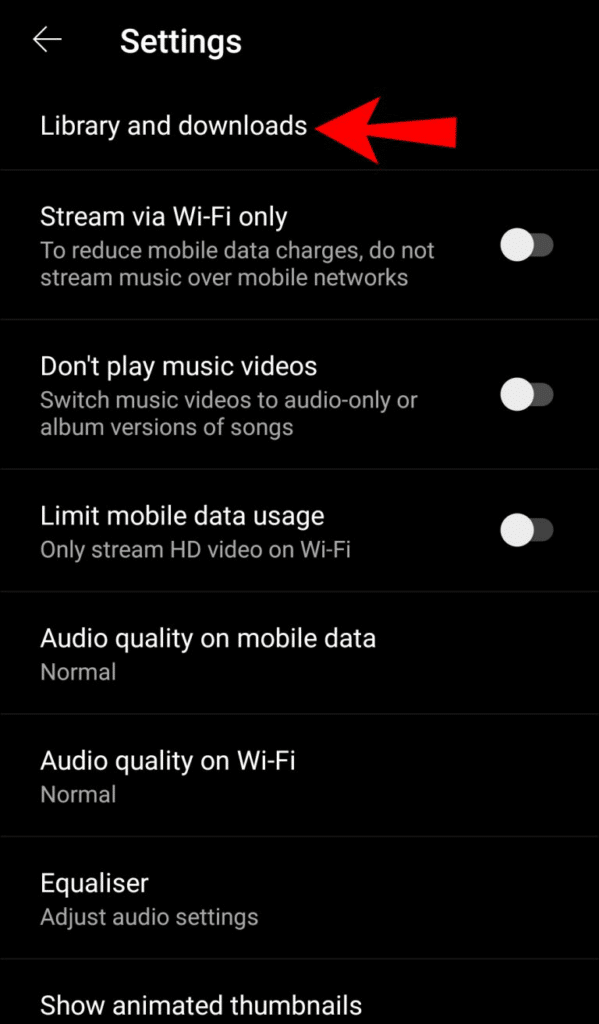
Once you solve the download issue on Apple Music, you can opt to enable automatic downloads. This will improve the syncing process of Apple Music and ensures that any newly added songs will appear in your library. On your iOS device, go to Settings > Music > Downloads and tap Automatic Downloads.
As for Mac devices, you can find this feature in the Apple Music app under Music > Preferences.
9. User Is Receiving “Unexpected Error Code 4010.”
Another error code we have received reports of is the unexpected error code 4010 when streaming Apple Music. However, it’s speculated that only an Apple employee knows what error code 4010 is and that no article on Apple Support addresses it. Nevertheless, some users from the Apple community discussed that error code 4010 is usually associated with interference from your device’s firewall or Antivirus. As such, for this issue, we suggest changing the settings for your device’s firewall (Step 16).
10. Apple Music Is Not Showing On Your Lock Screen
Like other music streaming apps, when you’re actively playing a song, the Music player will appear on your lock screen when you turn on the screen. However, suppose you find it isn’t showing on your lock screen. In that case, there may be an issue with the notification settings on your device, and here’s how you can fix it:
- To begin with, head over to Settings > Lock Screen and Security.
- Then, click on notifications on the lock screen.
- After that, select the Apple Music app to be shown on the lock screen.
- Finally, restart the Apple Music app and check if the Music player appears on your lock screen.
11. Apple Music Showing the Not Signed In Error Message
Additionally, many users have reported having issues signing into Apple Music. So, when does this problem occur? Some users say that their devices will prompt them to join Apple Music. However, even after the app recognizes their membership, they can still not sign in when they click on the prompt. On top of that, there are reports that a group of users has received the Not Signed into Apple Music message. This situation occurs when they’re trying to play songs, even after they have signed into their account.
If the problem you’re facing falls into this category, you can first try to switch to the Radio in Apple Music. It’s a quick and easy solution where you click the Radio button in the top-center of your iTunes window and choose any Radio station. Enter your Apple ID and password if prompted, and swap to Apple Music. This process will prompt iTunes to re-check your sign-in status and make Apple Music available again.
Subsequently, you can look into these fixes:
- Sign out and back into iTunes and App Store.
- Re-add the album or song.
- Update your device’s system software.
- Reinstall the Apple Music app.
12. Apple Music Keeps Randomly Skipping Songs
Moreover, another commonly reported problem that occurs on Apple Music is that the songs played are constantly skipped randomly. There are a few possible causes leading to this issue. For starters, there is a problem with the audio file of the song you’re trying to play. As Apple Music cannot process the audio file, the song is skipped to ensure an uninterrupted streaming experience. Secondly, there may not be enough internet bandwidth to retrieve and download audio files from the Apple servers to stream the music. As a result, Apple Music may skip to the next song or songs already downloaded or played. As such, to tackle this issue, you can give these few fixes a shot:
- Test the audio stream on a different Apple Music song or album
- Test and improve your internet connection
- Re-add the album or song
- Contact Apple Support
13. Apple Music Lyrics are Not Showing
Furthermore, Apple Music has introduced a new feature where one can view lyrics while playing a song. This is a fantastic feature as it allows you to sing along to your favorite tunes. If you haven’t tried out the quality, here’s how you can do it:
To see song lyrics in Apple Music on your iPhones or iPad, select the song played from the bottom of your screen and tap on the lyrics icon.
As for Mac devices, you can click on the lyrics icon at the top-right corner of the Apple Music app to view the song lyrics. For Windows, from the iTunes app, click on the three horizontal lines at the top right corner and select Lyrics.
However, we’ve also received reports from users about how the Apple Music lyrics are not showing, especially for iOS 13 devices. Suppose you’re also facing similar issues where one or a few songs don’t show lyrics. In that case, likely, the songs do not have lyrics available for them. Nevertheless, we recommend conducting further inspection by playing a few more songs and seeing if at least one shows lyrics. Else you can also look into these steps to fix your problem:
- Make sure your Apple Music subscription is active.
- Update your device system software.
- Test and improve your internet connection.
- Disable content restrictions.
14. Apple Music Won’t Play Explicit Songs
Another issue with Apple Music that doesn’t sit right with most modern-day pop songs is that it won’t let you play explicit content. An explicit track generally refers to one with curse words or language deemed as sexual, violent, offensive, or unsuitable for children. Hence, even a tiny line in the lyrics can mark the song as explicit. Although we’re unable to find the reason behind this problem, we did manage to get a few workarounds for this problem:
- Disable Content Restrictions
- Play an explicit podcast. You can find one from the Podcast app labeled with the letter E next to its title.
- Switch to iTunes and play explicit content. When prompted by a popout notification about playing explicit content, hit Agree.
15. Users Have Trouble Connecting To Apple Music
Users also report having trouble connecting to Apple Music, iTunes, or any Apple services such as the App Store. Some of the details given are Apple Music shows the cannot connect message, nothing is loading on Apple Music, and the app stops while downloading content. Folks also say that they receive one of the following error messages:
- I could not connect to the iTunes Store. Make sure your network connection is active and try again.
- We could not complete your iTunes Store request. The iTunes Store is temporarily unavailable. Please try again later.
- I cannot connect to the iTunes Store. An unknown error has occurred.
- We could not complete your iTunes Store request. The network connection could not be established. There was an error in the iTunes Store. Please try again later.
- I could not connect to the iTunes Store. A secure network connection could not be established.
In this situation, your device can’t seem to connect or establish a network to the iTunes store. One of the possible causes of this problem is that there is an error in your device’s date, time and time zone. With that said, you should update these settings beforehand and inspect if the issue persists before heading toward the technical fixes:
- For starters, navigate to the Control Panel.
- Then, click Date, Time, Languages and Regional Options, followed by Date and Time.
- Subsequently, verify your PC’s date and time are accurate and update if necessary.
- Lastly, click OK to apply any changes.
If it wasn’t an issue with your device’s date and time settings, you could opt to reset Winsock configurations. Open Command Prompt as Administrator, copy this netsh winsock reset command, and press Enter. This reset will revert the wsock32 DLL file to its default setting, giving such software a fresh start at connecting to TCP/IP traffic. Some users suggested taking it further and reinstalling the iTunes app (Step 27).
Suppose the fixes above didn’t work for you, you can also look into these general fixes:
- Check if Apple Music is Down
- Test and improve your internet connection
- Update your device’s system software
16. Apple Music Freezes
Another issue users have with Apple Music is that the app tends to crash and become unresponsive. One of the possible causes of this issue is that you have downloaded a lot of music and podcasts but have a limited amount of storage available on your device. Nevertheless, it may also be caused by app bugs and glitches in the Apple Music app.
With that said, here are some troubleshooting tricks you can try:
- Free Up Storage Space on Your Phone
- Restart the Apple Music app
- Log out and back into the Apple Music app
- Restart your device
- Update Apple Music to the latest version
17. Apple Music Library Empty After iOS Update
Just installed the latest update for your iPhone, iPad, or iPod? Find that all your Apple Music is gone, and you no longer have any of your songs? You’re not alone, as this problem is one of the tops reported problems regarding Apple Music. As of now, we’re unsure of the cause behind this problem. However, there are a few quick fixes reviewed to help tackle this problem:
- Sign out and back into iTunes and App Store.
- Restart the Apple Music app.
- Restart your device.
- Clear Apple Music App Cache
- Restore a backup to your device using iTunes
- Enable iCloud Music Library
- Reset your device’s settings
There is also a possibility that there is a network setting that the Apple Music app requires after the update but can’t find. Therefore, you can also try to reset your network settings (Step 17).
30 General Apple Music Troubleshooting Tips for Apple Music Not Connecting, Loading, or Playing Songs
1. Make Sure Your Apple Music Subscription is Active
First and foremost, you should check if your Apple Music subscription has run out where there is a possibility that it has expired or someone with access has canceled it. With an Apple Music subscription, you can easily take advantage of Apple’s full streaming subscription service.
However, with all the various services offered nowadays, it’s easy to overlook the need to renew something. Issues such as an expired credit card can also mess up your Apple Music auto-renewal settings.
With that said, you can check your Apple Music subscription by following these steps:
Note: Verify and ensure you use the same Apple ID associated with your Apple Music subscription. Additionally, we recommend checking your subscription and region sync in this step. The reason is that changing your account region can also affect your subscription. This is especially crucial for non-US users who changed their region to a country that doesn’t support Apple Music because it’ll cause their subscription to be invalid.
For iPhone or iPad
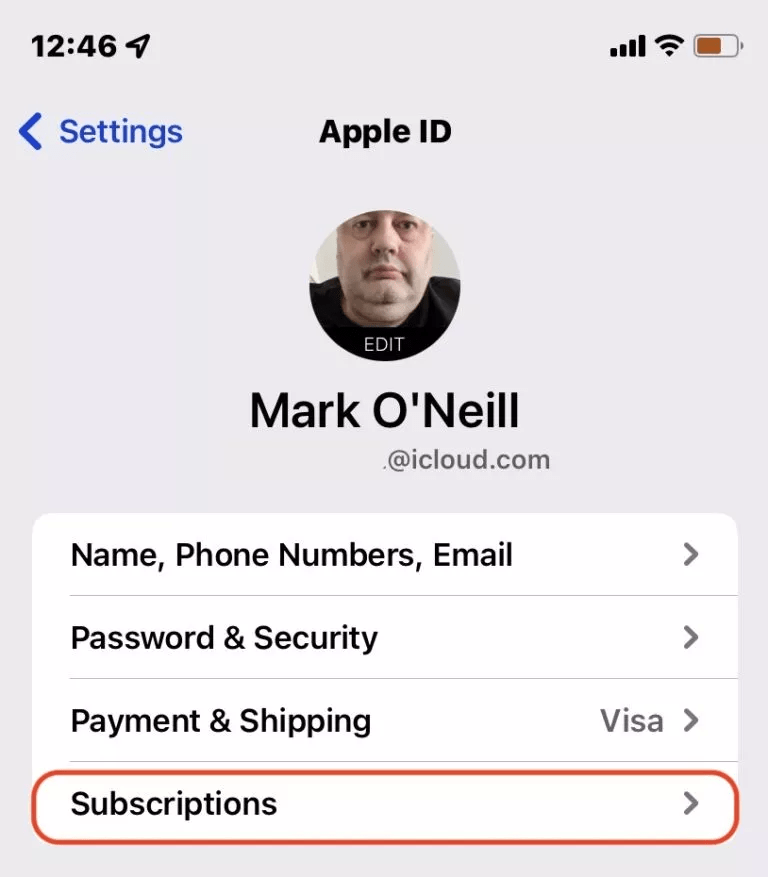
- First, launch Settings on your iPhone.
- Then, tap on your iCloud account photo at the top of the screen.
- From there, locate and select iTunes & App Store.
- After that, you’ll notice your Apple ID. Tap on View Apple ID and authenticate your identity using your passcode, TouchID, or FaceID.
- Lastly, scroll down and tap Subscriptions.
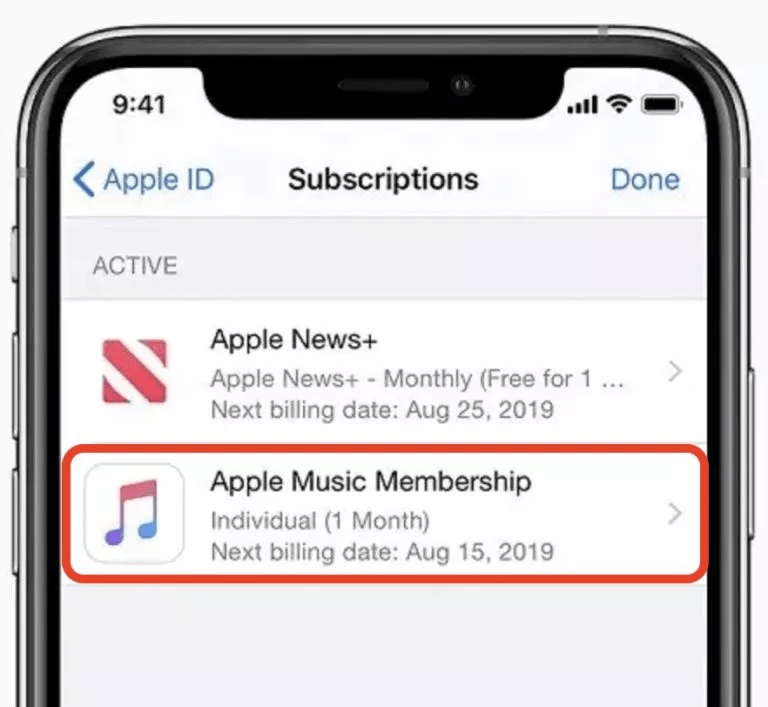
Here, you’ll be able to check the current status of your Apple Music subscription. However, suppose you have more than one active subscription. In that case, the following screen will show all your active and expired subscriptions. You’ll need to take an extra step and tap Apple Music to view your account status.
For macOS & Windows Devices
- For starters, launch the Apple Music app for Mac devices or the iTunes app for Windows devices.
- Then, click Account, followed by Account Settings.
- After that, you’ll be prompted to log into your iCloud account, and you’ll be able to see your account details.
- Next, scroll down to Subscriptions and click the blue Manage button.
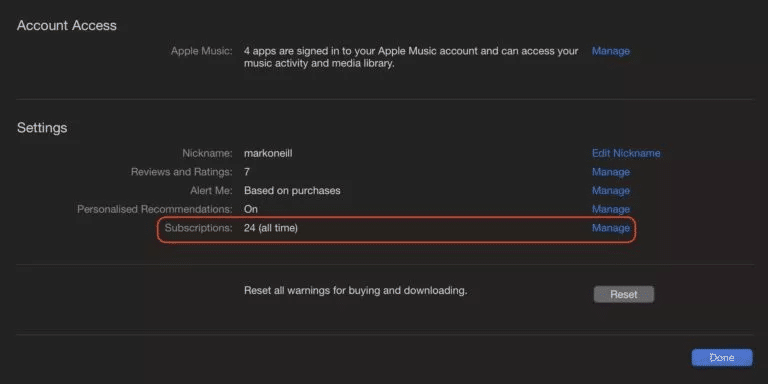
- Finally, locate Apple Music and click Edit on the next screen to view your subscription status.
For Android Devices
Yes, indeed. Now, Apple Music is also available for download for Android devices on both Google Play and directly from Apple. To check your subscription on your Android device, you can utilize these steps:
- First, open the Apple Music App.
- Then, head over to Settings.
- Lastly, go to Account and click Manage Subscription. You can view your Apple Music subscription details in the Manage Subscription screen.
Once you identify your Apple Music subscription status, you can determine your next steps for all devices. If you find that your subscription is still active, we suggest proceeding with other fixes in the article. However, suppose your Apple Music subscription has expired or has been canceled. In that case, you may also consider renewing your subscription from the detail page.
2. Check the Volume Settings
Suppose you can’t hear your Apple Music stream and suspect it isn’t playing. In that case, we suggest troubleshooting various volume settings such as your Apple Music volume, browser audio, and the device’s system sound. From this step, you’ll be able to rule out the chances of the issue being caused by low or muted volume.
a. Check the Apple Music Volume Settings
Firstly, on Apple Music, you’re able to change the volume for all songs as well as for a particular theme. This feature is nifty as it allows you to adjust your Apple Music stream volume without affecting other system sounds. Different song genres may require different books for the best streaming experience. Nevertheless, there is a possibility that you may have set it too low during previous streams. Consequently, it caused the audio to be near inaudible and mistaken as Apple Music.
With that said, to diagnose the issue, we suggest adjusting the volume of Apple Music louder using these steps:
You can use the volume slider at the top of the Apple Music window to control the volume for all songs. However, the maximum importance of this adjustment will be limited by your computer’s volume.
To adjust the volume of a particular song or music video, the steps are listed as follows:
- Firstly, select the theme that you want to change the book to.
- Then, choose Song followed by Info.
- Finally, click Options and drag the volume slider.
To set all songs and music videos to always play at the same volume
- For starters, in the Apple Music app, choose Music.
- Next, choose Preference and click Playback.
- Lastly, select Sound Check and turn on the settings. This will normalize the volume level of your audio.
b. Unmute the Apple Music Web Player on Your Web Browser
Moving on, perhaps you’re having trouble with the Apple Music audio when using their web player. In that case, we recommend checking the browser settings and ensuring that the Apple Music tab isn’t muted. To do so, these are the steps:
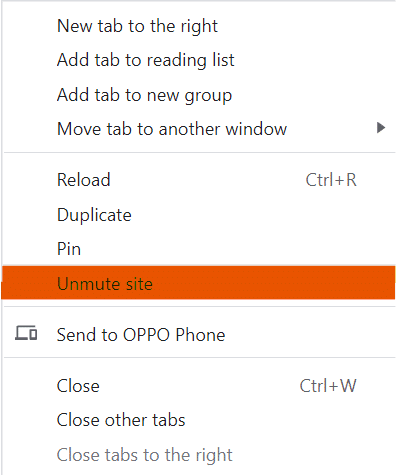
On Google Chrome
- Firstly, open the Apple Music web player.
- Then, move to the Apple Music browser tab and right-click on it.
- After that, from the right-click menu, inspect if the Unmute site option is enabled.
- From there, suppose you find that the feature is enabled, disable it.
Suppose you’re using the Safari app on your Mac. In that case, you can inspect whether the tab is muted by looking at the audio button in the Smart Search Field or on the right side of the bill in the tab bar. To unmute audio, click the muted Audio button in any of the places mentioned.

c. Inspect Your Device’s Sound Settings
Additionally, when encountering issues with Apple Music, you should ensure that your device’s system sound isn’t muted, either the Apple Music or iTunes app. Here, we’ll walk you through the methods to inspect these settings on various devices.
Ensure Device System Sound is Not Muted
Let’s ensure that your device’s system sound is not muted or at the lowest volume level, resulting in your Apple Music stream having no sound. If you notice that your device is muted at any point in this step, do proceed to unmute your device and increase the volume to your preference.
For Desktop and PC Users (Windows and macOS)
Starting with all the PC and desktop users, there are three ways to determine if your device’s system sound is muted. The steps are similar whether you’re using a Windows device or Mac.
Method 1: Inspect the mute key on your keyboard. If the silent key is lit, your device’s audio is muted.
Method 2: Check the audio icon at the bottom right corner of your device screen. You’ll find an X next to the speaker icon when your device audio is muted.
Method 3: Refer to the Master Volume level under Sound Settings.
For Mobile Device Users (Android and iOS)
Different system sounds, such as call ringtones, notifications, media, and alarms, have their respective volume control on mobile devices. As such, although it provides users more autonomy, it can confuse them when trying to adjust the media volume for Apple Music.
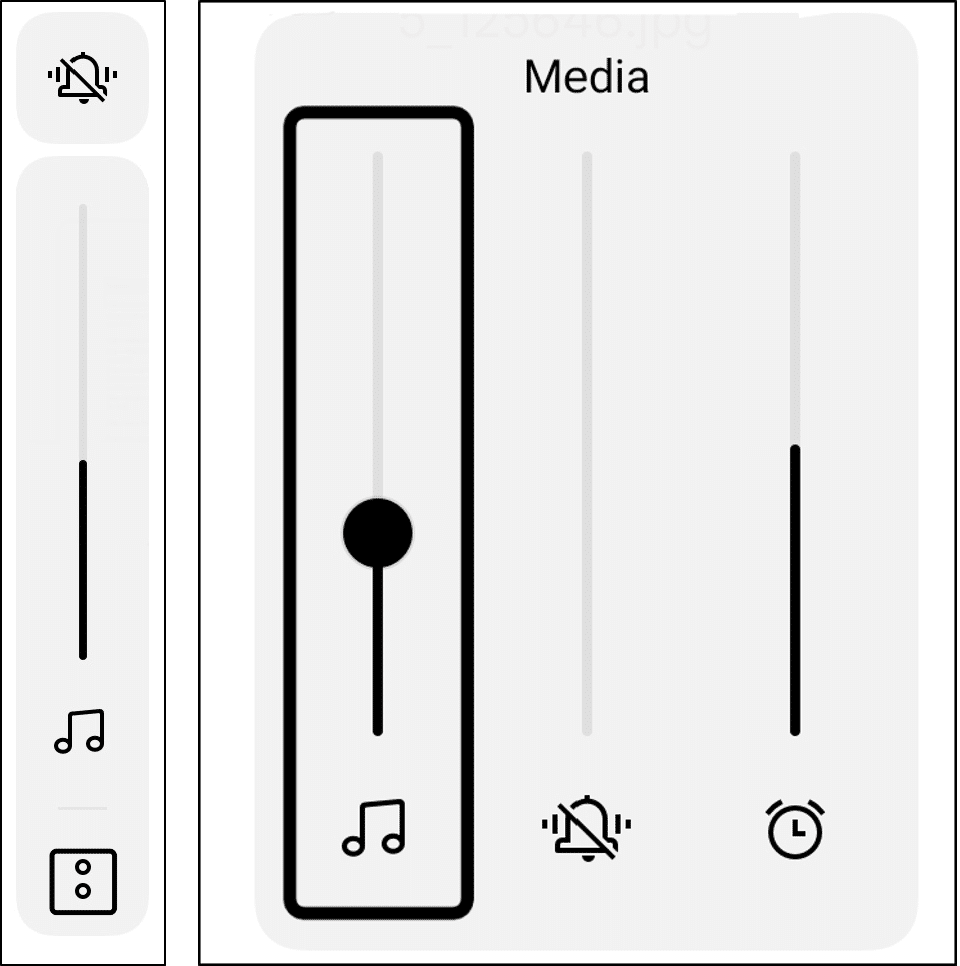
With that said, we’ll walk you through the different icon representations for other system sounds in the list below before going into the steps.
- Media volume: Music note icon
- Call and notification ringtone: Bell icon
- Alarm volume: Alarm clock icon
Once that’s clarified, there are two ways to increase your device’s media volume:
Method 1: Increase media volume using the volume panel
- Firstly, press the volume up button, and a volume level bar will appear on the left.
- Then, under the volume level bar, tap the menu icon represented by dots to expand the volume box, and two other volume level bars will appear.
- After that, find the volume level bar with the music note icon. That volume level bar allows you to adjust the media volume.
- Finally, adjust the media volume level to your preference.
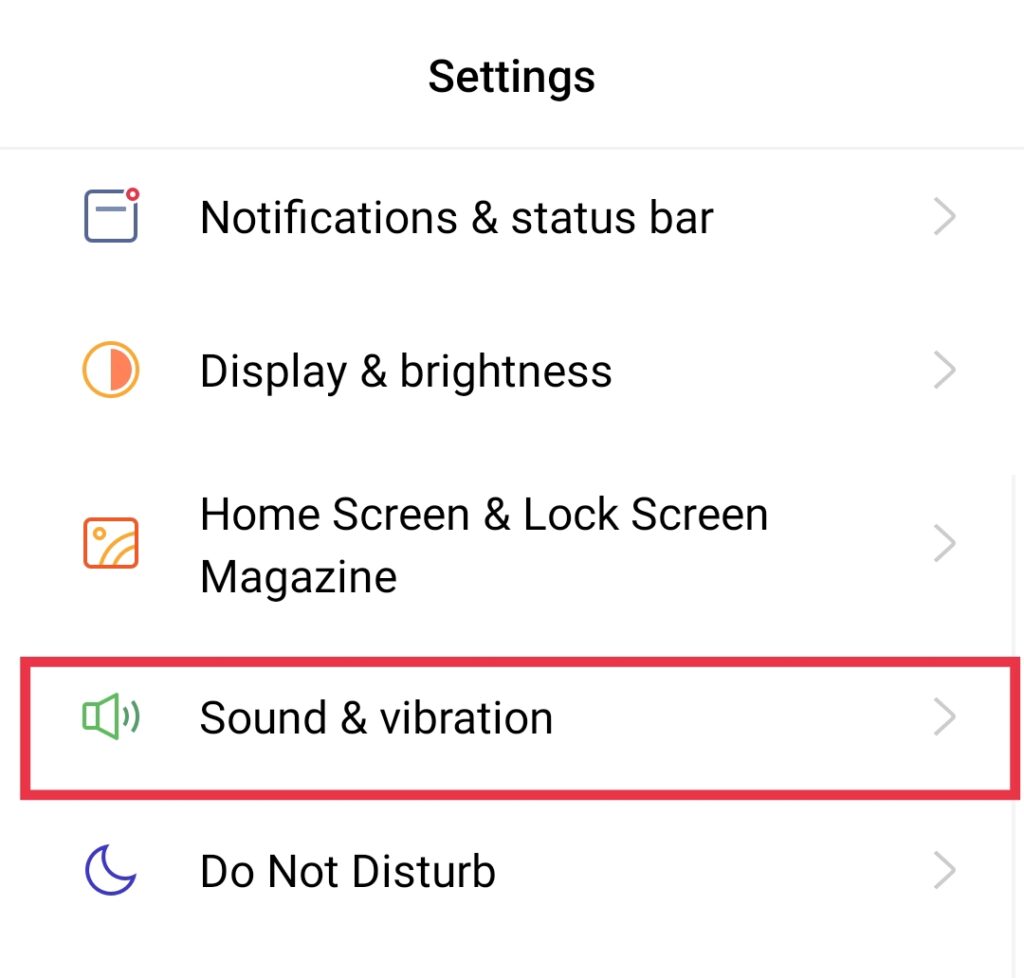
Method 2: Increase media volume from the Settings app
- For starters, launch the Settings app.
- Then, locate and tap the Sounds and Vibrations option.
- From there, locate and adjust the Media volume by dragging the slider.
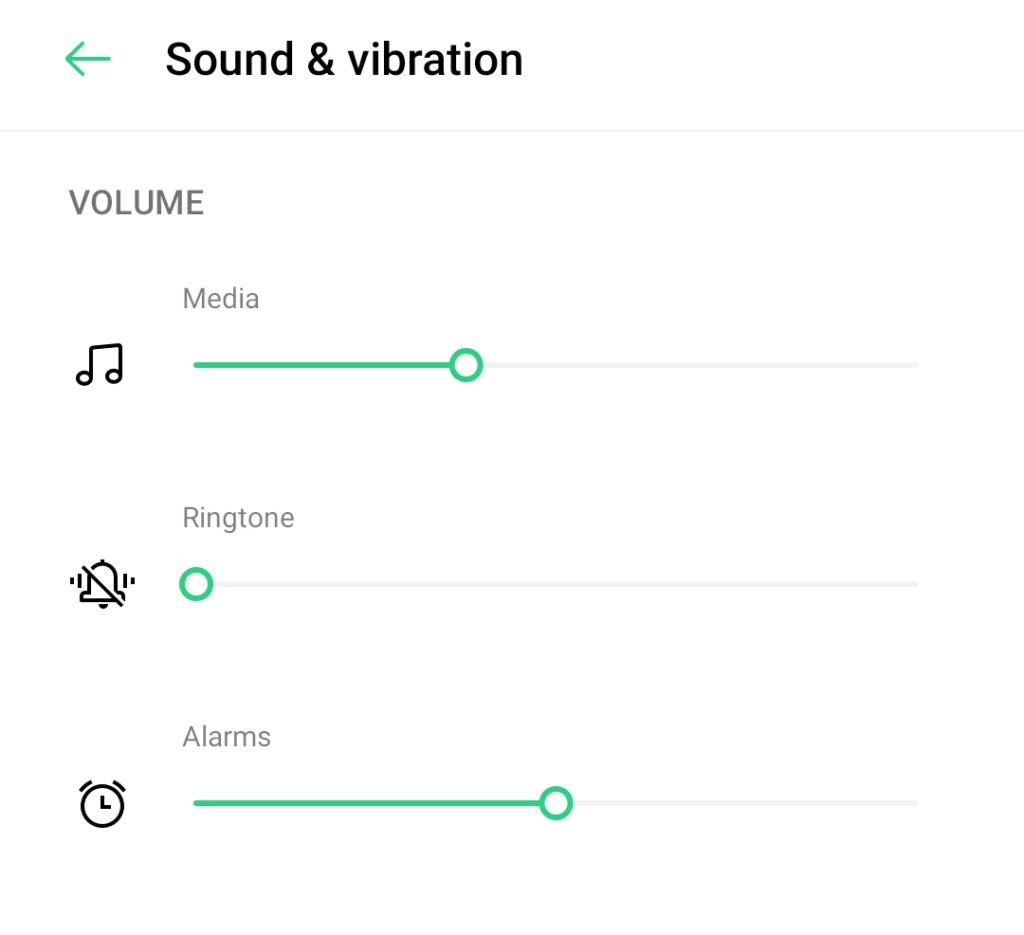
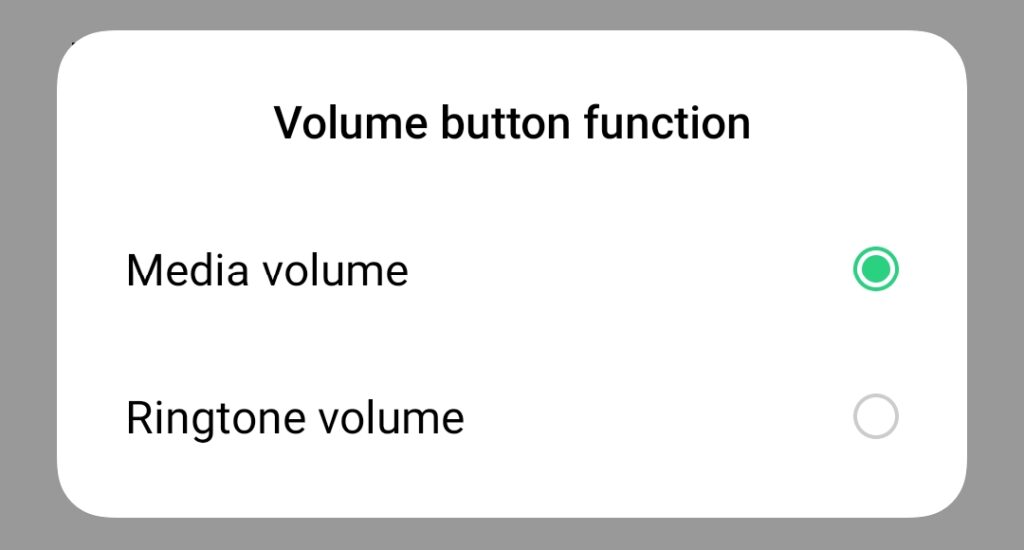
Under settings, you’re also able to set the default function for your volume buttons. By default, the volume buttons will adjust your ringtone volume when clicked. However, if you change your media volume more frequently, we recommend settings that as your default.
d. Ensure that the Apple Music or iTunes App is Not Muted
Furthermore, you should also check that the iTunes app is not muted on your Windows device.
This issue doesn’t apply to Mac users as Mac devices don’t have an in-built volume mixer that allows users to mute a specific app. However, if you find that you have an external volume mixer installed on your Mac.
You should check if it muted your Apple Music app using the necessary steps for your respective volume mixers. The steps to do so are as follows:
- Firstly, right-click on the Sound menu or icon on the bottom right corner of the screen.
- Then, in the pop-up menu, select Open Volume Mixer.

- After that, under Applications, scroll left and locate the Apple Music app. This setting shows the volume adjusted for the Apple Music app itself.
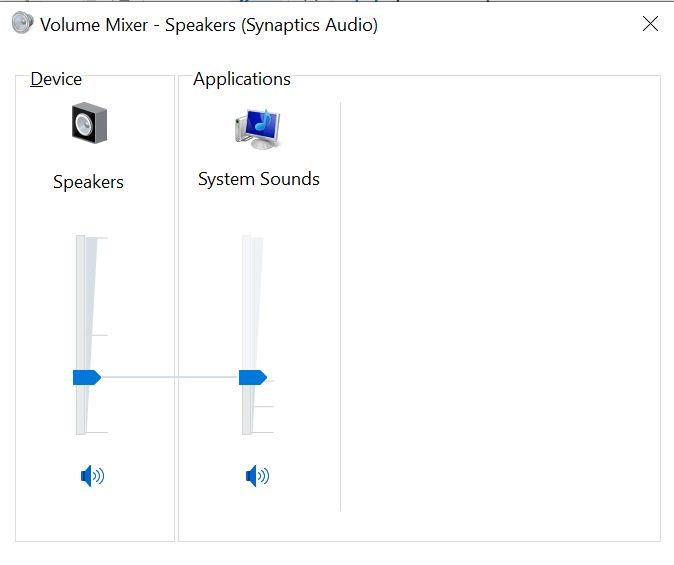
- Finally, suppose you find the Apple Music app volume too low or muted. In that case, increase the volume by dragging the volume slider.
3. Examine Connected Audio Device
Moreover, the audio device used when streaming Apple Music can also cause Apple Music to not function properly. This situation can be because your device selected the wrong audio device for sound output. You may also be unaware of any external audio devices used to play Apple Music. Hence, it leads us to the basic diagnostics done below:
Check the Sound Output Device Selected
For starters, you can play sound through various means on your device. These means include your computer’s internal speakers, display speakers, or any external devices plugged into your device or available wirelessly. By default, your computer’s internal speakers, known as synaptic audio on Windows, will be selected as the sound output device unless a new device is detected. Nevertheless, occasionally, changes are not applied to the sound output device selected, causing misinterpretations that there are audio problems with Apple Music. Hence, it’s essential to check these settings before moving on to more technical fixes by doing the following:
For Windows
You can check the sound output device by clicking the Speaker icon at the bottom of the screen. In the pop-up menu, ensure that the correct output device you want to play to is selected.
You can take it further and right-click the Speaker icon > Open Sound Settings to adjust the device properties.
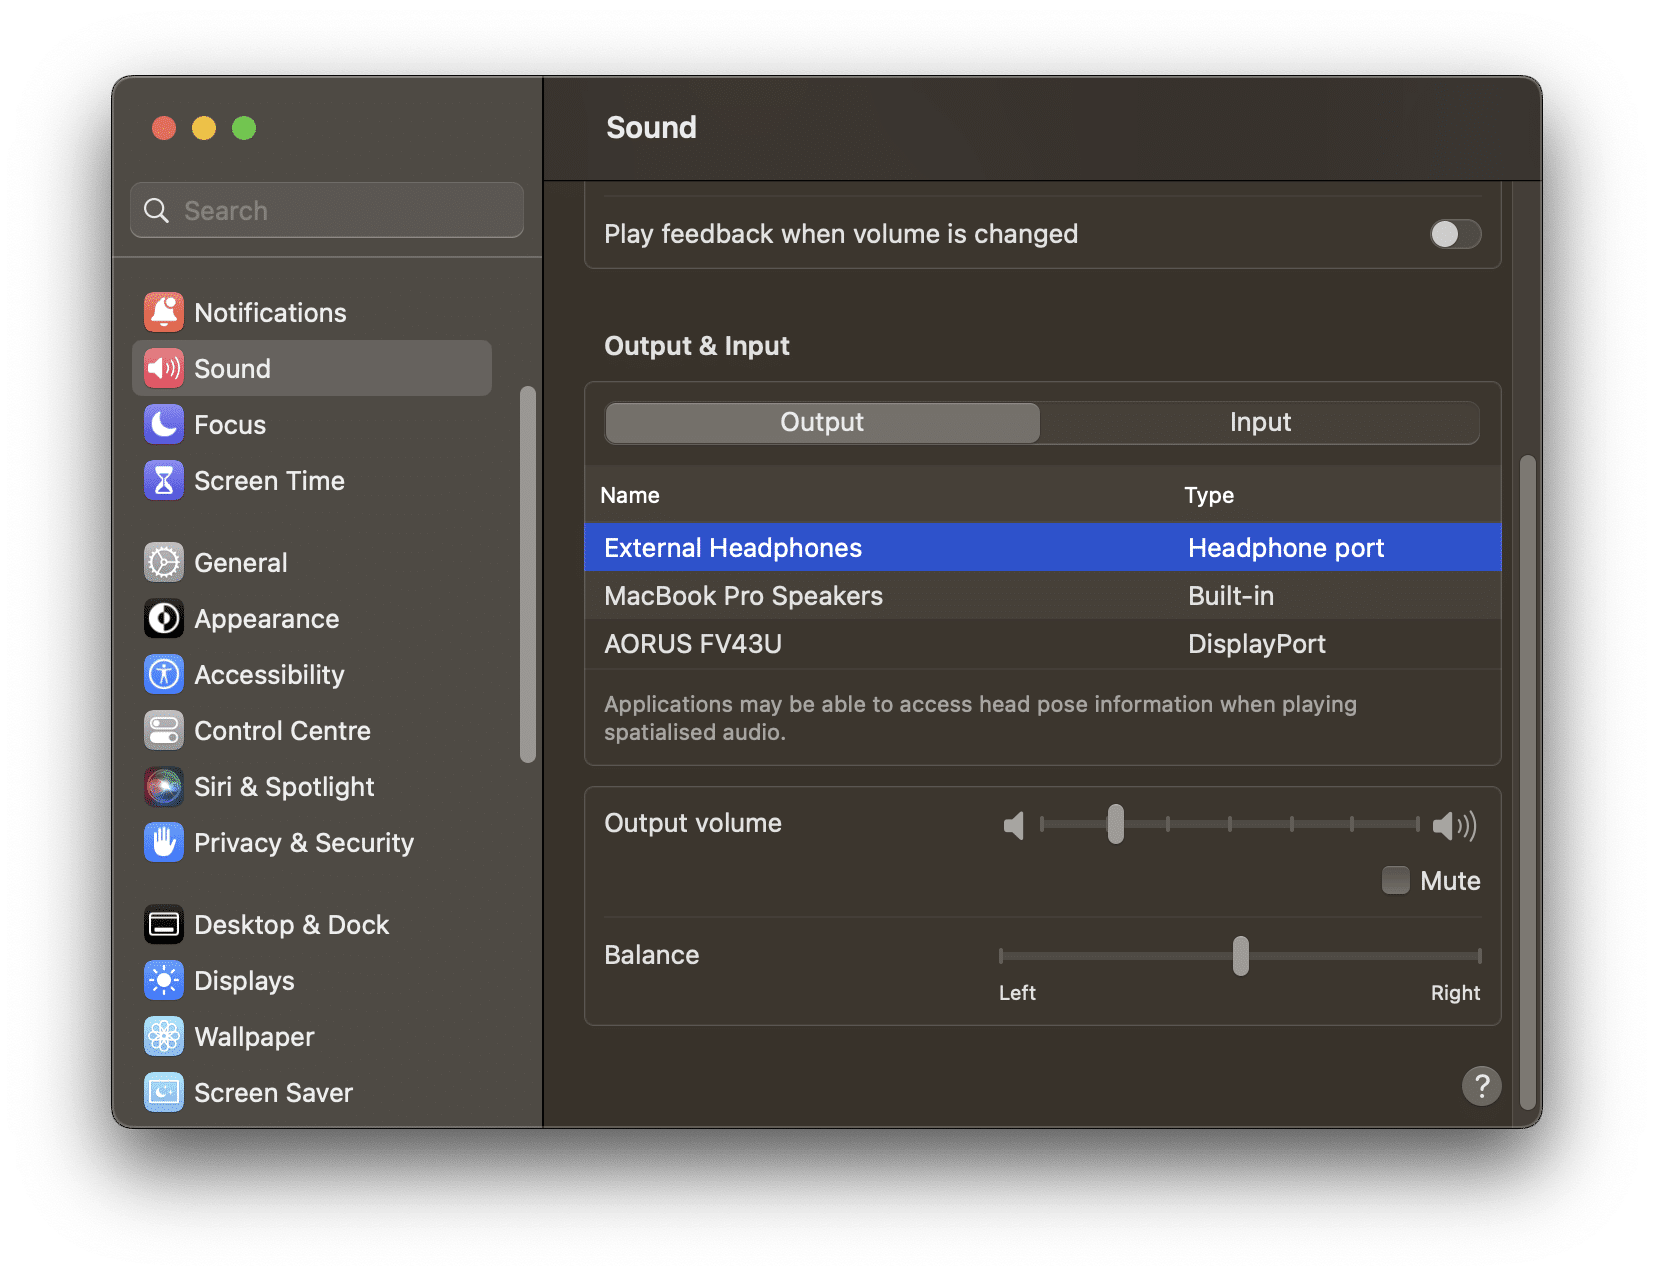
For macOS
You can change the sound output settings through the method below:
- First, on your Mac, choose the Apple Menu.
- Then, go to System Preferences or System Settings.
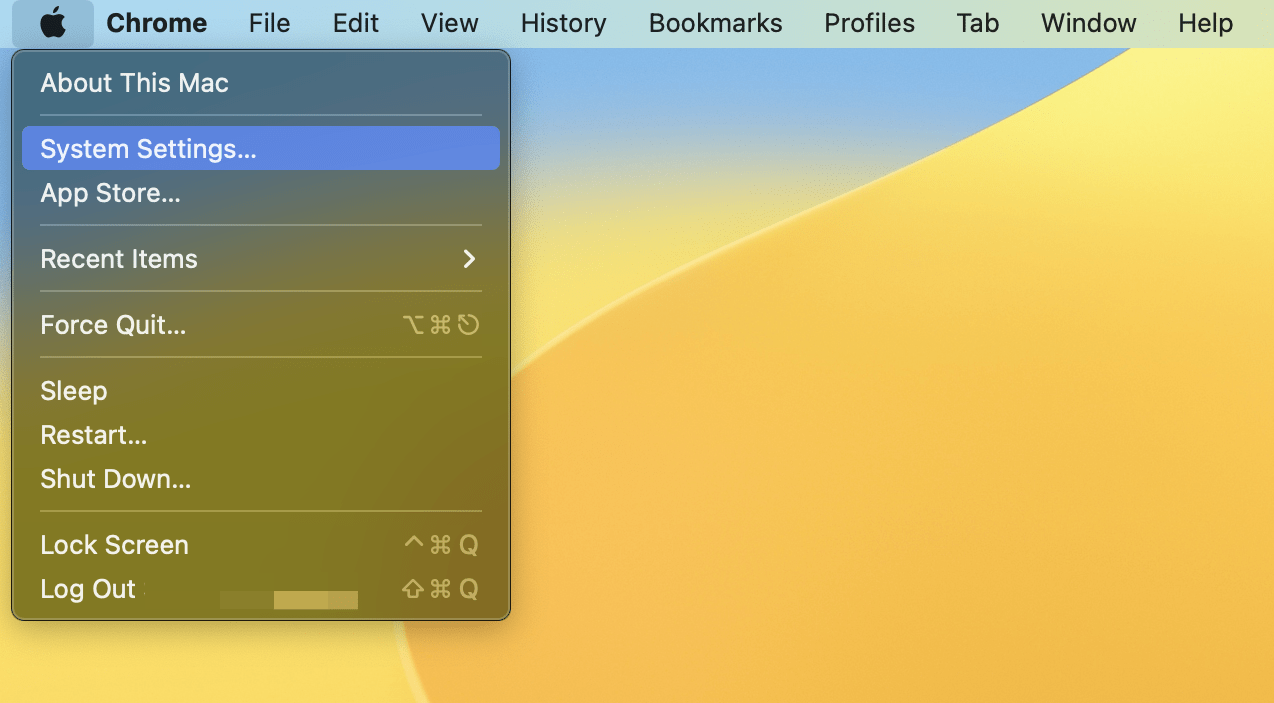
- From there, click Sound and select Output.
- Lastly, select the device you want to use in the list of sound output devices.
Note When Using an External Audio Device…
Your devices must be connected correctly. Starting with a wired connection, you should look for any loose connections or broken wires that may occur over time with extended use. You should also ensure the cables are connected to their respective ports. If these criteria are not fulfilled, audio signals cannot be transmitted from the device to the audio output device. As a result, it gives the misconception of a misbehaving Apple Music app.
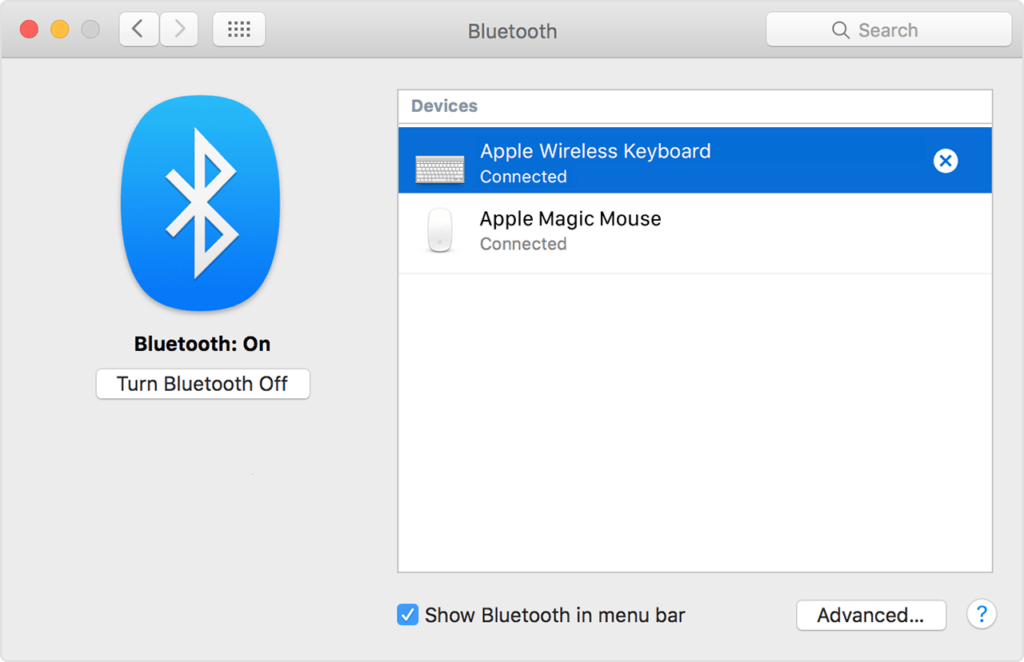
Moving on, when it comes to wireless audio devices, we suggest ensuring that your device is connected to the correct external audio device. This issue is particularly common for Bluetooth connections and Screencast because external devices are commonly given a default name based on their model. Hence, suppose you own more than one of the same devices within your household. In that case, it’s easy to mistake one external device for another with the same name. With that said, in this step, we’ll cover how to check your Bluetooth connection and how to change the name of your external audio device:
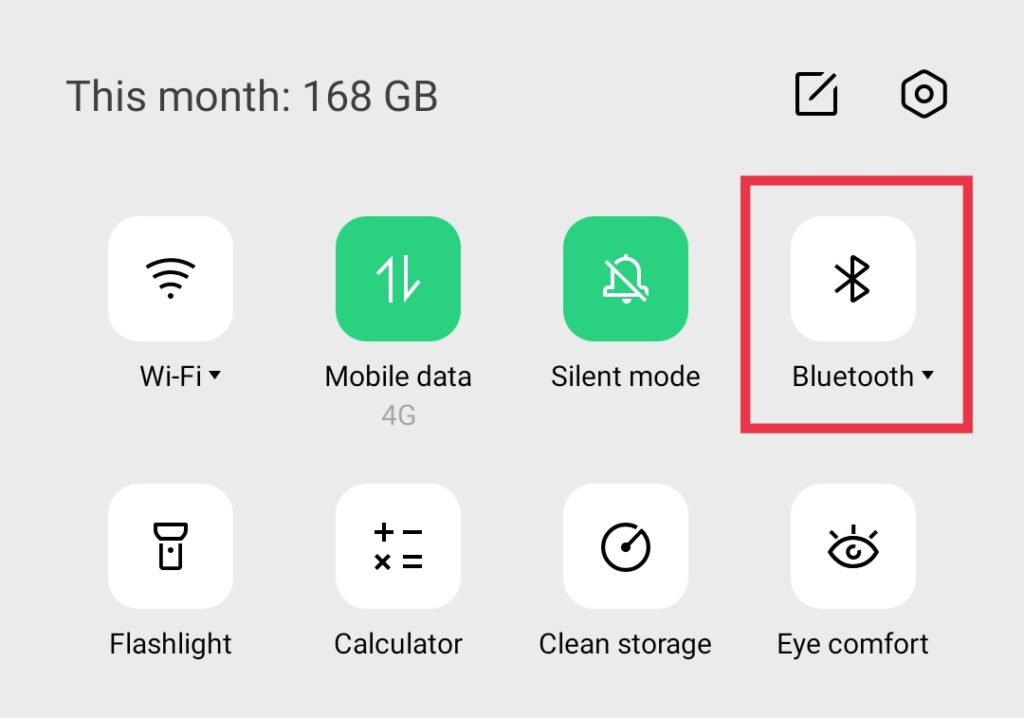
To check your Bluetooth connection,
- For starters, open the notification shade (Android) or control center (iOS).
- Then, locate the Bluetooth icon in the notification shade.
- Subsequently, under the colored Bluetooth icon, inspect the name of the device connected.
- Finally, suppose there is no sound coming from the connected device, swap to other available devices to check if they’re the correct ones.
Once you’ve identified the correct external audio device, change the device’s name. You can do so by tapping the information icon followed by the device name. Once a textbox appears, edit the device name to something unique.
Ensure that You’re Not Playing Audio to a Different Device
Furthermore, we recommend ensuring you’re not sending the Apple Music sound somewhere else through any wireless connections. Starting with turning off your Bluetooth connection, the steps are as follows:
For Mobile Devices (Android & iOS)
- First, open the notification shade (Android) or control center (iOS).
- Then, locate the Bluetooth icon in the notification shade.
- Lastly, tap on the Bluetooth switch to turn it off. Bluetooth is turned off if the Bluetooth icon isn’t colored.
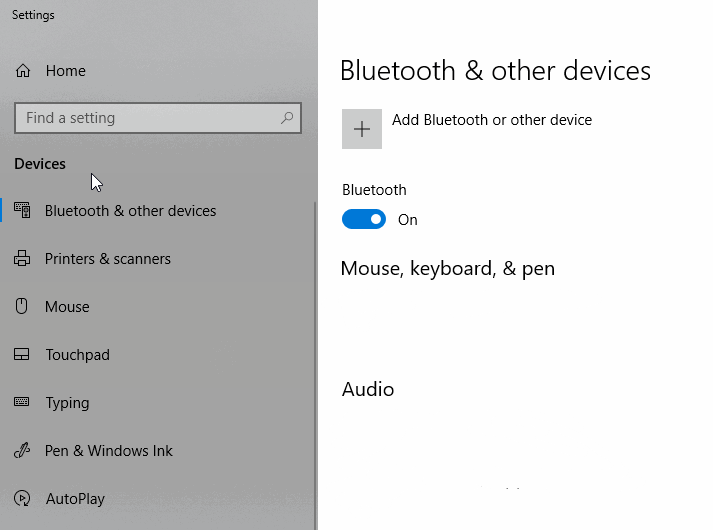
For Windows
Follow the steps below to turn off your device’s Bluetooth:
- First, click on the Start Menu in the bottom-left corner of your display.
- Then, select Settings.
- After that, click on Devices.
- Finally, click on Bluetooth & Other Devices from the side menu and ensure your Bluetooth connection is switched off.
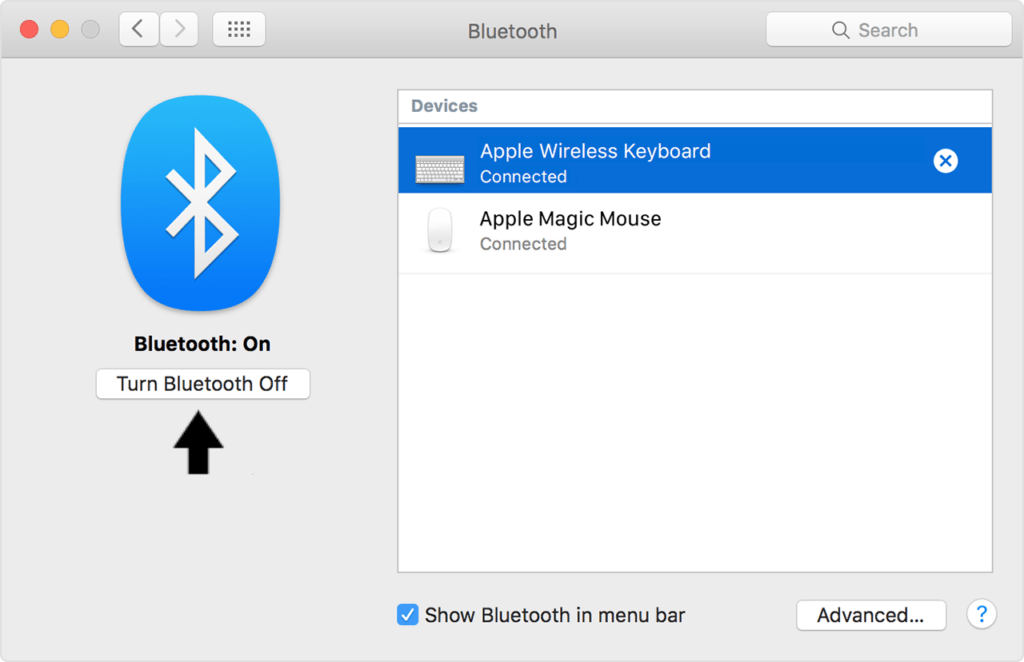
For macOS
You can control your Bluetooth connection by doing the following:
- On your Mac, click on the Apple logo or Apple menu button on the top-left corner of your display.
- After that, click on System Preferences.
- Lastly, click on Bluetooth and make sure that it’s off.
Subsequently, let’s look into the steps to turn off AirPlay on your iOS and Mac devices.
For macOS
Select the Mirroring icon indicated by a rectangle with a triangle at the bottom from the top menu bar. Then, from the Mirroring menu that opens, select Turn Mirroring off. However, suppose you don’t find the Mirroring icon. In that case, you can use these steps to make the icon available:
- First, select the Apple icon from the menu bar.
- Then, click System Preferences followed by Displays.
- Lastly, check the Show mirroring options in the menu bar when the available option is in the lower left corner.
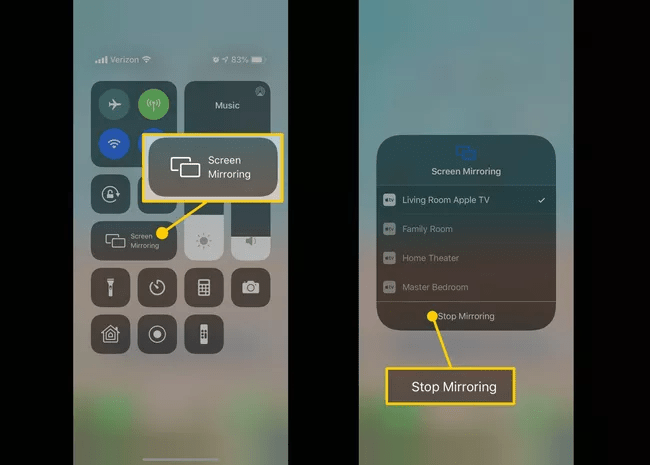
For iPhone (iOS) or iPad
The steps to turn off mirroring is as follows:
- For starters, open the Control Center. If you’re on iPhone X or iPad iOS 12, swipe down from the screen’s upper-right corner. However, swipe up from the bottom of the screen if your device is iPhone 8 or iOS 11 and earlier.
- Then, select either the Music widget or the Screen Mirroring widget.
- Lastly, select the option to Stop Mirroring or Stop Airplay.
4. Check if Apple Music is Down
Subsequently, suppose you find that your Apple Music subscription is active. Before moving on to the technical fixes, we suggest checking if the problem is on your end or a problem with the Apple Music servers. Although Apple apps and services generally have a good reputation for staying online and not crashing, it’s still possible for them to encounter unforeseen circumstances. Therefore, we wouldn’t want our fellow readers to waste time diagnosing the problem in the wrong direction.
With that said, here are a few methods you can follow to check the Apple server status.
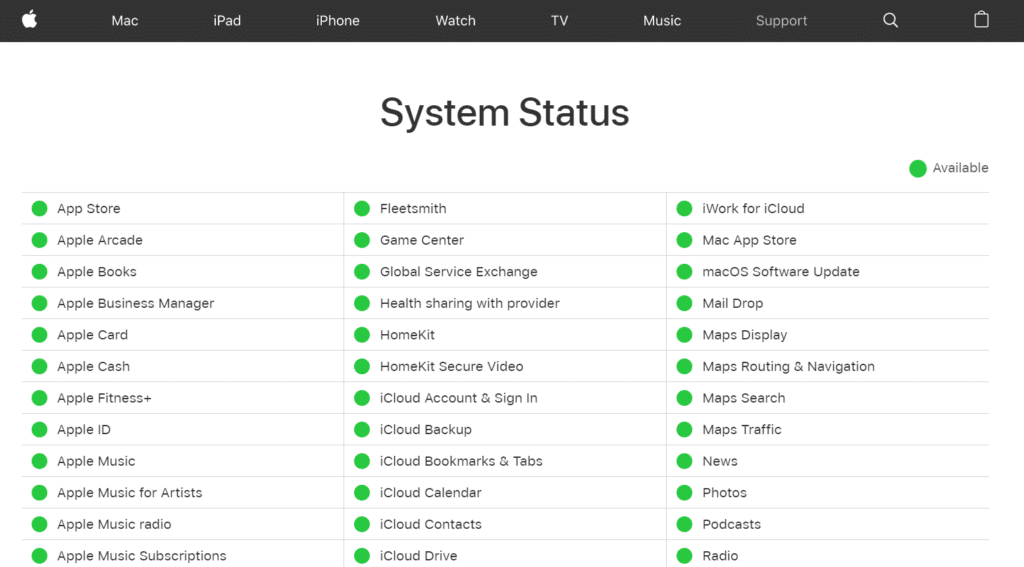
Method 1: Through the Apple Official Support Page
For starters, Apple provides a dedicated page that lists the server statuses for all Apple-related services. For your convenience, we have attached the link to the page here.
After you have accessed the page, locate all Apple Music-associated services. These services include Apple Music, Apple Music for Artists, Apple Music radio, and Apple Music Subscriptions. Here, if the indicator next to all the services is lit green, it shows that the servers for these services are up and running. However, if any of the services related to Apple Music is down, it can cause your Apple Music to not function correctly.
Method 2: Through Downdetector or Other Third-Party Status Checkers
Secondly, you can inspect the Apple Music server status using third-party status checkers. These websites are user-based sites that use several reports to potentially predict the current status of the Apple Music servers. Among all the available third-party server status checkers, we strongly recommend DownDetector for this purpose.
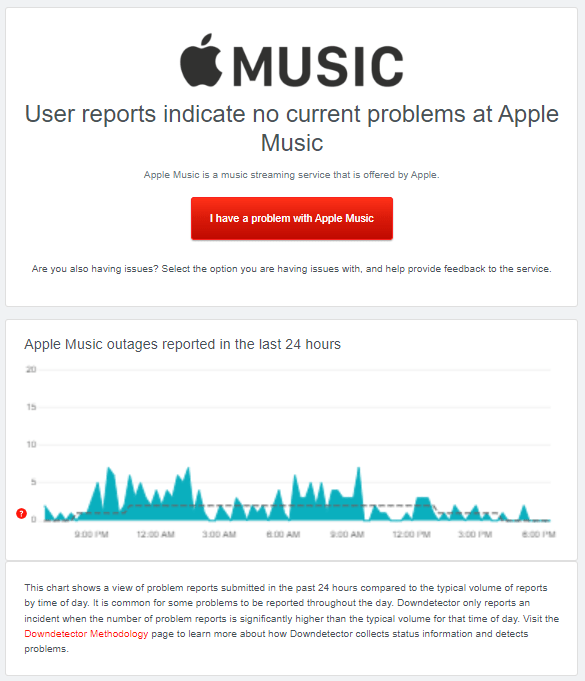
The reason behind recommending this page is that it’s one of the third-party server status checkers that is more credible. Plus, it also provides all-rounded services that support different user needs, including:
- A live graph showing the number of reports in the past 24 hours
- Filter for information based on the user’s geolocation of the list of top three problems with the highest number of reports
- A comment section for users to discuss the issues they’re experiencing
Method 3: Check @Apple Music for any ongoing issues
Furthermore, users can also utilize Apple Music’s Twitter page to check the server status. This page is a communication platform for Apple with their Apple Music subscribers. For starters, it’s important to note that there is no direct indicator of the Apple Music server status on the Twitter page. Nevertheless, this page is designated to post updates on any important news or situation associated with the availability of the Apple Music servers in case of a nationwide problem.
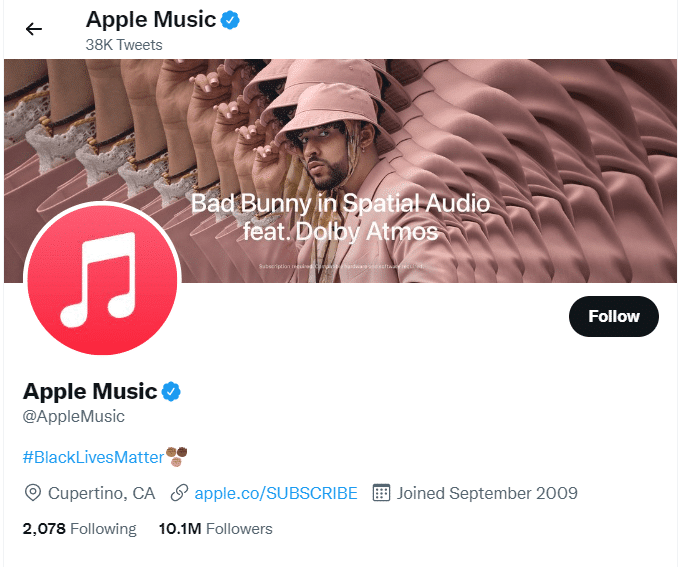
On Twitter, we also looked up Tweets about the Apple Music servers using the hashtag #applemusicdown. From there, check out what other users are experiencing. Suppose you find some people going through similar problems, don’t hesitate to join in the conversation as you might find your solution there as well.
5. Check if the Availability of Apple Music
Additionally, we strongly suggest checking whether your current location supports Apple Music, especially if you’re traveling. To do so, we have attached the link to the article regarding the availability of Apple media services in various countries. The benefits you should look out for in the list include Apple Music, Apple Music Radio, Beats 1 Radio, and iTunes Match. If these services are unavailable in your current location, you’ll have trouble signing in to your Apple Music account.
6. Test the Audio Stream on a Different Apple Music Song or Album
Perhaps you find that the issue with Apple Music is on your end, and no other users are facing similar difficulties now. In this situation, we recommend first narrowing down the source of the problem. To begin with, pick and play another song on Apple Music randomly and inspect if the issue persists. The reason may be an underlying issue or glitch with the specific song albums or audio files. Consequently, it is observed as the Apple Music app has no sound during playback.
Nevertheless, it’s irrational to jump to conclusions simply from the observation of one different song. Therefore, you should repeat this step as often as possible to increase the accuracy of your word. If songs from the same album are not playing correctly, test it out on other albums. Subsequently, if you find that the problem is isolated to some but not all songs, you can try to remove and re-add it by following Step 23. We recommend unchecking your device restrictions if you can only play explicit music content (Step 21). You can also report this problem to Apple Support (Step 30).
However, if the issue persists on all other songs, we suggest continuing the article to further isolate the problem.
7. Check Whether the Problem is with Apple Music App or the Device
At this point, you’ve eliminated the chances of this problem being a specific content issue. The next step is narrowing down the source of the situation further. In this step, you’ll be testing your device’s sound and audio to pinpoint whether the problem is caused by your Apple Music app, instrument, or web browser. This step can be segregated into two different parts:
Part 1: Test Your Music Stream on Another app or site
For Apple Music App users
For starters, if you’re playing Apple Music on the app, try playing songs on a different streaming platform, such as Apple Music and the Apple Music web player. Suppose these apps can load and play content properly. In that case, there may be an issue with your Apple Music app.
For Apple Music Web Player users
Subsequently, perhaps you’re facing issues with the Apple Music web player. You should try playing songs on a different website and the Apple Music app to see if the problem persists. This method can help you identify whether it’s an issue with your web browser.
Part 2: Try Playing Music using the Apple Music App on a Different Device
Lastly, we suggest checking for problems with Apple Music on a different device to identify whether it is an issue with your device. For example, if you were streaming on your PC, try switching to your mobile device and vice versa. Suppose the problem only happens with your device. In that case, there are several aspects that you may look into to troubleshoot the issue:
- Ensure that Your Device Firewall isn’t Blocking Apple Music (Step 16)
- Update Your Device System Software (Step 26)
8. Restart the Apple Music App
Now, you found out that it is an issue with your Apple Music app. So, where should you start? For us, it’s always best to start with the easy stuff, like restarting your Apple Music app. This step is commonly used as the first step when debugging an app that freezes, won’t respond, or has any significant performance difficulties. The reason is that it can help to remove any corrupted temporary files, forcing the app to reconstruct them. It also will allow the app to re-sync your user data with the Apple Music servers. Anyhow, we would like to clarify that clicking the red dot in the top-left-hand corner of the app on your Mac device will not close the app. Instead, it merely minimizes it to the Dock. The same goes for clicking the Home button on your iOS device. With that said, here are the proper steps to force-stop the Apple Music app.
For iOS Devices
To properly close the Apple Music app on your iPhone or iPad, you can do so via the App Switcher. However, the method used to open up the App Switcher may vary across different Apple device models. Here, we have covered the steps for several iPhone models:
Suppose you’re using an iPhone 8 or earlier. In that case, you’ll need to double-click the Home button to open up the App Switcher.

The step for iPhone X is to swipe up from the bottom to the center of the display. Then, hold your finger in the center of the screen for a second or two.

Perhaps you have an assistive touch enabled on your device, giving you a floating button on your screen. If so, you can open the App Switcher by clicking on the button, selecting More, and tapping Switch Tabs.
Once the App Switcher is open on your device, press and holds the Music app window until a red minus button appears in its upper left corner. To close the app, you can either tap the red minus button or swipe the Music app up and off the display.
For Android Devices
Method 1: Removing the Apple Music App from Recent Apps
- Firstly, swipe up from the bottom of the screen, stop when your finger reaches the middle, and pause until the app previews show up. For some devices, you can view your Recent apps by tapping on the hamburger menu at the bottom of your screen.
- Then, in the app switcher, swipe sideways and locate the Apple Music app card.
- Lastly, swipe up on the Apple Music card preview to force close the app.
Method 2: Force Close via Device Settings (Android Devices)
- For starters, launch the Settings app on your device.
- Then, select Apps and find and tap the Apple Music app in your list of apps.
- Lastly, tap the Force Stop option.
For macOS
Perhaps you’re streaming Apple Music on a Mac device instead. To close the music app correctly, right-click the app icon in the Dock and select Quit.
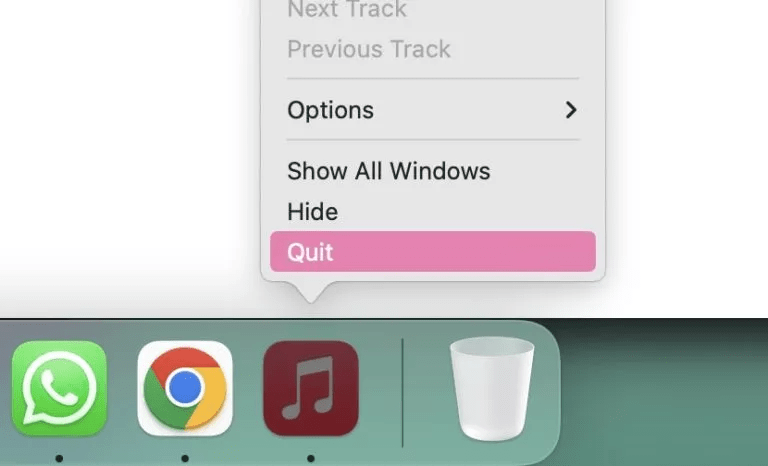
If the Quit command doesn’t work, resolve to Force Quit instead. To do so, right-click the app icon again, and you’ll find that Force Quit has replaced the Quit option. Alternatively, you can follow these steps as well:
- Firstly, open the Activity Monitor on your Mac device.
- Then, locate the Music app and highlight it.
- Lastly, click the X icon at the top, followed by Force Quit.

For Windows Desktop Devices
- Firstly, on your device, right-click the taskbar and select Task Manager.
- Then, locate and select the Apple Music app under the Processes tab. In this step, you should ensure that the entire process tree under Apple Music is selected.
- Next, click End Task.
- Subsequently, launch the Apple Music app by pressing the Windows Key and searching Apple Music.
- Finally, click Open.
From there, relaunch the app and check if the issue persists. We also strongly recommend executing this fix after other fixes as a testing effort to see if the problem is solved.
Note: Force-stopping apps on your device is a bad habit because it reduces your battery life.
9. Sign Out and Back Into iTunes and App Store
Subsequently, we recommend re-signing your iTunes and App Store using your Apple ID and password. Account-related issues can also trigger minor software errors that prevent Apple Music from performing normal operations. Hence, the purpose of this step is to remove corrupted user data lurking in the app leading to unsync information and account issues such as being unable to log in. This fix is also nifty for those who aren’t Apple Music subscribers but are encountering problems with their music not showing up in the Music app.
With that said, the steps to resign into Apple Music, iTunes, and the App Store are as follows:
- To begin with, launch Settings and select iTunes and App Store.
- Next, tap on your Apple ID.
- Then, click Sign Out.
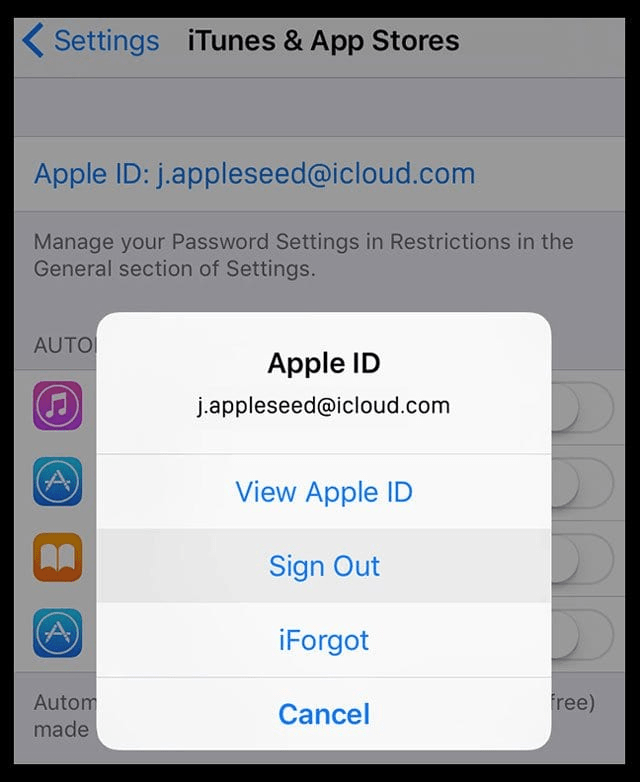
- Subsequently, wait for your device to fully sign out from iTunes, and the Sign in option will be available.
- After that, tap Sign In and enter your Apple ID and password.
- Lastly, wait for the App Store to display your Apple ID before restarting the Apple Music app.
10. Update the Apple Music App or iTunes
Another cause for app bugs is an outdated Apple Music or iTunes app. The reason is that an ancient Apple Music and iTunes app can no longer recognize and adequately process new audio content formats. Consequently, this compatibility problem can cause your Apple Music playback to malfunction.
Therefore, it’s essential to always keep your Apple Music, or iTunes updated. The same goes for all other apps installed on your device. The reason is that these app updates are a way for developers to communicate new features, bug fixes, and security patches to you as users. Nevertheless, we understand that with the number of apps installed, it can be rather tedious to keep track of released updates for each of them. Hence, we recommend utilizing the automatic updates feature for this purpose.
In this step, we have provided steps for both methods to cater to different user needs:
Method 1: Switch on Automatic Updates
For iOS
- First, on your iOS device, navigate to Settings.
- Next, locate and tap iTunes & App Store.
- Lastly, switch on the App Updates setting.
For Android
- To begin with, on your Android device, launch the Google Play Store.
- Then, in the Search Bar, input Apple Music.
- Next, tap the three dots on the top right once the Apple Music app appears in the results list.
- Lastly, check the Auto-update option.
Method 2: Update Manually
For iOS
- For starters, launch the App Store on your iOS device
- Next, for iOS 12 and below, tap on the Updates tab in the bottom panel. As for iOS 13 and above, you can find App Store updates by tapping your profile icon and then scrolling down.
- Then, from the list of apps, locate the Apple Music app.
- Finally, if updates are available, tap on the Update button.
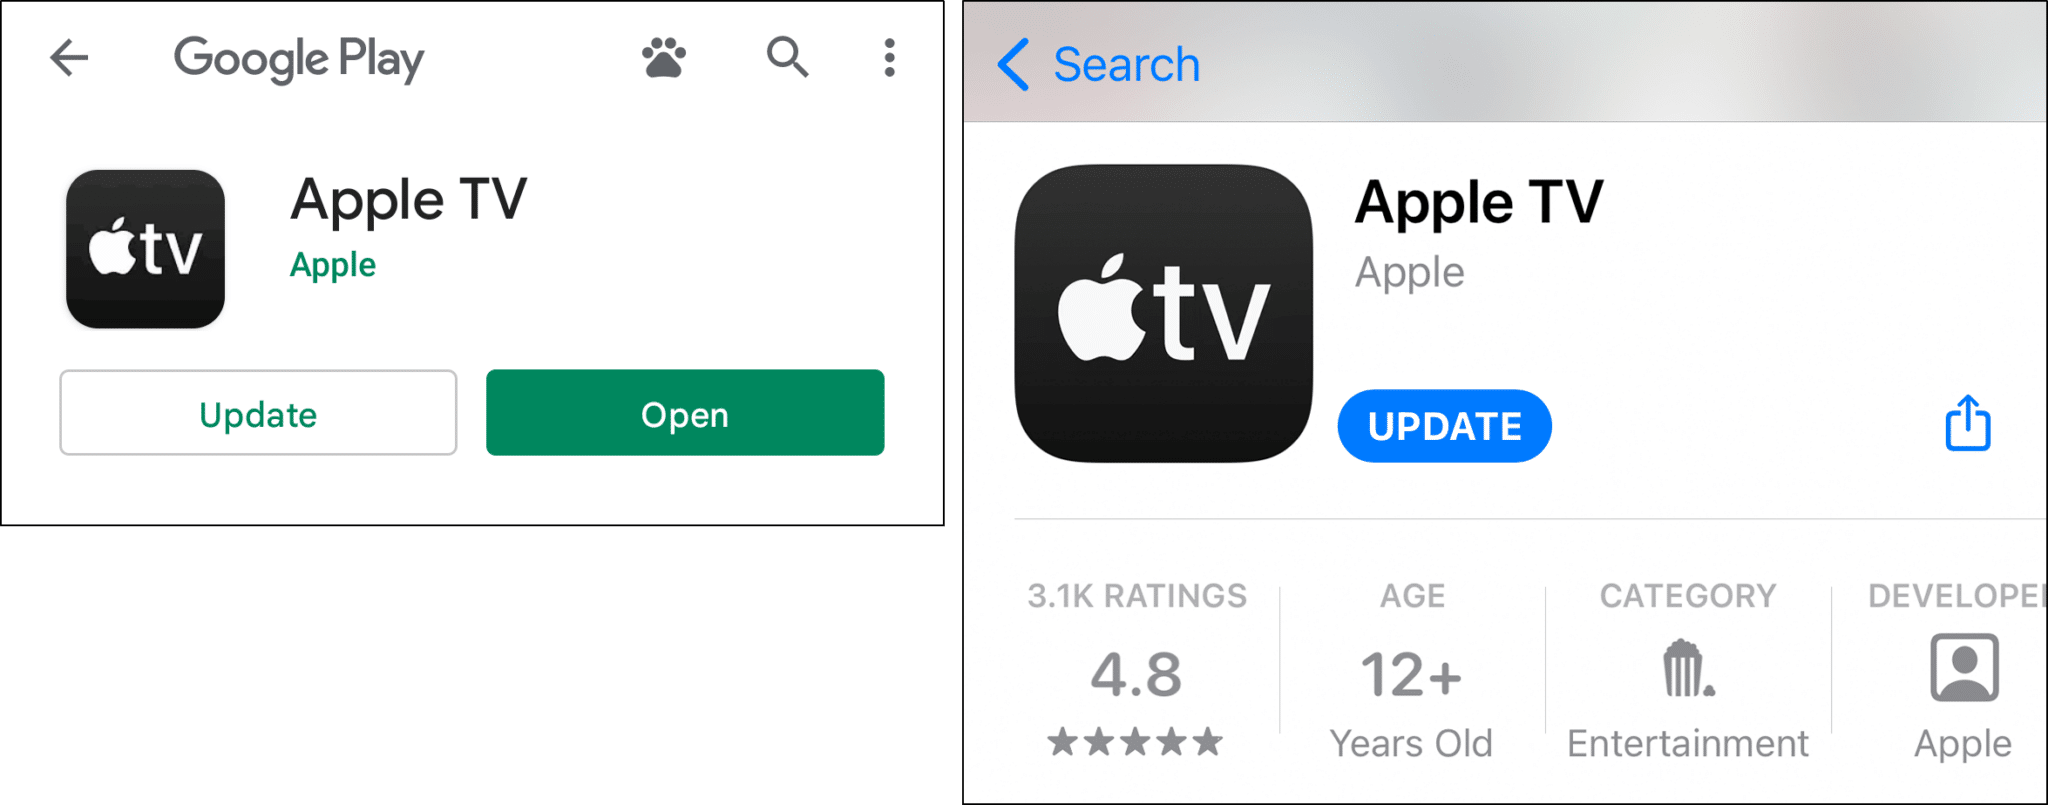
For Android
- First, launch the Google Play Store on your Android device.
- Then, search and locate the Apple Music app.
- Lastly, if updates are available, tap on the Update button.
For macOS Devices
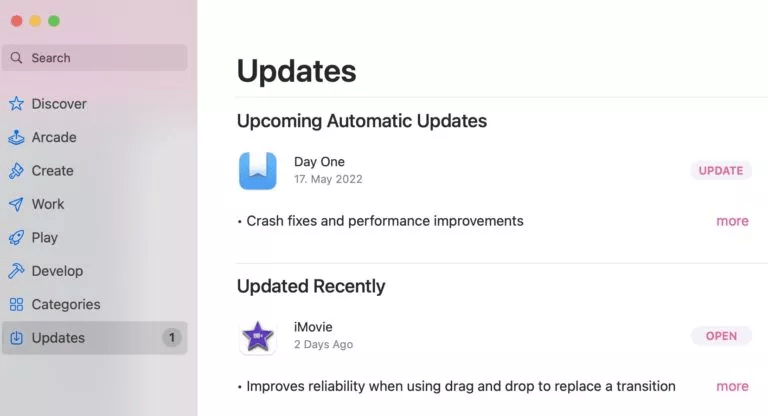
- First, open the App Store to identify whether an update is available.
- Then, click on the Updates tab.
- From there, locate the iTunes app and check if an update is available.
- Finally, click the Update button on the right if an update is pending.
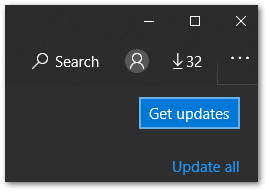
For Windows Devices
- For starters, launch the iTunes app.
- Next, click on the Help tab at the top of the screen.
- Subsequently, click Check for Updates.
- Lastly, if an update is available, follow the on-screen instructions to install the updates for iTunes.
After installing the Apple Music app updates, restart the app. This additional step will allow the updates to be correctly applied and configured.
Note: Suppose you don’t see the Apple Music app listed after tapping your Apple ID image, or there is no update option available. In this case, your Apple Music app is on the latest available version.
11. Reload the Apple Music Web Player
Perhaps you’re facing problems when streaming on the Apple Music web player. In that case, you can reload the page using these steps. By doing so, you’ll be able to o re-sync any data on the web player with the Apple servers:
Method 1: Click the Reload Button on the Web Browser
Method 2: Shortcut Keys
For Windows: press the Ctrl + R key.

For macOS: press the Command + R key.

Subsequently, if the issue isn’t fixed, there may be a problem with the browser cache used to load the web player. In that case, you can opt for a hard refresh to remove some minor cache and retrieve new resources from the servers:
For most web browsers on Windows (Chrome, Firefox, Edge), press Ctrl + F5 together at the Apple Music web player page to perform a hard refresh.

On the other hand, on Safari and other browsers for macOS, press the Command + Option + R key simultaneously.

12. Restart or Reboot Your Device
Moreover, your Apple Music is also not working because your device has been on for long periods. Consequently, many apps run in the background, causing overused RAM or CPU issues. This situation can result in your Apple Music app crashing, not responding, slow streaming, and glitching. Therefore, we suggest rebooting your device to clear your device’s RAM and purge all fragments of previously running apps. n this step, we have provided the steps to reboot different types of devices:
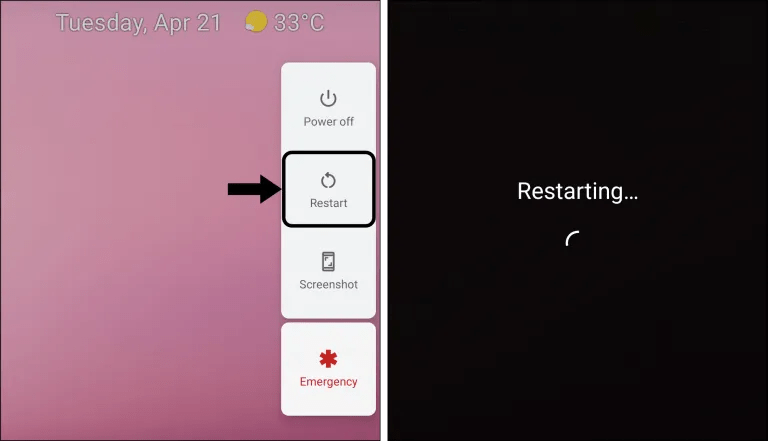
For Android Devices
You’ll need to press and hold the power button. Once the restart or power off option appears, tap the Restart option.
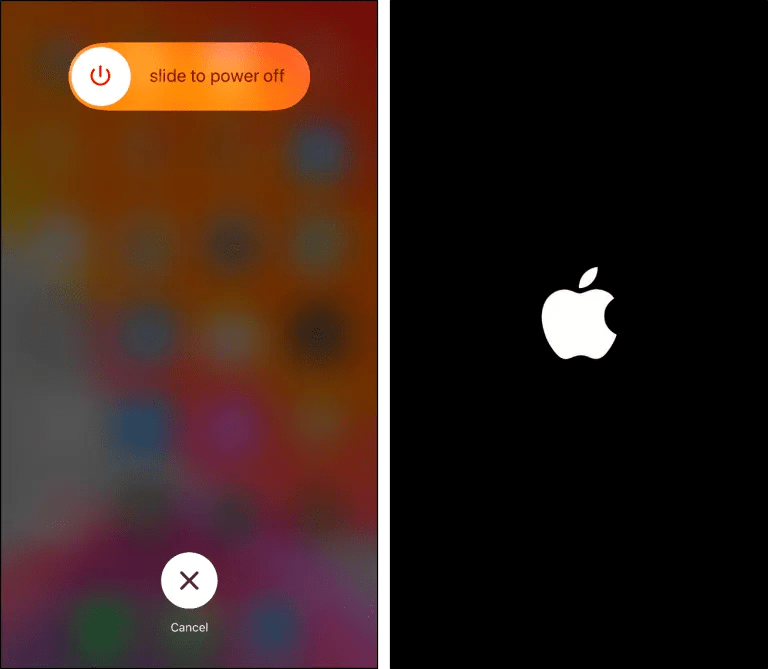
For iOS Devices
Perhaps you’re using an iPhone 6s or below or iPads with home buttons and iPod Touches. You’ll need to press Home and the Power button simultaneously until you see the Apple logo. On the other hand, for iPhone 7 or iPhone 7 Plus, press and hold both the volume button and the side button for at least 10 seconds until the Apple logo appears. As for iPads with no home button and iPhone 8 and above, the steps to restart the device are as follows:
- First, press and quickly release the Volume Up button.
- Then, press and quickly release the Volume Down button.
- Finally, press and hold the Side or Top button until you see the Apple logo.
For Windows Devices
Open the Start menu and select the power icon at the bottom right corner of the screen to view all power options. Suppose you’re using Windows 8 or below. The power icon will be at the top of the screen. From there, select Restart.
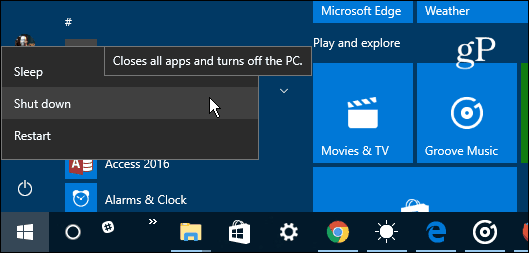
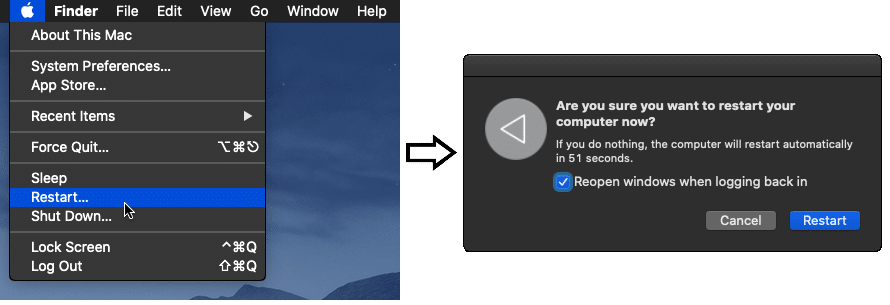
For macOS Devices
You can restart your device by choosing Apple Menu > Restart.
13. Test and Improve Your Internet Connection
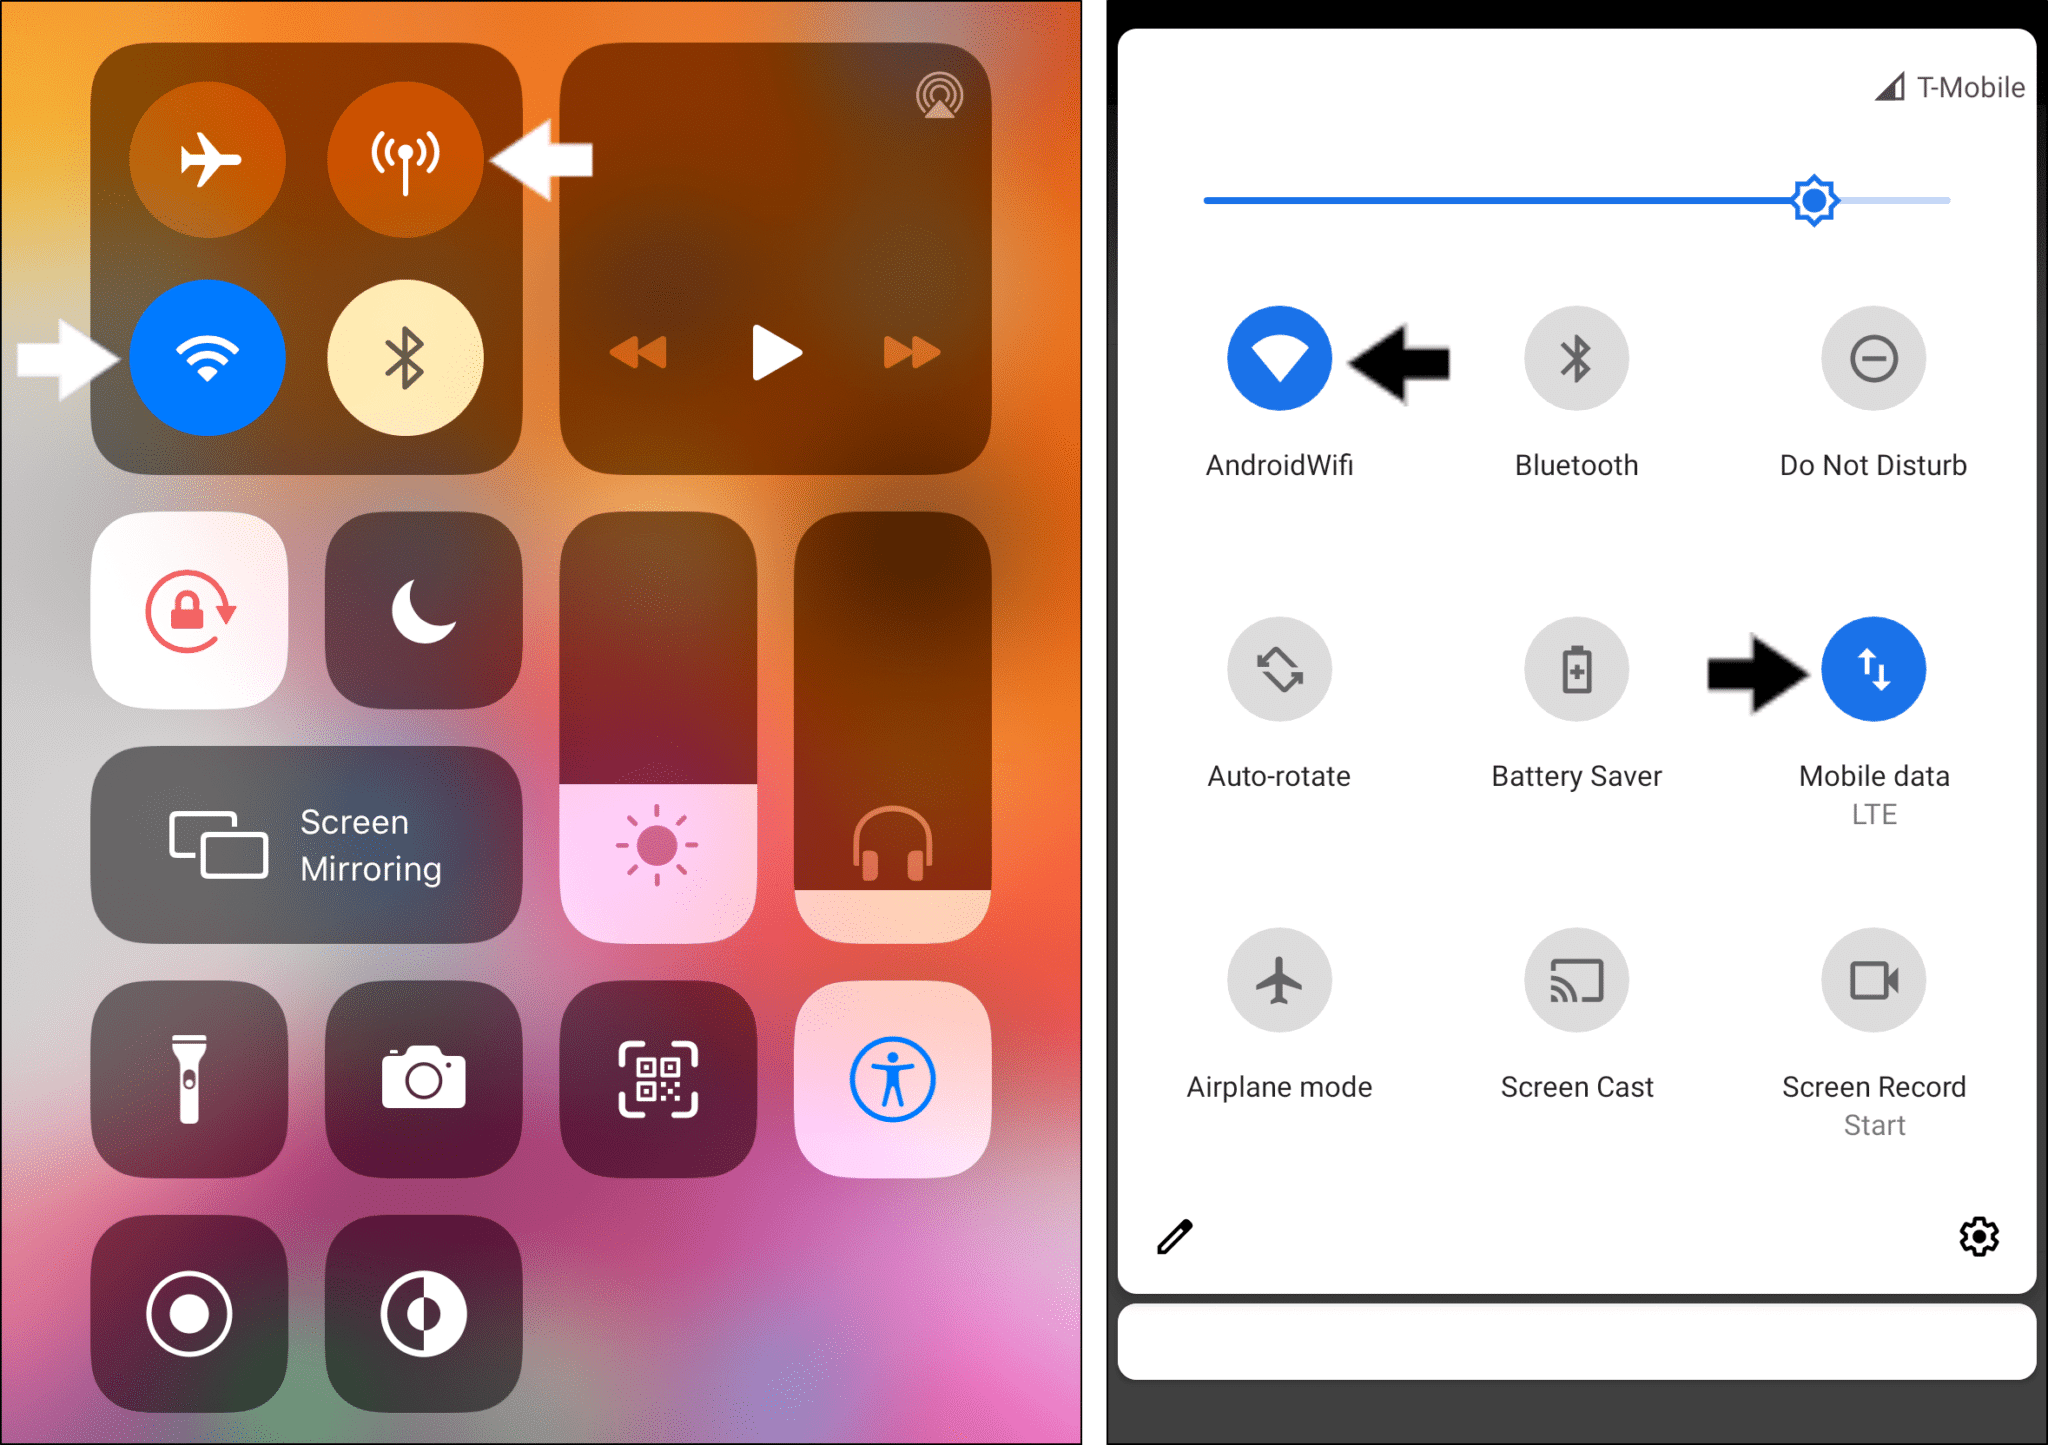
Furthermore, a poor or slow internet connection can also result in problems with your Apple Music. To begin with, you can first identify whether your device is connected to an internet connection. This can be done quickly by looking at the top of your computer to find the Wi-Fi signal icon.
Suppose you’re using your mobile data. In that case, inspect whether there is a 4G sign above your device signal bar icon. Alternatively, you can locate all this information from your notification shade.
Secondly, let’s look at how much internet bandwidth Apple Music consumes. For Apple Music, Apple provides three different audio quality tiers with two high-quality levels using lossless compression. Perhaps you’re playing Apple Music using the standard audio quality. For that, it’ll use approximately 5 MB of bandwidth for a three-minute song, amounting to around 60 MB per hour of non-stop streaming. The reason Apple Music requires more internet bandwidth is that even at standard quality, Apple Music’s bitrate tops out at 256 kbps. However, it’s important to note that the better the audio streaming quality, the more data it’ll eat away.
Test the Internet Connection Speed
Hence, the first question is, do you have sufficient internet speed to support normal music streaming on Apple Music? We suggest using an internet speed tester such as Fast.com to find out. This website is easy to use, even for newcomers, and provides almost instant results. These results are also thorough, covering your internet connection’s upload speed, download speed, and latency.

Another way to check your internet speed is to launch other apps, such as YouTube, that require an internet connection aside from Apple Music. From there, inspect if the app takes too long to load or respond. If so, it indicates that your internet speed might be slow.
After a simple test on your internet speed, suppose you find that your internet speed is enough to allow smooth streaming of Apple music on standard audio quality. Then, you can scratch the possibility that a weak internet connection causes the audio issue. However, if you realize that your Internet speed is lower than usual, you can use these steps to improve your Internet connection:\
Ways to Improve Your Internet Connection
a. Switch Between Mobile Data and Wi-Fi
For starters, perhaps you’re entitled to both a Wi-Fi connection and mobile data. In that case, we suggest toggling between the two available options and determining which is more stable during that time. Although by theory, a mobile data connection should be more durable than Wi-Fi. However, many external factors can affect this statement, such as the lack of broadband infrastructure for Wi-Fi connections and issues with 4G towers affecting mobile data connections.
At this point, suppose you find that using your mobile data resolves the Apple Music audio issues. In that case, you can continue using your mobile data to stream Apple music. Nevertheless, for those who don’t have access to mobile data services due to coverage issues or are generally concerned about quota limitations, never fear. This article will cover how to improve your Wi-Fi connection using the following methods.
b. Tweak Cellular Data Settings
Suppose you’re using cellular data to stream Apple Music. For starters, you’ll need to ensure that you have given Apple Music the required permissions to utilize cellular data on your device. To do so, you can follow the steps below:
- First, head to Settings and access Cellular Settings.
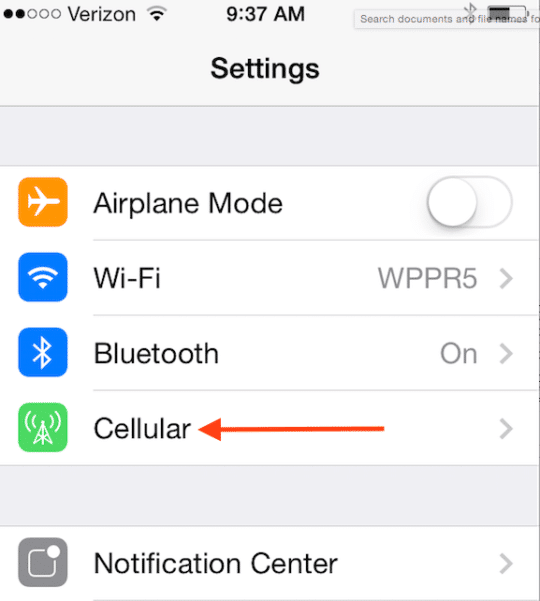
- Then, ensure that the switch next to Cellular data is toggled.
- Next, scroll down to check if Apple Music’s switch is toggled on.
- After that, return to the Settings app home page. From there, select Music.
- From there, go to Streaming and Downlads.
- Lastly, enable the switch for Use Cellular Data.
c. Forget and Reconnect to the Wi-Fi
The first method you can try is reconnecting to your Wi-Fi connection. You can do so by simply toggling off the Wi-Fi setting and toggling it back on again via the notification shade or control center.
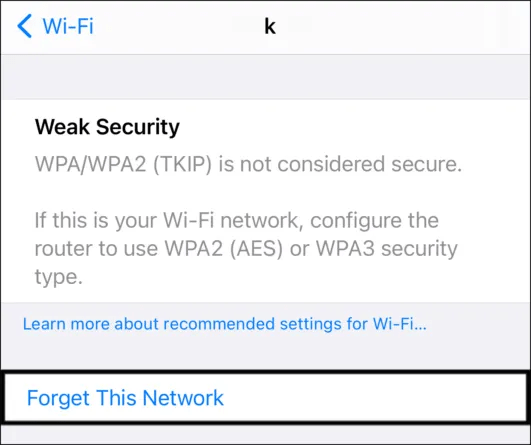
You can take this further and forget your Wi-Fi network on your streaming device before reconnecting. To do so, follow these steps:
- To start, go to Settings.
- Then, select the Wi-Fi option.
- Next, click on the Wi-Fi you’re connected to.
- Subsequently, choose the Forget this Network option.
- After 2 to 3 minutes, reconnect to the Wi-Fi again.
d. Restart Your Network Device
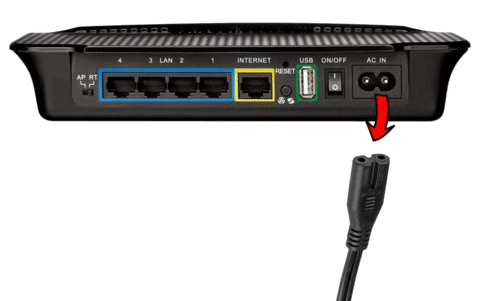
Moreover, we recommend power cycling your router. This step is another method to improve your Internet speed by reconfiguring your Wi-Fi.
The steps to do so are:
- First, turn off and unplug the power from your modem or router.
- Then, wait approximately 30 seconds.
- Subsequently, reconnect the power source to the router or modem and wait for it to connect to the Internet.
- Connect your streaming device to the Wi-Fi and try streaming Apple Music again.
e. Reset All Network Settings on Your Device
What if your device is connected to a Wi-Fi connection or has a good cell phone signal, but Apple Music indicates that you’re offline? In that case, the best approach would be to reset the network settings on your device. This step can solve issues such as Apple Music not working on Wi-Fi, Apple Music not loading the music library, and Apple Music not playing. With that said, here are the steps to do so:
For iOS Devices
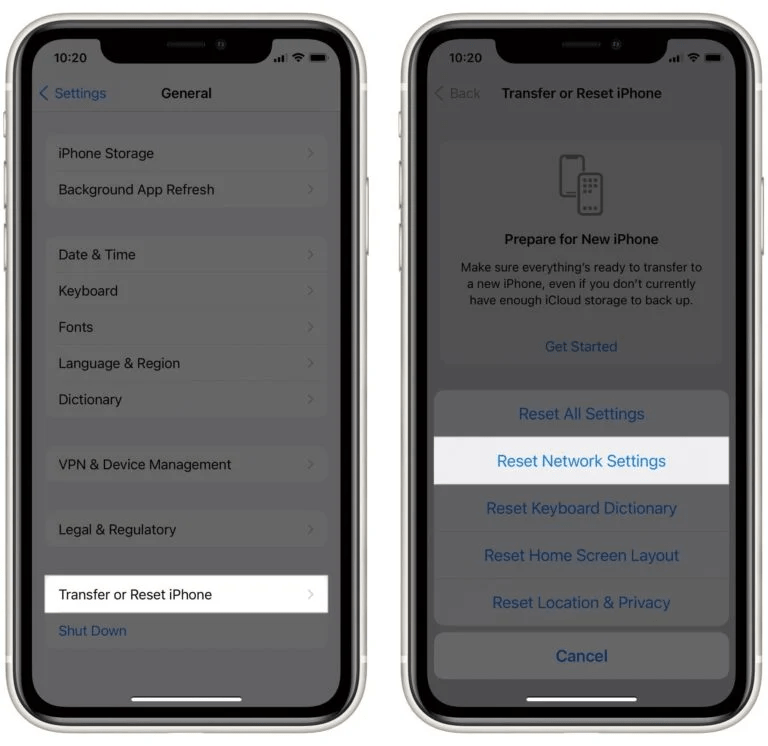
- For starters, go to Settings and tap General.
- From there, select Transfer or Reset iPhone.
- After that, scroll to the base of the page and choose Reset, followed by Reset Network Settings.
- Lastly, when prompted, enter your iPhone passcode and tap Reset Network Settings again.
For Android Devices
- First, head over to Settings, scroll down, and tap System.
- Next, to reset your Wi-Fi, mobile or Bluetooth connection, click Advanced.
- From there, tap Reset options and then Reset Wi-Fi, mobile, and Bluetooth.
- After that, in the confirmation box, tap Reset Settings to confirm.
- Lastly, enter your screen unlock code, whether PIN, Pattern, or Password, and tap Reset to continue.
Once you’ve completed the steps above, the network settings will reset, and your device will restart. Once your device comes back on, the reset is complete.
Note: Resetting your network settings will not delete your device data. It only wipes out any saved Wi-Fi passwords and other connection information.
f. Adjust the Streaming Quality of Your Apple Music Playback
Furthermore, you can also reduce the amount of internet bandwidth needed for your Apple Music playback by reducing the streaming quality. As previously mentioned, Apple Music provides three audio quality tiers, from standard to lossless to hi-resolution lossless.
The idea of lowering your Apple Music audio streaming quality is to reduce the amount of bitrate needed. In turn, it minimizes the amount of internet bandwidth required. With that said, here are the steps on how to do it.
Before you begin, we would like to mention that this fix only applies if you’re signed in as a subscriber to Apple Music. Furthermore, some features aren’t available depending on your country or region:
For Mac Devices
- First, launch the Music app on your Mac.
- Then, go to Music Preferences and locate the Playback pane.
- After that, find the Streaming (Audio Quality) section and choose the lowest option.
- Lastly, under Lossless Audio, turn the feature off. From here, you can choose the audio quality for streaming and downloading audio.
For iPhone or iPad
- For starters, open the Settings app on your device.
- Next, locate and tap Music.
- Subsequently, go to Audio Quality.
- Finally, toggle the Lossless Audio off.
For Android Devices
- To begin with, launch the Apple Music app.
- From there, tap the More button followed by Settings.
- Next, tap Audio Quality and disable Lossless audio.
- Lastly, configure your audio quality to the lowest settings.
Note: Perhaps you also stream some videos on your Apple Music. In that case, you can also take this optional step to reduce your video streaming quality. From the Playback pane, locate Streaming (Video Quality) or Video Playback Quality instead and choose the lowest setting.
g. Listen to Apple Music Offline
The fantastic thing about streaming music is that it doesn’t take up valuable space on your device. Nevertheless, suppose you have no internet speed improvement or limited internet access. In that case, we strongly suggest downloading the music to your device for offline listening instead. To do so, we’ll cover the steps to play Apple Music offline on different devices with or without an Apple Music subscription.
Note: While some content can be downloaded offline, some areas of the Apple Music collection require an online connection to view. For instance, you’ll need to be connected to Wi-Fi or cellular data to access sites like For You, Browse, and Radio. If you don’t have internet access, these tabs will generate an error message saying that you’re offline.
Starting with those who have an active Apple Music subscription, Apple Music allows you to download any track or album from its catalog in the app. Here’s how the whole process works:
For Mobile Users (iOS & Android)
- Firstly, open the Apple Music app on your device.
- Then, touch and hold a song, album, or playlist you wish to listen to offline and tap the Add to Library button.
- From there, tap the Download icon to make the content available offline.
- Lastly, view the downloaded offline songs in Apple Music by tapping Library > Downloaded Music from the top menu.
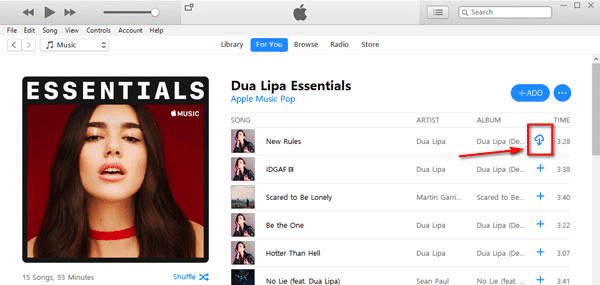
For Desktop Users (macOS & Windows)
The steps are similar, where you’ll find the song you want to listen to offline and click the Add button to add it to your library. You can click the Download icon next to the music to save it for offline listening.
However, if you don’t subscribe to Apple Music, you’ll need to purchase these songs from the iTunes Store before you can download them to listen offline. The process will require the iTunes Store, Apple Music app, and your Apple ID and password.
For iOS and Android Devices
- For starters, from the iTunes Store, tap the Music button.
- Then, search for the song or album you want to buy and tap the Price next to it to make the purchase.
- Subsequently, you’ll be prompted to sign into your account with your Apple ID and password to pay.
- Finally, head to the Apple Music app, tap Library, followed by Download to download the purchased song.
You’ll only require the Apple Music app to conduct this step on Mac with macOS Catalina. In contrast, purchasing and downloading songs on Windows and Mac with macOS Mojave or earlier will require the iTunes app instead.
14. Reauthorize Your Computer
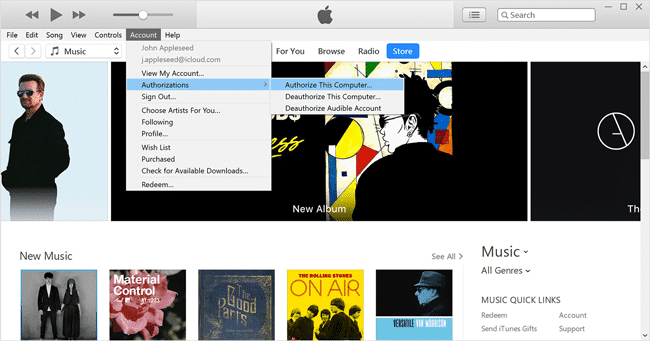
Another common cause that leads to problems with Apple Music is the authentication and authorization of your device. Perhaps you have exceeded the number of authorized devices on your network. When your device exceeds its authorization limits, you won’t be able to access your Apple Music Library or play certain songs on your Mac or Windows PC. Therefore, when this situation occurs, you’ll need to deauthorize one of your devices and reauthorize your computer using these steps:
- For starters, open the Apple Music app on your Mac or the iTunes app on your Windows device.
- Then, sign in using your Apple ID and password.
- After that, from the menu bar, choose Account, followed by Authorizations.
- Next, select Authorize This Computer or Deauthorize this Computer.
- From there, you’ll be prompted to log in with your Apple ID and password again.
- Lastly, tap Authorize or Deauthorize.
From there, if you see the Remove Download option. It indicated that you’re logged in with the Apple ID used to purchase the item from iTunes Store. In contrast, if you don’t see the Remove Download option, it shows that you’re not signed in.
15. Free Up Storage Space On Your Phone
Suppose you’re having trouble downloading tracks or albums from Apple Music to your phone when you click the download button. You also cannot see album covers in the Apple Music app. We suspect you may not have sufficient space on your iPhone to save new music.
From other users’ feedback, you need to have a minimum of 3 to 4 GB of available space on your device. Opening up this internal space will allow Apple Music to download songs, load album art, and conduct other tasks smoothly.
With that said, we have listed here a few ways to free up storage on your device:
- First, you can delete any gaming apps that are no longer used. The reason is that gaming apps tend to take up more storage with every new update and release.
- Secondly, you can look into removing outdated podcasts, photographs, and movies that you no longer want. Although a single picture or video may not consume a lot of storage, an accumulation of them can put a significant toll on your device’s storage.
- Lastly, we suggest offloading and uninstalling any apps you no longer use.
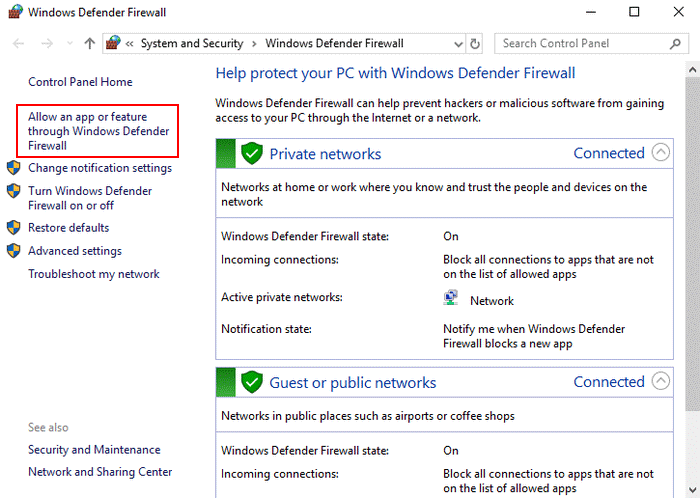
16. Ensure That Your Device Firewall Is Not Blocking Apple Music
Moreover, some users have reported that they not only encounter issues with playing music on Apple Music. Instead, they also run into the error code 4010. To work around this problem, we suggest allowing Apple Music through by updating your device’s firewall using the method below:
- First, right-click on the Start button and select Run.
- Then, in the Run window, type in the control firewall.cpl into the textbox and hit Enter.
- After that, in the left options pane, click Allow an app or feature through Windows Defender Firewall.
- Next, click Change Settings in the Allowed apps window.
- Subsequently, check the boxes associated with Apple Music. This step ensures that both Private and Public are checked for Apple Music.
- Lastly, click OK to confirm.
17. Create Another Apple Music Library
Suppose you find that the Apple Music problems only persist on a specific music library. You can try to remove the problematic library and create a new Apple Music Library instead. The steps to do so are as follows:
- For starters, navigate to your Music Library under your username by clicking Music followed by Music Folder.
- Then, locate the library that is not playing correctly and move it to another location.
- Next, relaunch the Apple Music app (Fix 8) while holding the Option key.
- Lastly, click Create to open a new music library.
18. Restore Apple Music Library on iOS 13+
Unfortunately, some users have reported issues with Apple Music on their iPhones, iPad, and Macs after updating their device software to the latest version. One commonly reported problem is that Apple Music doesn’t sync, and their music library becomes empty. When they attempt to play a previously existing song in their library, they receive an error message stating that the song is unavailable in their country.
Nevertheless, don’t fret. Your Apple Music library isn’t permanently wiped out. Instead, you can retrieve your songs by following these steps:
- For starters, back up your iPhone using iTunes.
- Then, download the latest ipsw file for iOS 13 and your device from ipsw.me or another source onto your computer.
- After that, restore your iPhone using iTunes with the downloaded ipsw file.
- Once the process is complete, reinstall the files from the backup done in Step 1.
- Lastly, reboot your iPhone and check if the issue persists on Apple Music.
Note: When backing up files on your iPhone, you must use iTunes instead of iCloud. The reason is that the iCloud backup doesn’t help restore files and showed no success in solving this issue. In contrast, iTunes backup managed to fix the problem for most users. If your device runs on macOS Catalina or above, you’ll have to back up and restore using the Finder app instead.
19. Enable iCloud Music Library
Once you’ve restored your Apple Music Library, we suggest taking it further and enabling iCloud Music Library for older iOS versions or Sync Library. This step can help to fix issues if your current music in your Apple Music Library has vanished or newly uploaded songs and playlists haven’t appeared.
The reason is that this step will allow you to access all of the music in your Apple Music Library. From there, any alterations made to your Library will also be automatically updated across all your devices. As a result, it can help reduce the chances of complications and similar issues arising.
Additionally, this iCloud Music Library can store up to 100 thousand music files without taking up any of your iCloud storage. Songs purchased from the iTunes Store don’t count against this limit either!
Furthermore, it’s important to note that Apple Music isn’t a backup service. Hence, you must always back up your device to have a copy of your music and other information in case your device is ever replaced, lost, or damaged.
With that said, the steps to do so are as follows:
Steps to Sync Apple Music Library
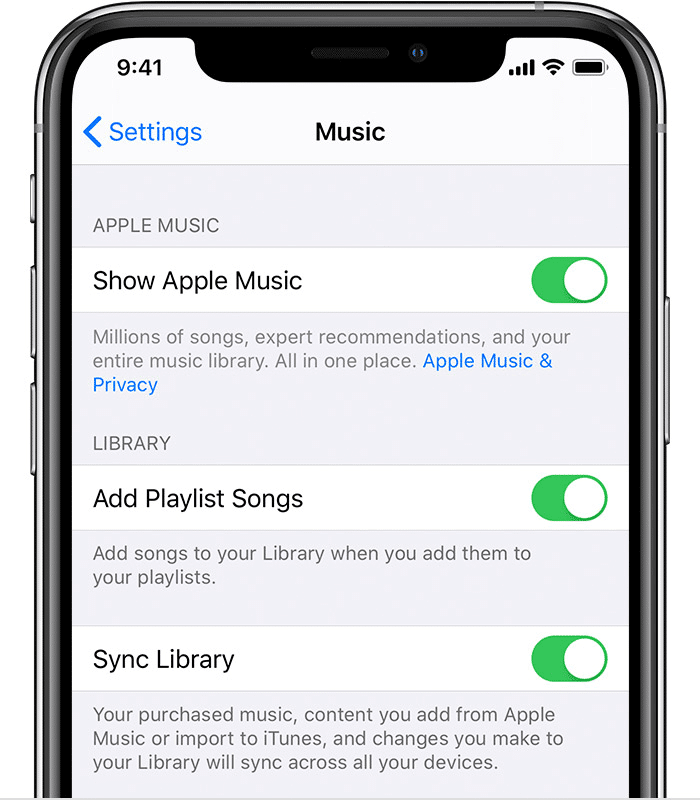
For iPhone, iPad, or iPod touch
- For starters, launch Settings and select Music.
- Then, turn on Sync Library.
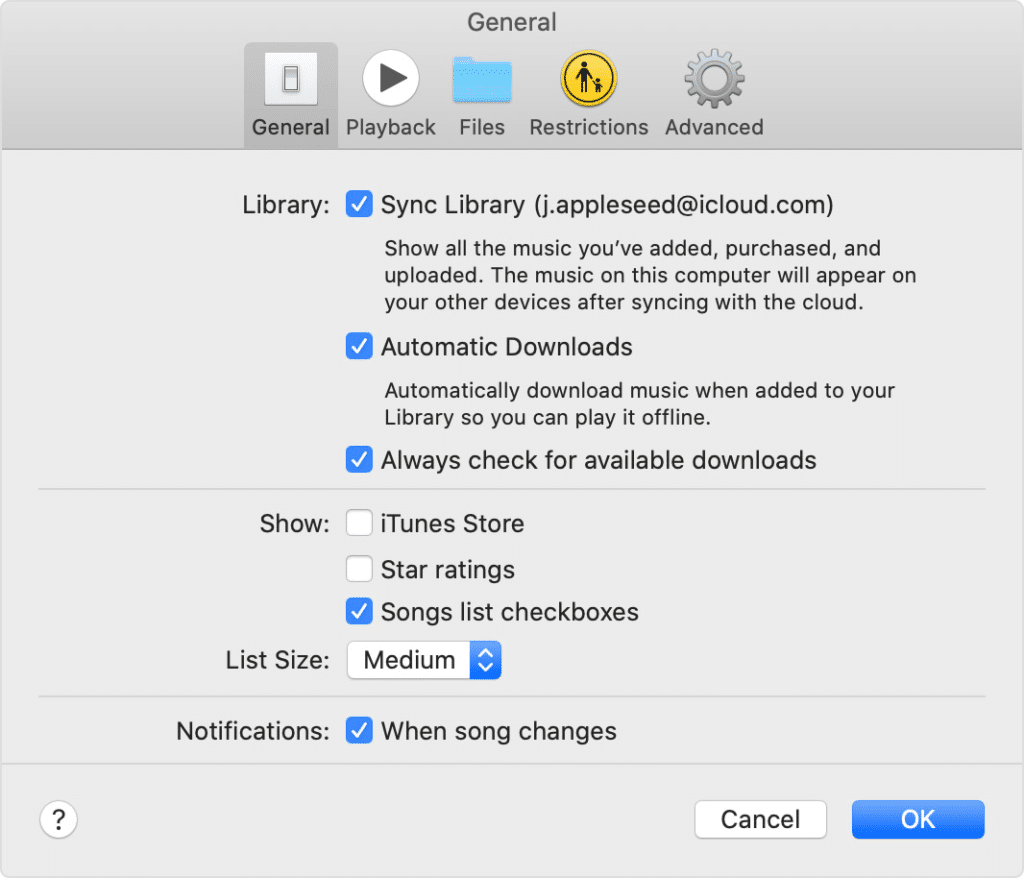
For Mac Devices
- Firstly, open the Apple Music app.
- Then, choose Music followed by Preferences from the menu bar at the top of your screen.
- From there, go to the General Tab and select Sync Library to turn it on.
- Lastly, click OK to confirm.
Perhaps you already have iCloud Music Library enabled. We suggest toggling it off and back on again using the above steps to refresh your connection to Apple iCloud Music Library. Plus, for some reason, when you update your device’s iOS or iPadOS, iCloud Music Library sometimes gets switched off. This feature is not automatically re-enabled after completing the update. Therefore, it’s also best for folks with an Apple Music subscription to verify that sync is turned on for your device.
Key Considerations when Syncing Apple Music Libraries
To avoid further errors coming from using this feature, there are a few things you should take note of:
- For starters, you’ll need to ensure that your music streaming device is updated to the latest software version (Fix 28).
- Secondly, you should ensure that you’ve subscribed to Apple Music. Else, you won’t see an option to turn on Sync Library.
- Subsequently, all your devices must be signed in to the same Apple ID used for your Apple Music subscription.
- Lastly, your devices should all have the Sync Library feature enabled and are connected to an active internet connection.
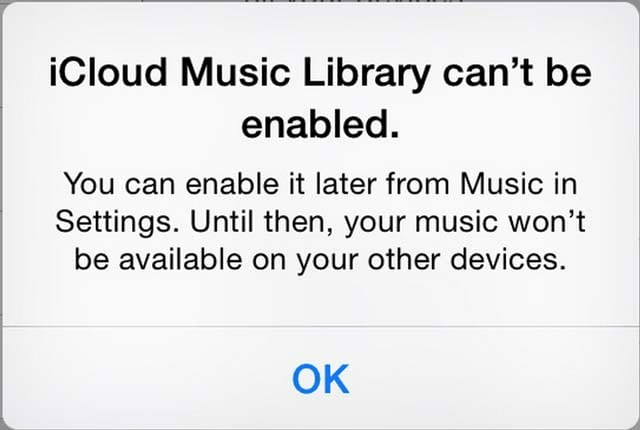
How to Fix the “iCloud Music Library Can’t be Enabled” Error?
Nevertheless, if you encounter the error message saying that iCloud Music Library can’t be enabled, here’s what you can do.
- Verify if the Apple servers are working correctly (Fix 4).
- Then, restart your device (Fix 12).
- After that, toggle the Sync Library feature on and off from your device Settings.
- Lastly, repeat Step 3 a few times until your device connects to the Apple servers.
Note: When Sync Library is turned on, deleting a song from one device will remove it from all other devices. Suppose you sign out of your Apple ID or cancel your Apple Music or iTunes Match subscription. In that case, you won’t be able to access and sync your music library on all your devices. Hence, you’ll find the original song file on the device from which they were uploaded.
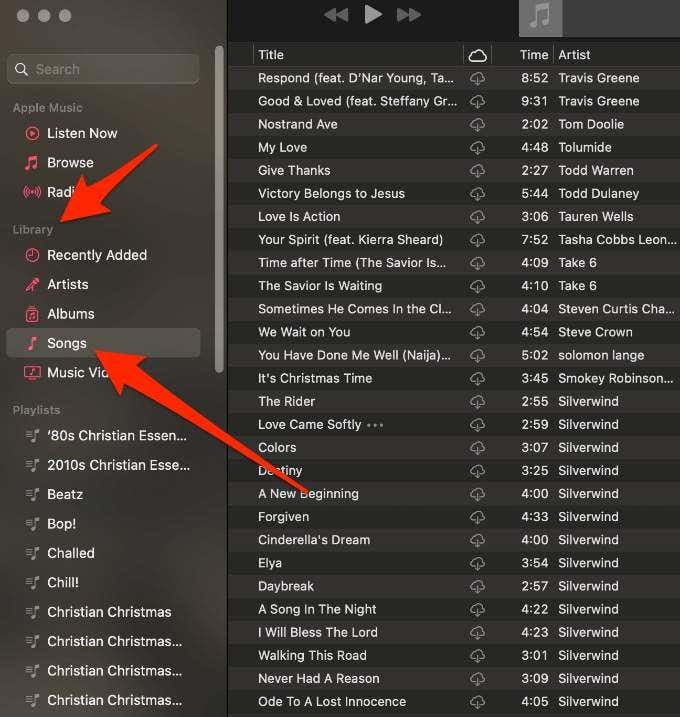
20. Check Every Song In Your Library
On your Apple Music app, you may also encounter a situation where Mac omits some songs, or the song names appear as gray text. This issue involves digital management rights (DRM), where your computer must be authorized to play the songs.
Therefore, suppose you find that one or all songs are grayed out. Here’s what you can do:
- For starters, launch the Apple Music app on your Mac or iTunes on your PC.
- Then, for Apple Music, select Menu followed by Music > Preferences. As for your PC, click iTunes > Preferences.
- Next, select the General tab.
- Under the General tab, check the checkbox for Song list tick boxes and click OK.
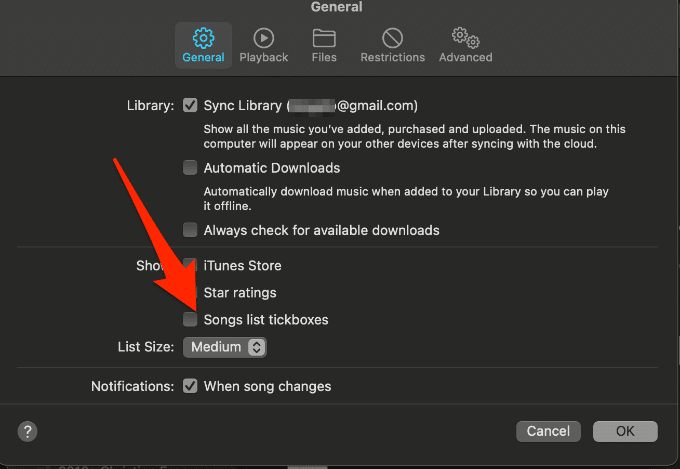
- Subsequently, under Library, select Songs and ensure that all songs are checked.
However, suppose the songs are still grayed out after uploading your music library. In that case, you can try to import a copy of the song and update your iCloud Library using these steps:
- For starters, in the Music app, click on the File menu.
- Then, choose Library and select Update Cloud Library.
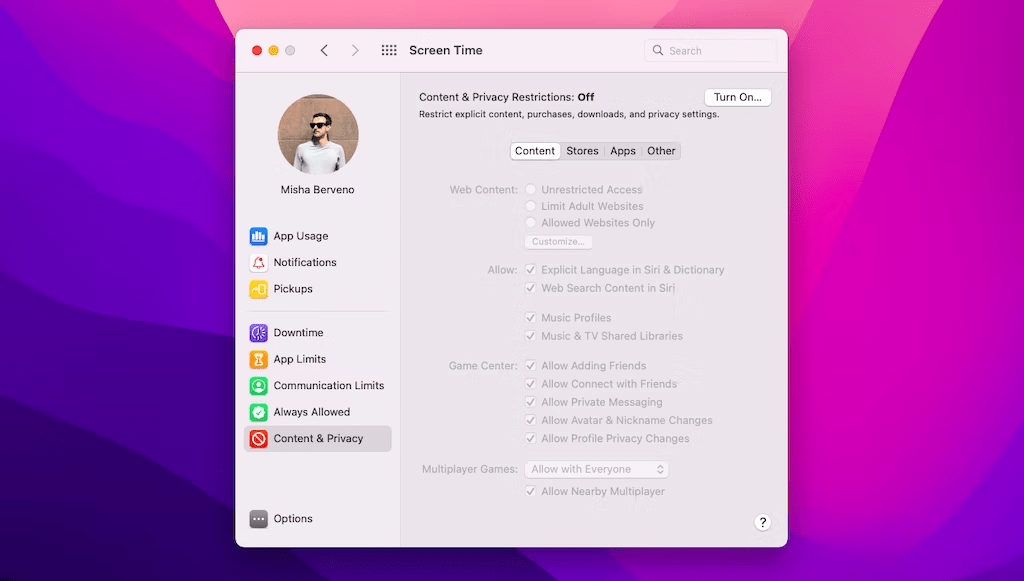
21. Disable Content Restrictions
When pinpointing the source of your Apple Music problem, perhaps you find that all other songs play perfectly fine except explicit content music. You can’t play these songs because you likely have your device’s content restriction turned on. With that said, here we’re going to show you how to disable it:
- Firstly, on your device, go to Settings.
- Then, locate Screen Time.
- From there, select Content and Restrictions.
- Lastly, uncheck Restrictions.
After conducting these steps, if the songs are still grayed out, follow these steps instead:
- For starters, on your device, open the Apple Podcast app.
- Next, in the pop-up that appears, confirm to allow explicit content.
22. Change the Country or Region of Your Apple Account
Suppose you find that your Apple Music app constantly crashes after you install the newest upgrade for your device. The reason may be that Apple Music is unavailable in your current location. Apart from that, maybe you have a few songs grayed out as it isn’t available in your region yet.
In that case, changing the country or region setting of your Apple account may help you get your songs back:
- For starters, on your iOS device, tap Settings followed by your Apple ID profile.
- Next, tap your Apple ID and choose View Apple ID.
- Subsequently, on your Mac or PC, open the Apple Music or iTunes app and select Menu.
- From there, click Account and then View My Account.

- After that, sign in with your Apple ID.
- Then, select Change Country or Region in the Account Information page.
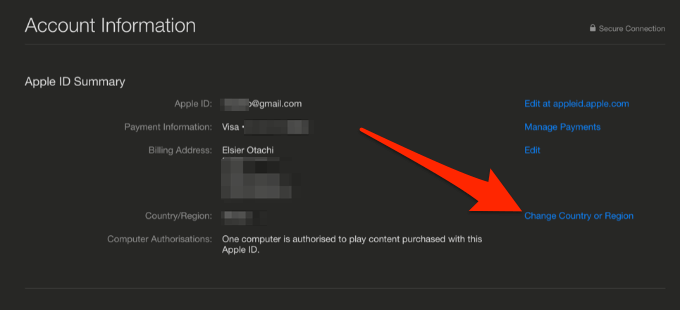
- Next, pick your new country and region, review the Terms & Conditions and click Agree to confirm.
- Lastly, enter any relevant information requested and hit Continue.
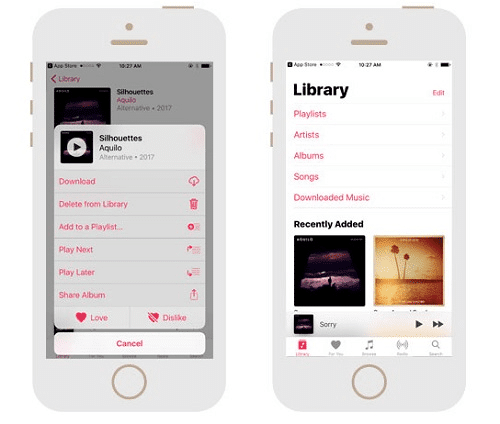
23. Re-add the Album or Song
Suppose you find that it’s just one song or album that won’t play. In these cases, we recommend removing the song or album from your playlist and immediately re-adding it. It can remove corrupted audio files and re-sync the content with the Apple Music servers.
However, when it comes to eliminating songs from the iPhone, users also tend to question whether they’re deleting the songs from iCloud or iTunes. They are different for clarification purposes, and there are other occasions when you want to do that.
With that said, we’ll cover deleting music from iCloud, iTunes, and your iPhone in the following steps:
To Delete Songs From Your iCloud or Device
Note: The Delete from Library option will delete the song from your music library, referring to your iCloud Music Library. Therefore, it’ll no longer be available on your devices and iTunes. Suppose you go for the Remove Download option. In that case, the song will no longer be available offline on your device. However, it will remain in your iCloud Music Library and all your iCloud-connected devices for online listening. This option is the best of both worlds, as it won’t take up space on your device but will remain in your iCloud Music Library.
Let’s look into the steps to remove a song or album if you have an Apple Music subscription.
For iPhone, iPad, iPod touch, or Android Devices
- Firstly, open the Apple Music app and find the song or album you want to delete.
- Then, tap and hold the song to bring up the menu.
- Next, from the pop-up menu, select Remove….
- Lastly, choose Delete from Library or Remove Download based on your needs.
For macOS Devices
- Firstly, open the Apple Music app
- After that, in the sidebar, click Songs or Albums
- Then, from the menu bar, choose View > Only Downloaded Music.
- Subsequently, if you want to delete a song, tap and hold the song or click the More button to bring up the menu. To delete an album, move the pointer over the album and click the More button.
- Next, from the pop-up menu, select Remove….
- Lastly, choose Delete from Library or Remove Download based on your needs.
Suppose you deleted the song from your library. In that case, you can re-add it to your library by searching for it in Apple Music.
Perhaps you didn’t subscribe to an Apple Music subscription. In that situation, all songs you sync from iTunes are stored locally on your device. You’ll only have the option to Delete it from Library, and the music will be removed from iTunes and all your devices connected by the same Apple ID.
However, suppose the songs released are purchased through the iTunes Store. You can visit the iTunes Store and restore your purchase to redownload the music for these contents.
As for songs that you downloaded from elsewhere apart from the iTunes Store, they will still be available in iTunes on your computer.
To Delete Songs From Your iTunes
- For starters, open iTunes on your Mac or PC.
- Then, locate the song you want to delete. Here, you can select multiple pieces if necessary.
- Next, right-click on the songs selected and click Delete.
- Finally, when prompted whether to keep the file on your computer or delete the file, choose based on your needs. Suppose you decide to save the file. Then, you can import the song to iTunes later. In contrast, deleting the file will move it to your device’s trash bin.
If you encounter any issues deleting your music, you can turn off computer syncing and check if the content is downloaded.
24. Install Pending Browser Updates
Furthermore, Apple Music was recently made available on the web browser. Accessing Apple Music via your browser indicates that you don’t need to use the Apple Music or iTunes preinstalled apps.
However, suppose you encounter issues with the Apple Music web player. In that situation, we recommend checking for any pending browser updates. No article on Apple support clearly states the minimum browser requirements to run Apple Music smoothly. Nevertheless, keeping your browser up-to-date ensures that all necessary features in the new patch are installed to run Apple Music correctly.
With that said, here’s how you can do it:
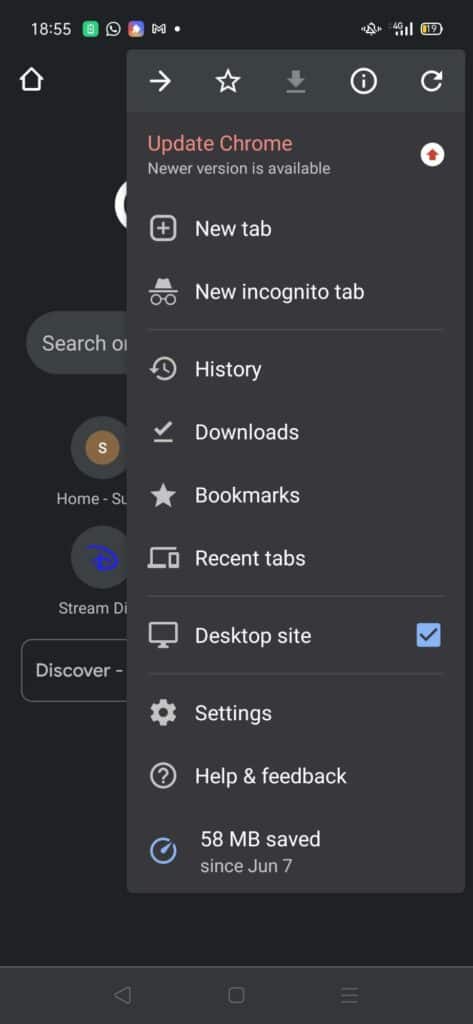
For Google Chrome
- For starters, open Chrome on your device.
- Then, look at the More icon in the top right corner.
- Next, check if pending updates are available. If an update is pending, the icon will be colored. The color of the icon indicates how long the update has been released.

- Subsequently, if an update is available, click on the More icon.
- Finally, click Update Google Chrome. If you can’t find this button, your browser is up to date.

For Microsoft Edge and Mozilla Firefox
- First, launch the web browser.
- Then, click on the main menu button in the top right corner.
- Next, select Help (Firefox) or Help & Feedback (Edge).

- After that, click About Modzilla Firefox or About Microsoft Edge.
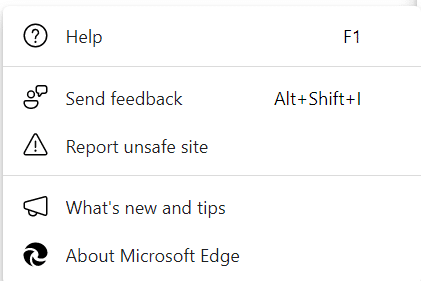
- From there, the browser will automatically check and download the available updates.
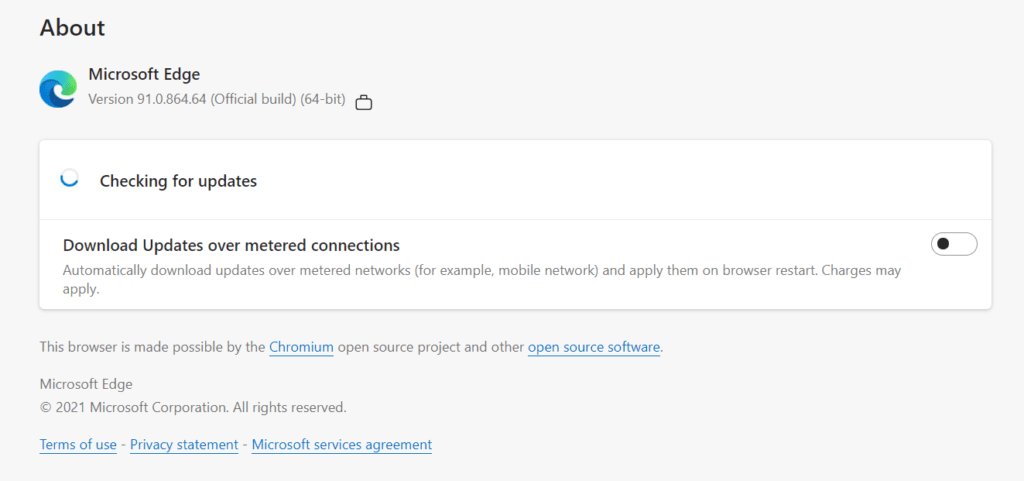
Once the browsers are updated, don’t forget to relaunch the browser to configure the updates.
For Safari Browser on Mac and iOS Devices
- For starters, from the Apple Menu in the corner of your screen, choose System Preferences or System Settings.
- Then, in the System Preferences window, click Software Update.
- Finally, install any updates or upgrades shown. The latest version of Safari is included in the newest version of macOS.
Note: Suppose your System Preferences don’t include Software Updates. In that case, you can use the App Store to get updates for Safari instead.
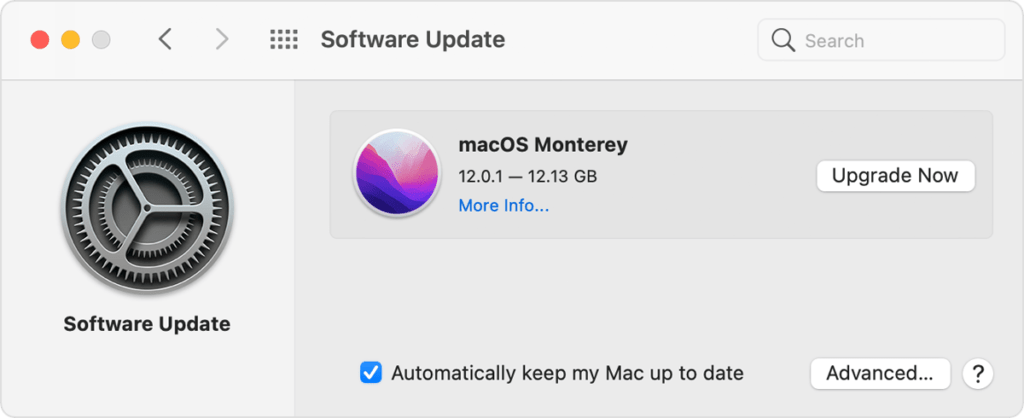
25. Delete and Clear the Web Browser Cache and Data Files
Clearing the web browser cache can sometimes fix issues with Apple Music not working, connecting, or playing songs. This is because the cache is a collection of temporary files that are stored on your device by your web browser. These files can include things like images, fonts, and script files.
Over time, the cache can become cluttered and corrupted, causing problems with the functioning of websites and apps, including Apple Music. By clearing the cache, you are essentially deleting these temporary files and allowing your device to retrieve fresh copies of the files it needs to run Apple Music.
This can help to resolve issues with the app not working or connecting as intended. It is worth noting that clearing the cache may not fix every issue with Apple Music, but it is a simple troubleshooting step that can sometimes be helpful.
On Windows
The following steps are catered for Google Chrome. However, if you’re using a different web browser on Windows (Firefox, Edge), the steps are still similar:
- You can access your browsing history by pressing Ctrl + H together. Or click the menu button at the top-right and choose History at the drop-down.
- On the following page, click the Clear Browsing Data button. For Google Chrome, that’ll be on the left.
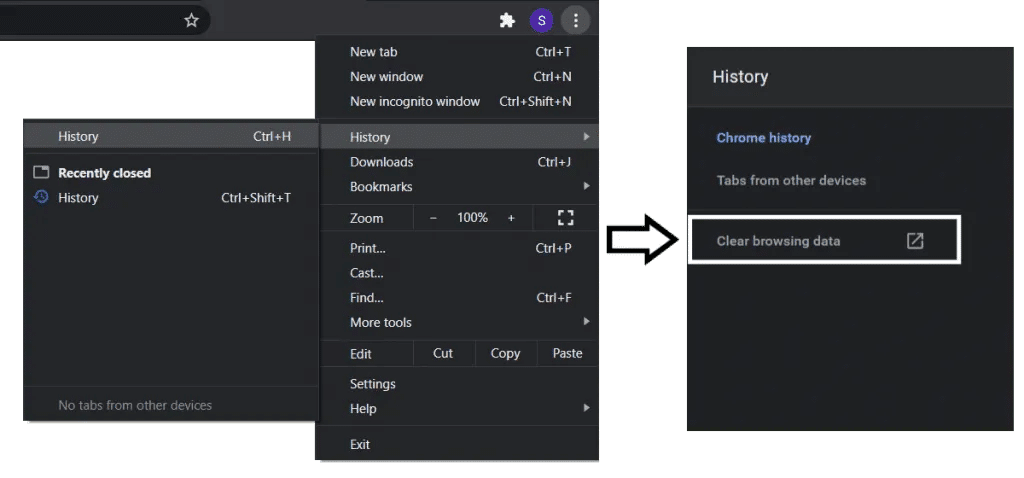
- Next, under Basic, check all options. Plus, you should select a time range of All time. Then, click Clear Data.
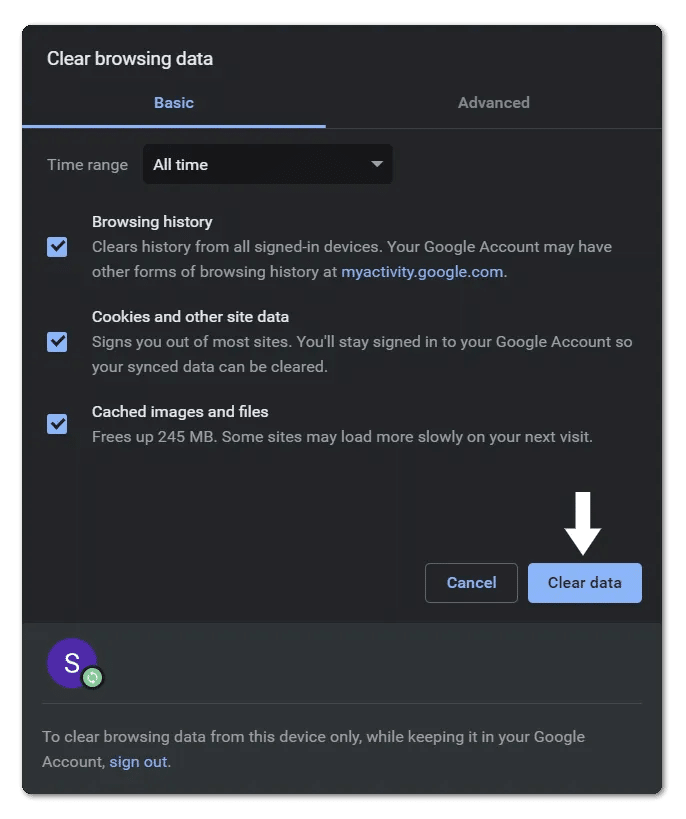
On macOS
- First, with Safari launched, from the Menu Bar, click Safari and select “Preferences…”
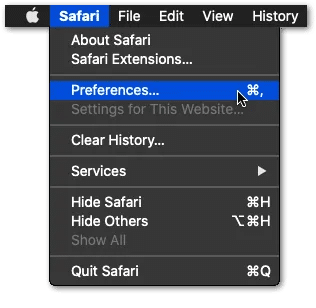
- At the following window, choose Advanced from the top bar, and tick the box next to “Show Develop menu in bar.”
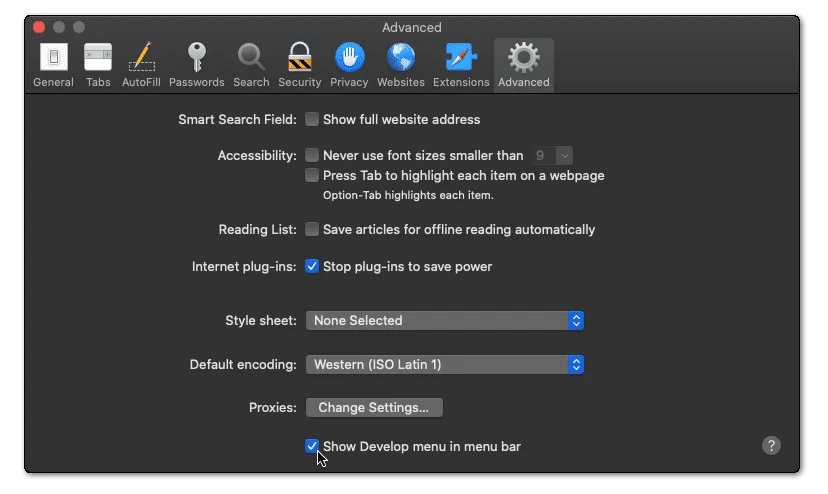
- Subsequently, from the Menu Bar, click Develop, and select Empty Caches.
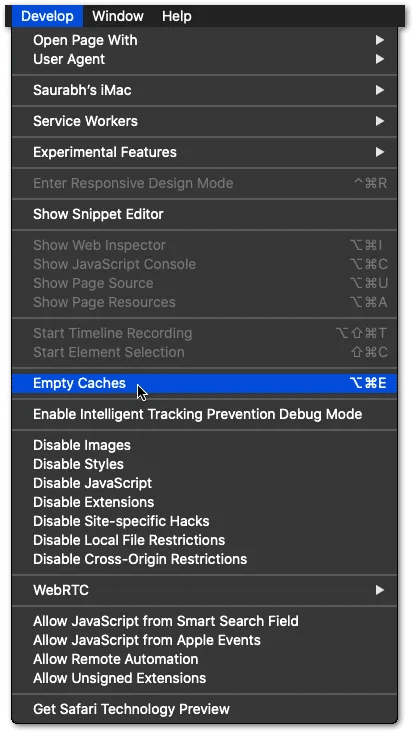
- After that, you can clear your search history and even more Site Data and Cookies. To do this, from the Menu Bar, click Safari, and choose “Clear History…”.
- Lastly, click Clear History at the following window.
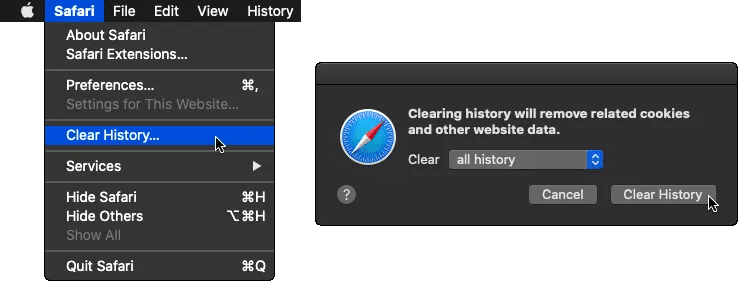
26. Clear Apple Music App Cache
Subsequently, another common reason for a misbehaving Apple Music app is a corrupted Apple Music app cache. When streaming music on Apple Music, the app stores many cache data on our devices. The reason is to allow users to play previously streamed songs without requesting the audio files from the server again.
Unfortunately, these cached data can become outdated if left unattended, leading to communication problems with the Apple servers when processing audio files. Hence, it’s essential to regularly clear the cached data for the Apple Music app.
This applies to all apps on your device. With that said, here’s how you can do it:
Delete Apple Music App Cache for Mac Devices
- First, from the menu bar, select Go followed by Go to Folder. You can also use the shortcut key Shift + Command + G for this step.
- Then, type in ~/Library/Caches and press Enter.
- Next, locate the folder from com.apple.iTunes.
- Finally, delete all files in the folder.
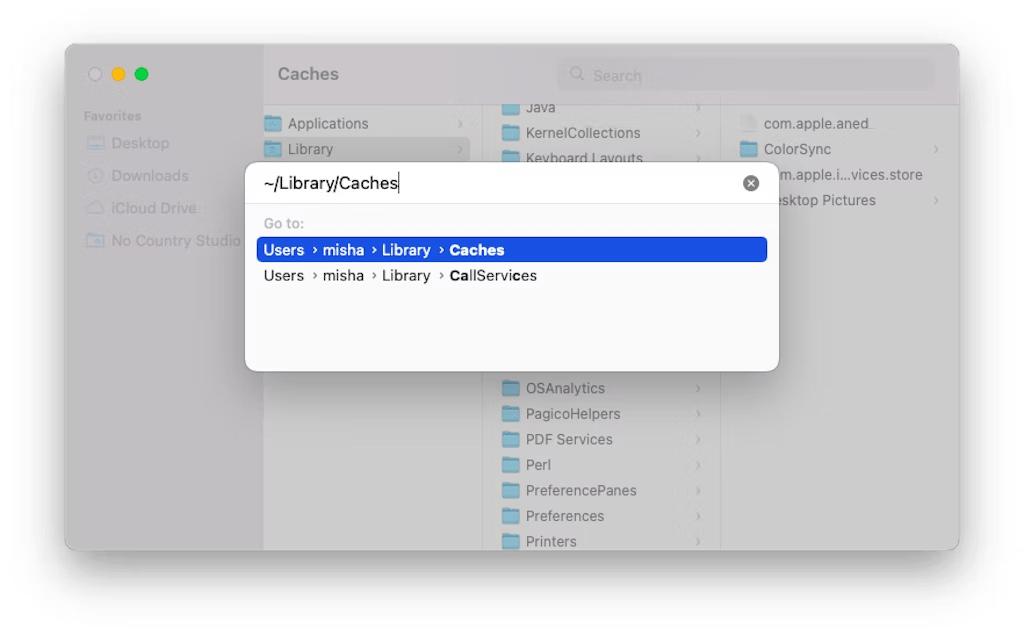
Clearing Apple Music App Cache on Windows Desktop or PC
- First, launch the iTunes desktop app.
- Then, in the main window of iTunes, click the three dots in the top left corner and click on Preferences. Alternatively, you can also open the Preferences of this program using the shortcut key Ctrl + P.
- Next, at the bottom of the page, within the advanced options, locate the Storage of offline songs.
- After that, identify the registered location. This file location is where the iTunes app will save the entire cache.
- Subsequently, navigate to the identified location in the Windows file explorer.
- Lastly, delete the cache contents of the folder manually.
Delete the Apple Music App Cache and Data Through Settings for Mobile Devices (For Android)
- For starters, open the Settings app.
- Then, tap on App Management followed by App List.
- Next, locate and select Apple Music from the list of installed apps.
- From there, tap Storage & Cache.
- Lastly, start by tapping Clear Storage, and then choose Clear Cache or Clear Data.
Note: Clearing cache cleanses duplicated data files produced by the Apple Music app. On the other hand, clearing data will wipe out all data associated with the app, including offline downloads. From there, your app will behave as a newly installed app. You’ll need to log in again, grant necessary permissions, adjust notification settings, and vice versa.
27. Reinstall the Apple Music App
Furthermore, reinstalling the Apple Music app can potentially fix the issues faced by the app by restoring it to its default state. For instance, when you attempt to launch the Apple Music app, you receive an error message. This step can help to remove any corrupted app files or cached data that may be causing the problem. From there, it installs a fresh copy of the latest app on your device.
With that said, to reinstall the Apple Music app, you can refer to the steps below. For your convenience, we have segregated the actions based on the type of device you’re using:
To Reinstall Apple Music on Your iPhone
- For starters, press and hold the Apple Music app icon until it begins to wiggle.
- Then, click the X button in the upper left corner of the app icon to close the program.
- Next, tap Delete to remove the app.
- After that, launch the App Store and search for Apple Music.
- Finally, tap the download icon to reinstall the app.
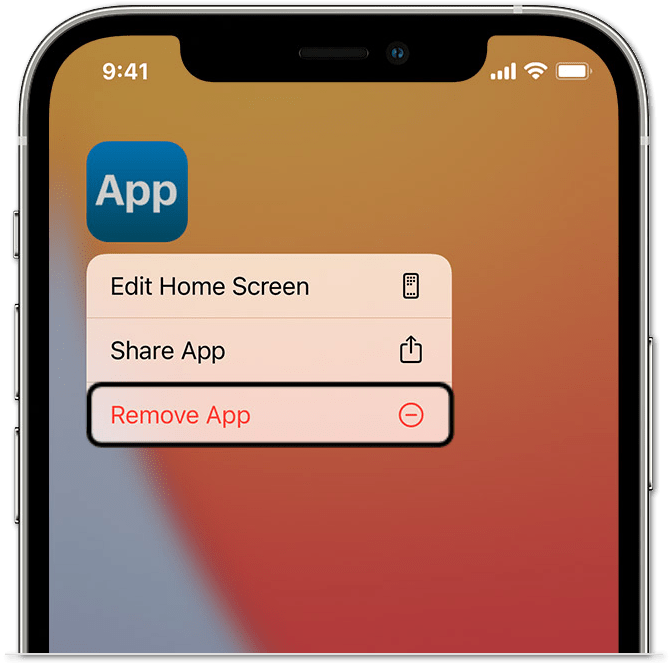
To Reinstall Apple Music on Android
For Android version 6.0 and above
- First, head over to your phone’s Settings.
- Then, select Apps and find and tap the Apple Music app in your list of apps.
- Next, if you’re looking for a clean reinstall, tap Storage, then Clear Data.
- Lastly, tap Uninstall.
For Older Android versions
- After heading to your phone Settings, you’ll need to select Applications, then Manage applications to view your list of installed apps.
- Then, find Apple Music in your list of apps, and tap it.
- After that, tap Clear Data.
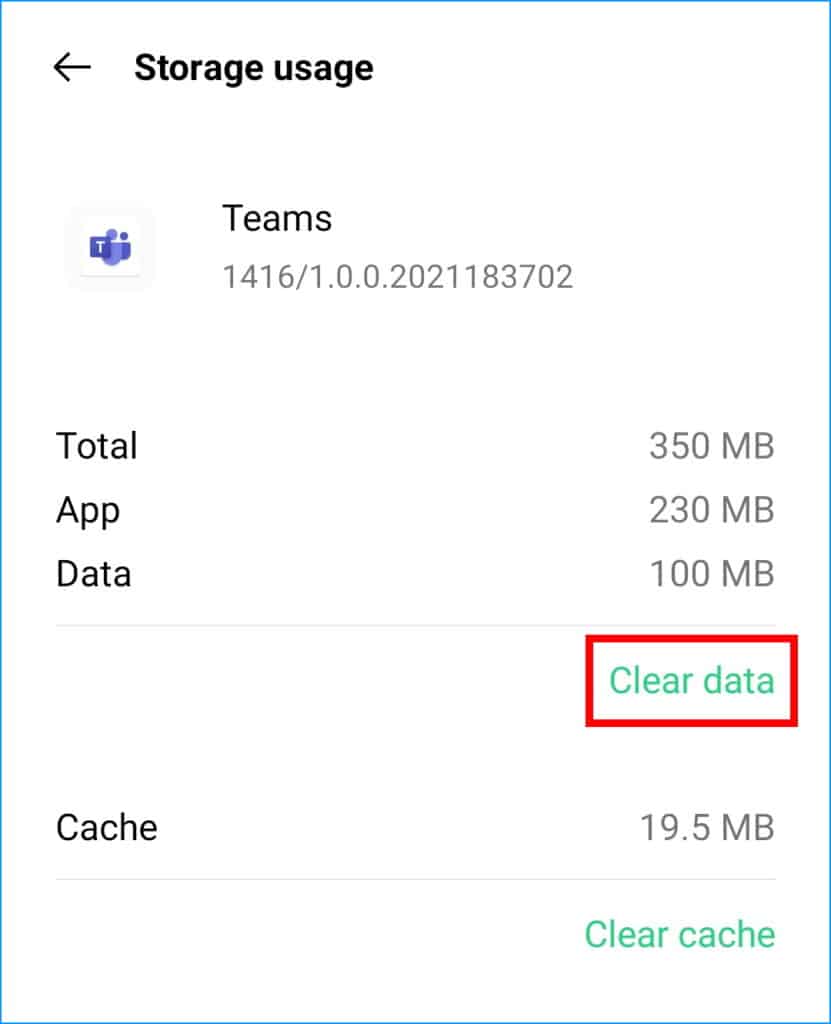
- For a clean reinstall, go to Storage > Android > Data and delete a folder called com.applemusic.music.
After uninstalling the app, you can head to Google Play Store using this link to reinstall the Apple Music app.
28. Update Your Device System Software
Perhaps your device software version is too low to support the Apple Music app. Then, that may be the possible cause of your Apple Music problems.
Apart from ensuring that your device is compatible with the Apple Music app, keeping your device software updated is also essential for various reasons. For one, having the latest software provides you with the newest and latest features. It also helps to protect your device from security issues through privacy updates and bug fixes.
With that said, you need to ensure that you have the latest version of the operating system installed by following these steps:
Installing Updates for iOS Devices
- First, back up important data and plug the device into a power source.
- Next, connect the device to a Wi-Fi connection.
- Then, launch the Settings app.
- From there, select General and choose Software Update.
- Suppose an update is available. Tap Download and Install. This process will take a few minutes, and you’ll receive a Verifying update notification.
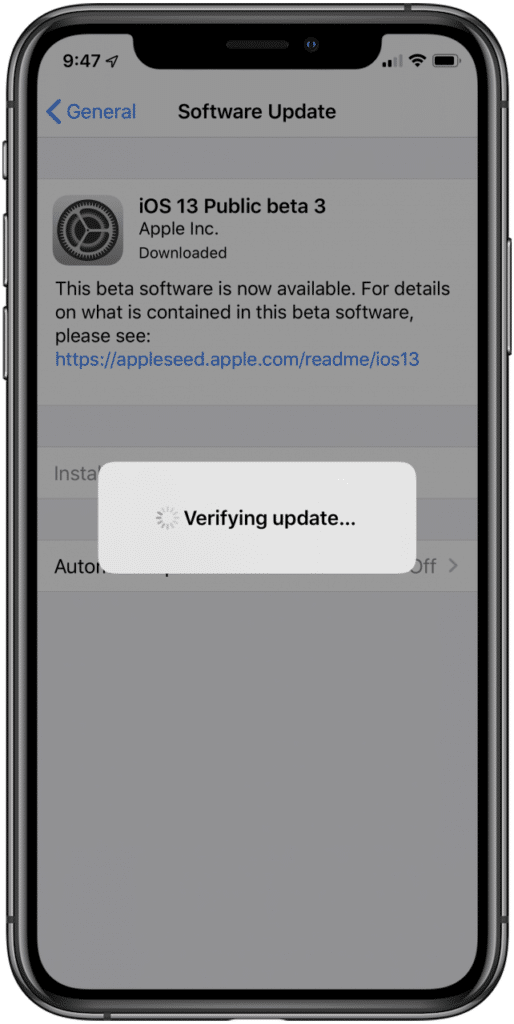
- After downloading the OS, tap Install Now and agree to the Terms and Conditions.
- Lastly, follow any on-screen instructions to complete the update once your device restarts.
Installing Updates for Android Devices
- First, connect your device to a Wi-Fi connection.
- Then, open Settings.
- Next, scroll down, locate and click About Phone.
- After that, tap Check for Updates. If an update is available, tap the Update button.
- Finally, once the update is downloaded, install it. Depending on your device OS, this may appear as Install Now, Reboot, and Install or Install System Software.
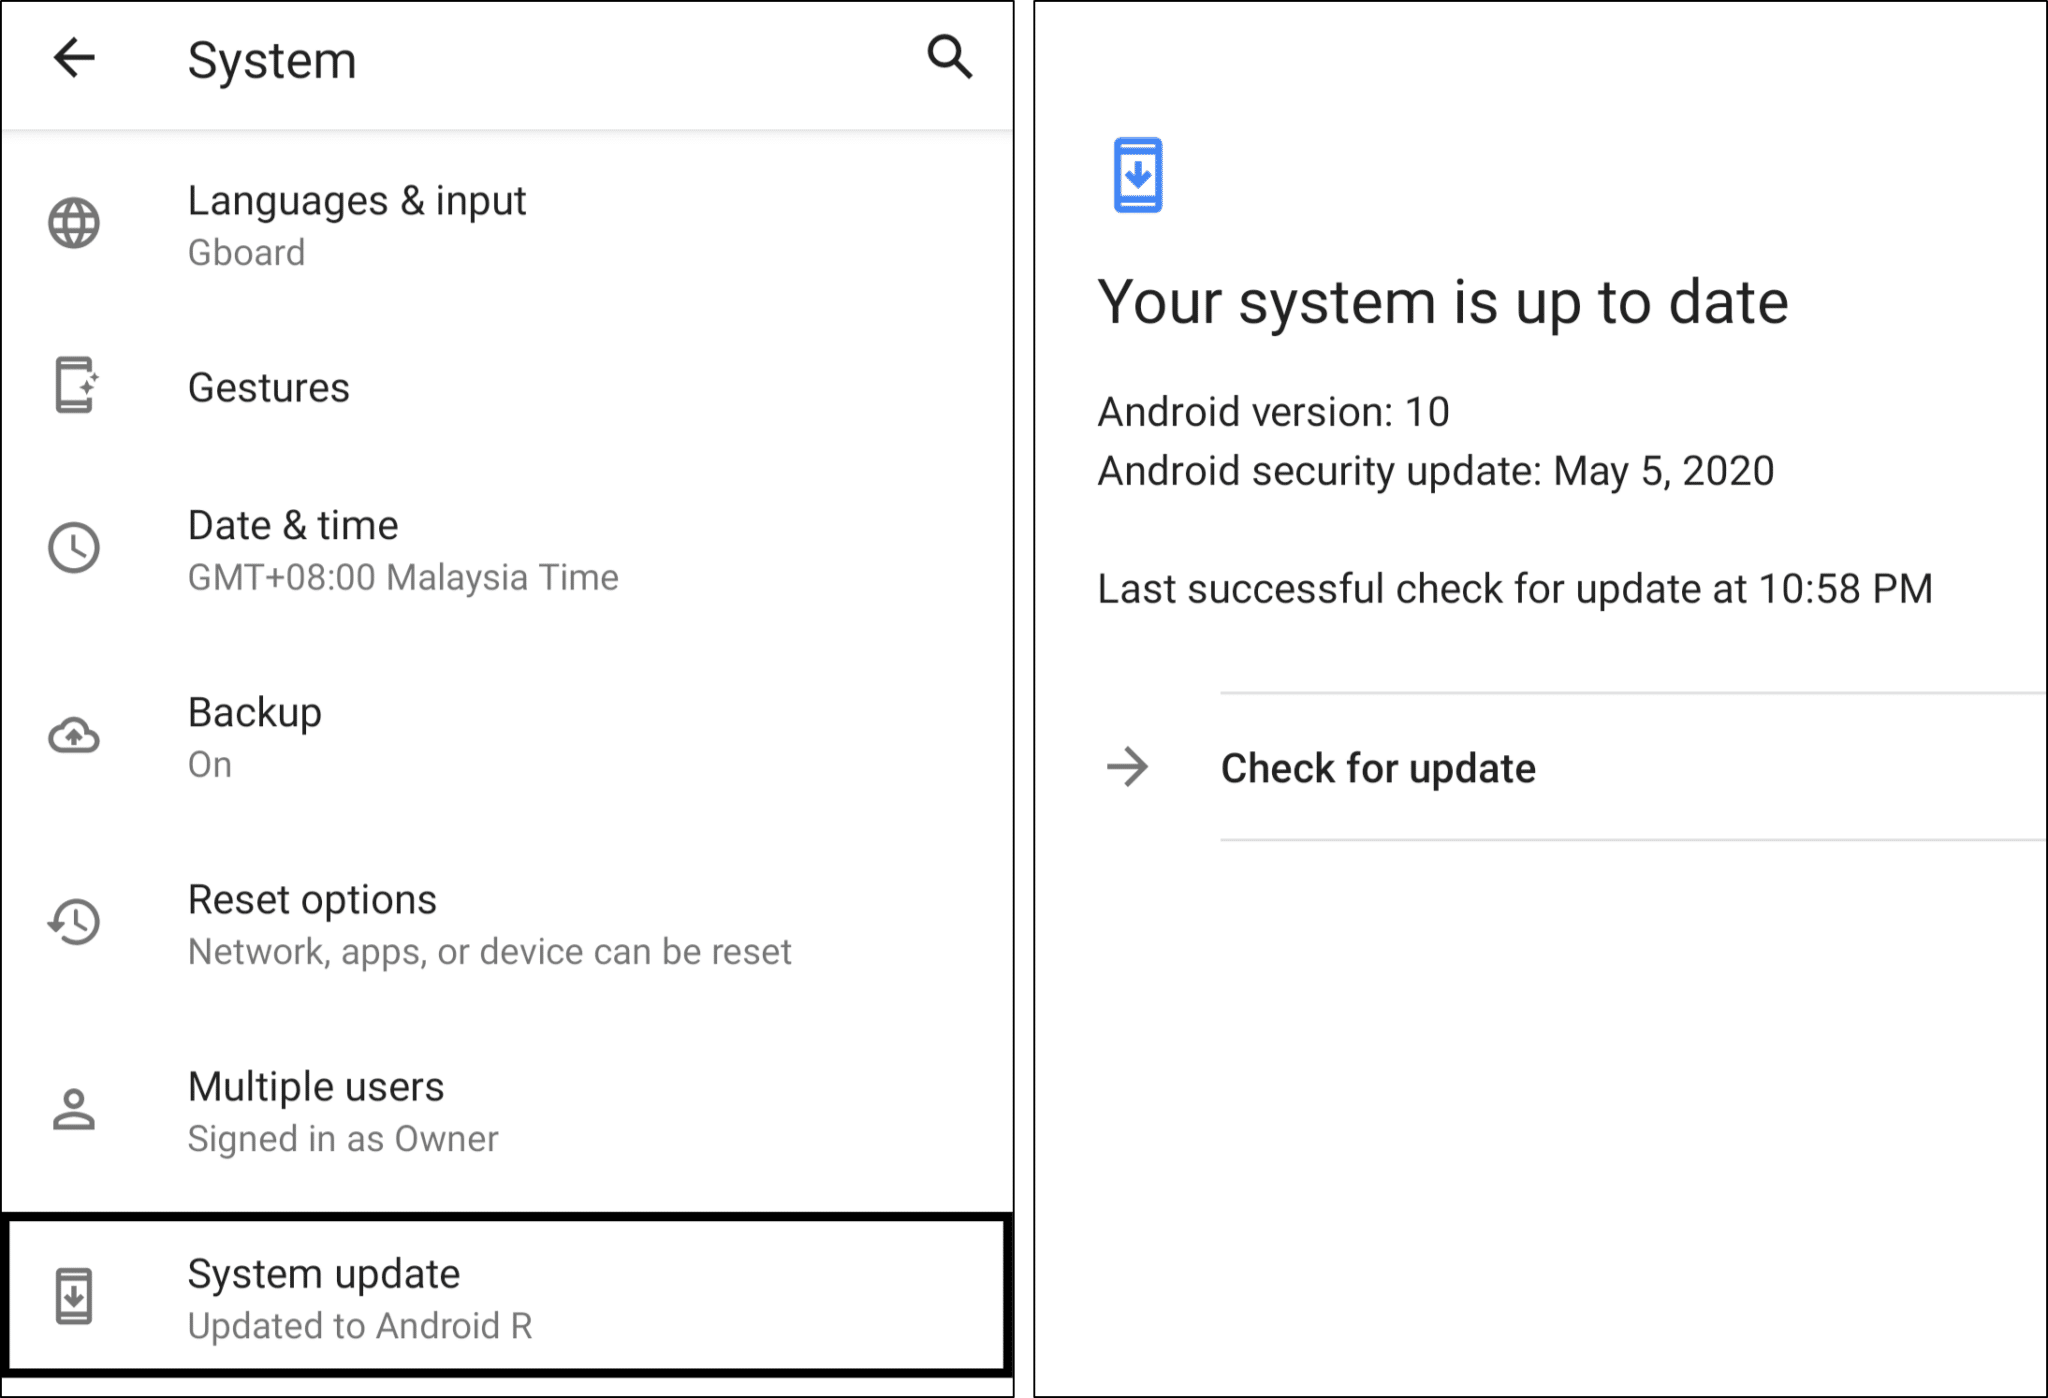
Installing Updates for Windows Devices
- For starters, click the Start button.
- Then, choose the Settings icon.
- Next, under Settings, select Update & Security
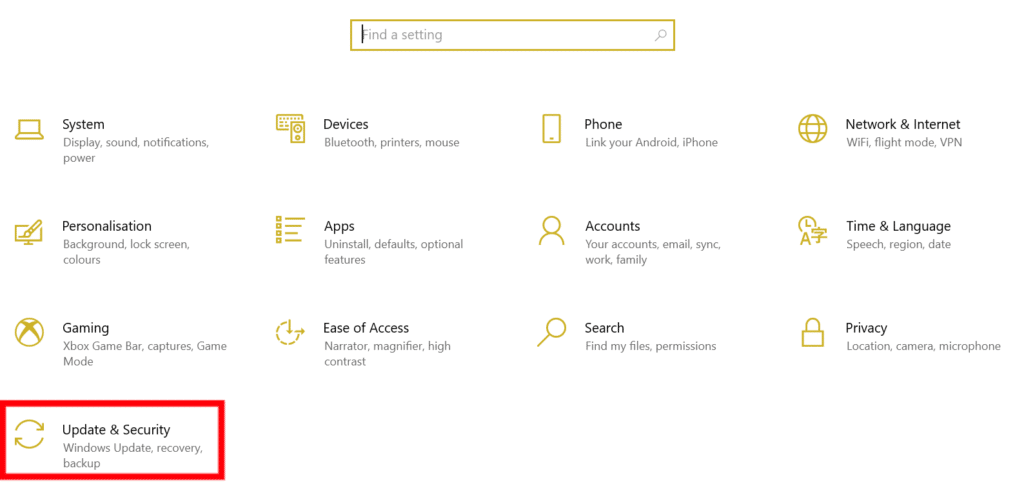
- Subsequently, choose Windows Update.
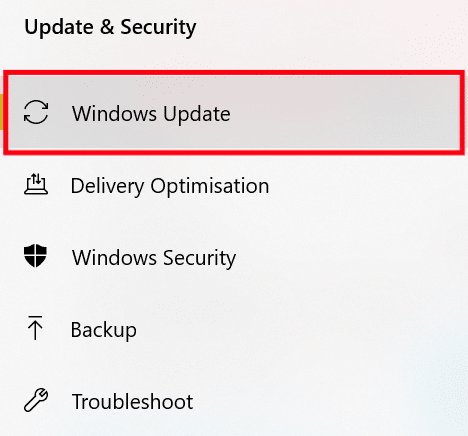
- Finally, click Check for Updates.

From there, you should allow Windows to check for any available updates. Windows will proceed to install any pending updates available for your PC.
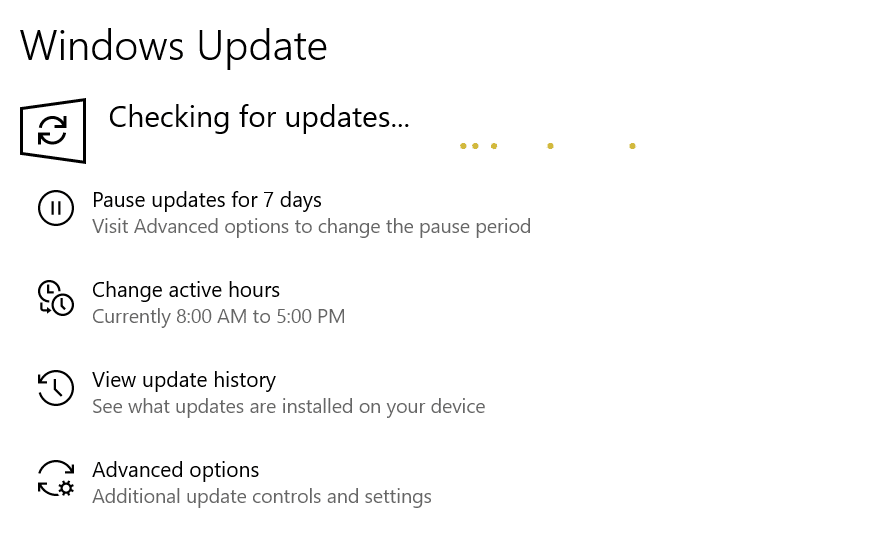
Installing Updates for macOS Devices
- For starters, back up any critical data on your Mac device.
- Then, from the Apple Menu in the corner of your screen, choose System Preferences.
- Next, in the System Preference window, click Software Update.
- Lastly, click Update Now or Upgrade Now.
Here, we would like to emphasize the difference between Update Now and Upgrade Now when checking for software updates on a Mac device. For starters, Update Now installs the latest updates for the currently installed macOS version. For instance, an update from macOS Big Sur 11.5 to macOS Big Sur 11.6. In contrast, Upgrade Now installs a major new version with a new name, such as macOS Monterey. However, it’s important to note that software updates will only show upgrades compatible with your Mac device.
Note: Suppose your System Preferences don’t include Software Updates. In that case, you can refer to these articles on how to upgrade your macOS Monterey or upgrade to an older macOS.
29. Reset All Your Device’s Setting
If none of the fixes have worked for you, your last resort is to conduct a factory reset on your device. This step resolves any random device settings that may be causing issues with your Apple Music Library. The steps to do so are listed below according to the type of device:
Note: Before factory resetting your device, you should back up all your critical data to iCloud, iTunes, or any external storage device or backup location.
For iOS or Android Devices
- For starters, head over to the Settings app on your device.
- Then, tap General for iOS or Additional Settings for Android.
- From there, select Reset followed by Reset All.
- Finally, follow any on-screen instructions to complete the process.
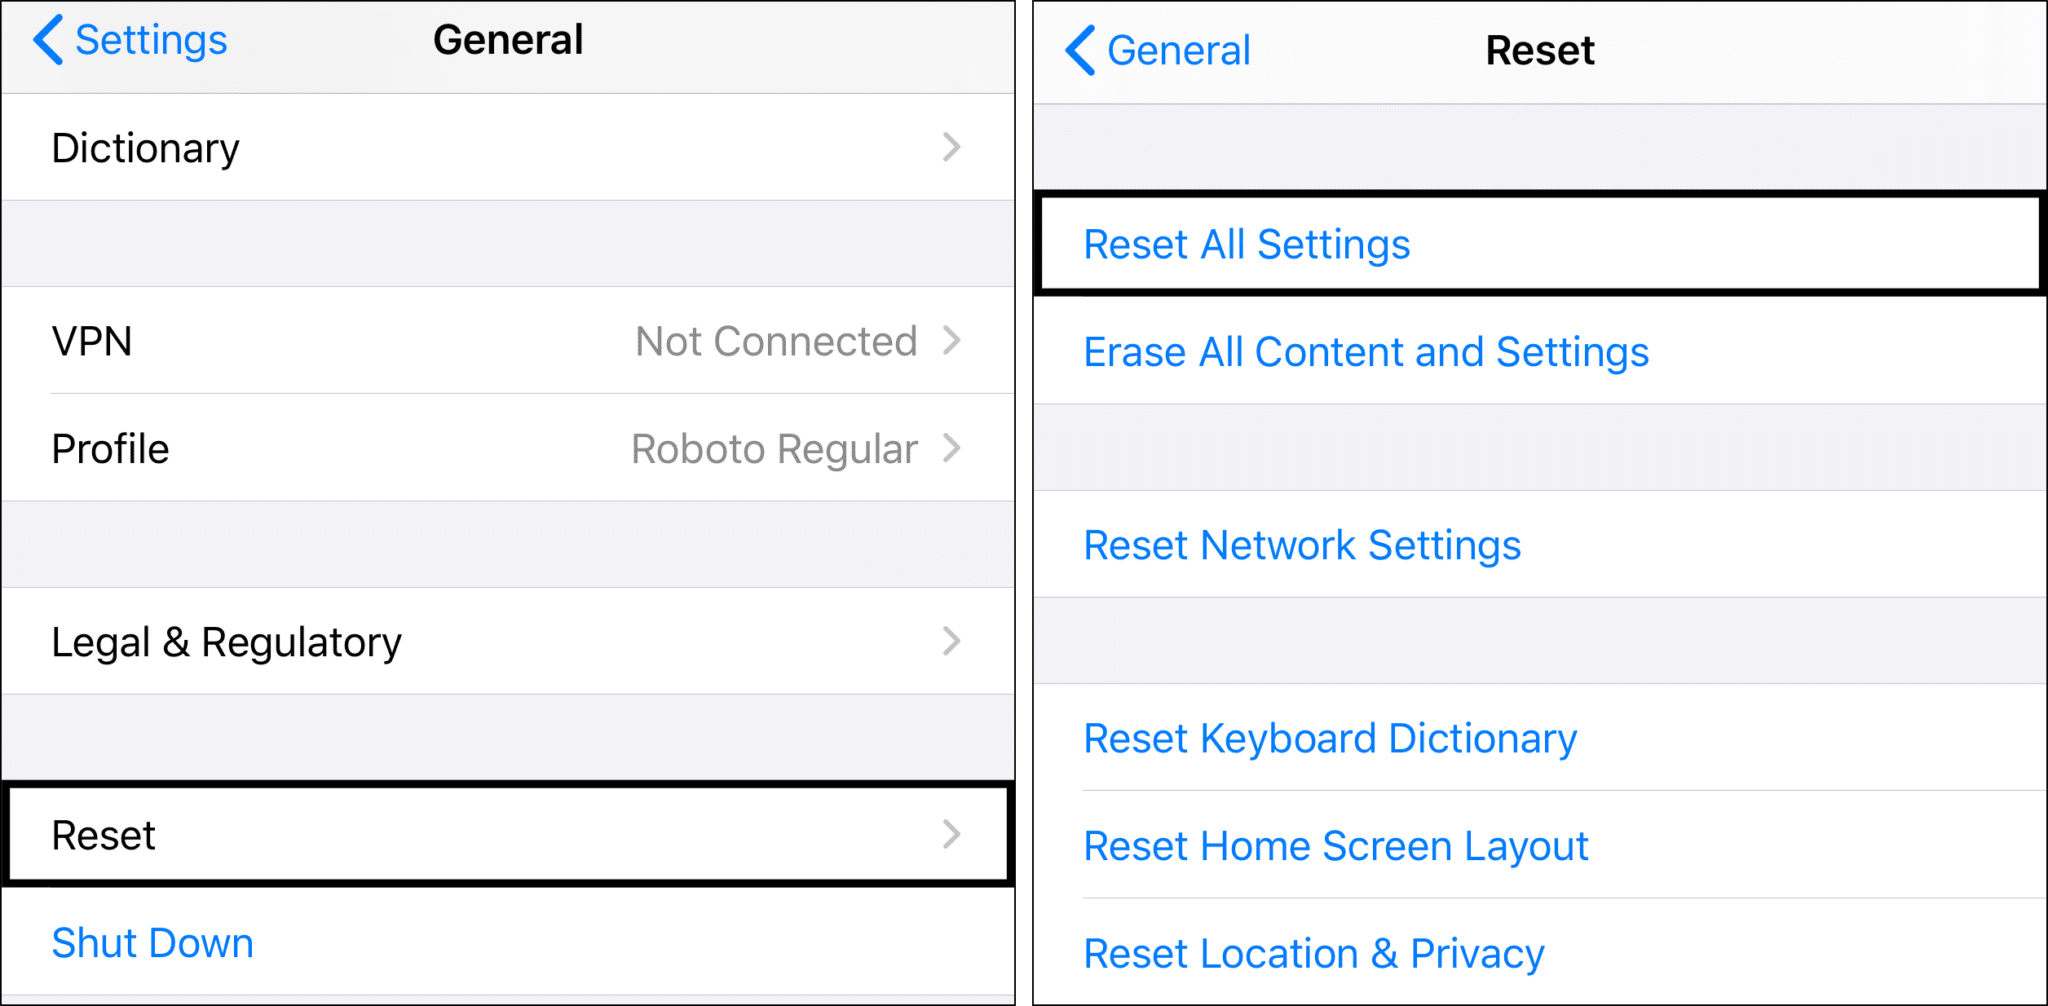
For Mac Devices
- To begin with, from the Apple Menu in the corner of your screen, choose System Preferences.
- Then, in the menu bar, choose to Erase All Content and Settings.
- Next, sign in with your administrator credentials by entering the password used to log in to your Mac and click OK.
- After that, once prompted to back up your Mac, use Time Machine to back up to an external storage device. Alternatively, you can skip this step by clicking Continue.
- Subsequently, press Continue to allow your settings, media, data, and other listed items to be removed.
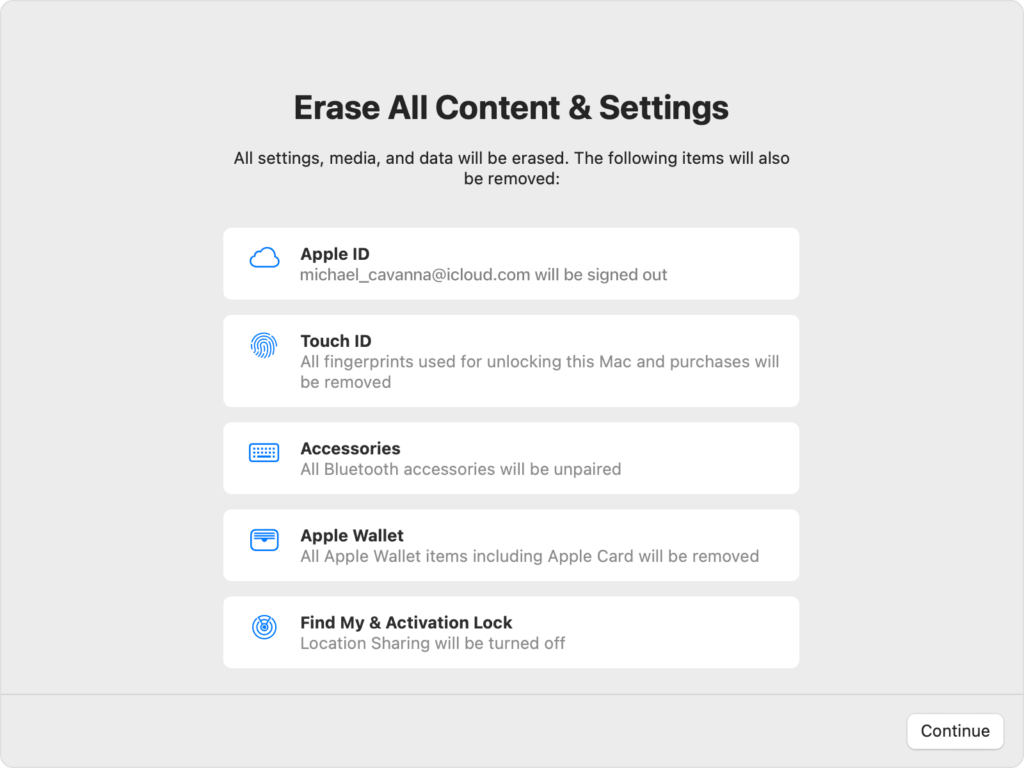
- From there, sign out of your Apple ID by entering your password and clicking Continue.
- Then, click Erase all Content & Settings to confirm.
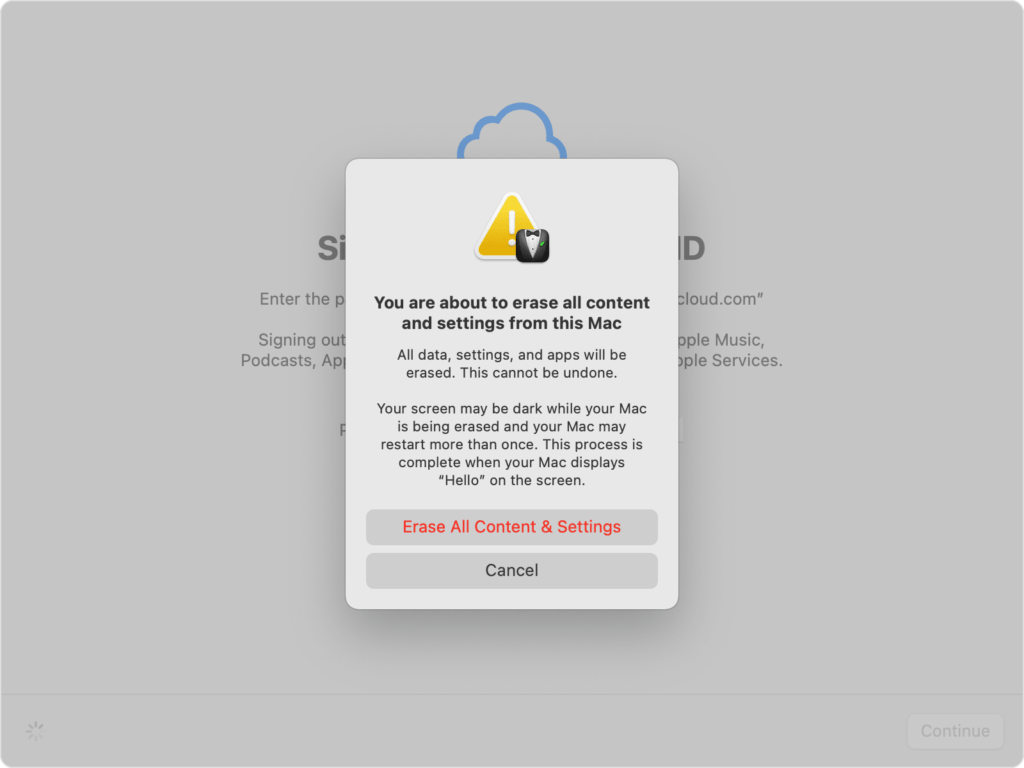
- Next, at this point, connect to a Bluetooth accessory or Wi-Fi network if prompted.
- Lastly, once your Mac activates, click Restart.
For Windows PC
- First, click the Windows button and open Settings.
- Then, select Update & Security.
- Subsequently, choose Recovery from the panel on the left.
- After that, under the Reset, this PC heading, click Get Started.
- Next, choose whether to keep your files or remove everything. In short, keeping your files will keep files on your device but remove any programs or changes made to settings.
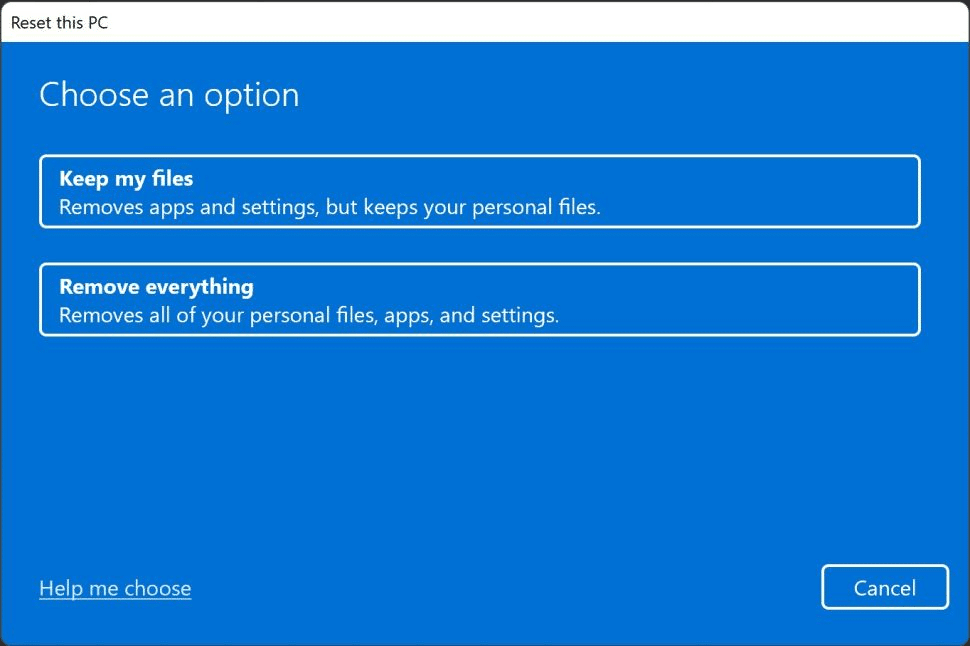
- From there, select the method to reinstall Windows. You can download Windows from the Internet or use a recovery copy on your device.
- Then, approve the settings and click Next.
- Lastly, click Reset again to confirm.
Nevertheless, this fix is not the top choice on our list, as it resets all your device’s personalized features back to factory defaults.
30. Contact Apple Support
Suppose you have attempted all the fixes but to no avail. In that case, we reckon that your last resort is to report the problem and seek help from Apple Support. To report broken content or bug, there are a few ways to contact Apple Support:
Method 1: Get in Touch with Apple Support
For starters, one of the most direct ways to contact Apple Support and have one of their customer service experts assist you. For your convenience, we have attached the link to their Contact Us page here. Once you have accessed the page, scroll down to the Get the help you need section and follow these steps to begin:
- First, choose the type of device or Apple product you’re having trouble with, Apple Music.
- Then, choose the specific device encountering issues.
- Next, for What’s going on, select More.
- From there, under a topic, choose Music and press Continue.
At this point, Apple Support will provide you with a list of articles associated with your chosen topic. You may opt to refer to these articles first and identify if there’s one that fits your problem. Nevertheless, if you encounter any roadblocks, we recommend going through the following steps to get in touch with an advisor:
- Subsequently, find various contact options at the end of the list of articles.
- After that, select the contact method you’re comfortable with. For chat and calls, the wait time will be 2 minutes or less.

- Lastly, fill in your details and wait to be connected with an advisor.
Note: Whether you have decided to call, message, or email an advisor, be descriptive when describing your problem with Apple Music. Don’t hesitate to include any screenshots when necessary for chat and email. With a clearer picture of your issue, the advisor can provide a better and more personalized solution.
Suppose you would like to skip the process above and directly talk to an Apple Advisor. You can refer to this page and call your country or region’s Apple Support phone number. However, before you call, remember to have your serial number and all the needed information ready.
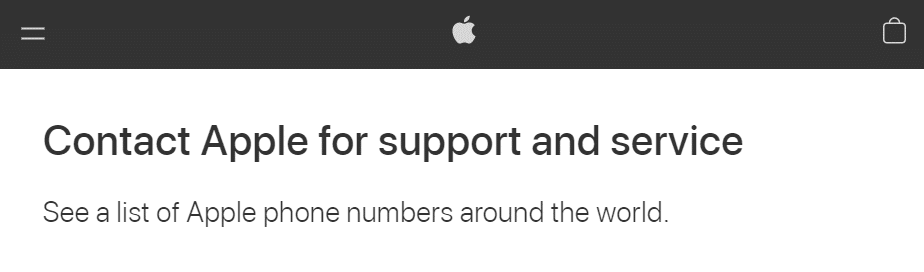
Method 2: Tweeting to @AppleSupport
Secondly, you can also contact Apple Support by tweeting a direct message to @AppleSupport. You’ll also find many posts about solutions and updates to various tweeted problems on the Twitter page.
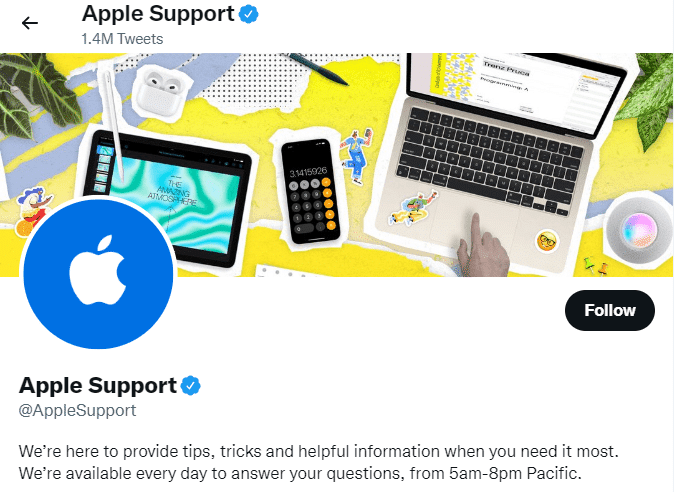
Method 3: Utilize the Apple Community Discussion Forum
With over 588 million users worldwide, Apple has gathered its vibrant community and established an official Apple Support Community. Here, you are free to search for existing discussions posted by other users. Hence, you may find something useful for your Apple Music problems.
Even if you don’t come across anything related to your issue, you can also ask a question about your product. The community members are often helpful and will share their ideas and solutions for various problems. Apple Community also has Community Specialists who are more knowledgeable and active on the Forum.
Method 4: Download the Apple Support App
Lastly, suppose you’re a hardcore Apple product user. In that case, we suggest you download the Apple Support app. This app will also give you personalized solutions to your Apple Music problems. Although this app provides similar services to the Apple Support web page, you can access solutions at your fingertips regardless of location.
From the app you cannot only contact an advisor on the app, but you can also make reservations with authorized service providers and get express replacement services. Therefore, it also comes in handy when encountering other issues on your Apple devices or services.
Conclusion
That brings us to the end of this post covering 17 types of Apple Music problems that are not working to your expectations and 30 ways to fix them. We hope that a fix in this article managed to solve your Apple Music issues.
Fixing aside, we also hope you gained a better understanding of the causes of different types of Apple Music problems and how various fixes work. This can also help when facing similar technical issues on other platforms.
Overall, as much as the Apple Music bugs can be frustrating, don’t let them ruin your jam, whether in the middle of a refreshing morning run or amidst a full-blown party.
Lastly, let us know in the comments:
- Is your Apple Music suffering from audio problems too?
- Did any of the fixes above work for you?
- Are there other valuable fixes that we should add to the list?
Know a friend bummed by their Apple Music not playing or working correctly? Don’t hesitate to share this post with them and join the jam afterward!