Are your downloaded songs on Apple Music not playing or do you find that offline mode isn’t working correctly for you suddenly?
Apple Music is a music and audio streaming platform released by the namesake company that allows Apple convenient and unlimited access to various songs from their favorite artists and bands. The service offers an extensive library of songs, from classic tunes to the modern beat you can never get enough of.
As long as you have an internet connection, you can freely access and play the extensive music library Apple Music has to offer. Additionally, Apple Music also has a nifty download feature that allows anyone to download their favorite songs and albums so that they’ll be able to play them on the go, even without the internet.
However, several Apple Music users have found themselves struggling with the download feature as they encounter several problems that make it almost unusable. This situation can lead to the application crashing and ceasing all functions, which can be incredibly frustrating. Your road trip or party can get stale without music to liven things up.
Since Apple Music is a streaming platform, an internet connection is required to use the application and play music. The download feature is a nifty thing the platform has as it allows anyone to download a song to play even without an internet connection.
Types of Apple Music Offline Mode or Downloaded Song Problems
Despite that, however, many users have found the feature to misbehave and not function at all. Several users have reported problems with the Apple Music Offline Downloads feature not working as expected.
The problem usually manifests with downloaded songs not playing despite appearing, or if they are playable, only playing a short segment of the song before pausing abruptly. Other users have also found themselves with their downloaded songs being deleted or not added to their list of offline songs and downloads not starting. This problem is accompanied by a “The operation could not be completed” error message.
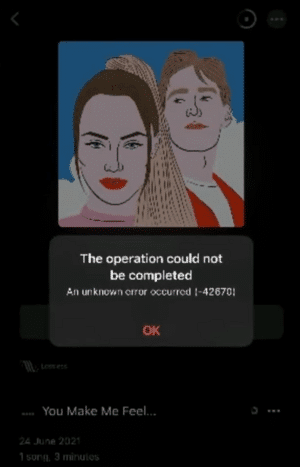
Regardless of the problem, they all lead to the same result of Apple Music not working and playing downloaded music when offline despite having the necessary means to accomplish it.
So, how does your Apple Music offline mode issue appear like? Share your experience in the comments below.
In light of this problem, we prepared this guide that will provide 5 reasons why this problem might be happening and 8 fixes you can try.
Apple Music is available mainly in Apple products from phones (iOS), laptops, and desktops (macOS), but it is also compatible with Windows and Android devices. The app is bundled with the iTunes app and is usually accessed by opening the former. We will be exploring potential fixes for the mentioned platforms whenever possible.
Now that we have all the technical jargon, let’s fix it!
For more help and fixes for Apple Music platform errors, problems, and it generally is not working correctly, check out our complete guide for that here. Additionally, if you’re encountering issues with the web player of Apple Music, this guide is more suitable for you.
Why Are Apple Music Offline/Downloaded Songs Not Playing?
1. The iCloud Music Library Feature is Disabled
The iCloud Music Library is a nifty feature in many Apple devices (although it is mainly used in iPhones and iPads) that allows access to your song library found in your iCloud. Like many apps for Apple, Apple Music is directly linked to your Apple ID, which allows the synchronization of data between different apple devices, provided that the feature is turned on.
If you cannot listen to your downloaded offline songs in Apple Music, you might’ve disabled the feature before preventing you from listening to any songs offline. Try checking and enabling the iCloud Music Library feature (Step 1), as this might be the simple solution to your problem.
2. Apple Music/iTunes is Crashing/Not Responding
One of the reasons you might not be able to listen to offline songs from Apple Music might be as the app is on the verge of crashing. There can be many reasons the app might be crashing (which we will explore in-depth later), even if the crash itself isn’t immediate.
If you frequently have crashed with your Apple Music, you might want to restart the application cleanly (Step 2) or check the server status for the Apple Music service (Step 3). Likewise, if the app crashes frequently, you might need to offload the app to get a fresh start (Step 4).
3. Outdated Device Version and Apple Music/iTunes App
As with many devices, staying on the latest version is always a good practice as, more often than not, the latest version will always give you the best experience possible. With this light, you might be experiencing problems because either your device version or Apple Music is severely outdated.
You might want to consider checking your device version and updating it (Step 5) and check for any updates with your Apple Music/iTunes (Step 6). The problem can manifest with either one of the 2 being outdated or the device and app being severely outdated from the latest version.
4. Low Device Storage Space
Low device storage space is a possible reason you can’t play songs offline in Apple Music, as it leads to several problems, especially with system performance. Low storage space is always an alarming sight as it negatively impacts your computer with a significant slowdown.
This becomes problematic as other apps can start misbehaving, like your Apple Music becoming prone to system crashes. Our best solution is to clean up any cache and app data you have built up, such as cleaning your Apple Music cache (Step 7), so the app is less prone to crashing.
5. Bugs and Glitches
The last reason you might be having problems with Apple Music not playing downloaded songs might come from bugs and glitches that might’ve been existing inherent ones or new ones that came as a result of a new update and the like.
The best way to solve this problem is to wait for Apple to roll out an update that addresses it directly. In the meantime, however, you can help them by providing more data about the problem by sending a support ticket to Apple (Step 8) to help them get a better picture of the problem.
8 Fixes for When Apple Music Downloaded Songs or Offline Mode Are Not Playing or Working
1. Enable the iCloud Music Library Feature
Since Apple allows for the syncing between devices, certain features play into this and often can cause problems if not correctly set or if it was changed recently. The iCloud Music Library Feature is one such thing, and when disabled can cause you to lose the ability to play songs you downloaded, as they weren’t synced up to your account and device.
You can enable/re-enable the feature by following the steps below:
- Open the Settings ⚙️ app on your iOS device.
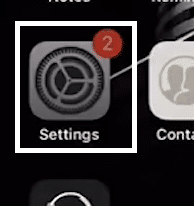
- From your device’s Settings app, scroll down, navigate to the “Music” 🎵 option, and open it.
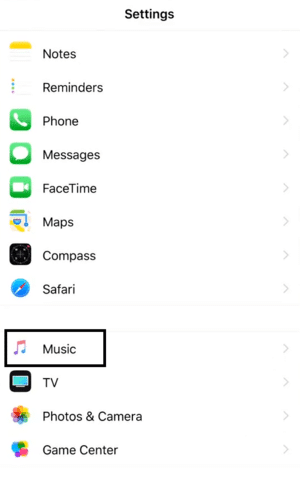
- Find and enable the “Show Apple Music” option from the Music Settings portion of the app. This should be enabled by default but can be disabled due to other devices.
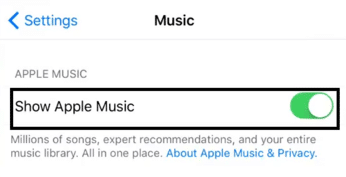
- After enabling “Show Apple Music”, find the “iCloud Music Library” option, and will allow it also. Similar to the “Show Apple Music” option, this is enabled by default.
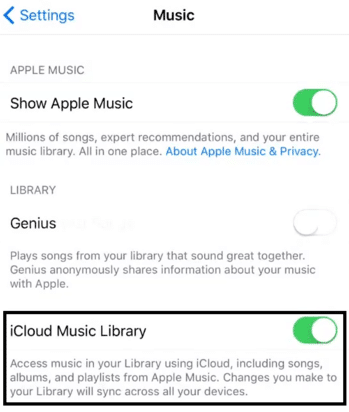
The steps above will enable the Apple Music application and the iCloud Music Library feature. You can exit your Settings and open Apple Music, and start redownloading the songs you want to play offline.
This option is mainly available to iPhones and iPads as Apple Music is bundled with iTunes for PCs and laptops instead. Additionally, this setting configuration will be carried through all mobile apple devices linked to the same Apple ID.
2. Restart the Application
Sometimes, a quick restart of Apple Music/iTunes is all you need to get it back and running correctly again. You might need to restart the application if you are experiencing it lagging and freezing, as this is a clear indicator of it crashing or about to crash.
To prevent the app from crashing and causing further problems, you can follow these steps to close and restart the app cleanly:
For iPhone/iPad
- In your device’s Home 🏠 screen, swipe up ☝️ from the bottom. Doing this will show all active and running apps on your phone.
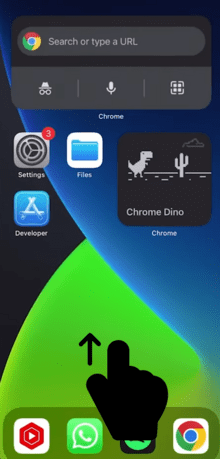
- Scroll through the active apps until you find the Apple Music 🎵 tab.
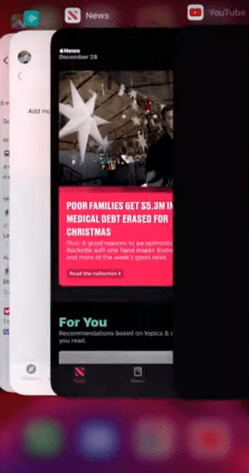
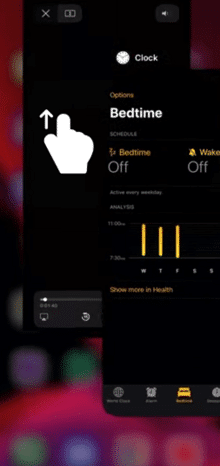
- Tap and hold the tab containing Apple music and swipe up ⬆️ to close your app.
For Desktop (Windows and macOS)
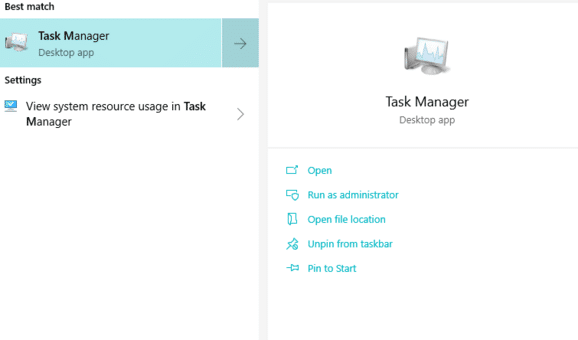
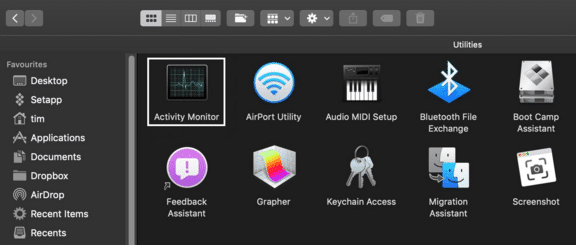
- Open your Task Manager (Windows) or Activity Monitor (macOS). The former can be accomplished by searching for it in your system.
While the latter can be done by simultaneously pressing down the CMD + ALT + ESC on your keyboard.
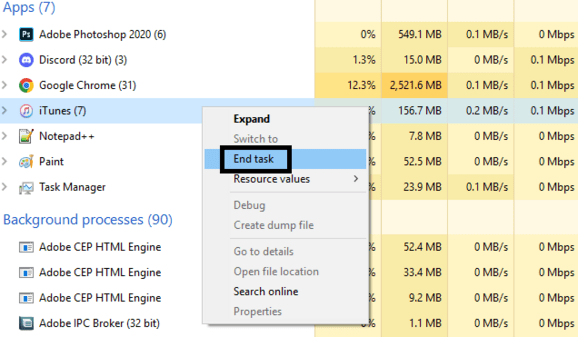
- Find iTunes or Apple Music from the list of your active apps and select it. Afterward, click on it and select “End Task” or something similar to close the application.
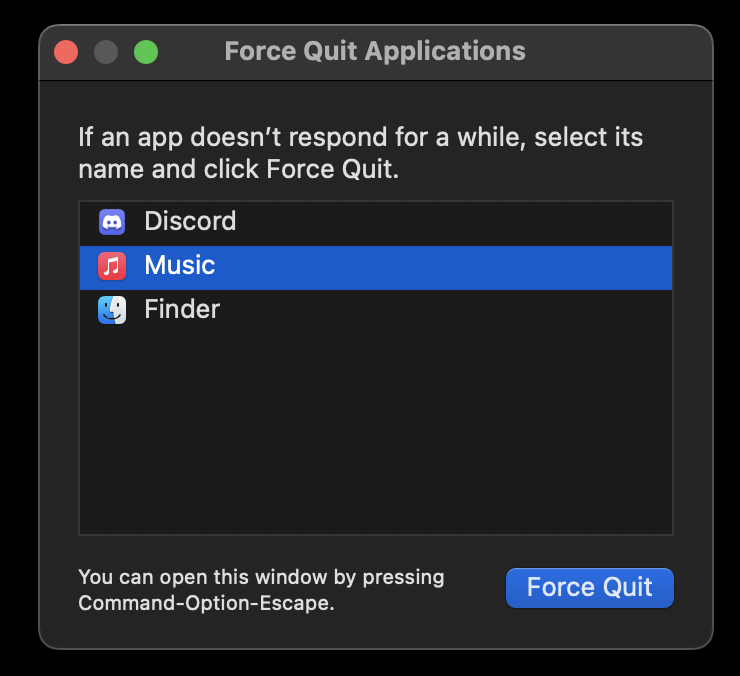
Whereas for macOS devices, you can force quit the Apple Music application, by clicking the Apple Menu icon at the upper left, selecting “Force Quit…” and then selecting the Music application in the Force Quit Applications window, and clicking the Force Quit button.
Following the steps above are the fastest and safest ways to close both Apple Music and iTunes if they are on the verge of crashing. Once either application has been closed, wait a few seconds for your device to return to normal before opening the app and trying again.
An additional fix you can do at this step is to sign out and sign back into your Apple ID. Conversely, signing in to another Apple ID to test the app/feature is a great practice but unnecessary.
3. Check Apple Music Server Status
Many of Apple’s built-in apps either have online functionality and can work offline completely well or rely on the internet but have limited offline functionality. Apple Music and iTunes are great examples of the latter as they still have offline functionality for playing downloaded music but rely on an internet connection to function for the most part.
Despite offline songs having the name, the server still plays an essential role as the songs you downloaded might’ve not been able to get downloaded into your account correctly, or the app itself might’ve received a wrong packet that negatively impacts its performance.
Because of this reliance on online, the app is deeply connected to Apple’s servers and can tend to misbehave if the servers are experiencing hiccups and problems. This usually results from the app not functioning and even crashing in extreme cases.
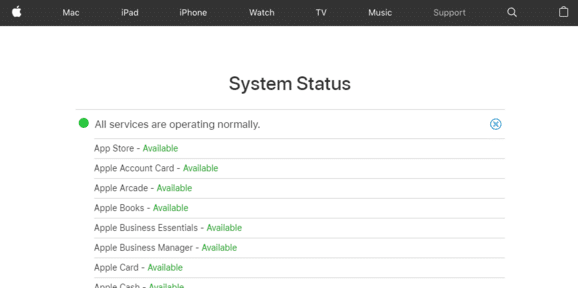
Method 1: Through the Official Apple’s System Status Website
You can go to Apple’s System Status website to see if anything is happening with the server. The website will briefly overview Apple’s apps and services and an individual look at each.
Method 2: Through Third-Party Server Status Checkers (i.e., Downdetector)
Besides you can refer to third-party server status checkers like Downdetector that compile user reports to indicate whether the service is currently undergoing problems. Therefore, refer to the outage graph, live map and comments section to determine whether other users are encountering difficulty in initiating or starting downloads on Apple Music as well.

4. Offload the Music App
Suppose you are experiencing repeat offenses with the app crashing multiple times in a row. In that case, a fresh installation might be the next best option, as the app crashes might result from something getting damaged or corrupted with its internal files.
Offloading your application can easily allow you to uninstall the application to leave your phone available for reinstallation. However, offloading applications are only available to iPhones and iPads as iTunes is considered a system file, making it impossible to delete.
Regardless, here are the steps you can follow to offload Apple Music:
- Open the Settings ⚙️ app on your iOS device.

- From your Settings, navigate to the “General” option and open it.
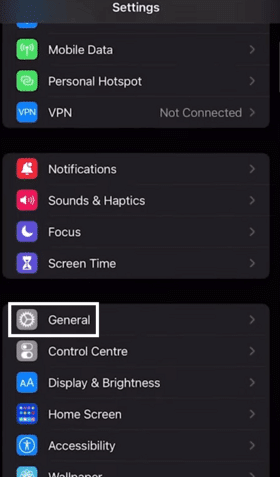
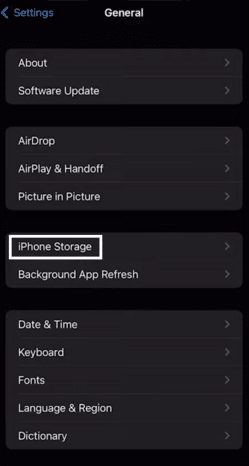
- From your General option, find and open “iPad/iPhone Storage”. This will open an app list with all the apps you have installed.
- Find Apple Music (often shortened to Music) from the app list and open it.
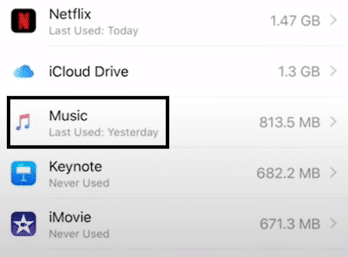
- Tap on the “Offload App” option to start the offloading process.
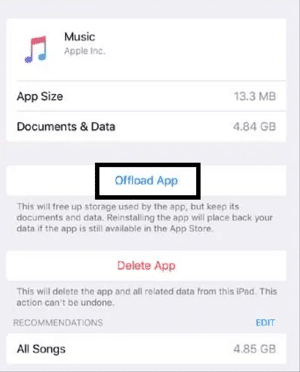
After following the steps above, you can reinstall Apple music by opening the App Store and searching for “Apple Music”. This will redirect you to the app page for Apple Music, where you can click the download button to redownload and install the app again.
5. Update Your Device Version
Many apps tend to misbehave if your device version is severely outdated compared to the app version. Quickly checking and updating your device version can fix any potential errors you might be experiencing with your apps due to an outdated system.
For iPhone/iPad
- Open the Settings ⚙️ app on your iOS device.

- From your Settings, navigate to the “General” option and open it.

- Find and open the “Software Update” option in the General options tab.
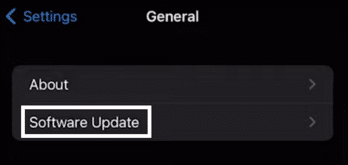
- After tapping on “Software Update” you can tap on the software update you want to install. Likewise, you can also select “Upgrade to…” to upgrade your iOS version to the latest one.
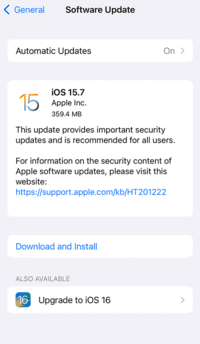
Regardless if you follow the first or second option, you can update your device with the latest information, applications, and security. After installing the new updates, a device restart is recommended to ensure everything is applied correctly.
For Desktop (macOS)
- Click on the Apple Menu and select “System Preferences”.
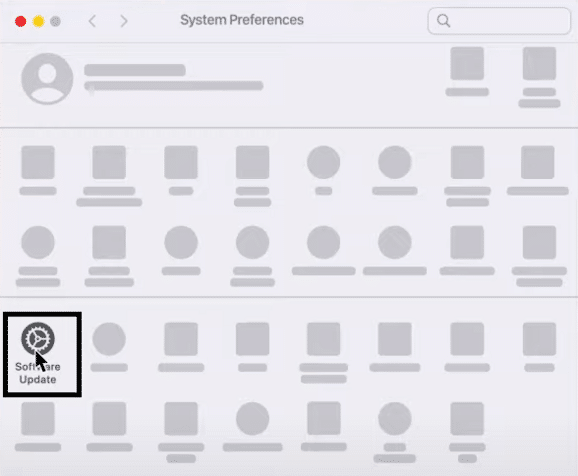
- From the System Preferences window, find and click “Software Update”.
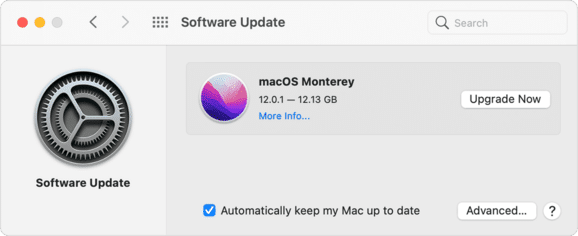
Following the steps above will start an internet scan for updates for your system and other installed apps. If any updates are detected, the download for it will automatically be started. After everything is installed, you might be recommended to restart your device, which we advise you to follow.
For Windows
- Open your computer Settings through your system menu.
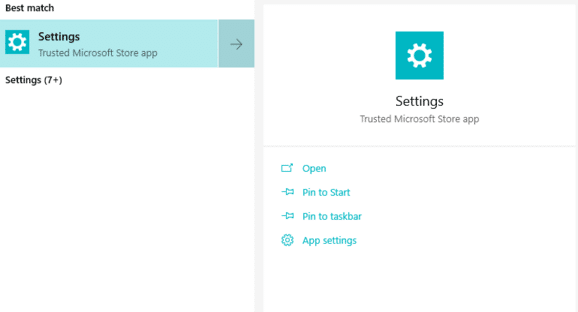
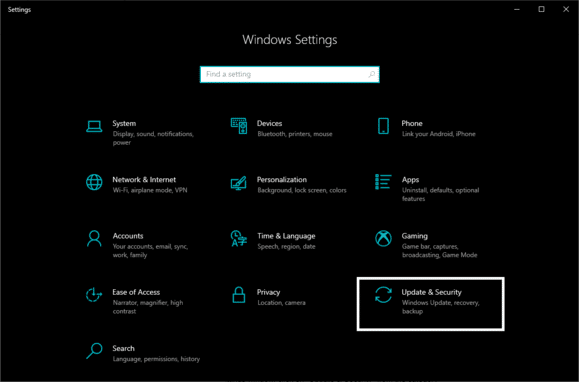
- Click on “Update & Security” from the category list in your Windows Settings window.
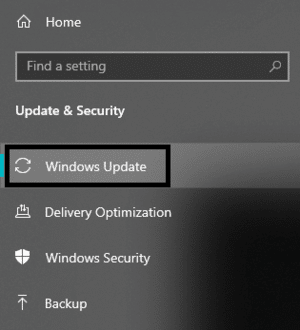
- Click “Windows Update” on the left-side task pane to open the corresponding tab.
- Under Windows Update, click on the “Check for Updates” button.
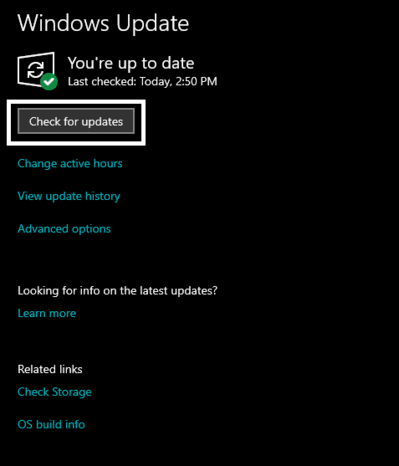
Following the steps above will allow your system to scan for any updates online that it can download. You will be prompted that you are at the latest version if no new updates are detected. Otherwise, the latest updates will start downloading and installing immediately.
6. Update Apple Music/iTunes
Likewise, with outdated apps, older versions of apps tend to have bugs and glitches that might’ve been fixed in a new iteration of the app. Most apps can be updated overnight or just in an hour after you install them, so it is never a bad idea to use the latest versions of apps.
For Mobile (iOS)
Updating Apple Music on mobile devices is incredibly easy as you only need to:
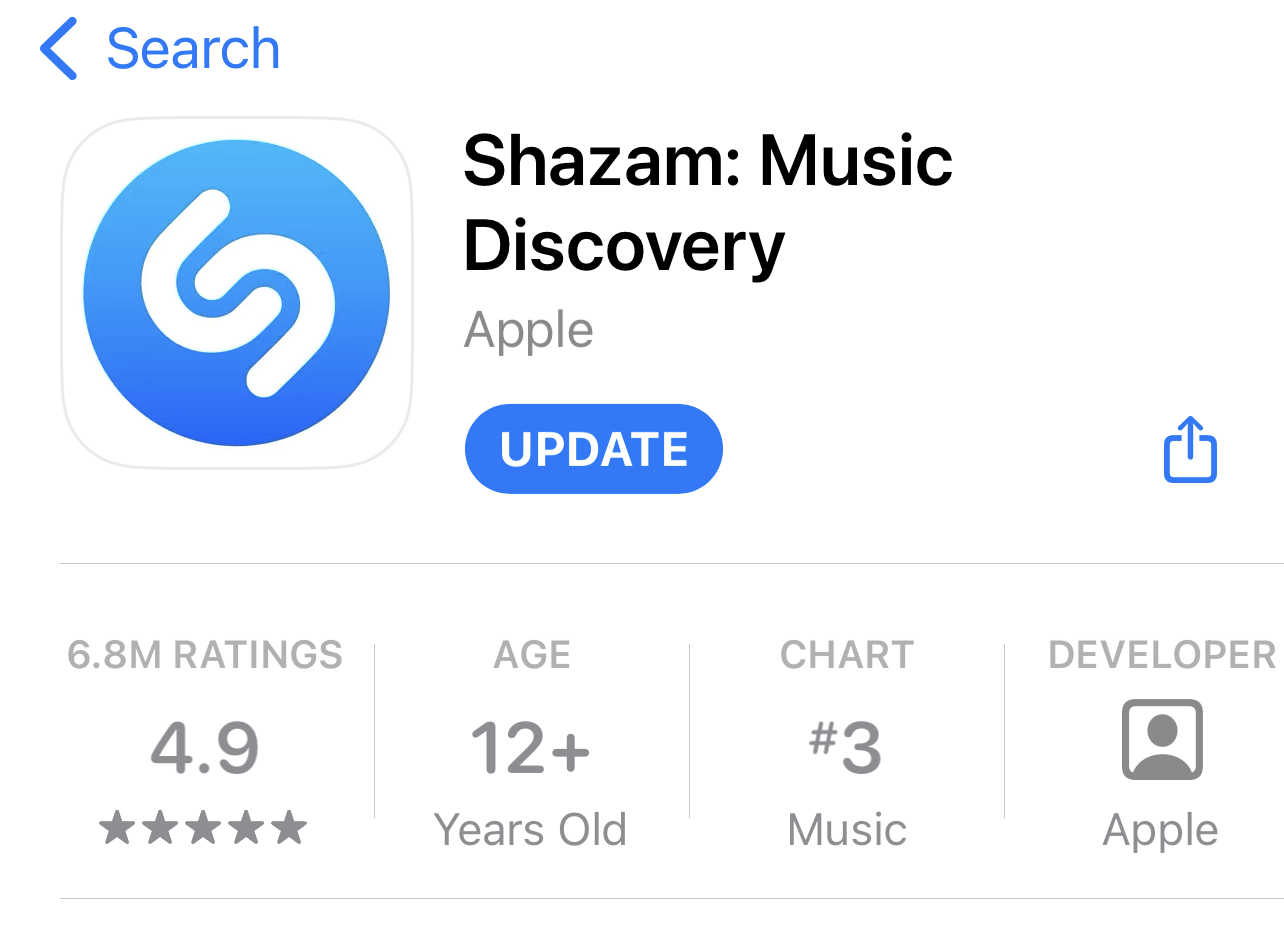
- First, open the App Store and search “Apple Music”. This will almost always redirect you to the Apple Music app page or give you a list of results containing the app in question.
- The Apple Music app page will prompt you if any new updates are detected through an Update button but will avoid doing so if it is already on the latest version.
For Desktop (macOS & Windows)
- Open your iTunes app on your Computer.
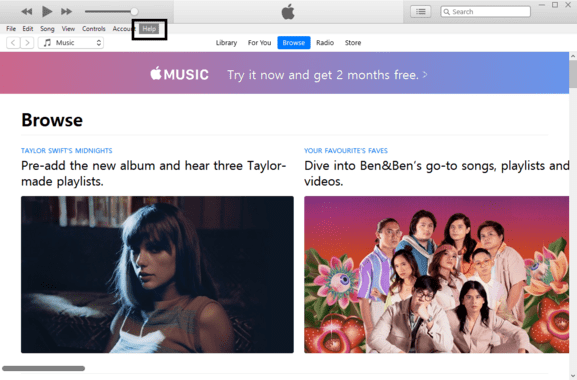
- Click on “Help” in the iTunes menu.
- From the Help menu, find and click on “Check for Updates”. This will immediately check for any available updates online for iTunes.
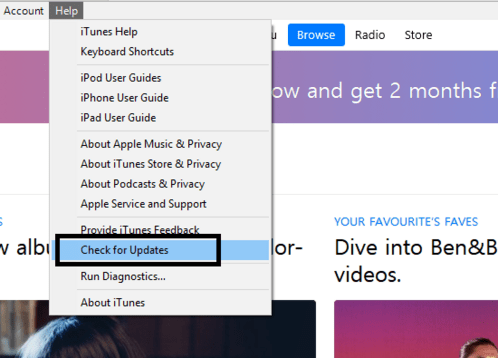
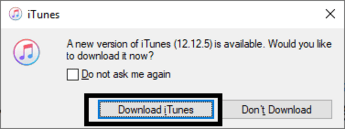
- iTunes will prompt you if a new update is detected. Click on “Download iTunes” to confirm and start the update process.
7. Clean Your Apple Music/iTunes Cache
Apps often leave behind temporary files that can build up over time and cause the app to slow down and underperform. Cleaning your Apple Music/iTunes cache can solve any issues with the app lagging and slowing down, leading to numerous other problems.
Here’s how you can clean the app cache and data on each platform:
For iPhone/iPad
- Open the Settings ⚙️ app on your iOS device.

- From your Settings, navigate to the “General” option and open it.

- In the General settings tab, find and open the “iPhone/iPad Storage”.

- Find “Music” 🎵 from among them and open it.

- Tap on the “Delete Documents & Data” or “Delete Data” option. If you can’t find it, tap “Documents & Data” first to expand it.
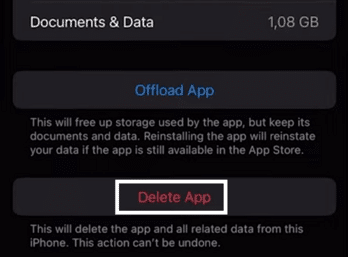
Following the steps above will quickly delete and clean up any data and cache on your Apple Music. This might also delete downloaded songs, meaning you must redownload them to make them playable.
For macOS
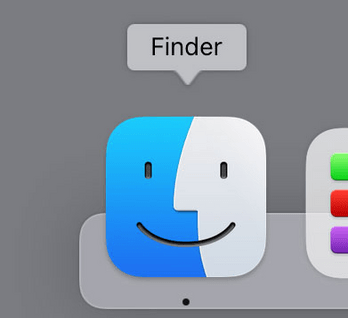
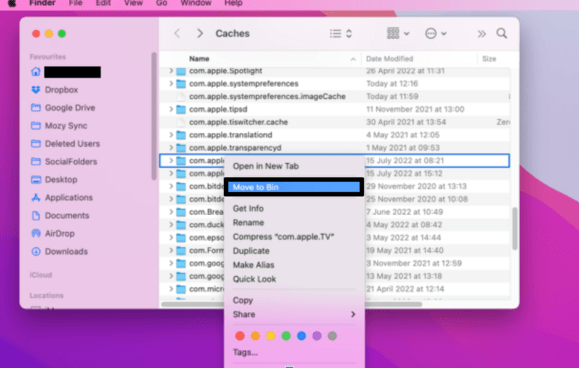
- Open and Launch “Finder” after closing iTunes.
- Press CMD + SHIFT + G to open the Go to Folder prompt and type in “~/Library/Caches/com.apple.itunes”.
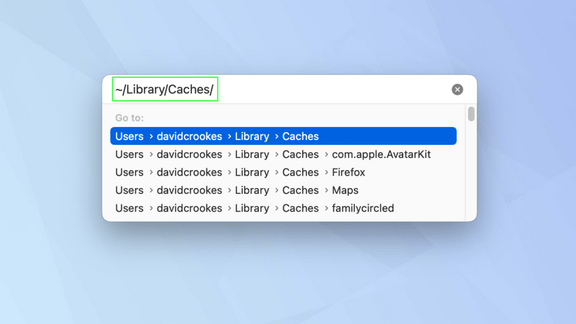
- Select the file that says “cache” and delete 🗑️ it.
For Windows
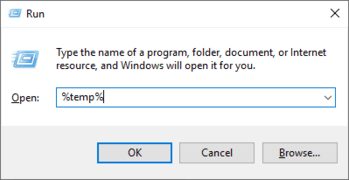
- Use the “Windows Key + R” key to open the run command. Type in “%temp%” in the Run command window.
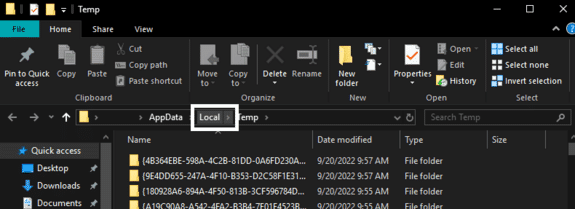
- From the Temporary folder, click on “Local” at the address bar to open it.
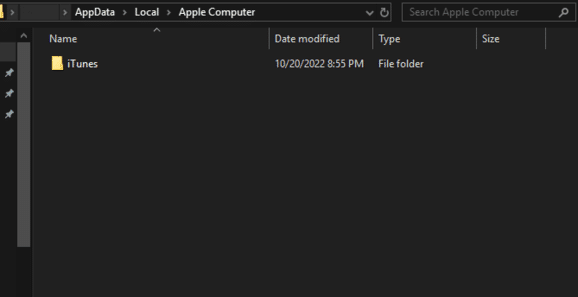
- Look for the “Apple Computer” folder in your Local folder and open it.

- This will contain an iTunes folder (and other Apple-based applications you’ve installed) that you can open.
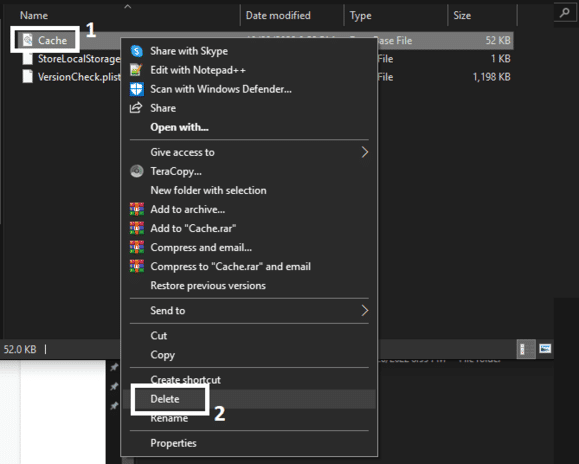
- Select and delete 🗑️ the “Cache” file inside the iTunes folder to delete all data in your computer.
8. Send a Support Ticket to Apple
Sending a support ticket is the best thing you can do if you happen to be experiencing app problems due to a bug or glitch. You can easily send a ticket through any device by following these steps:
- Open the official Apple Support page.
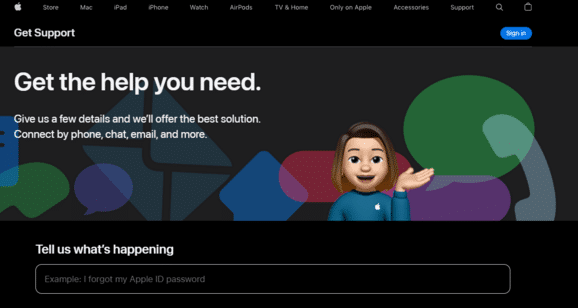
- Click “Choose a Product” under the “See All Products” option.

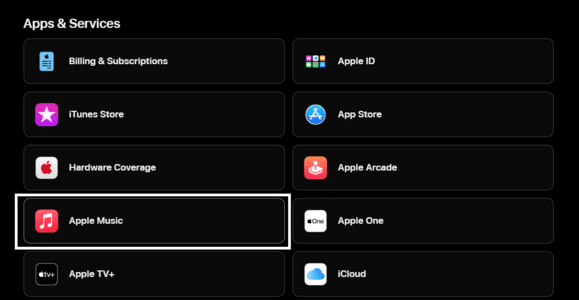
- Under Apps & Services, click on “Apple Music” from among them. You might need to click on “More” to expand the list.
- Click on “Playing & Saving Songs” on the “What’s going on” question.
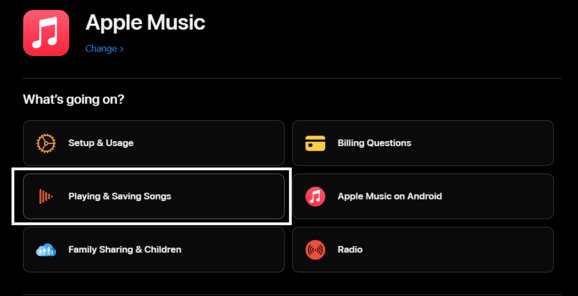
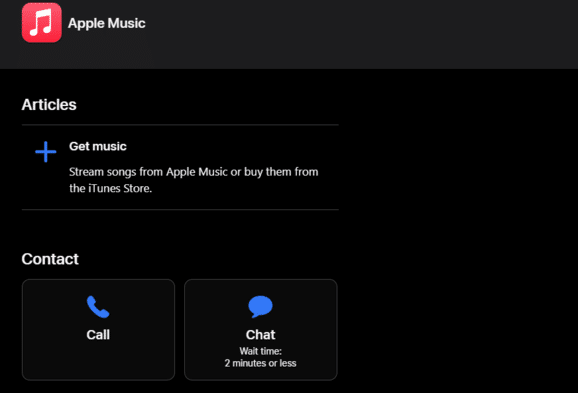
Following the steps above will redirect you to a page where you can contact support through chat or call. From here on out, you can select any of the 2 options that work best for you and follow the instructions you get from there. This’ll allow you to send a support ticket to Apple and potentially solve the problem you are facing with the help of an official representative.
Conclusion
Apple Music is an incredibly nifty and handy tool that many Apple users can enjoy as it provides limitless music in an extensive and rich song library. Although it relies on the internet to play music, its download feature makes up for it, as you can easily find and download your favorite tunes to listen to on the go.
Understandably, it can be incredibly frustrating to have the music you downloaded suddenly not playing, which is why we have come up with 5 reasons and 8 fixes for the situation in this guide. With our help, you’ll be sure to fix your Apple Music offline mode issues and quickly get back to jamming to your favorite beats.
For more help, check out our other guides catered to resolving Apple Music issues:
- Apple Music Not Working, Connecting, or Playing Songs
- Apple Music in Web Browser or Web Player Not Working
- Apple Music “This Content Is Not Authorized” Error
Let us know down below 👇 in the comments:
- If you found this guide helpful and which fixes worked best for you?
- Any additional fixes we missed that you can share and that we should add?
- Your favorite feature with Apple Music compared to other platforms.
- Any song/album recommendations you can drop that others should give a shot in Apple Music?
Feel free to share this guide with any friend, family member, or acquaintance you find might be having problems with getting their songs in Apple Music to play offline.
