Suddenly find that the Apple Music in web browser or web player not working correctly or playing any music?
If you’re someone who enjoys listening to music and find it hard to complete their day without their daily dose of sweet and savory tunes, chances are you are using popular music streaming services like Apple Music. Apple Music is one of the popular music streaming services available, as you can quickly get access to a wide variety of music on a large variety of platforms.
Apple Music has its services available as a web page and software. For the latter, the software is mainly available to Apple products such as iPhones and MacBooks, with support for other platforms such as Windows. However, the former is readily available in a large variety of platforms as long as they have access to the internet and a compatible internet web browser.
Apple Music’s web player makes it easy to play from the extensive library of the platform without going through complicated things. Despite this great accessibility, however, some users of Apple Music have found that its web player is unable to play any music, much to their disappointment.
Types of Apple Music Web Player Problems
Apple Music Web Player isn’t that much different from its non-Internet browser counterpart as they are functionally the same with only a few differences. Not going too in-depth into these differences, the minor differences barely affect the overall performance as they are capable of playing the same songs at the same quality.
The problem that many users have been experiencing with Apple Music’s web player is not being able to play music as the player will keep trying to load and reload the song or having the song being played in the web player, but no music is heard.
These issues typically can stem from several things, as it can be a problem from Apple, your internet browser or your device/platform. Regardless, we have come prepared with this guide with 6 reasons and 12 Fixes for when the web player from Apple Music isn’t performing at its best.
This guide will cover simple to complex solutions that you can follow through. Additionally, since Apple Music’s web player is available in a wide variety of platforms, we will be doing our best to give a general guide that will work in a majority of platforms and internet browsers.
Having got all those technical things out of the way, let’s get down and start fixing some problems!
Why is Apple Music in Web Browser or Web Player not Working?
-
You Are Using an Unsupported Internet Browser
One reason you might find that you might not be able to use Apple Music’s web player might be because of the internet browser you are using. There can be 2 factors that are related to the kind of internet browser you are using to being able to use Apple Music, and it is either the current version of your internet browser being too outdated to work with Apple Music, or your internet browser isn’t supported by Apple Music and lacks the capability to run the web player properly.
For the first instance of this problem, the best thing you can do is to update your internet browser to the latest version (Step 1). For the next problem, you have no other choice but to download and install one of the supported internet browsers for Apple Music (Step 2).
-
Performance Issues With Your Internet Browser
One of the most important things when it comes to using platforms like Apple Music is that your internet browser (and device) is capable of keeping up with the service. With this in mind, one reason why the web player from Apple Music is being problematic might come from a performance issue with your internet browser.
The performance of your internet browser is tied to several things and factors that you need to address to boost it. What we recommend to do in order to boost your performance is to restart and/or refresh your internet browser (Step 3) and clean out your browser cookie, cache, and data (Step 4).
-
Apple Music’s Web Player Wasn’t Set-up Properly
Although Apple Music is incredibly convenient with music access, it can be a pain to set up properly. This issue becomes problematic down the line as you can find yourself completely unable to use the service if you didn’t set up the web player properly.
The best way to fix this problem is by going back to the start and setting up Apple Music once again by re-logging in and re-linking your Apple ID (Step 5) in your internet browser and the platform you are using Apple Music in.
-
Firewall And Security Are Blocking Access to Your Browser/Apple Music
Going to the technical aspects of things, your internet browser’s firewall and security settings play a major role with not only the access to Apple Music but also with your access to other websites and services on the internet.
Your firewall settings can be the reason why you might not be able to use Apple Music properly, as it is not able to properly make a connection to Apple or the active internet connection. The best thing you can do is to whitelist your internet browser in your firewall settings (Step 6).
Continuing, the security settings such as website access and permissions can also play a major role in being able to use and listen to music from Apple Music’s Web Player. The quick fix for this is to allow access and permissions from Apple Music (Step 7) in your internet browser.
-
Third-Party Browser Add-ons And Extensions
Similar to the previous reason, any browser tools, add-ons, and extensions you have running and aren’t part of the base version of the browser can get in the way of Apple Music. If you find Apple Music to be working fine and playing music, but no sounds are coming out, or you find yourself unable to play any music, then it might be a result of the extensions in your browser.
Disabling and removing these add-ons and extensions is one of the best ways to solve this problem (Step 8) while you are using Apple Music. Additionally, you also have the option to use incognito mode (Step 9) and open Apple Music from there.
-
Internet Connection Problem
The last reason why you might be having problems with using Apple Music can be a result of a problem with your internet connection. Apple Music requires a stable internet connection to play things without interruption, which is why you need to make sure you have a capable connection to match these requirements.
If your internet connection is doing fine, but you are still struggling to use Apple Music, then you can try to reset your internet connection (Step 10) and set up your DNS settings (Step 11). You can also opt to try a different internet connection (Step 12).
12 Fixes for Apple Music in Web Browser or Web Player Not Working
1. Update Your Internet Browser to the Latest Version
Apple Music is readily accessible to a wide variety of platforms and can work with different versions of them up to a certain extent. If the internet browser you are using is way past the threshold for compatibility between versions, then you are unlikely able to use Apple Music without any issues.
For Google Chrome (Desktop)
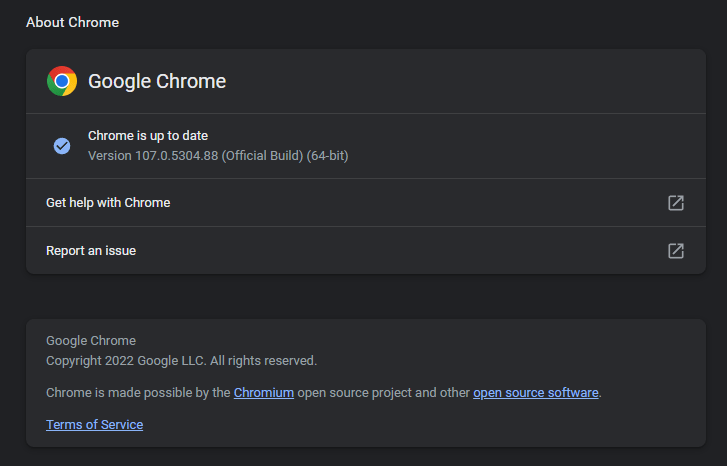
Updating your internet browser is usually automatic, but it can be quickly done by accessing your browser’s “About…” which is usually hidden underneath its menu.

In your browser’s About page, you can check to see if you are at the latest version and update it if you aren’t. Make sure to update your internet browser and wait for it to finish before going back to Apple Music and trying again.
For Safari Browser on macOS
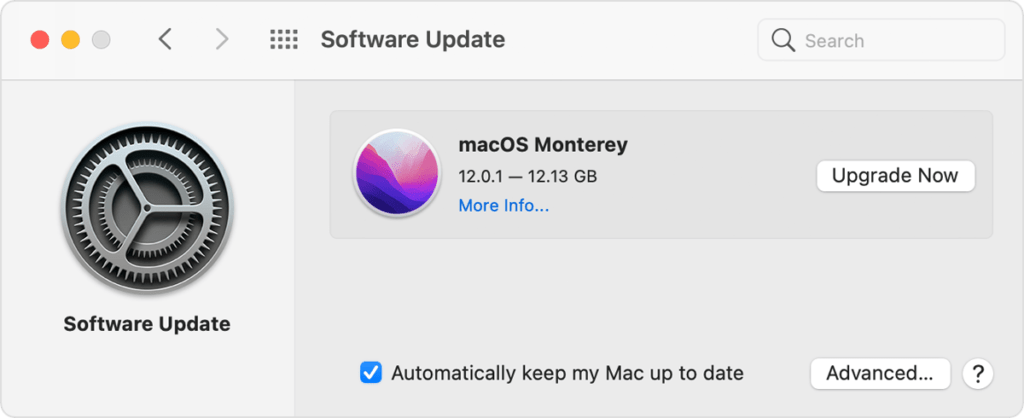
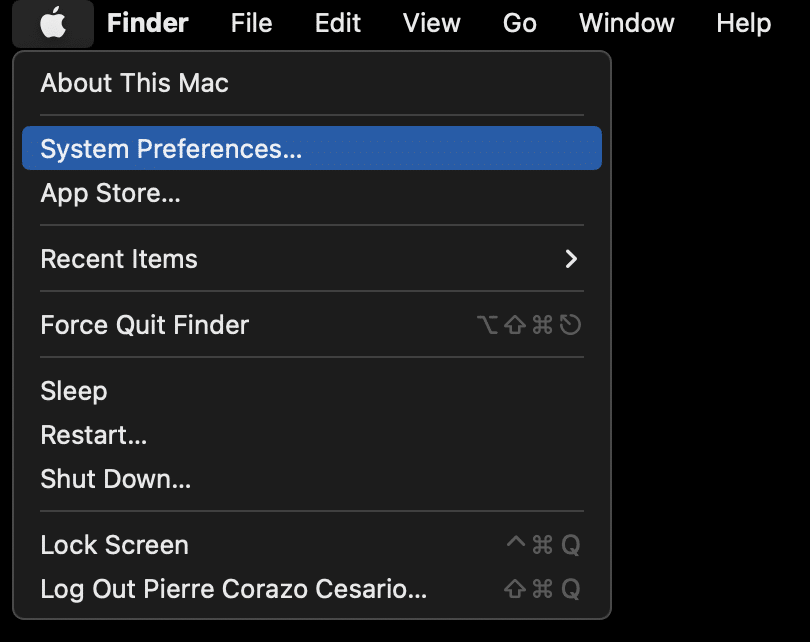
- For starters, from the Apple Menu in the corner of your screen, choose System Preferences or System Settings.
- Then, in the System Preferences window, click Software Update.
- Finally, install any updates or upgrades shown. The latest version of Safari is included in the newest version of macOS.
Note: Suppose your System Preferences don’t include Software Updates. In that case, you can use the App Store to get updates for Safari instead.
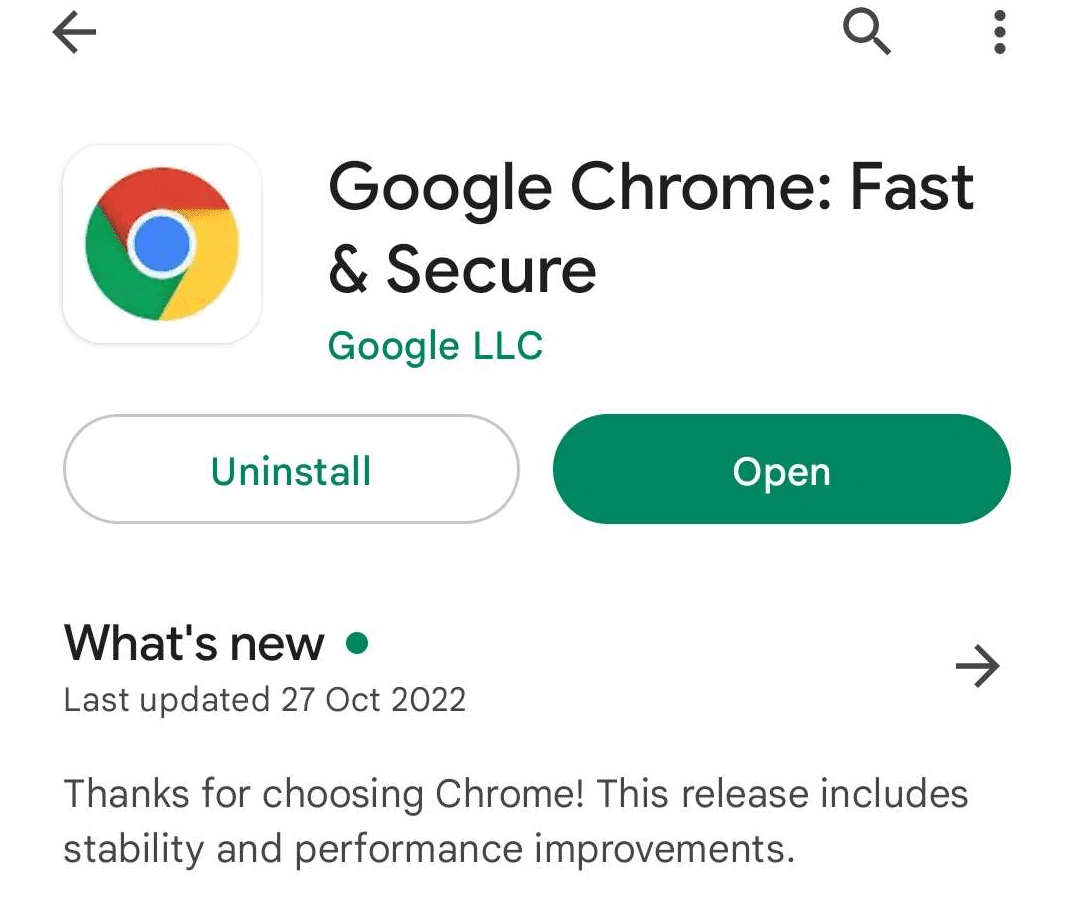
For Mobile Web Browsers
You can simply open your phone’s app store (Play Store/ App Store) and navigate to the app page of your internet browser and check for an update. The app page will usually contain a prompt to update your internet browser. Otherwise, it’ll be an option to either uninstall or open the app.
2. Download And Install a Supported Internet Browser
Other than using the latest version possible for your internet browser, you need to also be using an internet browser that is compatible with and supported by Apple Music. Although Apple Music is available in a wide variety of internet browsers, in the off chance you happen to be using an incompatible one, we recommend trying out the following internet browsers as they have complete compatibility and support with Apple Music:
Using any of the browsers listed above will allow you to access Apple Music without worrying if you are using the right internet browser or if you lack certain features that are required with the Apple Music service.
3. Restart/Refresh Your Internet Browser
Restarting your Internet Browser is usually a quick and easy way to boost its performance, especially if it is stuck with “Not Responding”. In most cases, you can simply close the browser and open it again.
In other cases, you might need to open your task manager and end the task yourself if the browser isn’t closing down properly. Here’s how you can do it:
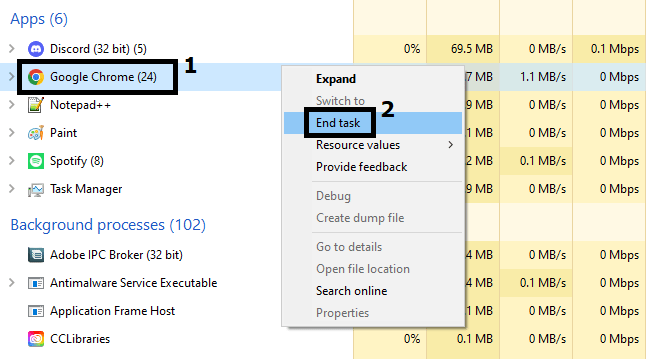
For Windows
- Open your Task Manager by searching it up in your System.
- Under the Processes tab, look for your browser from the list of Active Apps.
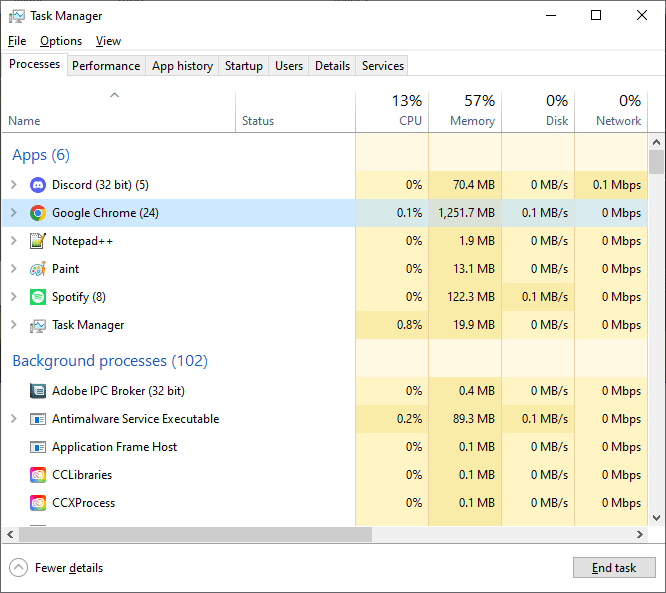
- Select and right-click your internet browser 🌐 and click on “End Task” to forcefully close your internet browser.
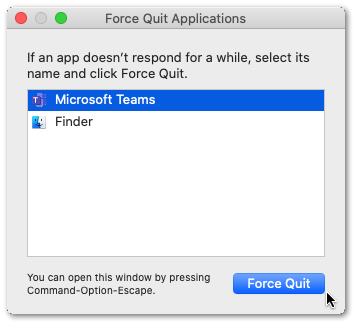
For macOS
- To start, press the Cmd (⌘) + Option + Escape keyboard shortcut to open the Force Quit Applications window.
- Next, select the web browser application you want to close and then click the Force Quit button at the bottom right corner to stop its current operations.
- Now, apply the same procedure to other applications that are running for no reason.
For Mobile
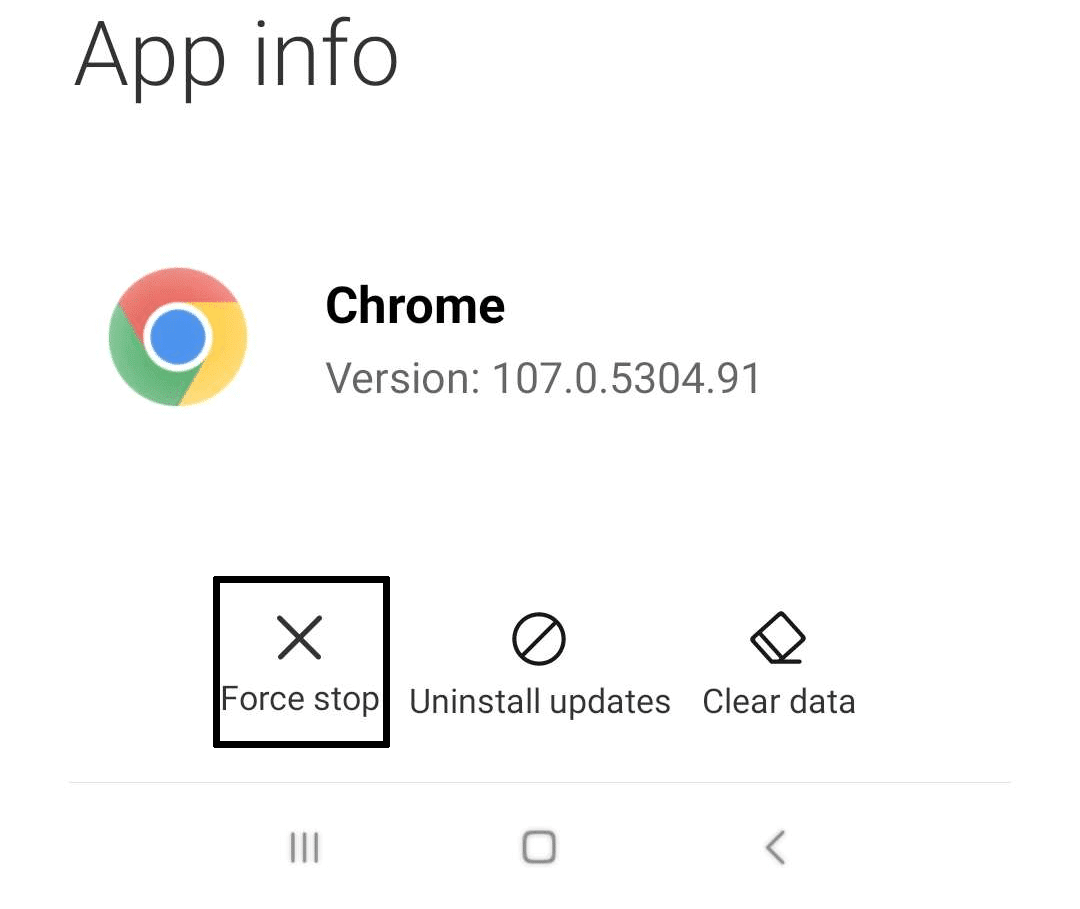
- Open your phone’s Settings ⚙️ apps.

- Navigate to your phone’s App List by tapping on “Apps” or something similar.
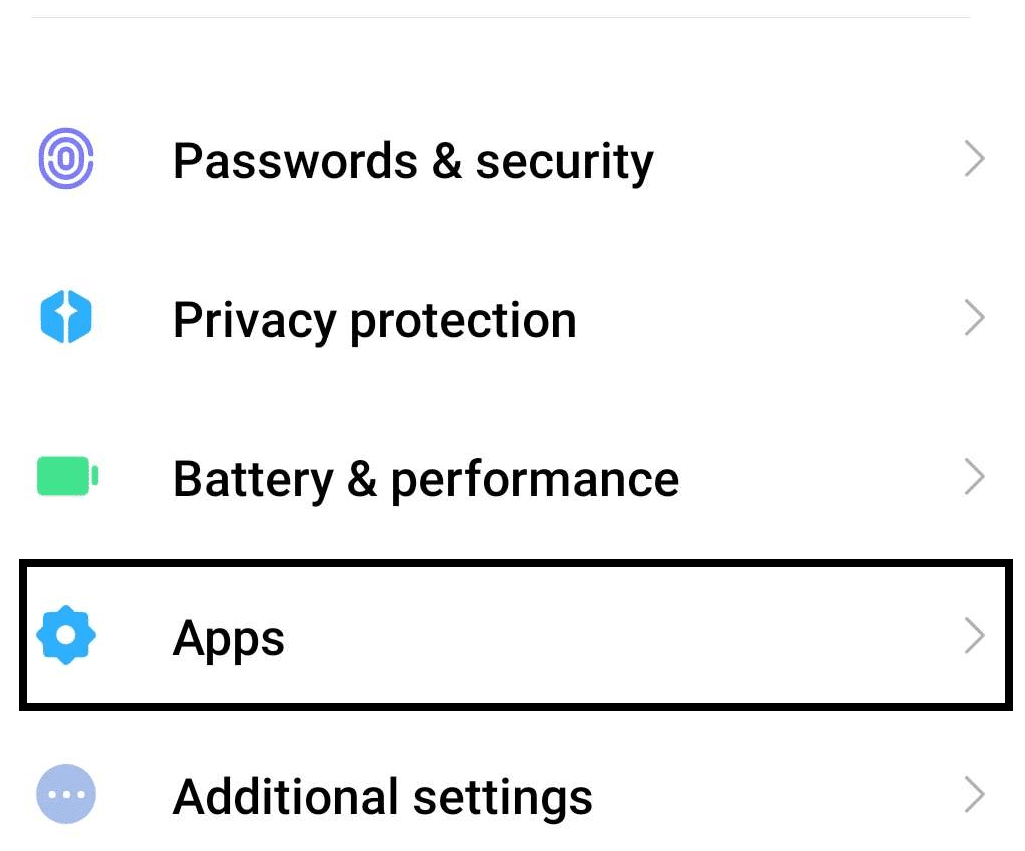
- Find your internet browser 🌐 in your App List and open it.

- On your internet browser’s app page, tap on “Force Stop”✖️.
After following the steps above, you can exit your Task Manager and open your internet browser again to check and see if it is still experiencing severe drops in performance and lag.
4. Clear Your Internet Browser Cache, Data, and Cookies
The main reason why your internet browser would experience a drop in performance and severe lag would come as a result of the stockpile of data, cookies, and cache that is found in your browser. Too much data and cache in your browser will result in it struggling to keep them loaded and consequently cause it to underperform.
Although this is usually cleaned up in a set time interval, it is never a bad idea and practice to clean your cache and data when you have the chance and if your browser is slowing down. Here’s what you can do to clean it up:
For Google Chrome (Windows & macOS)
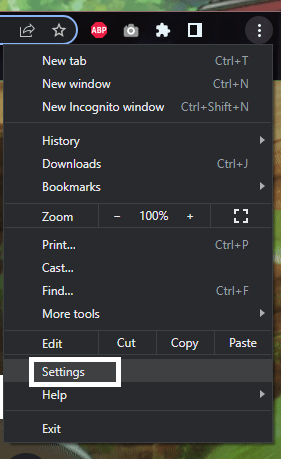
- Open your Internet Browser’s Settings ⚙️. This is usually underneath a menu that varies on the browser you are using.
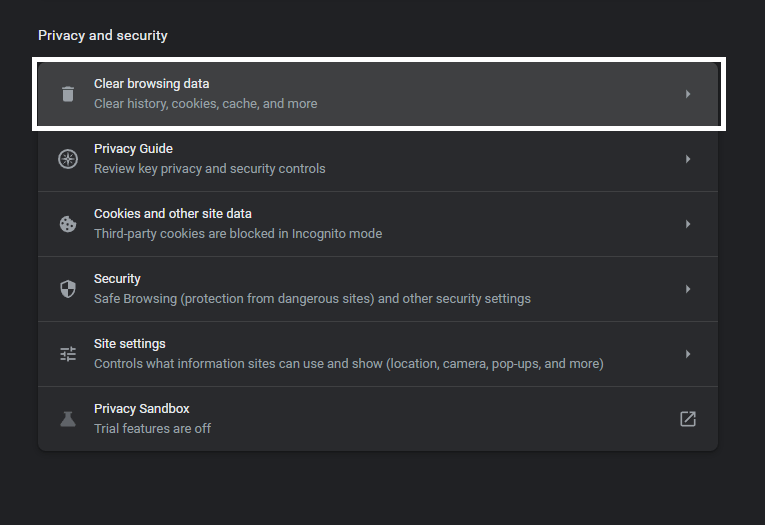
- Find the “Clear Browsing Data” 🗑️ option for your browser. This is usually underneath “Privacy and Security” in many browsers.
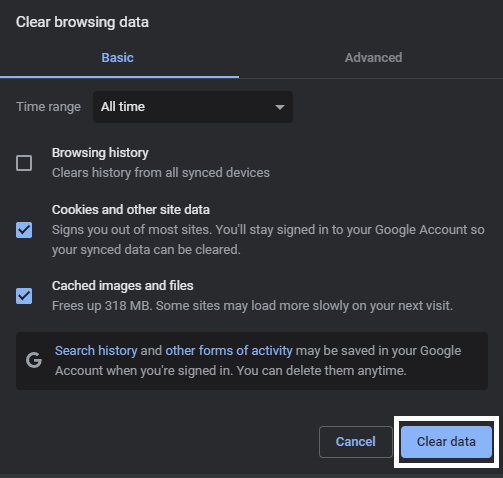
- If you are only cleaning up your cache and data, make sure to select the appropriate option and deselect other things, such as your browser history.
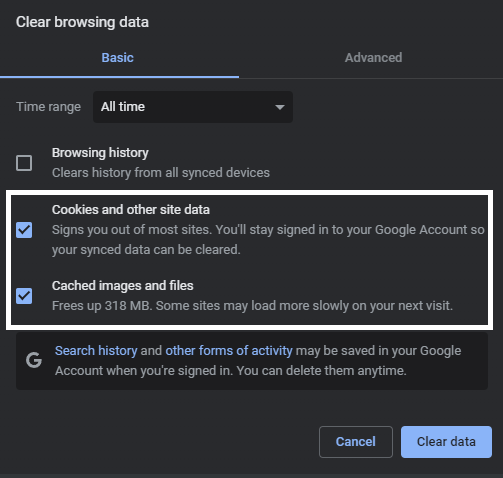
- Click on “Clear Data” to start the cleaning process.
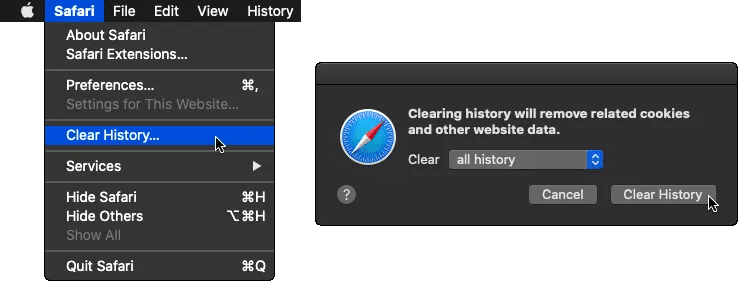
For Safari (macOS)
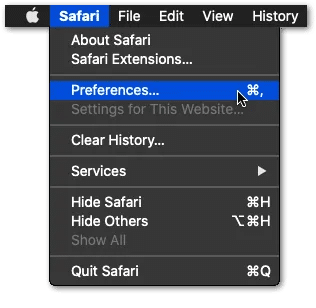
- First, with Safari launched, from the Menu Bar, click Safari and select “Preferences…”
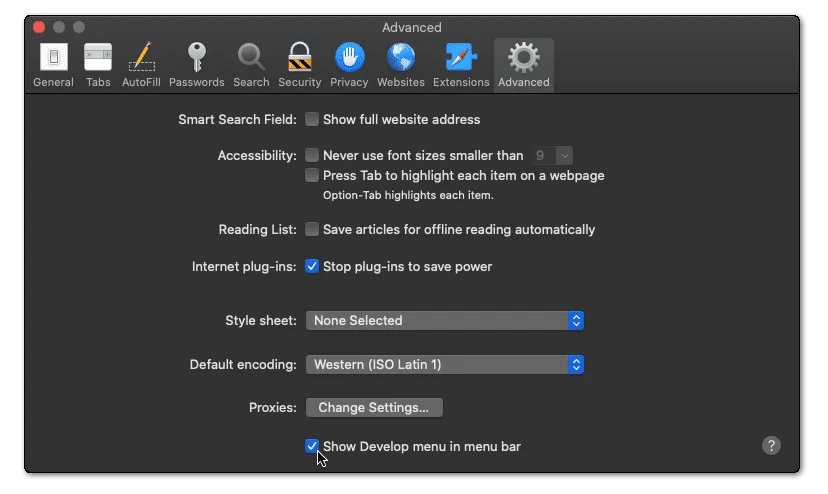
- At the following window, choose Advanced from the top bar, and tick the box next to “Show Develop menu in bar.”
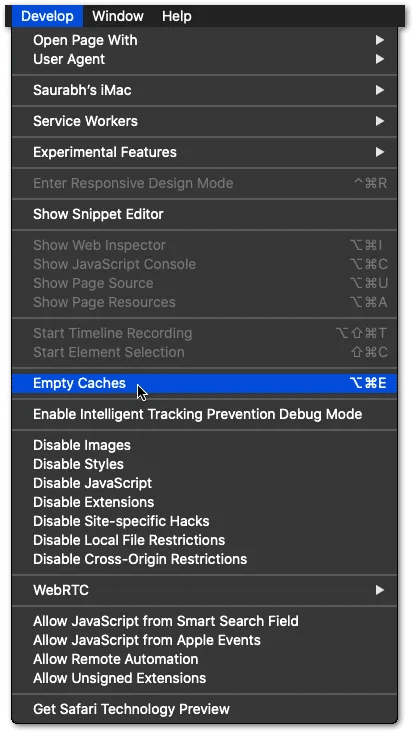
- Subsequently, from the Menu Bar, click Develop, and select Empty Caches.
- After that, you can clear your search history and even more Site Data and Cookies. To do this, from the Menu Bar, click Safari, and choose “Clear History…”.
- Lastly, click Clear History at the following window.
Once the browsing data and history are deleted from the system, open the browser again on your system and check the status of the issue.
For Mobile
- Open your phone’s Settings ⚙️ apps.
- Navigate to your phone’s App List by tapping on “Apps” or something similar.
- Find your internet browser 🌐 in your App List and open it.
- In your internet browser’s app page, first, tap on “Force Stop” ✖️ and once it finishes, tap on “Clear Data” 🗑️.
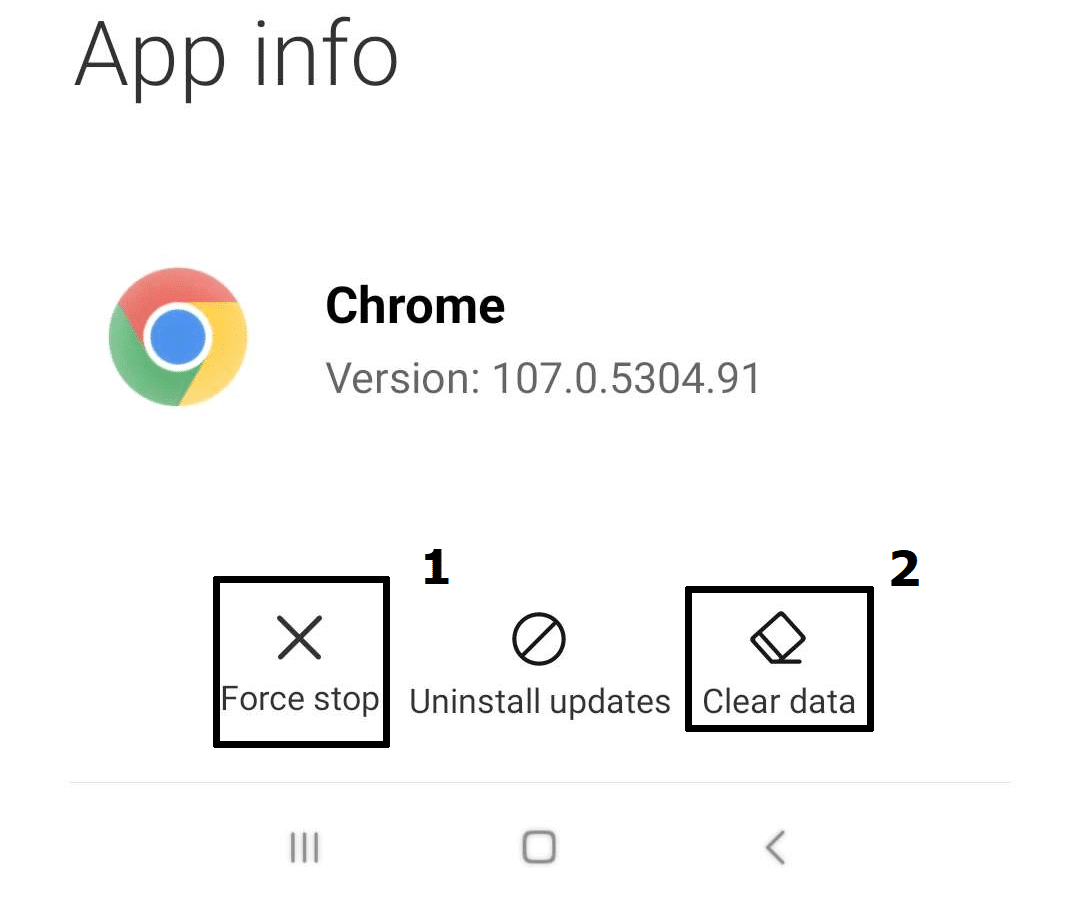
Following the steps above will clear any cache and data that was on your internet browser. This will allow it to have lesser things to have to load at a time which significantly boosts its overall speed and performance. You might need to re-login to the account you have logged in to as a result of clearing any data and cache.
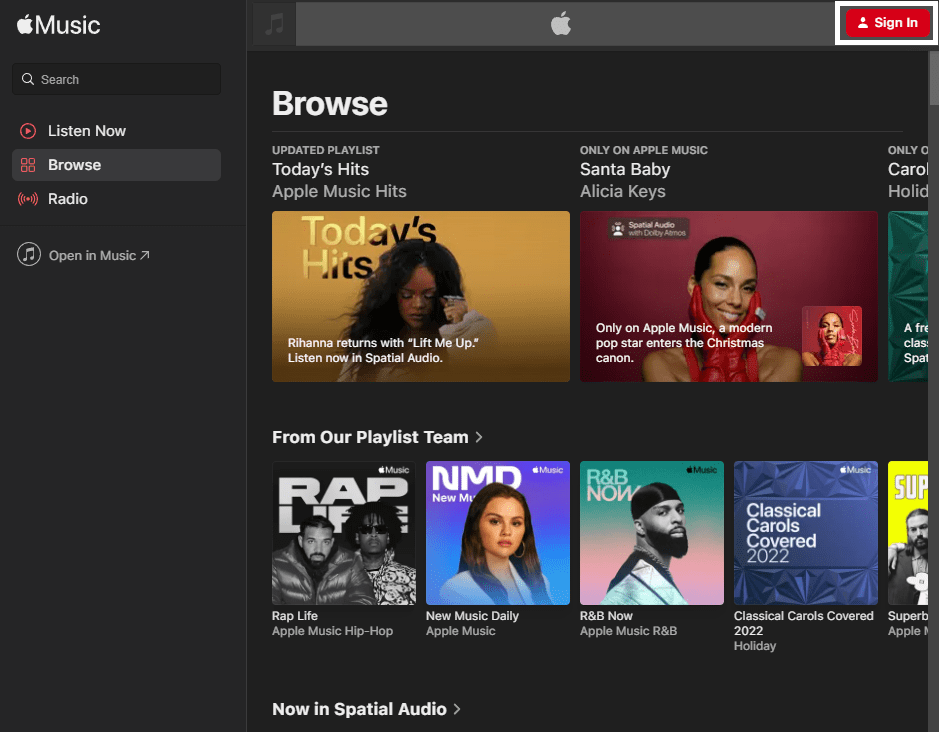
5. Set up Your Apple ID in Apple Music’s Web Player
An important step to being able to use Apple Music without any problem is having an Apple ID and access to the service. Regardless if you are using the app or website, you will need to sign in to your Apple ID to be able to use Apple Music without any issues. Here’s how you can do it:
- On the Apple Music Web Player page, click on “Sign in”, found in the upper right corner.
- Enter your Apple ID on the sign-in page.
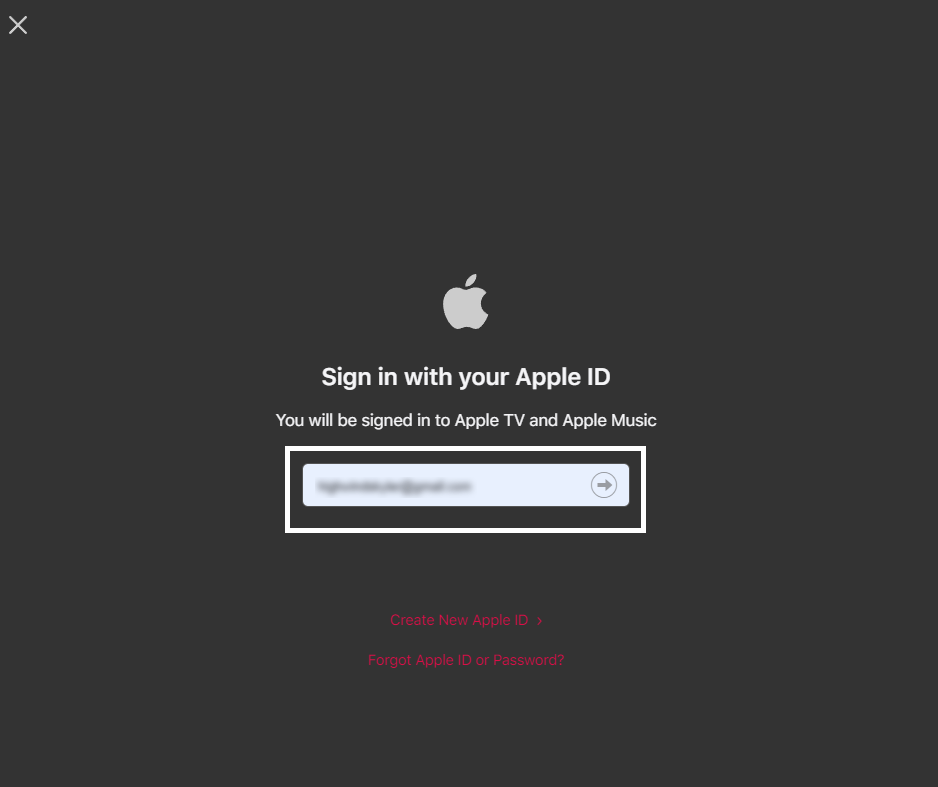
Note: you need an active subscription to complete your setup process. If you don’t have an active subscription to Apple Music, you will be prompted to renew as part of this Step.
Following the 2-steps from above will allow you to log in to Apple Music and use its Web Player through your internet browser the same way you would be able to use it as an app/software. Singing in will grant you access to the full library and catalog available in Apple Music and your mixes from top artists, songs, etc.
6. Whitelist Your Internet Browser in the Firewall
Since Apple Music is a streaming platform, a clean connection that is free from any obscurities and blockage is important. Having your internet browser blocked or restricted by your firewall will make certain features and websites become unusable.
In this scenario, whitelisting your internet browser will allow easy access through your internet connection and will allow all of its features to become usable. This, in turn, makes certain websites such as Apple Music. Here’s how you can do it:
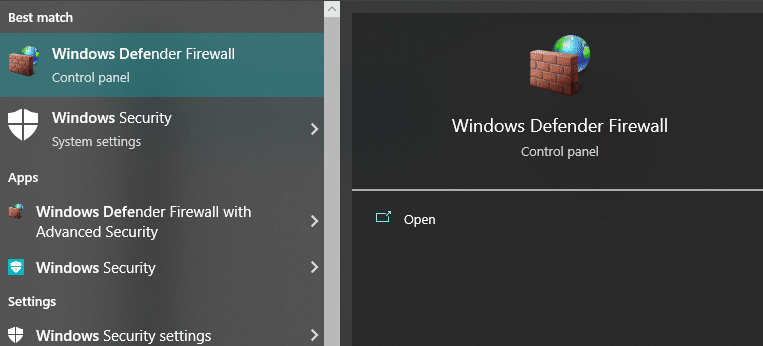
- Open “Windows Defender Firewall” or something similar by searching it up on your computer.
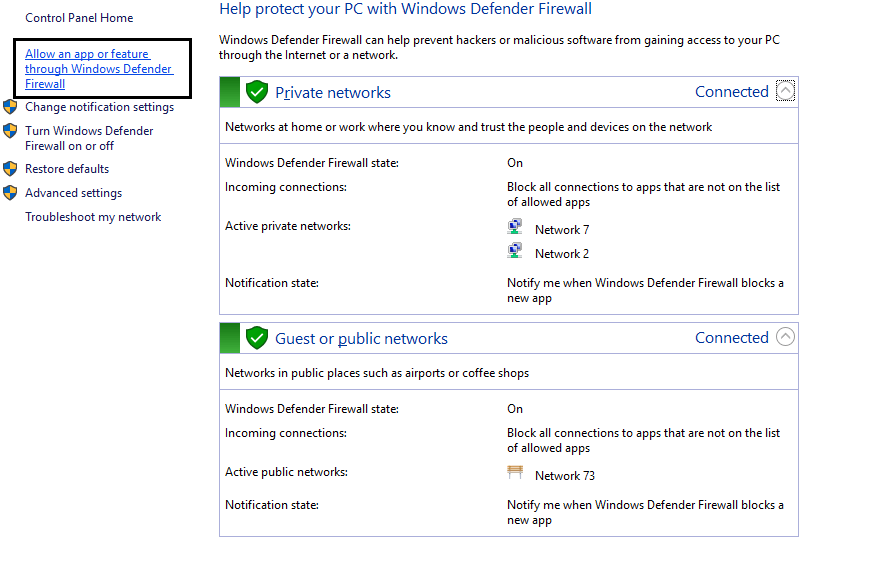
- Select “Allow an app or feature through Windows Defender Firewall” in the left-side task pane of the Windows Firewall settings.
- Select and click on “Change Settings” in the upper right portion of the app list found in the window. Find your internet browser in the app list (e.g. “Google Chrome”) and select it.

- Place a checkmark ☑️ on both boxes underneath “Public” and “Private”. Click on “OK” to apply these changes after checking both boxes.
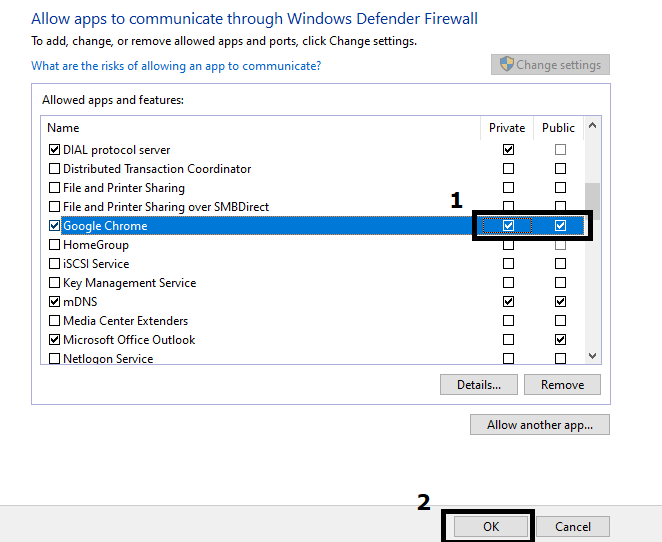
Checking both boxes will whitelist and allow your internet browser to go through your firewall with ease and prevent any future issues caused by your firewall.
7. Allow Access/Permission With Apple Music
When opening any website in an internet browser, certain restrictions are usually placed on the website that restricts what kind of actions they are capable of doing. This usually includes playing sounds, animations, etc. In the case of Apple Music, having the permission for music/sound set to be restricted won’t let any music get played in your speakers despite it playing on the website.
To prevent this issue, you will need to allow permission through your internet browser, which can be done through these steps:
For Desktop
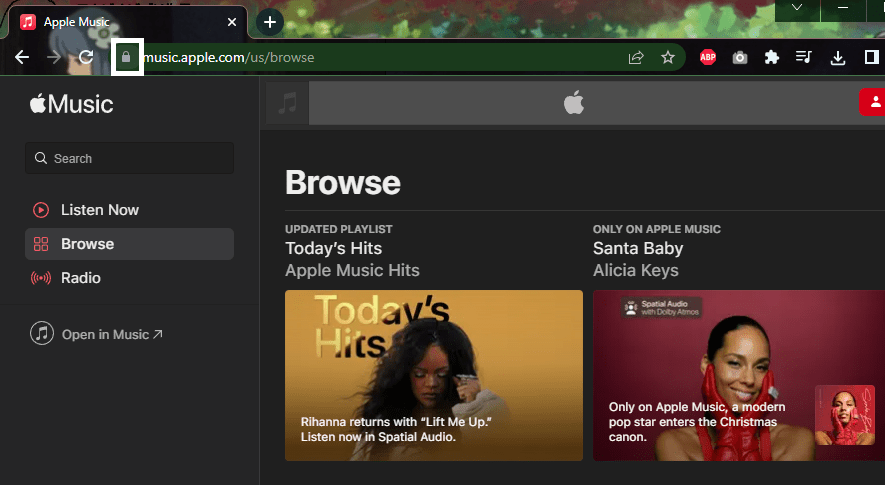
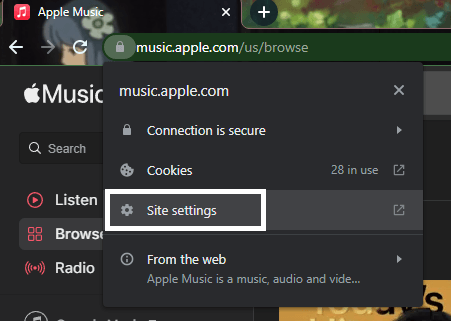
- On the Apple Music website, click on the security button 🔒 found in the upper portion beside the website URL.
- Click on “Site Settings” ⚙️ from the Security list.
- In the Site Settings for Apple Music, look for “Sound” 🔈 from the list of permissions and set it to “Allow”.

For Mobile
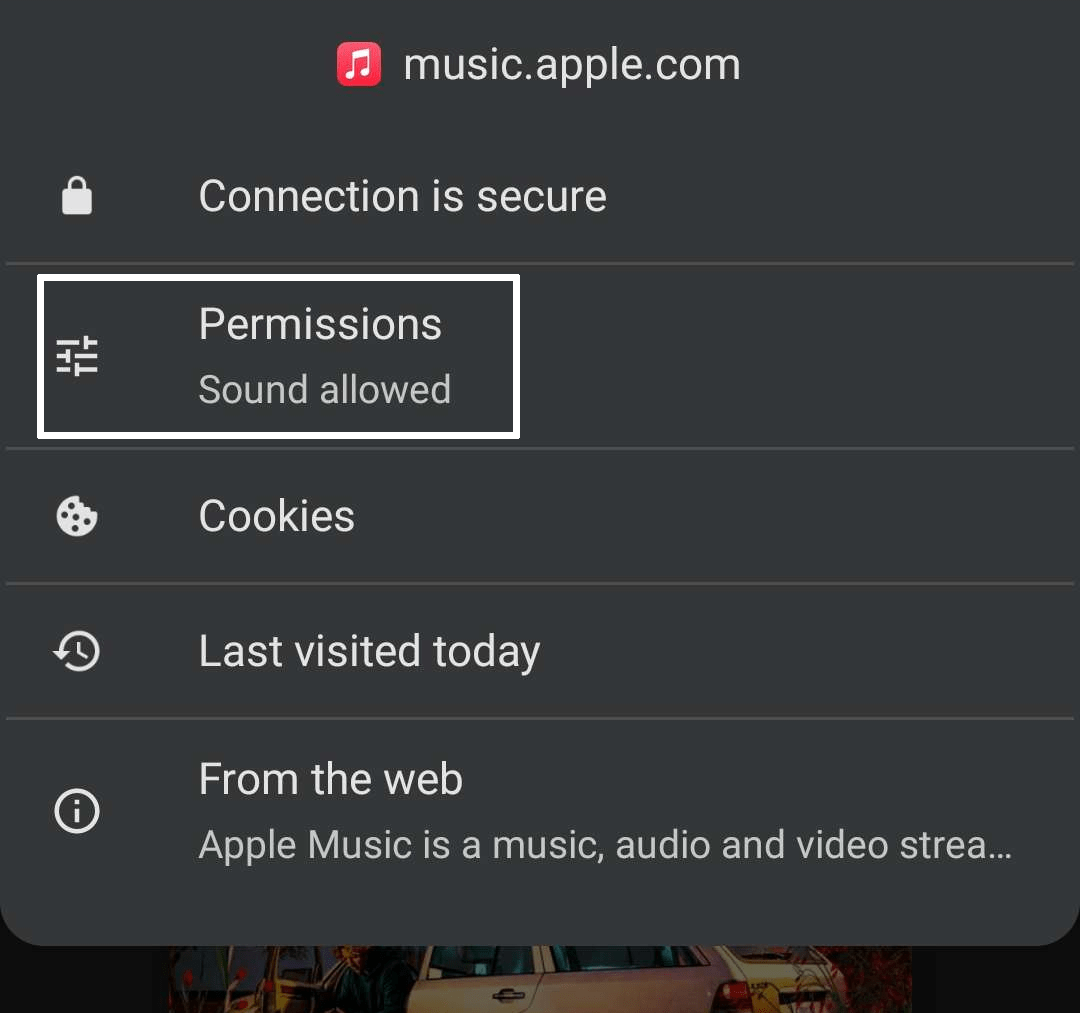
- On the Apple Music website, tap on the security button 🔒 found in the upper portion of the app beside the website URL.

- Tap on “Permissions” from the Security Action list.
- Enable/Allow the “Sound” 🔈 permissions to be able to play music from Apple Music.
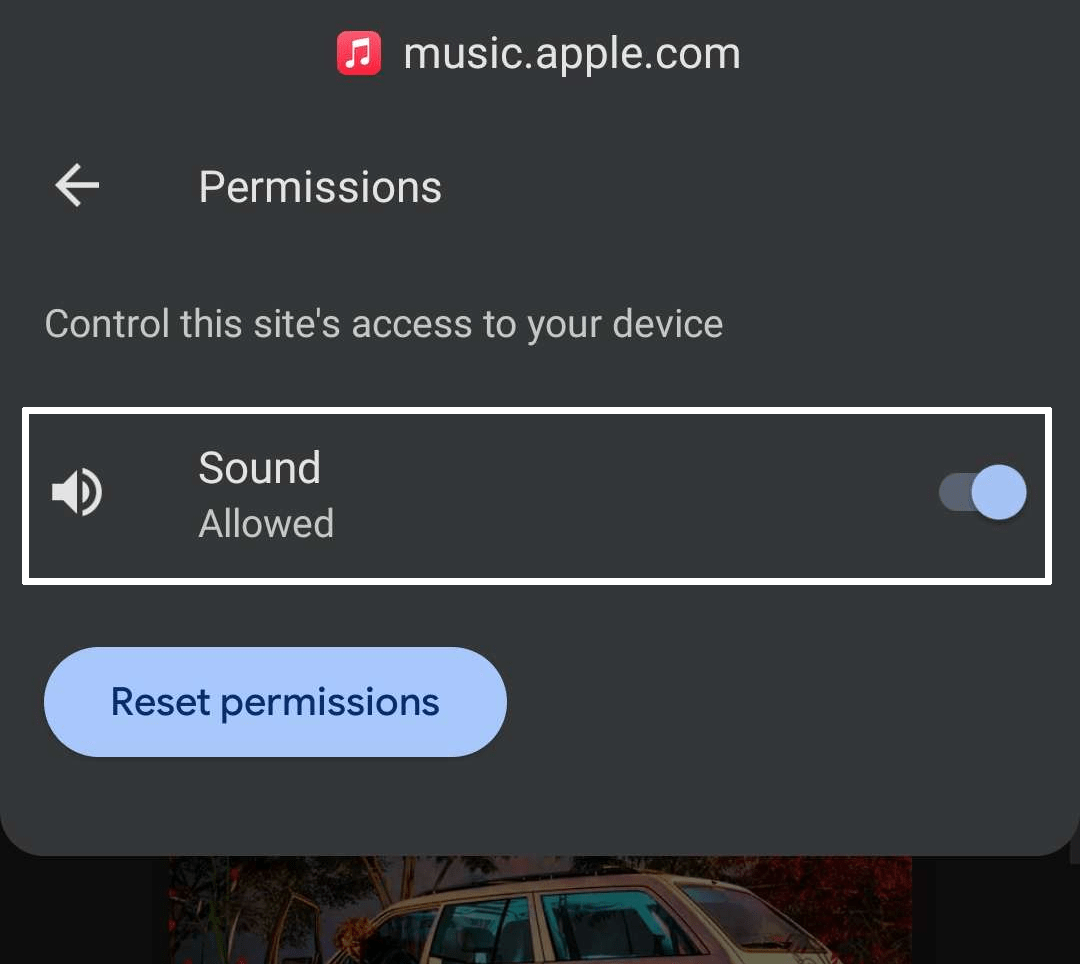
Following the steps above will enable and allow sound from Apple Music. These permissions are important to be able to listen to music from Apple Music (and any website), as having them disabled completely mutes the songs despite them being played.
8. Disable Any Browser Add-ons And Extension
Add-ons and extensions can make your internet browsing experience more convenient and safer, depending on the kind you are using. However, these extensions aren’t always compatible with all the websites you are accessing, which often causes them to misbehave or not function completely.
Apple Music is no exception to this, as it can sometimes not function properly if it has any incompatibilities with the extensions you have active. You can solve this issue by disabling them, which can be done through these steps:
For Windows (Google Chrome)
- Open the “Extensions” tab of your browser. This can be done through numerous means, such as opening your Browser Settings ⚙️ and selecting “Extensions” 🧩.
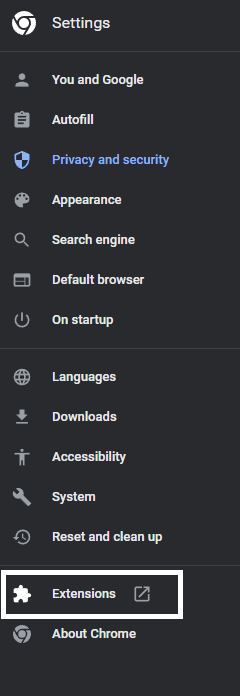
Or through a series of menus by opening your browser menu and navigating through your “Tools”.

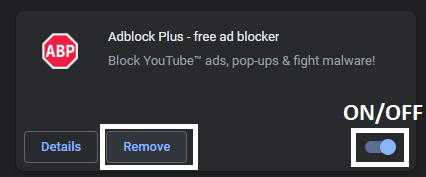
- In your Browser’s Extension tab, you can either opt to “Remove” or disable the extension from working by toggling them ON or OFF.
For macOS (Safari)
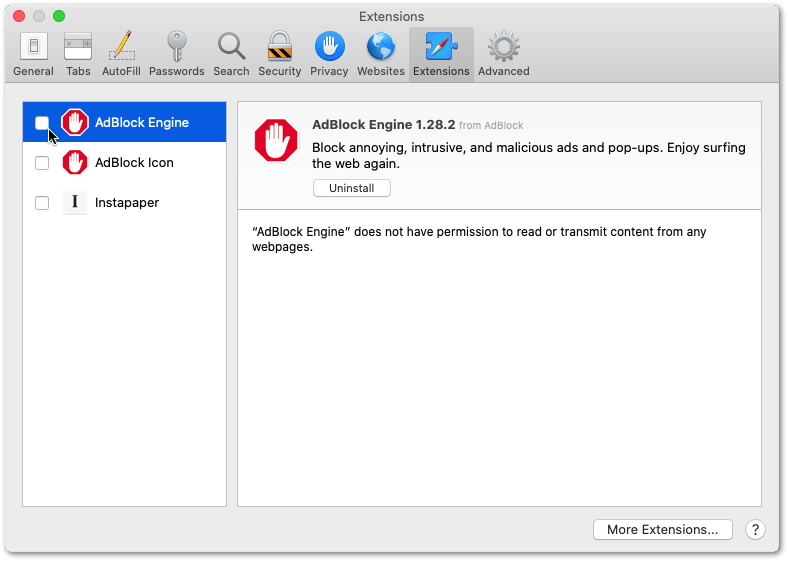
- To start, open the Safari browser on your Mac from the Apple Menu and then select the Preferences option.
- Lastly, click on Extensions (🧩) and uncheck all the checkboxes beside all the extensions to disable all the extensions at once.
Repeat the last step above for any additional extensions you need to disable/remove. You can check to see which specific extension you need to disable by refreshing the website every time you make a change. Do this until you are satisfied with the performance of Apple Music and your lineup of extensions in your Browser.
9. Use Incognito Mode
Incognito mode is usually used for anonymous browsing and is usually treated as a completely different user from your classic user in your internet browser. One of the nifty things about using incognito mode is that it uses the base version of your browser, which helps you skip the repetitive process of disabling any add-ons/extensions that might conflict with certain websites.
Accessing incognito mode can be easily done through the keyboard shortcut “CTRL + SHIFT + N”. Conversely, you can also access it by opening your browser’s menu and selecting “New Incognito Window”.
When you are using an Incognito window, you might need to set up your Apple Music again as a result of using it. You can follow Step 2 for a quick overview of this process.
Google Chrome
Shortcut keys: Ctrl + Shift + N
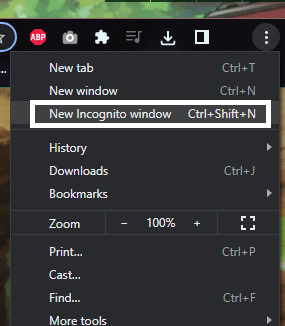
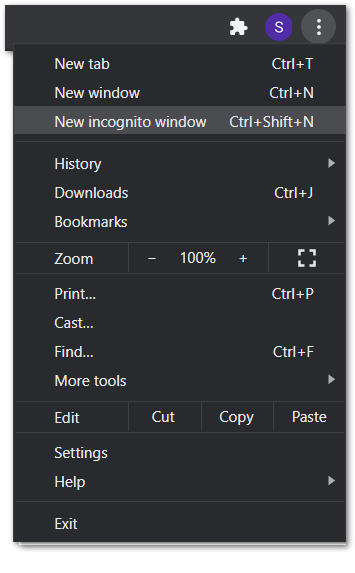
- Click on the kebab menu in the top-right corner of the browser.
- Select New incognito window.
Mozilla Firefox
Shortcut key: Ctrl + Shift + P
- First, click on the hamburger menu (三) in the top-right corner of the browser.
- Then, select New Private Window.

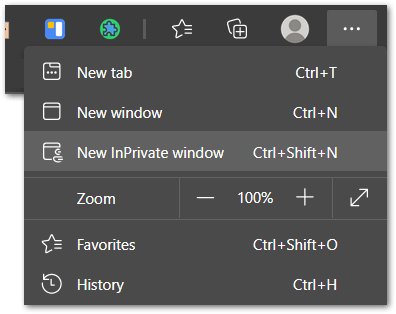
Microsoft Edge
Shortcut key: Ctrl + Shift + N
- First, click on the meatball menu icon in the top-right corner of the browser.
- Then, select the New InPrivate window.
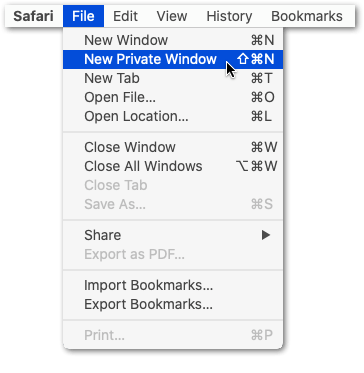
Safari (macOS)
Shortcut key: Command + Shift + N
- First, click on File. It is on the top-left corner of the browser.
- Then, from the drop-down menu, select New Private Window.
10. Reset Your Internet Connection
Resetting your internet connection is a quick and easy way to fix any issues you might be experiencing with it. Sometimes websites and apps that rely on an internet connection can experience problems as a result of having an unstable and weak internet.
If you have been experiencing fluctuating internet performance over a short period of time, you might want to consider resetting your internet connection so that you can have a fresh and stable one. Here’s what you can do:
For Desktop
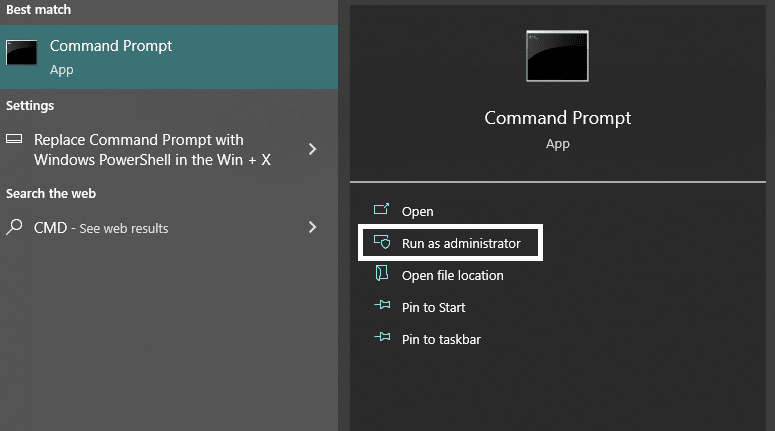
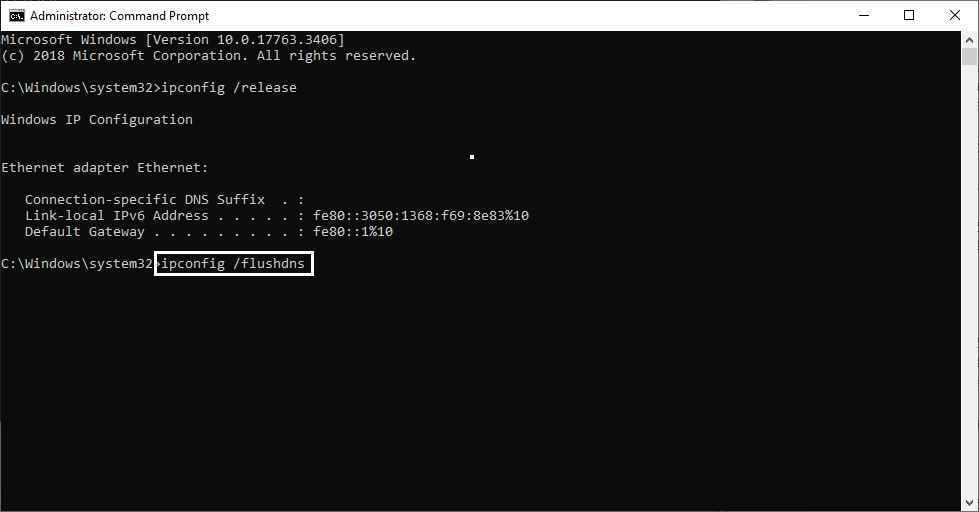
- Open your Command Prompt as an admin by typing “CMD” in your Search bar and right-clicking then selecting “Run as Administrator”.
- In the Command Prompt window, type in “ipconfig /release”, hit enter, and wait for it to finish.
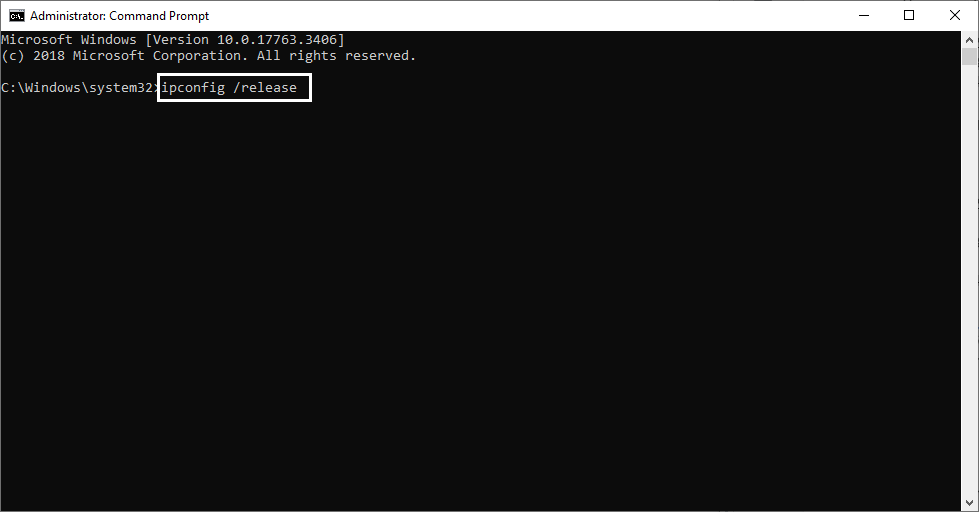
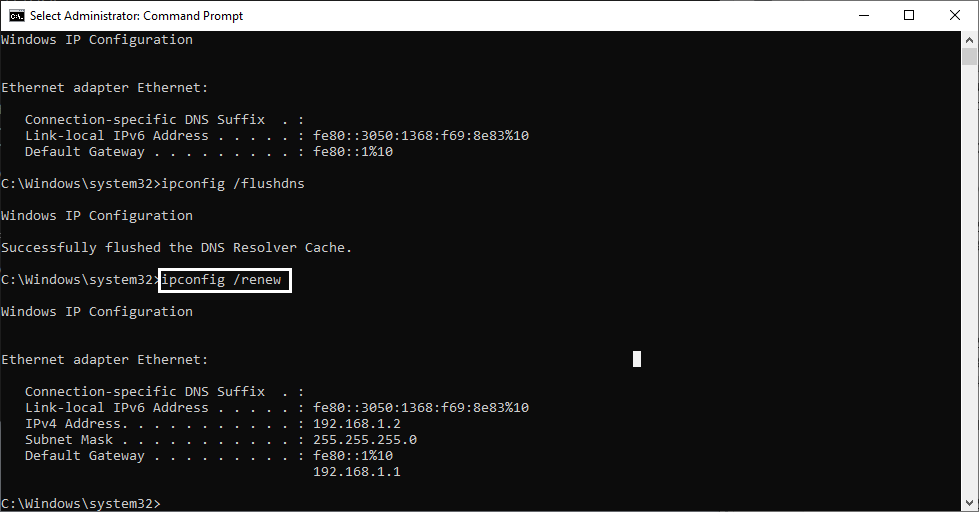
- Afterward, type “ipconfig /flushdns” and hit enter to flush and clean your DNS settings.
- Once the previous step is completed, type in “ipconfig /renew” to essentially restart and renew your internet settings and configurations. Once it finishes, you can close the window and restart your computer to make sure everything is applied properly.
For Mobile
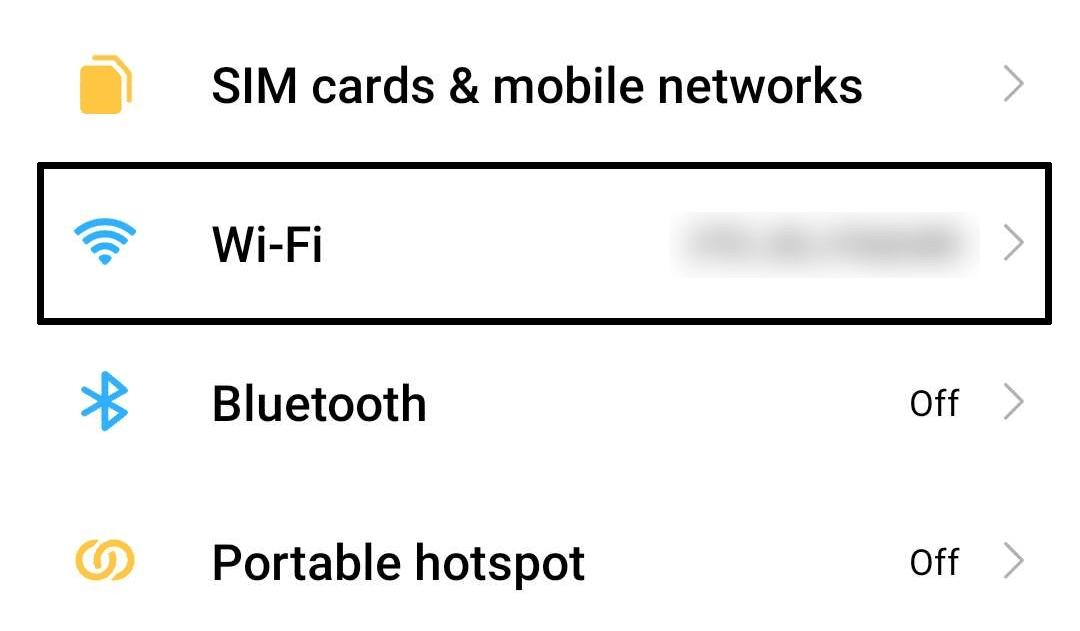
- Open your phone’s Settings ⚙️ app.
- Open your phone’s Wi-Fi settings by tapping on “Wi-Fi” or something similar.
- Open the settings for your active connection by tapping on the right arrow ➡️ or something similar.
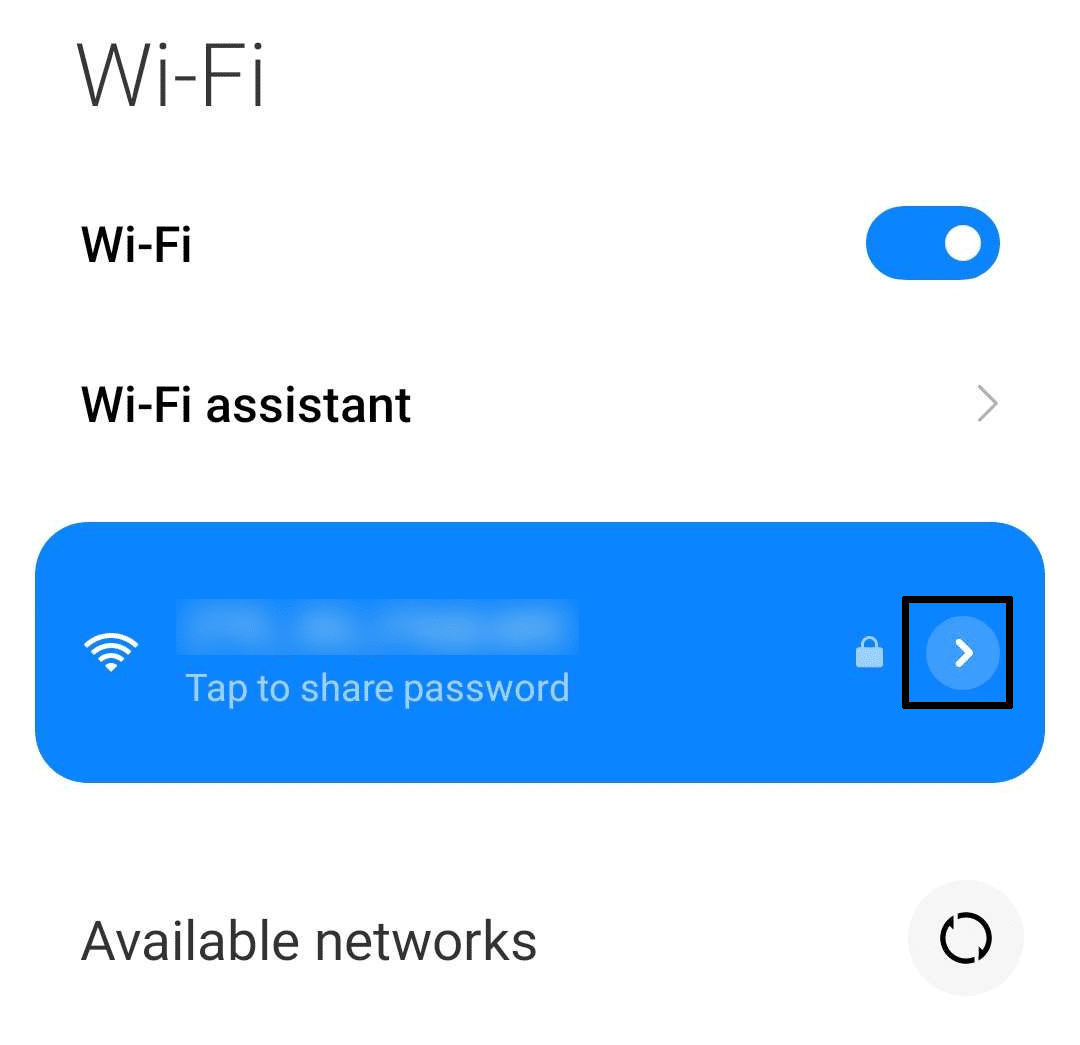
- In the Connection section, scroll and tap on “Forget Network”.
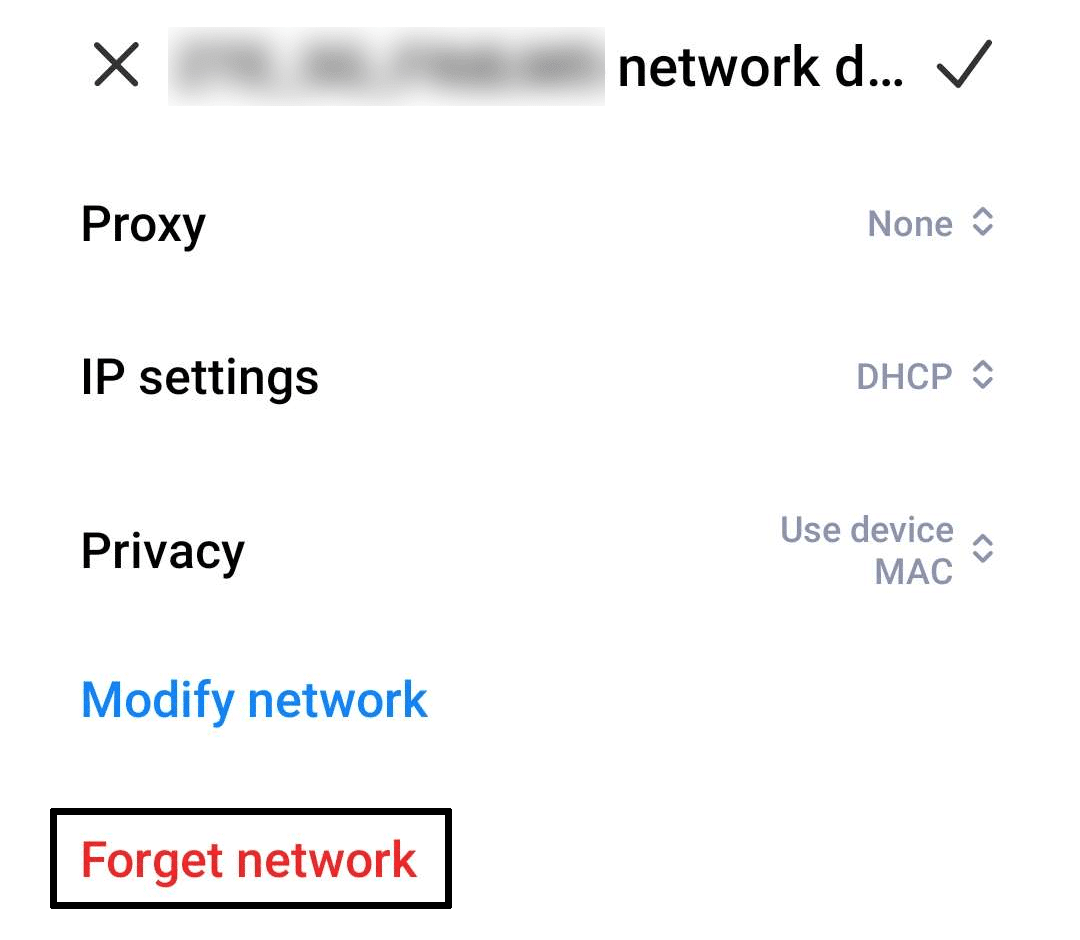
- Wait for 30 seconds before reconnecting to the network you just forgot.
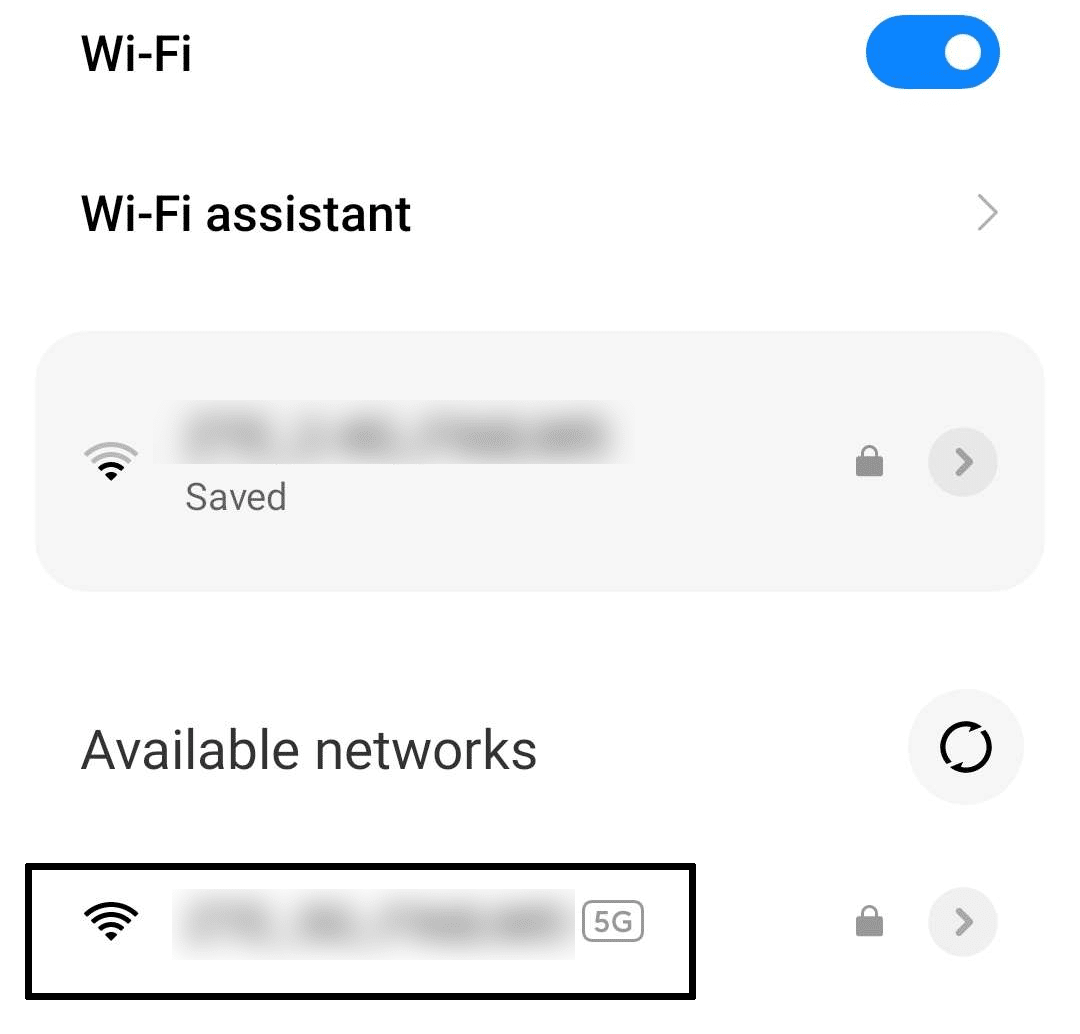
Following the steps above will quickly reset your internet connection with the network you were connected to. You will automatically be reconnected to your internet connection after following the steps for desktop users, while mobile users will need to manually re-enter their network password to reconnect to it.
11. Change Your DNS Settings
Similar to the previous step, aside from resetting your internet connection, you can also take steps to make it more stable, which will prevent any future problems that might come from an unstable connection.
Setting your DNS for your internet connection is a quick and easy way to improve your connection as it gives you a proper connection and internet route. Here’s how you do it:
For Windows
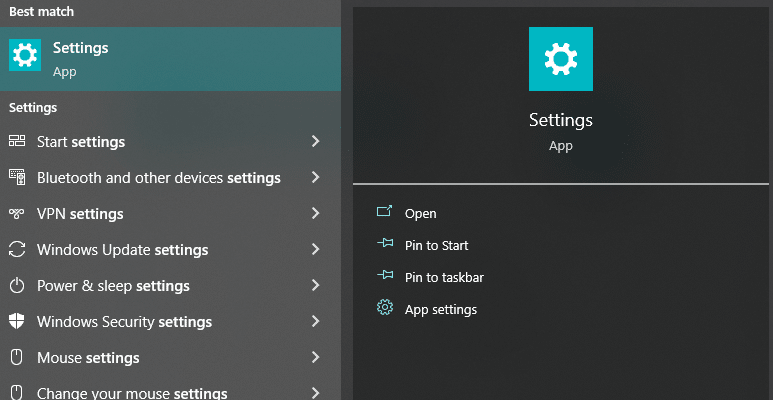
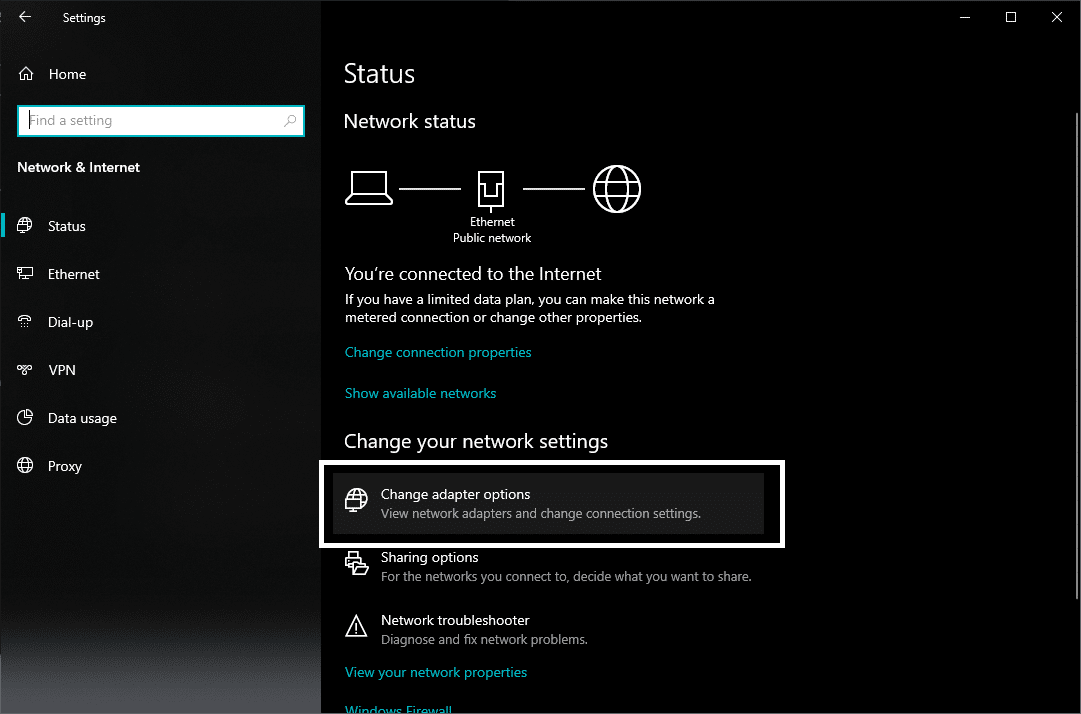
- Open your computer’s “Settings” ⚙️ by searching it up.
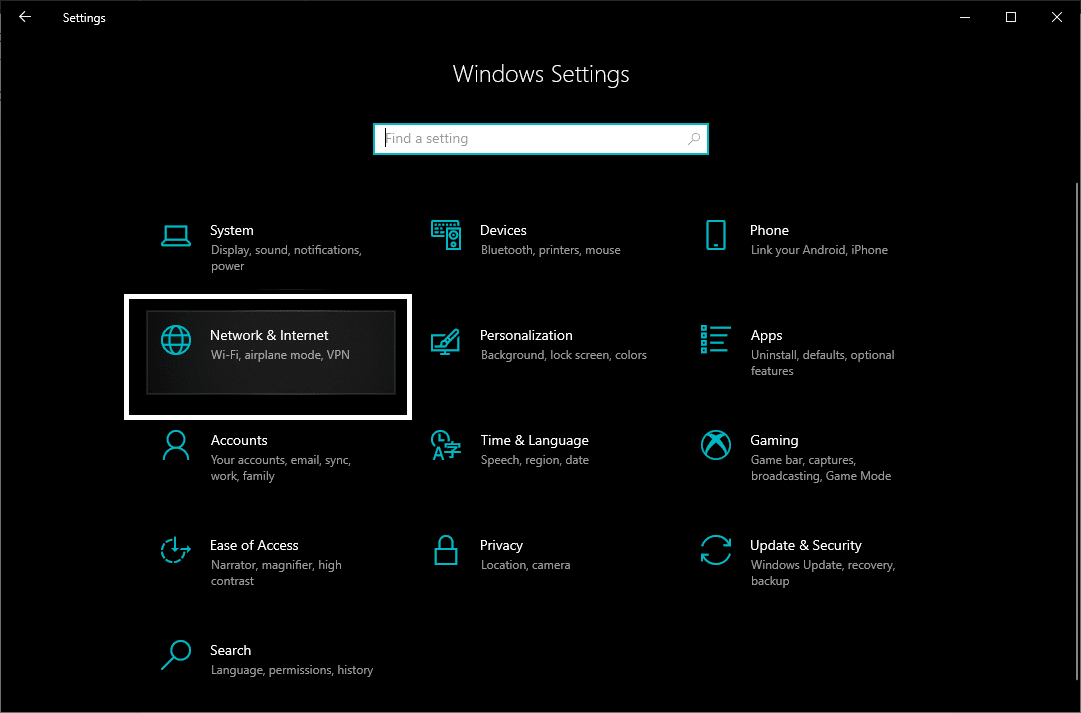
- Select “Network & Internet” 🌐 from the category list.
- In the Status page of your internet connection, select “Change Adapter Options” underneath “Change your Network Settings”.
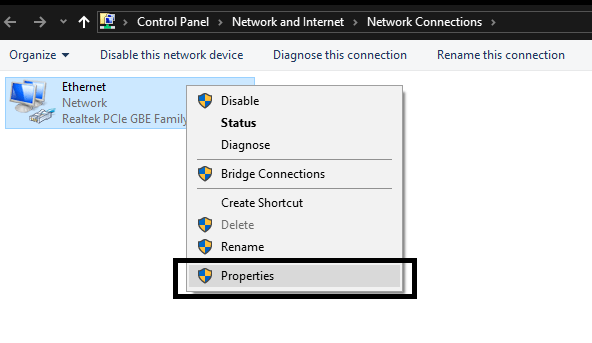
- Select the active network you are connected to (Ex: Ethernet) and right-click it. Select “Properties” from the menu.
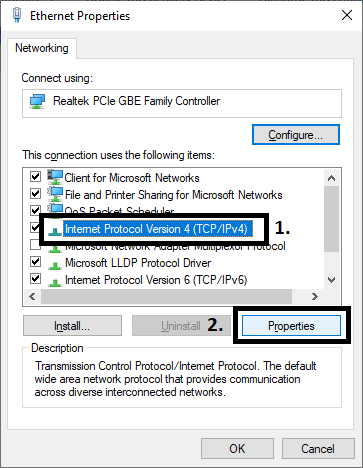
- Look for “Internet Protocol Version 4(TCP/IPv4)” and select it. After selecting the category, click on “Properties”.
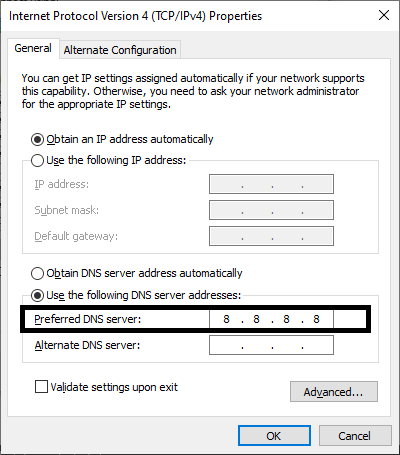
- Click on “Use the following DNS Server Addresses” instead of “Obtain DNS server addresses automatically”.
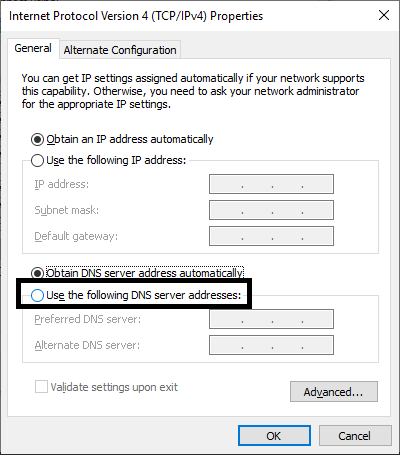
- In “Preferred DNS Server”, type in “8 . 8 . 8 . 8”.
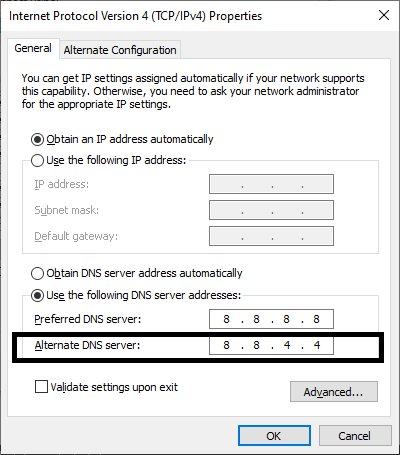
8. Afterward, in “Alternate DNS Server”, type “8 . 8 . 4 . 4”.
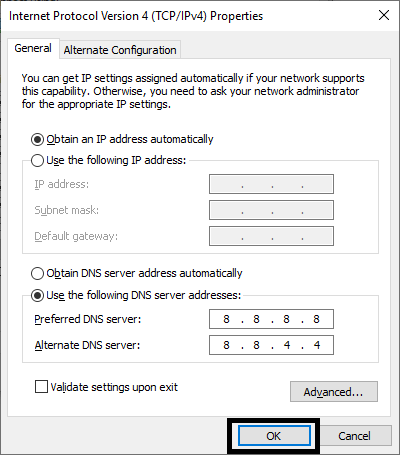
9. Click on “OK” to apply the changes and restart your computer
For macOS
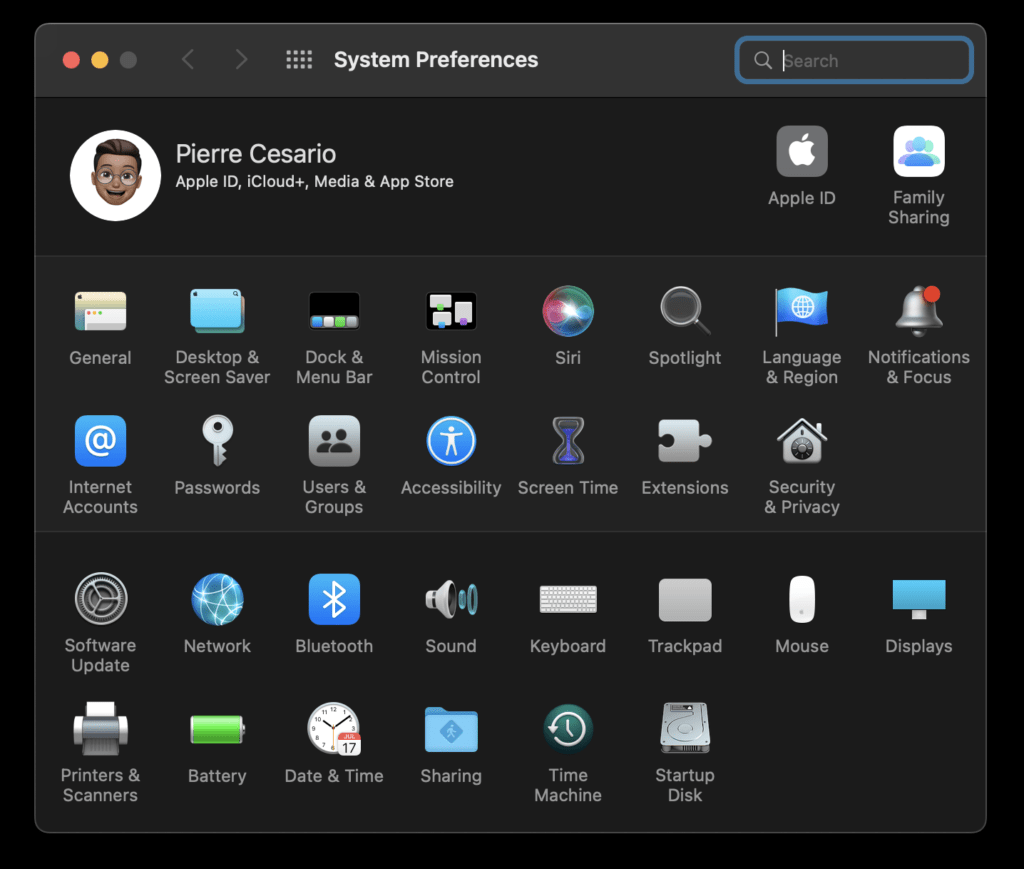
- Start by going to the top bar and clicking on the Apple icon.
- Then, in the drop-down menu, select System Preferences.
- In the newly opened window, click on Network in the bottom half of the window.
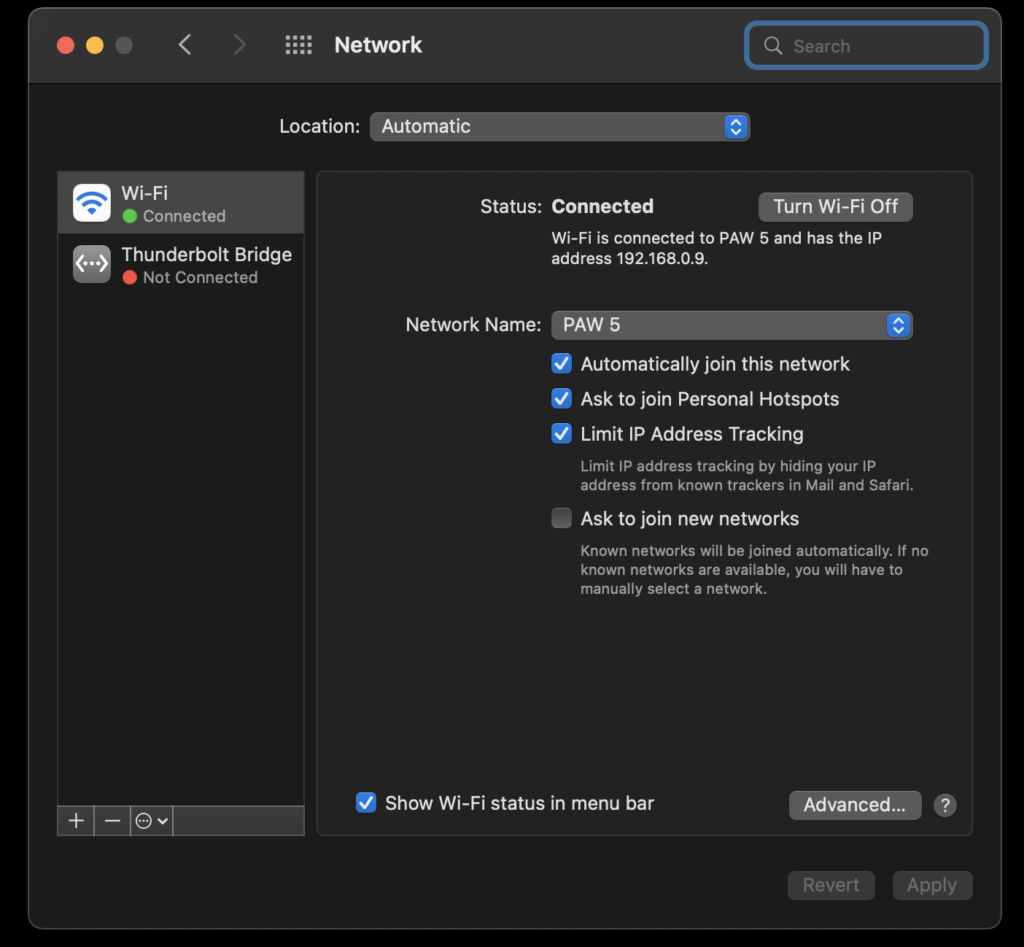
- Next, ensure your currently connected network adapter is selected in the left sidebar.
- Then, on the right-hand side, click on the Advanced button.
- After that, select the DNS tab in the newly opened window.
- Under the DNS Servers: section, click on the + icon to start adding new DNS servers – both the primary and alternate addresses.
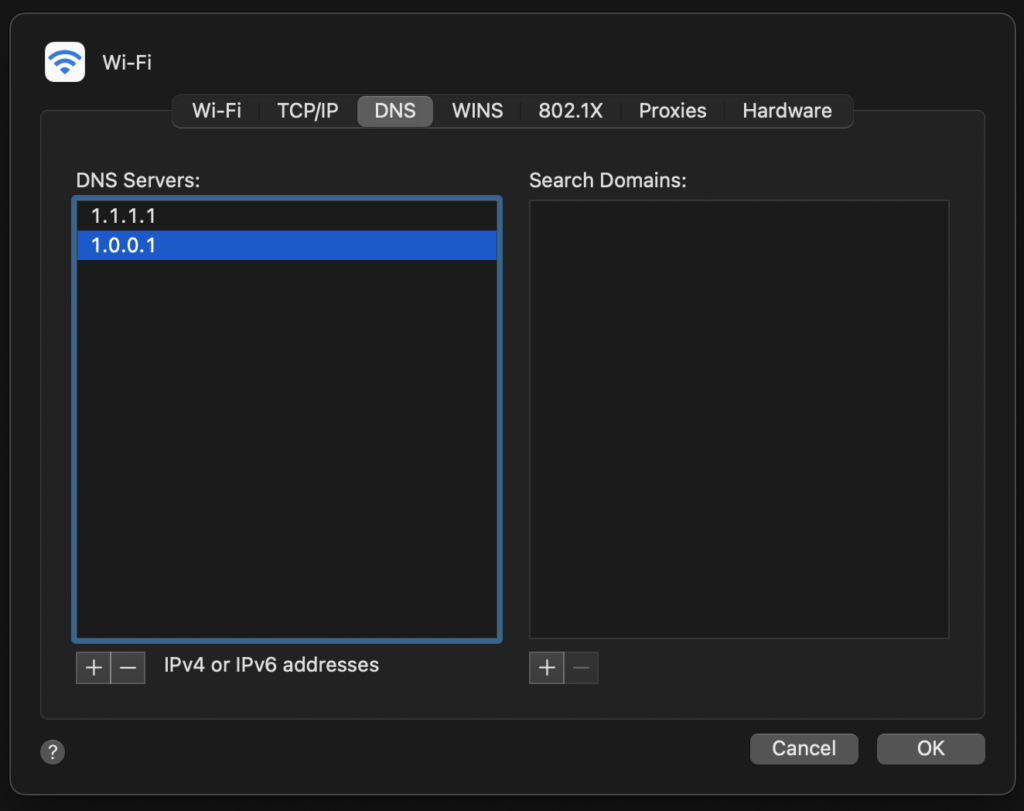
- Finally, once done, click on the OK button in the bottom right-hand corner of the window.
For Android
- Open your phone’s Settings ⚙️ app.
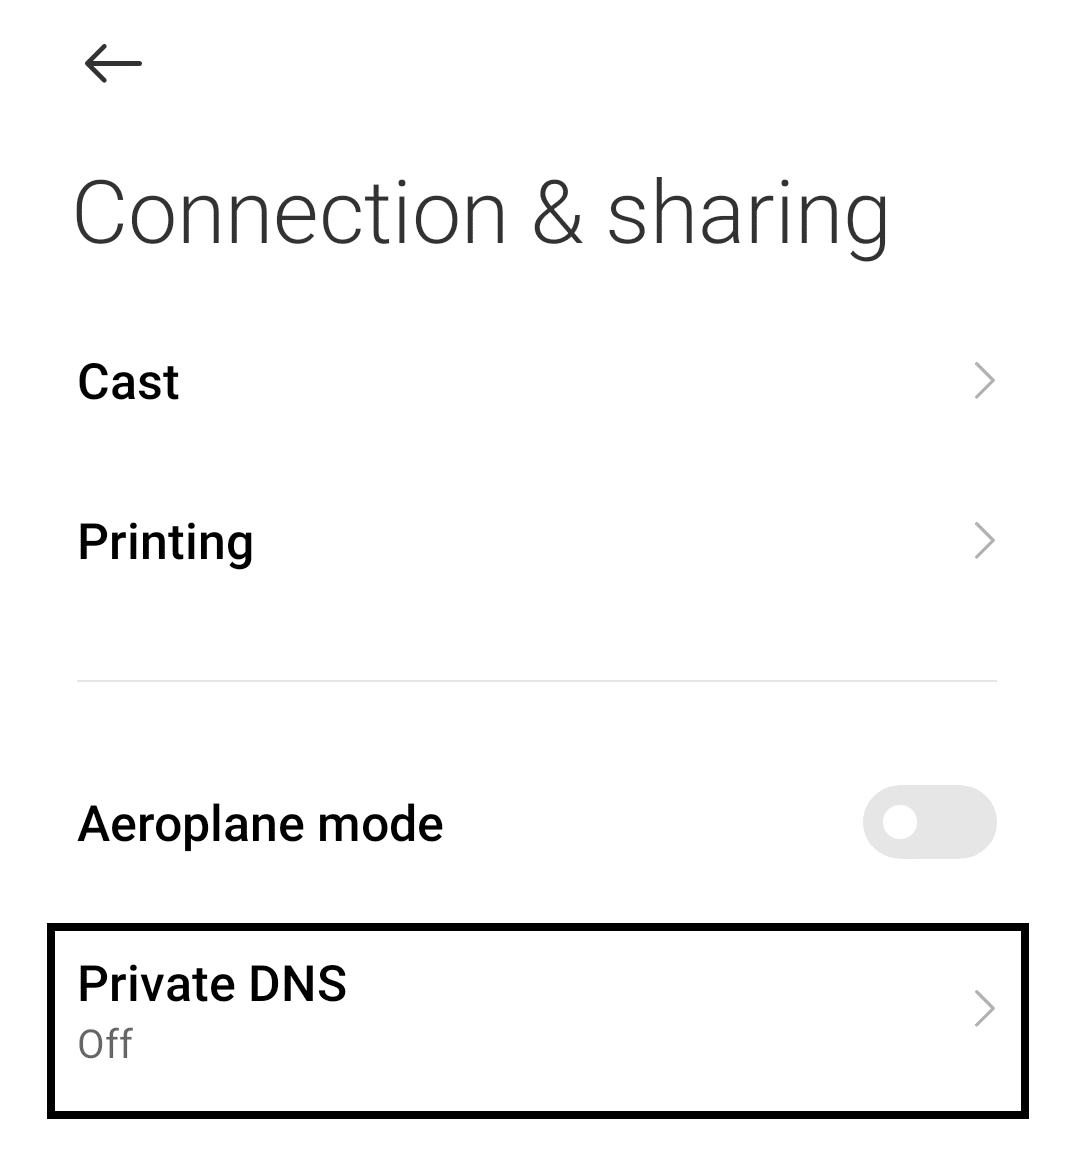
- Select “Connection & Sharing” or something similar like “Network & Internet”.
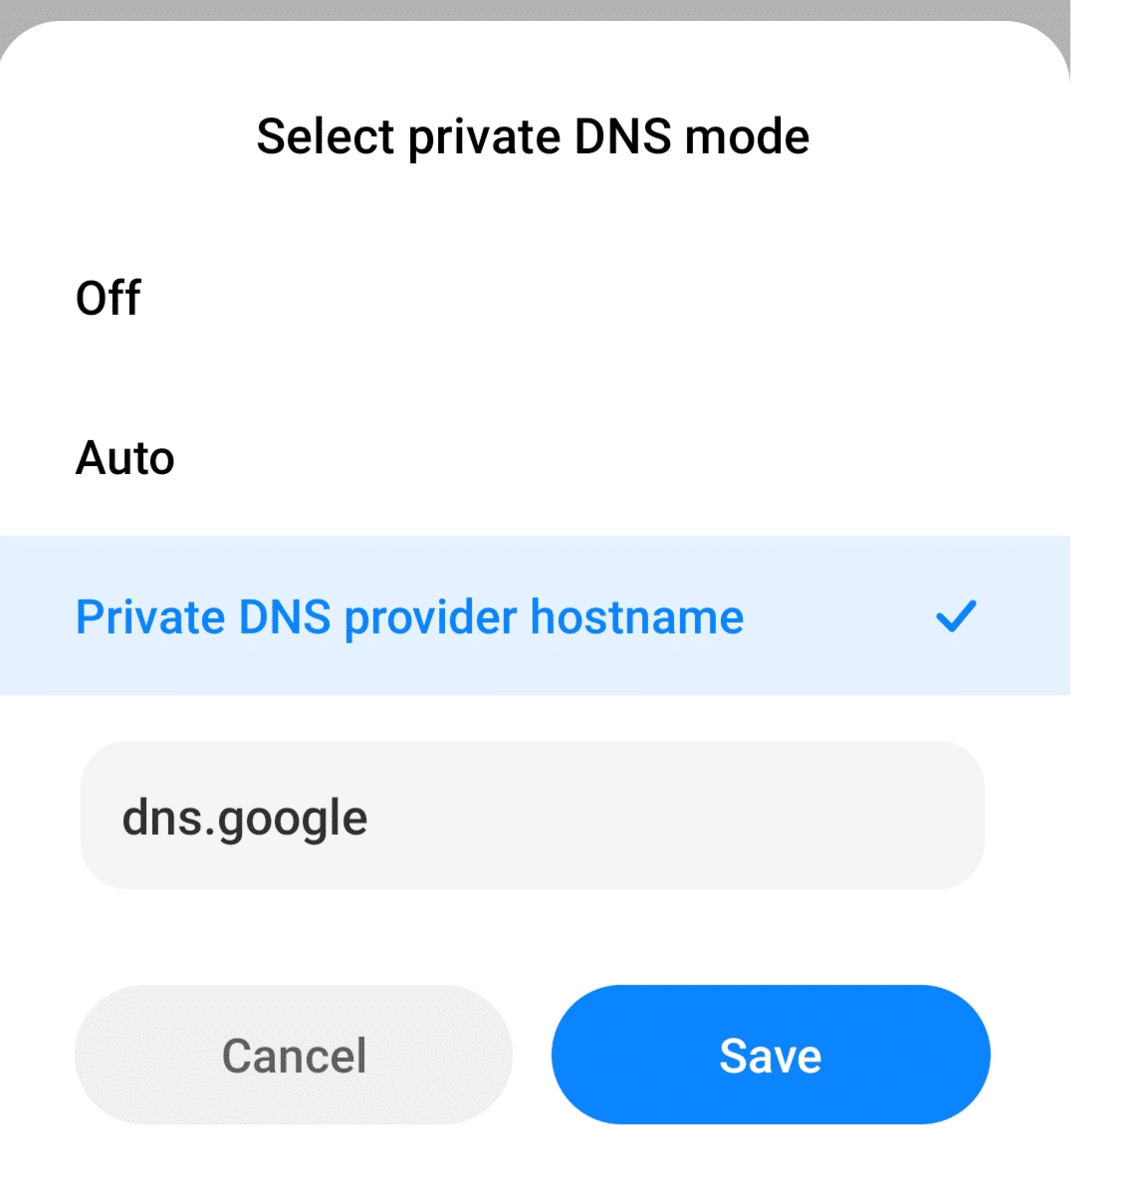
- Look for “Private DNS” and select/enable it.
- When asked to type a DNS Provider, type in “dns.google”. After typing in the provider, hit “Save” to apply the changes. You might want to consider restarting your phone before opening Discord.
Note: This method only works on Android 9 or higher. Older versions of Android don’t support the feature, thus making it impossible to use this fix.
For iOS
- Start by tapping on the Settings app on your device’s home screen.
- Then, tap on the Wi-Fi section. The available wireless networks in the range of your device appear.
- Next, tap the connected Wi-Fi network.
- On the new screen, tap on Configure DNS.

- After that, select Manual.
- Delete the current DNS servers and enter the new DNS servers as we mentioned in the table above. Either set of servers works well.

12. Try a Different Network Connection (e.g., Mobile Data)
If your internet problem doesn’t get solved after trying the steps above, its problem might be a result of the connection itself or your ISP. Connecting to another network or internet connection is the best way to address this, as this might be a unique problem to the previous connection.
Mobile users, laptops, and desktops that support Wi-FI can easily do this by connecting to another active network and testing from there. Mobile data and hotspot is a quick and easy ways to switch connections and can be easily done with a mobile phone.
For setups that don’t have the accessibilities mentioned above and rely on a LAN connection to access the internet, it is possible to still be able to swap your network connection through the use of your phone’s mobile data. You can do so through these steps:
- Connect your Phone to your Computer through a USB cable.
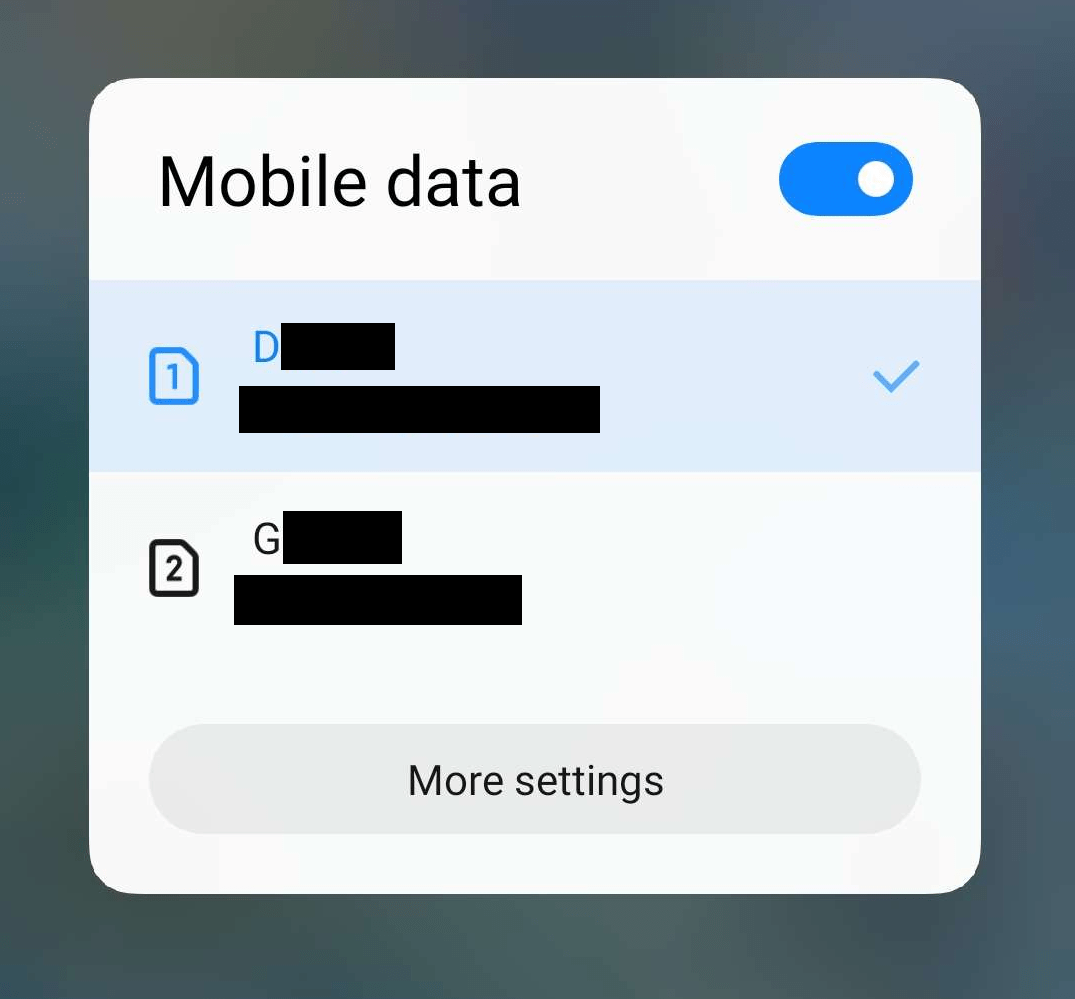
- Turn on Mobile Data on your Phone.
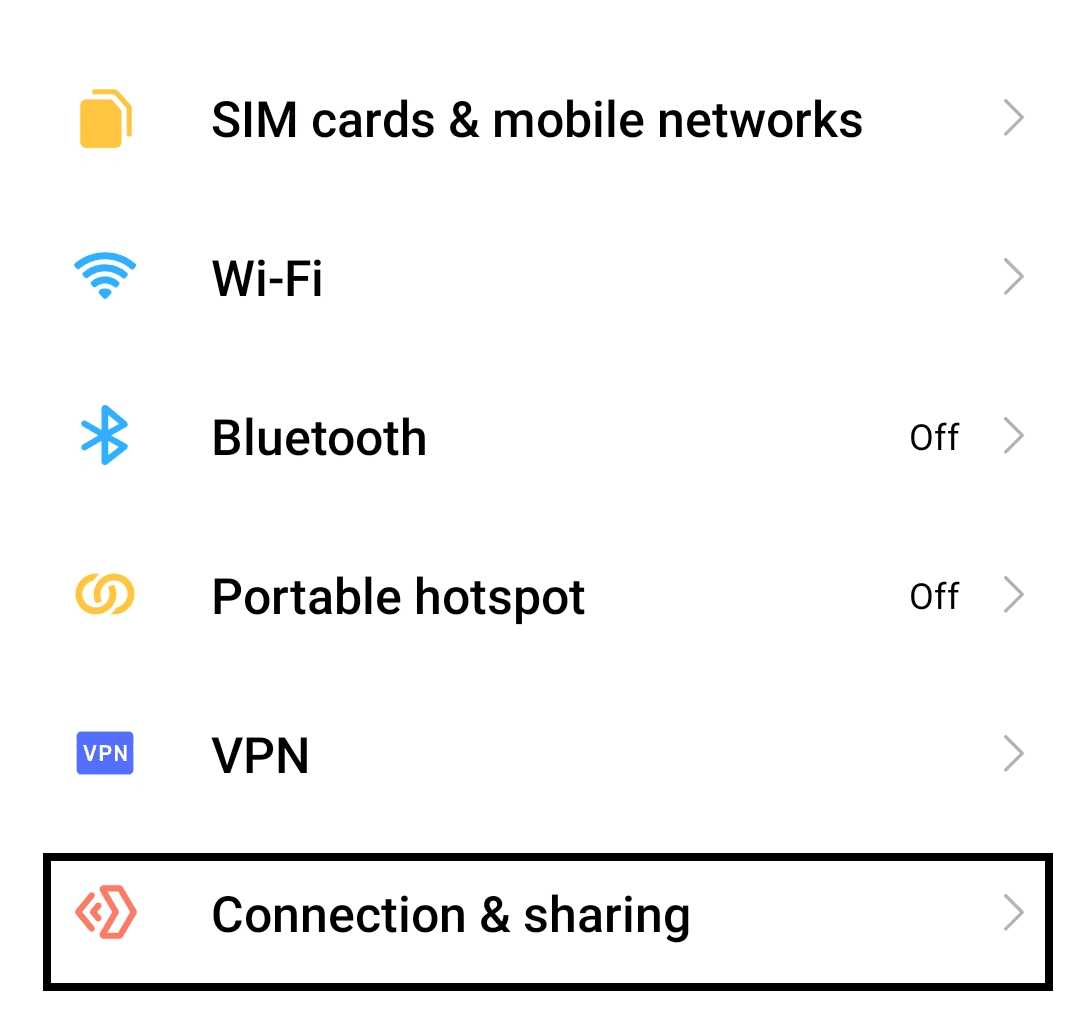
- Open your Phone’s Settings ⚙️ app.
- Navigate to your “Portable Hotspot” from your phone app.
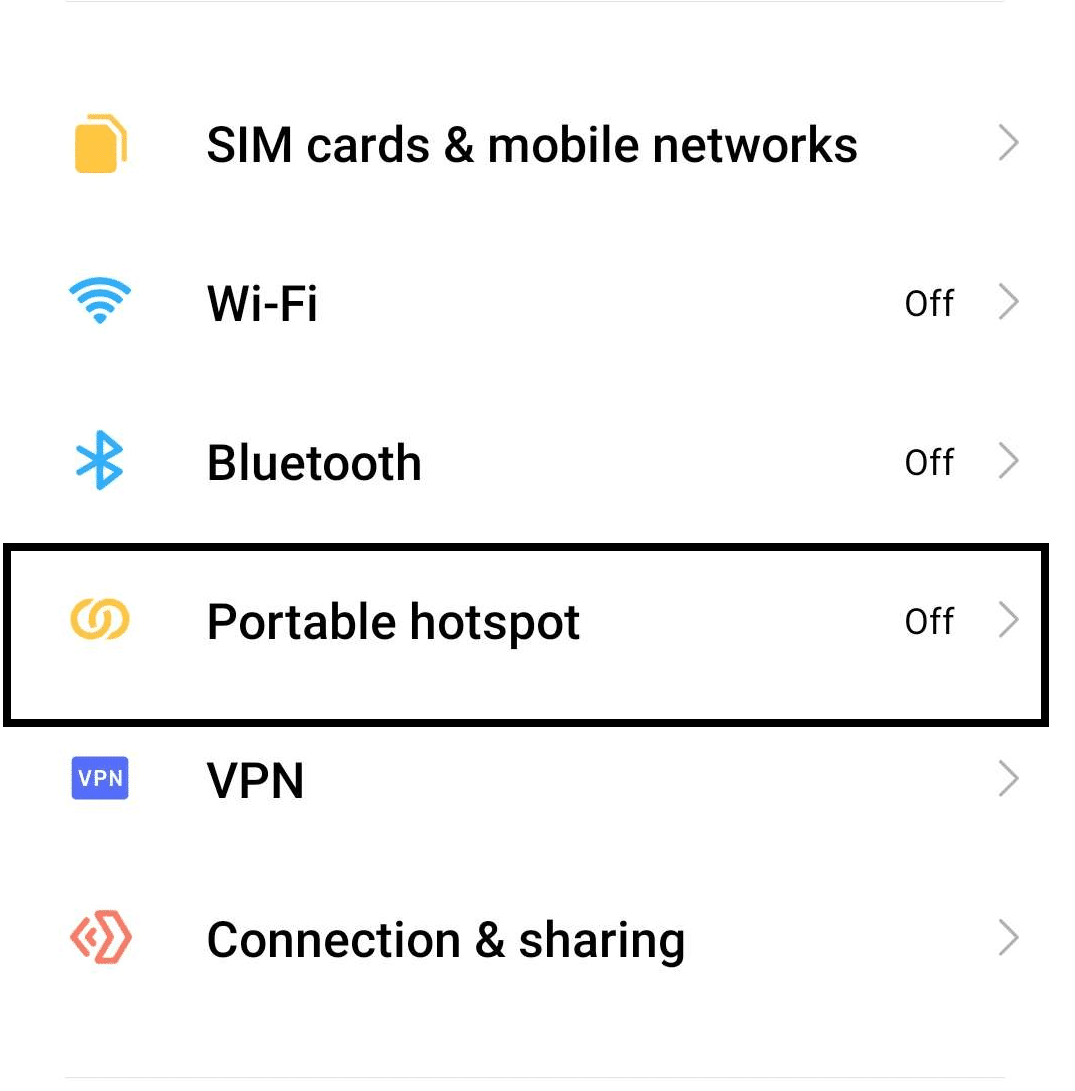
- Enable “USB Tethering” and keep your phone plugged in.
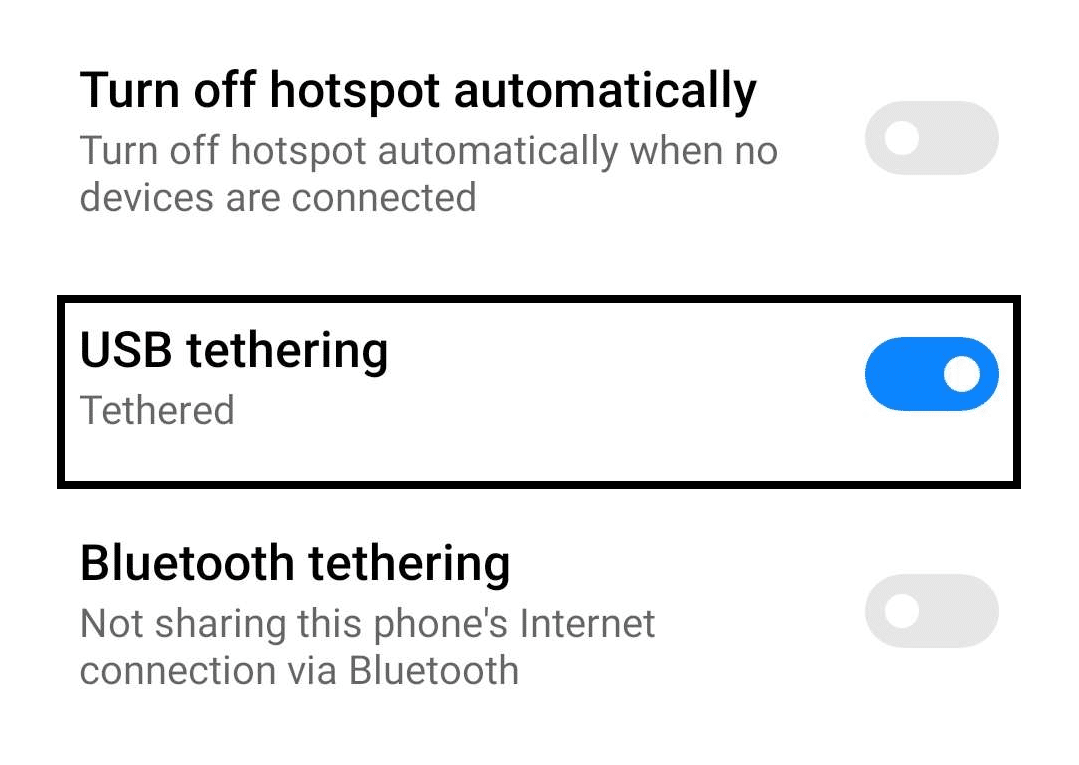
Following the steps above will allow your computer to connect to your phone’s mobile data. In order to make this step more reliable, we recommend disconnecting your LAN cable and waiting for a few seconds before opening Apple Music in your browser.
Conclusion
Streaming services such as Apple Music provide an easy avenue to get our daily dose of sweet and refreshing beats and melodies. Apple Music is one of the most popular streaming platforms available, as it gives you quick and easy access to music at an affordable rate and price.
Because of this, it is understandable how frustrating it can get if you aren’t able to use Apple Music in both its app and Web player versions. This guide here, with the 6 reasons and 12 fixes for the problem of Apple Music, is sure to help you get right back to listening back to your beats quickly.
All in all, let us know down below 👇 in the comments:
- If you found this guide helpful and which of the fixes worked the best for you?
- Are there any fixes we might’ve missed or should try out and add to the list?
- What is your favorite thing about Apple Music compared to other streaming platforms?
- Recent music you found and want to share with others.
Feel free to share this guide with anyone you find that are struggling with using Apple Music’s Web Player.