
Are you finding that desktop notifications and reminders from Slack are not working or showing up correctly for you?
Slack is a widely used VoIP/Instant Messaging platform for internal communication in companies — you probably use it for work. It’s easy to see why with all its integrations with other services such as GitHub, Jira, and Confluence, which are all staples in any tech company nowadays. Hence, if Slack is mainly a work-oriented application, notifications or reminders have a very high priority!
Now, what if it breaks? A lot can go wrong in your company very quickly! Since you’re on this article, that’s probably the case. You’ve already tried all the fixes that have come to mind, yet notifications and reminders still don’t work.
After some much-needed research, there are a bunch of other users reporting these same issues so rest assured that it’s not an isolated issue. These are the potential suspects that we’ve discovered:
- There are pending notifications
- Slack’s servers are not functioning correctly
- Your Internet connection is insufficient
- Your device’s network’s settings are preventing notifications
- Slack’s notification settings need to be configured
- Your operating system’s notifications settings need to be configured
- The Slack app may have corrupt files
- The Slack app needs to be updated to receive bug fixes
As such, this guide provides 18 fixes when you find that desktop notifications and reminders for Slack don’t come through or aren’t working correctly. Fixes are listed from easiest to hardest, as per usual, so that you can get your notifications back as quickly as possible!
Like any good communication tool, Slack is available on a variety of platforms for your convenience. Hence, we’ve prepared instructions on how to solve this issue on Windows and macOS. The same concepts apply if you wish to do it for the web version, of course.
Is the issue happening on your mobile device? We’ve got a separate guide for that here!
Ready to get your notifications back? Let’s dive in!
1. Mark All Pending Notifications as Read
First up, we recommend marking all your pending notifications or pings as read. This is a fix that even Slack themselves recommend, so it’s worth a try since it can be done in seconds.
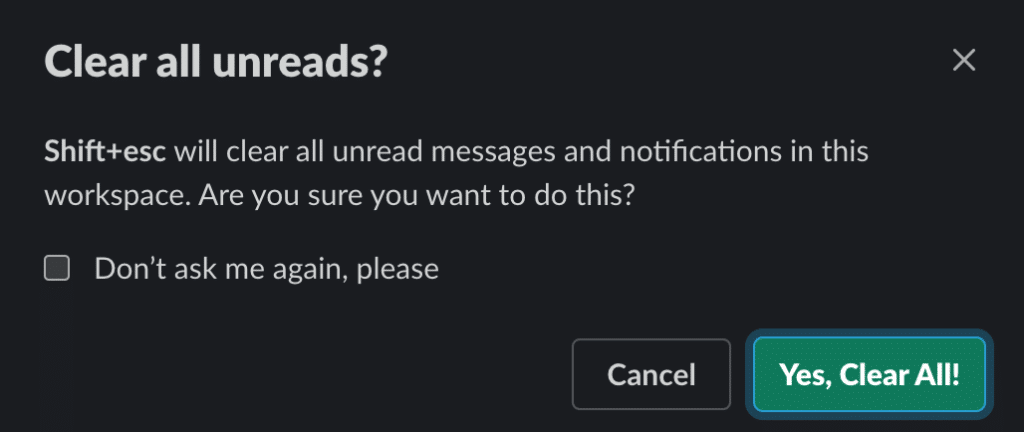
You don’t have to manually go to each workspace and channel to clear your notifications and unread. You can just use the handy built-in shortcut on the desktop (and only for desktop!):
- Start by opening up the Slack app and bringing it to focus.
- Then, go to your desired workspace on which you want to clear notifications and unread.
- Finally, simply press Shift + Esc on your keyboard.
- If you haven’t ticked the Don’t ask me again, please box, you’ll need to confirm with Yes, Clear All!
2. Check Slack’s Server Status
If you’re reading this, chances are that the first fix didn’t work. Before we proceed any further, it’s a good idea to check if Slack’s servers are functioning correctly. In other words, it’s at this stage that we highly recommend you check if there are server-side issues.
Essentially, notifications not working could very well be a server-side issue meaning that no matter what technical or time-consuming changes you do on your end, notifications still won’t come through! There are a variety of causes that aren’t under our control such as server maintenance, outages, downtimes, ongoing updates, or possibly even attacks.
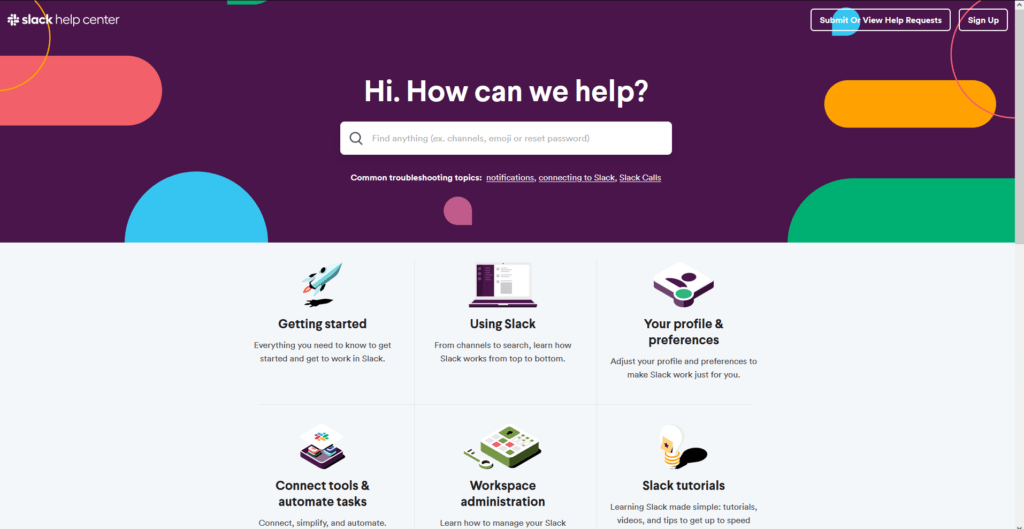
Fortunately for us, Slack has a dedicated website for checking its server status — status.slack.com.
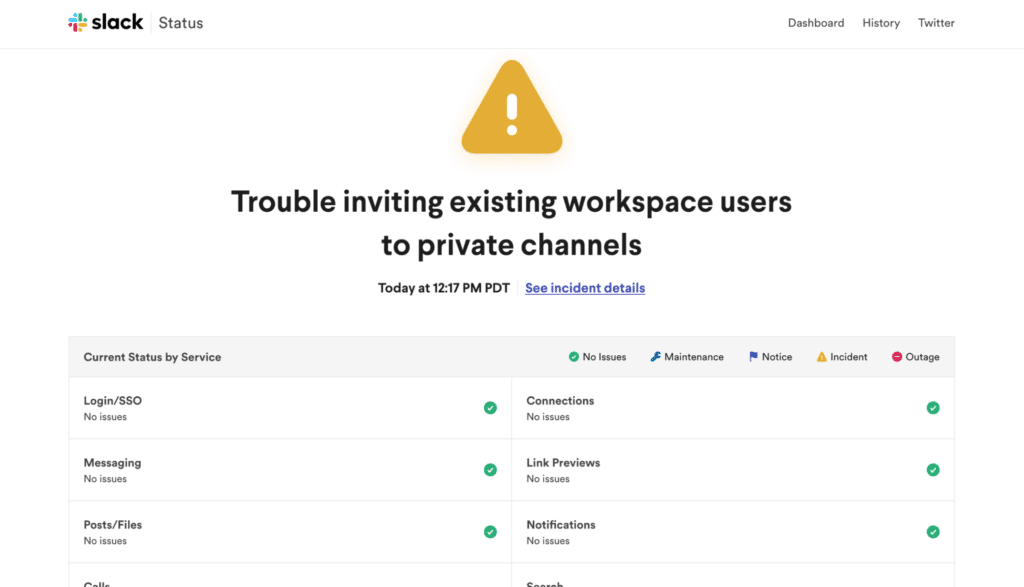
It’s a really simple website with a simple layout – which is what we want – yet it shows a detailed overview of all the possible issues with all of Slack’s services such as Login, Messaging, and Link Previews. One of them is Notifications, so you can determine if it’s a server-side issue easily.
Of course, it’s better to refer to two sources. So, we recommend referring to the vast selection of other third-party server status websites out there in conjunction with Slack’s status site. The one we highly recommend is Downdetector due to all its various features and ease of use.
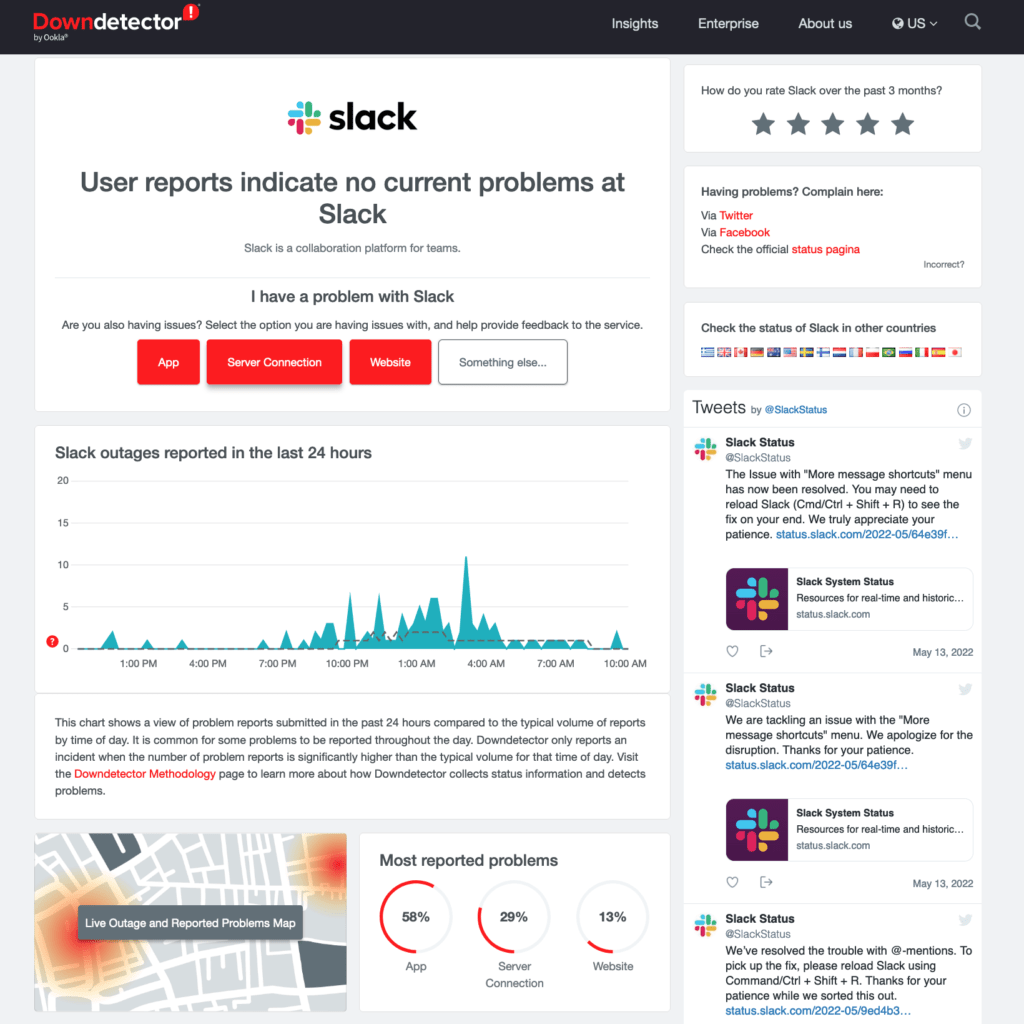
We like how Downdetector displays the current server status right in the middle, similar to Slack’s status site. As a result, determining whether or not something is wrong is relatively simple.
Of course, it’s also a good idea to review all of the user’s reports from the previous 24 hours to see if your experience matches that of others. On the right, you’ll find a useful embed of Slack’s official Twitter account, which discusses concerns reported by users. It’s yet another easy approach to see if others are having the same issue.
Need more stats to back it up? We particularly appreciate Downdetector’s awesome Live Outage and Reported Problems Map. Since Slack servers are scattered all across the world 🌎 to accommodate everyone and provide low latency, only certain servers may be experiencing issues. So, in this case, perhaps the ones you or your server is connected to. That’s why it’s good to see if your specific area is experiencing issues.
Lastly, there’s also a Most reported problems section right beside the heatmap. Using this, you’ll know the distribution of problems that Slack’s users are having which can help cement what kind of problems to expect on your end.
Alright, with all this information at our disposal, we can finally figure out if the notifications are a server-side issue. Picture this: Slack’s official server status site and Downdetector are saying that people are having issues with notifications or reminders, and it also doesn’t work on both the web browser and app. Unfortunately, they’re likely experiencing server-side troubles in that situation, and there isn’t much you can do about it.
On the other hand, Slack is likely to be aware of this by the time you are, and their official Twitter status account will report it. It normally takes a few hours to a day, so you’ll have to revert to other communication methods in the meantime. Step 12 provides links to Slack’s official support channels as well as instructions on how to properly report an issue to them, so you may skip the rest of the steps.
Still not sure? You can certainly continue troubleshooting with our other steps — it doesn’t hurt, especially if you have extra time to kill.
3. Run an Internet Speed Test
Next up — is your Internet connection’s speed and stability. We already know that Slack’s servers play a role in allowing users to receive notifications. By extension, your Internet connection and its speed and stability also become a factor in whether you reliably receive notifications. So, it’s a good idea to test it out.
As you may already know, there is a multitude of choices when it comes to testing your Internet connection. However, we recommend running Ookla’s speed test to determine if it’s the root of the issue since it’s quick, easy, and provides all the information you need.
You can either run it through your web browser or download its mobile app. So, here are the appropriate links:
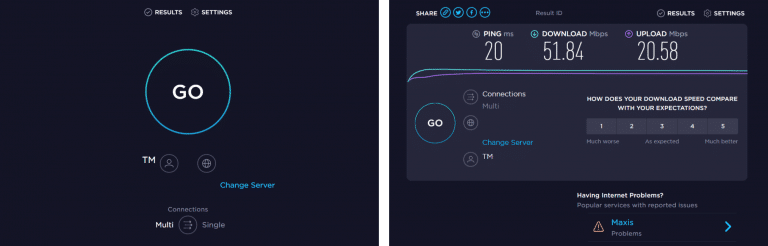
Now, how do we interpret these results? Notifications don’t need that much bandwidth honestly, so we advise upload and download speeds of at least 5Mbps, which shouldn’t be too hard of a task to achieve. Latency also doesn’t matter too much for notifications as long as it isn’t outrageous, but we advise a ping of under 100ms — the lesser, the better!
If your Internet connection isn’t up to snuff, you can proceed with the rest of the fixes listed below, or first try step 7, which teaches you how to go about switching your network.
4. Restart the Slack Application
We advocate restarting the program as one of the first solutions when it comes to issues like these. It’s quick and simple to accomplish, and it usually solves most application bugs. When software becomes problematic, a simple reset may be the boon that you need.
When you click the ‘X’ in the corner to restart Slack on the desktop (Windows/macOS), we need to be sure it’s entirely shut off. By default, Slack treats the ‘X’ as a way to minimize the program rather than completely shutting it down, so it runs in the background but isn’t visible.
Do you mainly use the web version of Slack through a web browser? If so, simply closing the tab and loading it back up will do the trick.
Else, here’s how to completely restart the app properly for the native apps on Windows and macOS:
Windows
- To start, open the Task Manager by pressing Ctrl + Shift + Esc on your keyboard.
- Simply select the Slack app, then click on End task in the bottom-right corner of the Task Manager’s window.
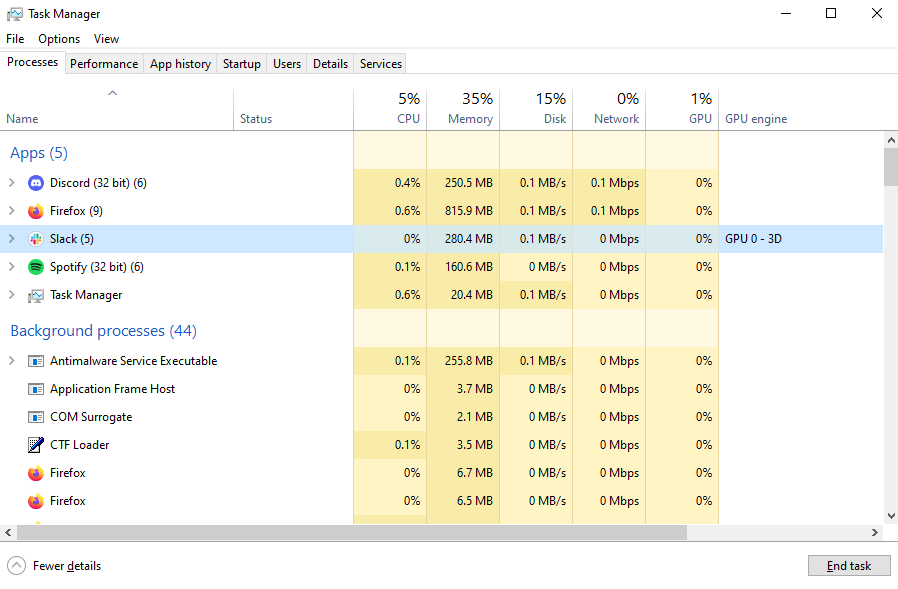
- After that, you can start Slack like you normally would.
macOS
- Start by opening the Force Quit Application menu by holding down Command + Option + Esc.
- In the menu, select Slack and click Force Quit.
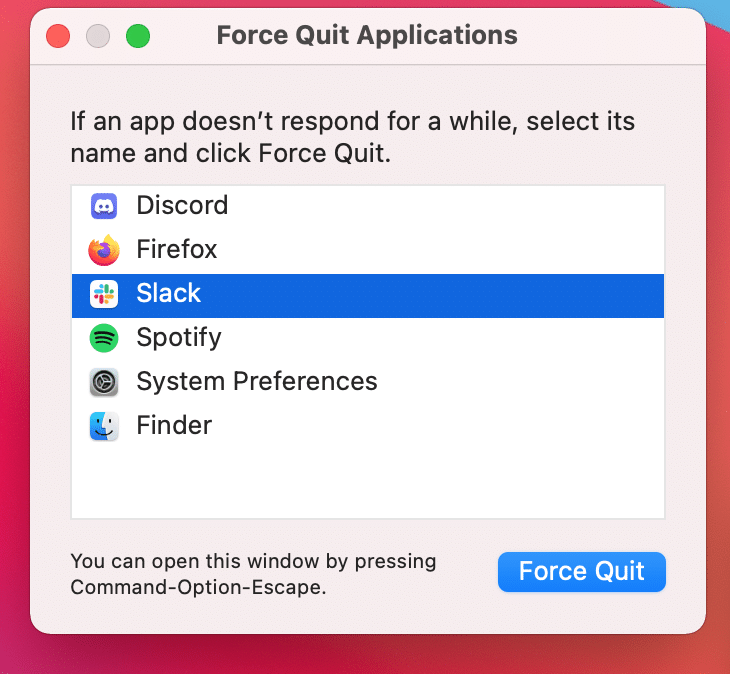
- Finally, start Slack back up like you normally would.
5. Unpause Slack Notifications
Another built-in feature of Slack is the ability to pause notifications for any period you desire. Of course, this is a great feature to have for when you’re on your lunch break or a vacation but it could also be something you forgot to disable once it was time to get back to work. As such, it wouldn’t hurt to check if you left it on.
Here’s how to unpause Slack notifications on your desktop:
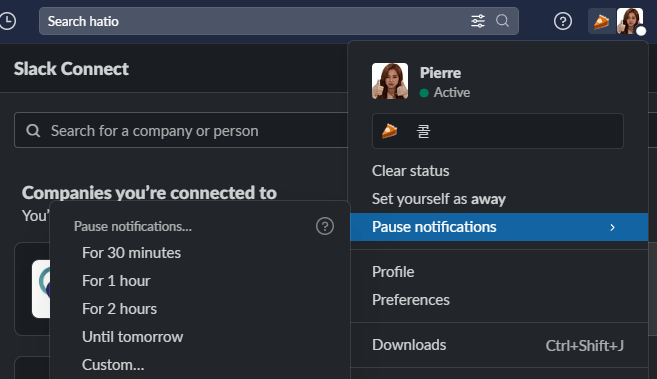
- First, open up the Slack app.
- Then, click on your profile photo around the top right corner of the app.
- In the drop-down menu, hover your cursor over the Pause notifications entry.
- Finally, click on Resume Notifications. This will only show if notifications were already paused.
6. Configure Slack Desktop Notification Settings
Have you never received any notifications at all from Slack? Or perhaps you want to receive notifications for all messages but you aren’t. It may be due to the notification settings in Slack itself. Being just one of the many notification settings, this is the first one we advise you to check since it’s the biggest and easiest one to troubleshoot.
Slack can be configured to send notifications for:
- All messages
- Only direct messages, mentions, and keywords
- Nothing
In addition to this, you can also use Slack’s other built-in notification handling features to make notifications only come in at certain times.
There’s a lot to go through here, so we’ll start with ensuring the notification settings aren’t set to Nothing.
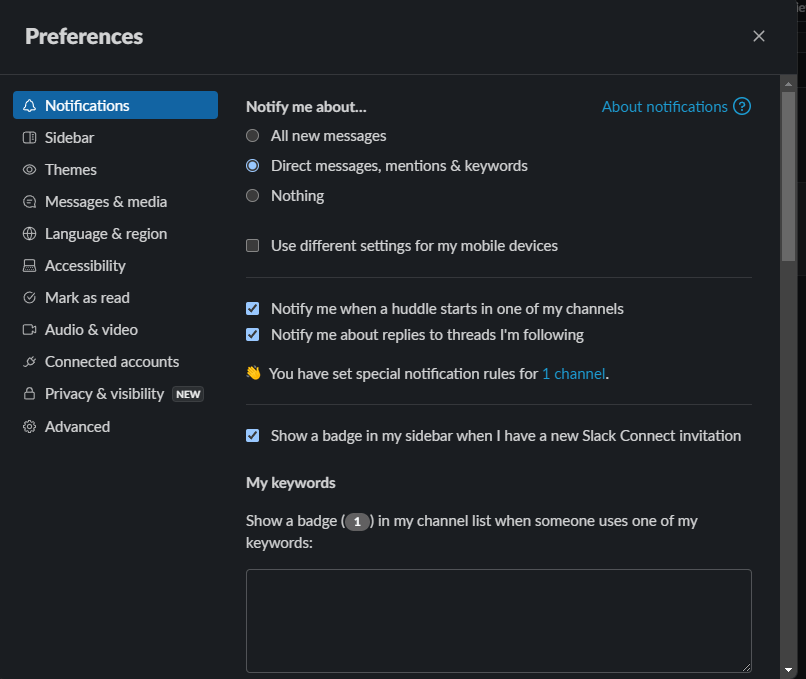
Notify Me About…
Here’s how to configure all of Slack’s notification settings on your desktop:
- First, click on your profile icon around the top right corner of the app.
- In the drop-down menu, click on Preferences.
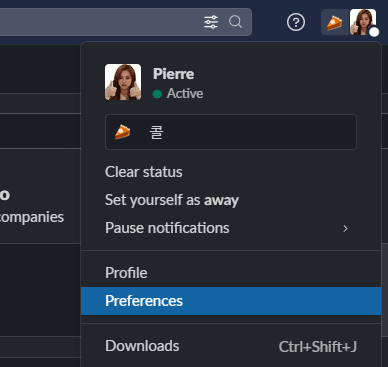
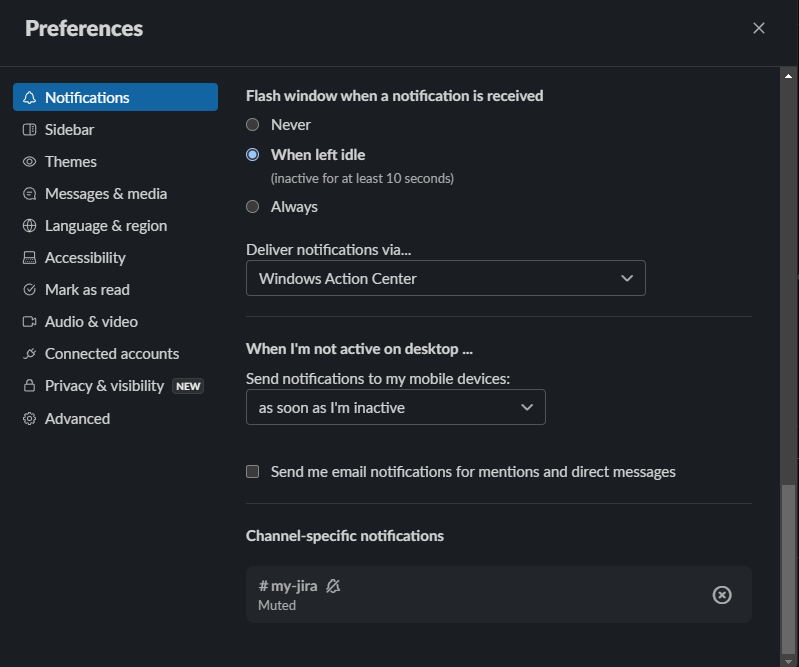
- Then, in the Preferences pop-up menu, ensure you’re in the Notifications tab.
- Finally, under the Notify me about… section, click on the radio button for either All messages or Only Direct messages, mentions & keywords depending on your preference.
- Just below it are some additional checkboxes that you may wanna configure too.
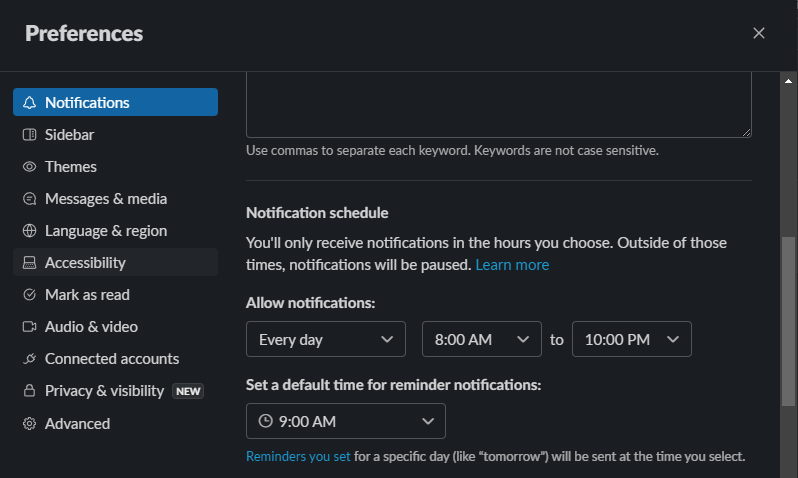
Notification Schedule
Another built-in Slack feature, a particularly new one at that, is the notification schedule setting. It can be used to only allow notifications to come through for a certain period of the day – outside those hours, notifications automatically get paused. Perfect for maintaining your work/life balance, but detrimental when you need to get notifications if configured wrongly!
Continuing from the Notify Me About… section:
- In the Preferences pop-up menu, ensure you’re in the Notifications tab.
- Scroll down until you see the Notification schedule section.
- Here, configure the timing for when you prefer notifications to come through.
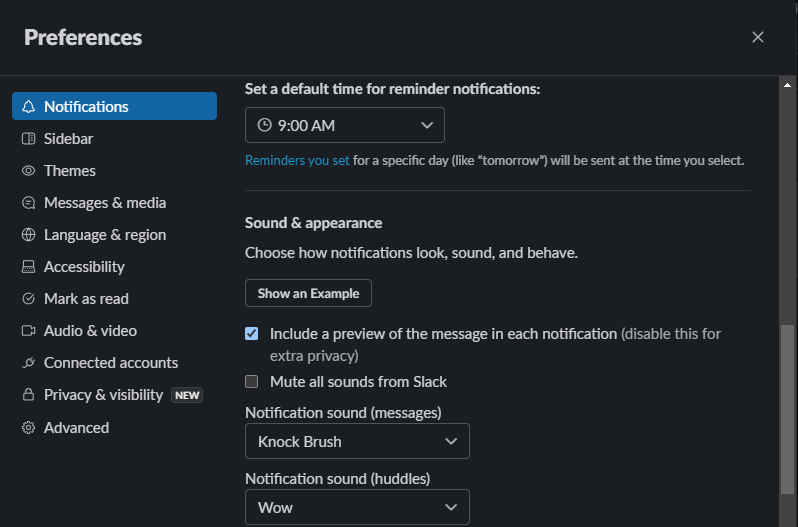
Notification Sounds
For better or for worse, the Slack app has its setting to enable or disable Slack notification sounds. It’s getting a bit convoluted as most operating systems have their settings like it anyway, but we digress. It’s definitely worth a check if you aren’t receiving that signature ding from Slack.
Continuing from the Notification Schedule section:
- In the Preferences pop-up menu, ensure you’re in the Notifications tab.
- Scroll down until you see the Sound & appearance section.
- Here, make sure that the Mute all sounds from Slack checkbox isn’t ticked.
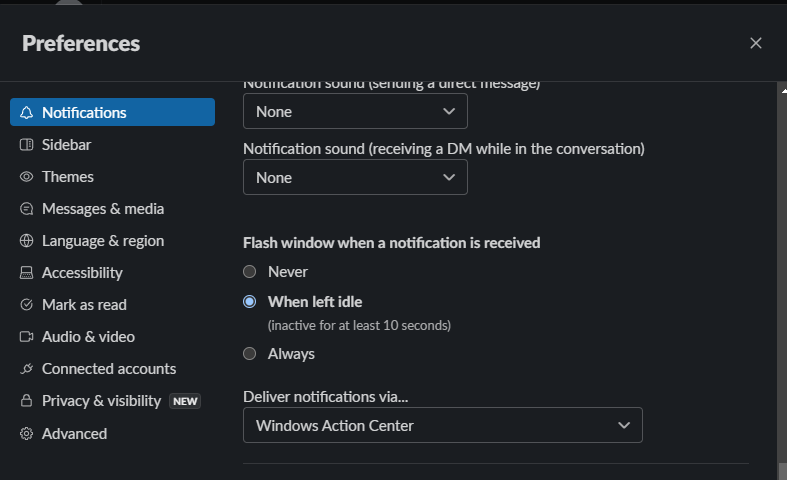
Notification Delivery Via… (Windows)
Another option that can be configured is how these notifications reach you: either through Slack itself or through Windows’ Action Center. Slack themselves say that this could be the reason why your notifications are coming in delayed. Of course, this is only for Windows users.
Continuing from the Notification Sounds section:
- In the Preferences pop-up menu, ensure you’re in the Notifications tab.
- Keep scrolling a bit more until you see the Delivery notifications via… header.
- Here, change it to Slack’s built-in notifications if it’s on Windows Action Center and vice versa.
Unmute Channel-specific Notifications
Perhaps getting notifications for everything, except for one channel in particular. You may have muted that specific channel previously, but completely forgot to unmute it. Fortunately, Slack aggregates all channels for which notifications have been modified here too.
This is how you can access and disable them.
Continuing from the Notification Sounds section:
- In the Preferences pop-up menu, ensure you’re in the Notifications tab.
- Scroll down until you see the Channel-specific notifications section.
- Here, press the little x on the right side of any of the channels you wish to unmute.
7. Configure Windows Notification Settings
Are notifications or reminders still not coming through? We’ve already run through the Slack app’s notification settings, so now it’s time to check if everything is alright on the OS side, Windows in this case. There are two main settings to address: Notifications & actions and Focus Assist
Here’s how to configure notifications and actions:
- Start by bringing up the Windows Start Menu by pressing on the Windows icon in the far left corner of the taskbar.
- Then, type Notifications & actions and then click on the Notifications & actions tile.
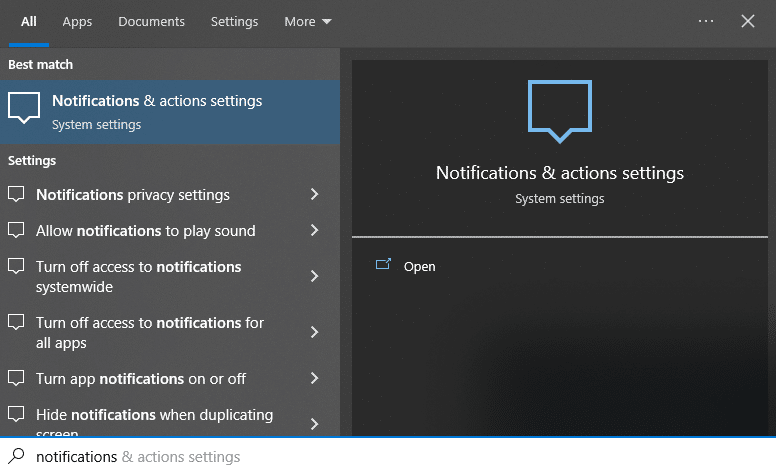
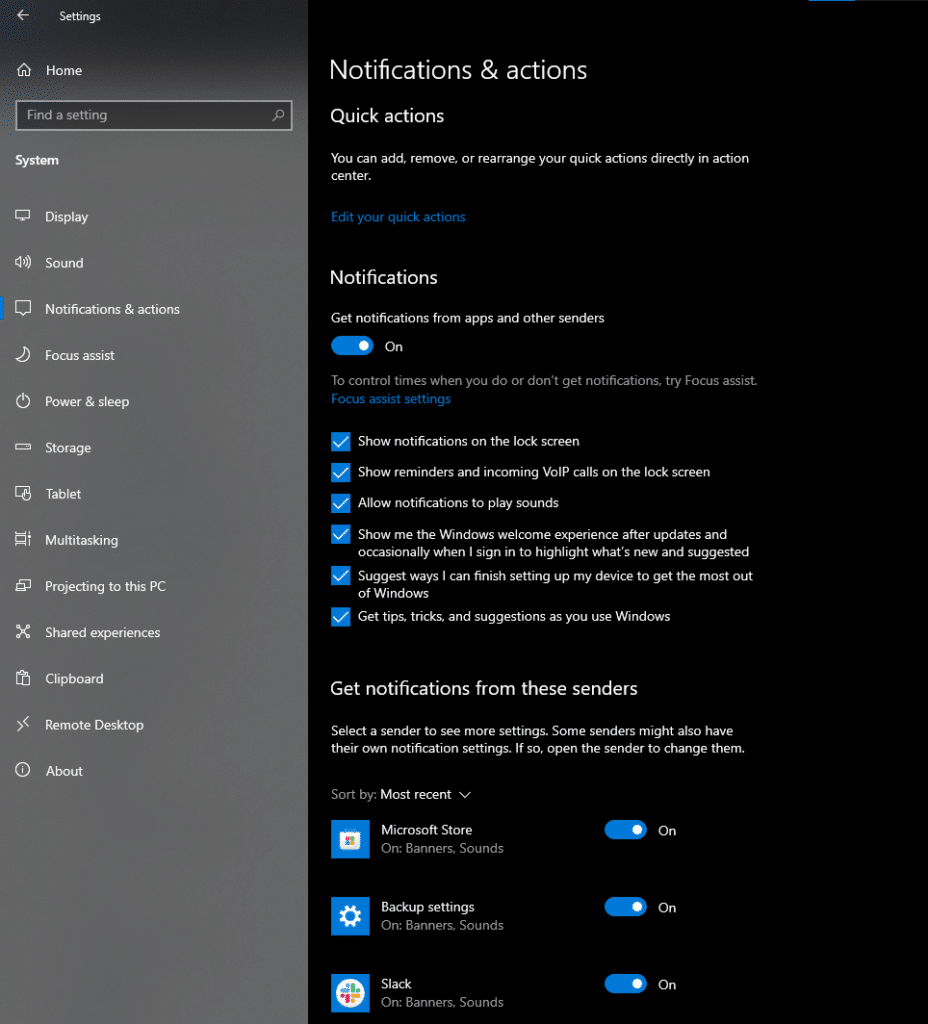
- Here, ensure the Notifications toggle is set to On.
- Finally, in the Get notifications from these senders section, ensure the toggle for Slack is also set to On.
8. Turn Off Focus Assist (Windows)
Focus Assist, which was initially called Quiet Hours, is a handy Windows 10/11 feature that mimics the Do Not Disturb mode on other operating systems. Essentially, it’s meant for high-concentration sessions where you can’t be distracted – it blocks any incoming notifications except for those which you deem important. See how this feature could be the culprit behind Slack notifications not working? Similar to the previous fix, perhaps you forgot to disable it, so notifications are still blocked.
This is how to turn off Focus Assist in Windows 10/11:
Method 1: Through the Action Menu
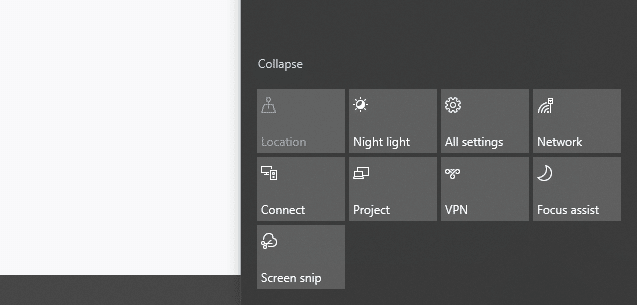
- To start, click on the little message icon on the far right side of the taskbar to open the Action Menu. Alternatively, you may press the Win + A keys on your keyboard to bring it up.
- Then, in the newly opened sidebar, click on the Expand button. If it has already been expanded, it would say Collapse instead.
- Then, click on the Focus Assist tile until it becomes greyed out and says Focus assist.
Through the System Settings
- Start by bringing up the Windows Start Menu by pressing on the Windows icon in the far left corner of the taskbar.
- Then, type Focus Assist and then click on the Focus Assist tile.
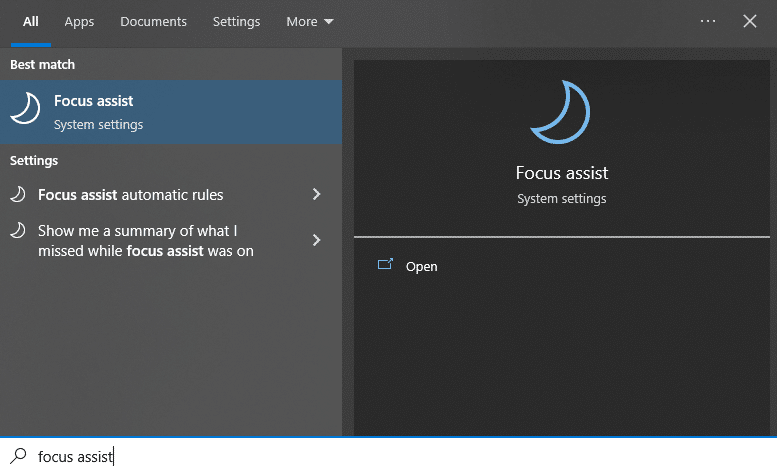
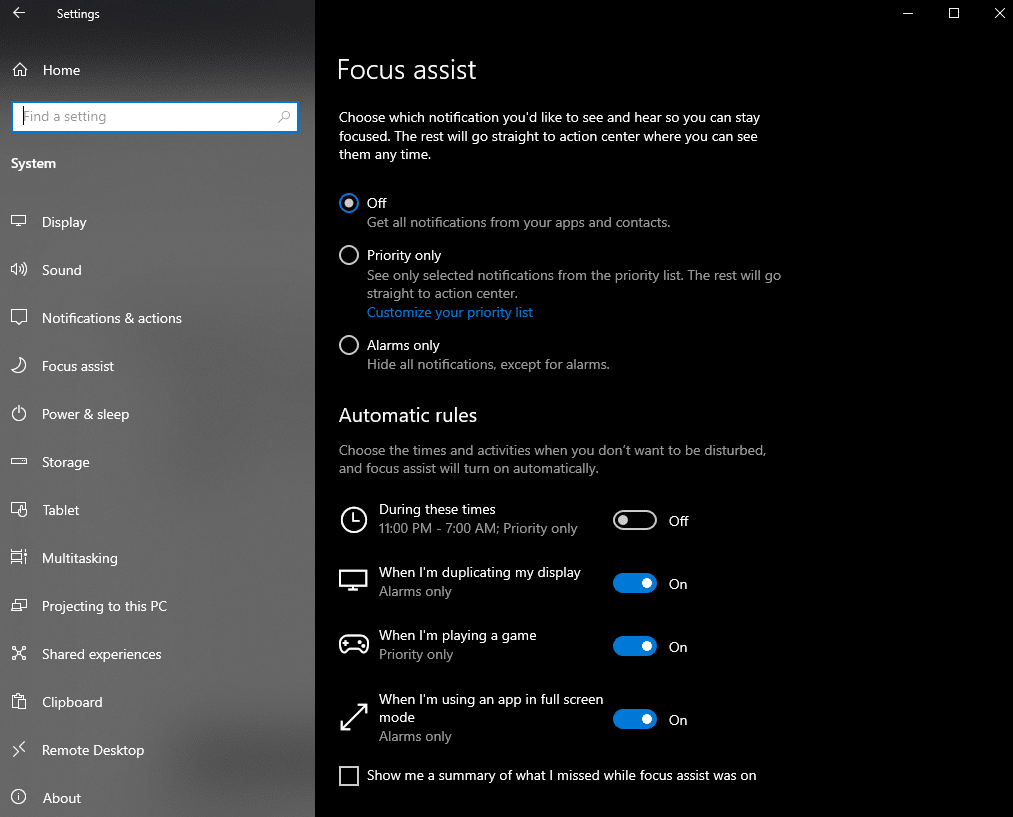
- Finally, you can turn off Focus Assist with the appropriate radio button.
- Here, you can configure all other aspects of how Focus Assist works.
9. Configure macOS Notification Settings
Similar to the previous fixes, which were for Windows, we need to check if macOS itself is blocking notifications from Slack. This only applies to you if you’re using Slack on macOS. For this, macOS also has a dedicated menu aptly named Notifications.
This is how to access the Notification settings on macOS:
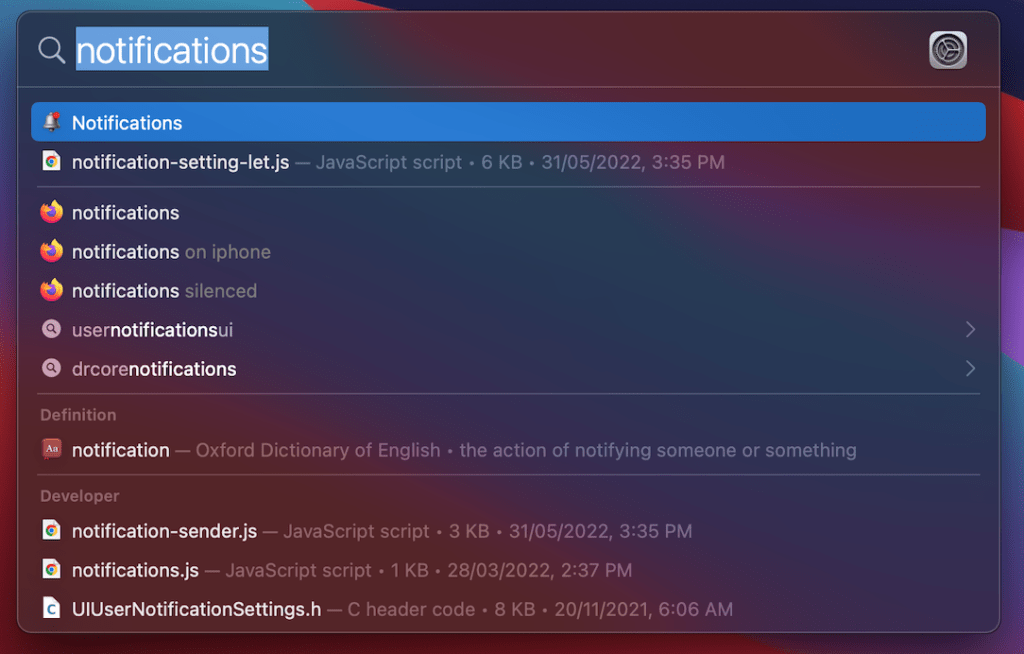
- First, open Spotlight by pressing Command (⌘)+ Spacebar on your keyboard.
- Then, type notifications. Hit enter on your keyboard if the highlighted option is Notifications, with a bell icon.
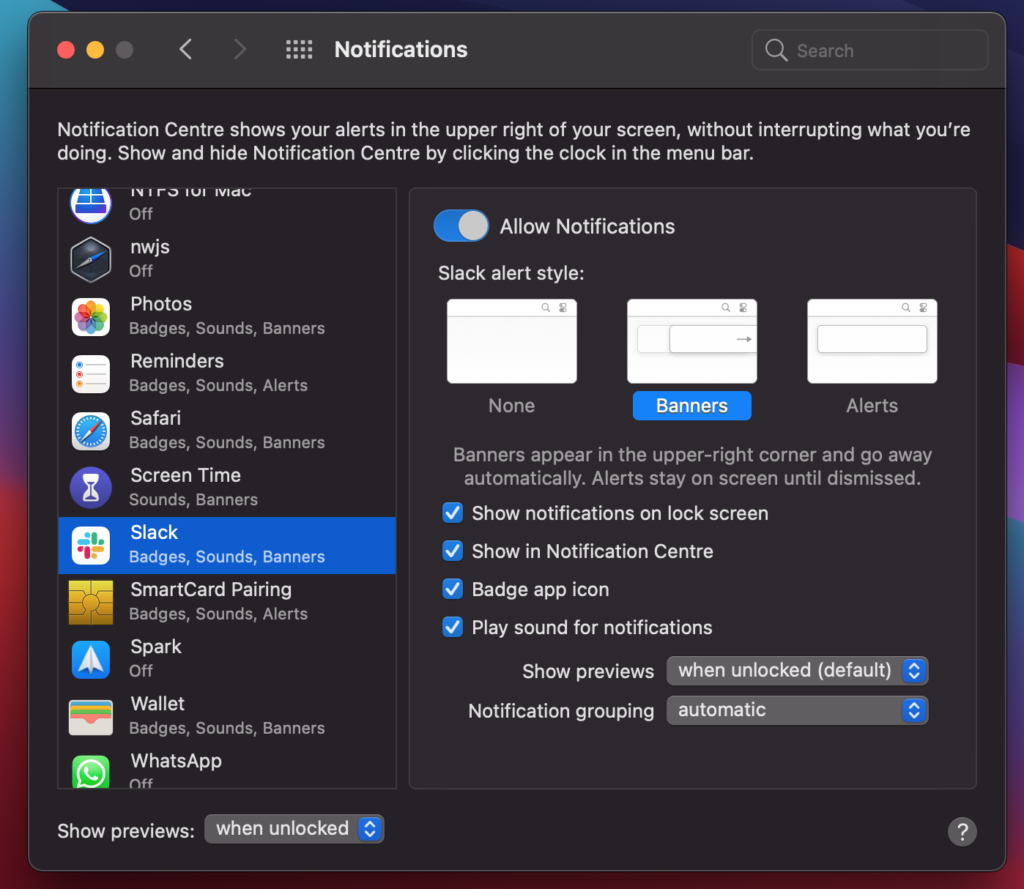
- In the Notifications menu, scroll down the left sidebar until the Slack entry is visible and click on it.
- Finally, ensure the toggle for Allow Notifications is enabled.
- You can configure all the other aspects of Slack’s notifications here too.
10. Turn Off Do Not Disturb (macOS)
What if you use macOS? Similar to turning off Windows’ Focus Assist, MacOS has a Do Not Disturb setting that may be the reason why your Slack notifications or reminders aren’t coming through. Like most Do Not Disturb modes on modern devices, they essentially prevent almost all notifications from reaching you, except notifications that you have explicitly allowed. So, it’s recommended that you check if you left it on and disable it.
Here’s how to turn Do Not Disturb off:
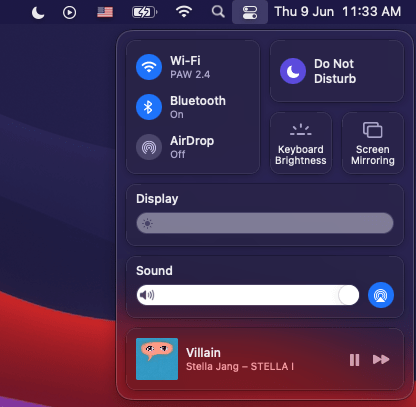
- In the top right corner of your screen, click on the toggles icon to open the Mac Notification Center.
- Then, make sure Do Not Disturb is disabled. It has a crescent moon for its icon and is colored violet if enabled.
11. Restart Notification Center (MacOS)
On macOS, the Notification Center is what’s responsible for delivering you your notifications. Hence, it could be the culprit in this case. We recommend restarting Notification Center just in case it’s having trouble syncing with Slack’s notifications.
Here’s how to do it:
- Start by quitting Slack. It needs to be properly closed, which we detailed how in Step 3.
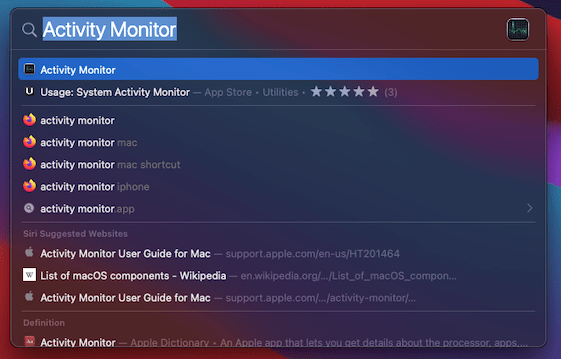
- Then, press Command + Space on your keyboard to open Spotlight.
- Search for Activity Monitor and press Enter on your keyboard.
- After that, in the newly opened window, search for Notification Center.
- Then, double-click on Notification Center.
- In the newly opened window, click on Quit.
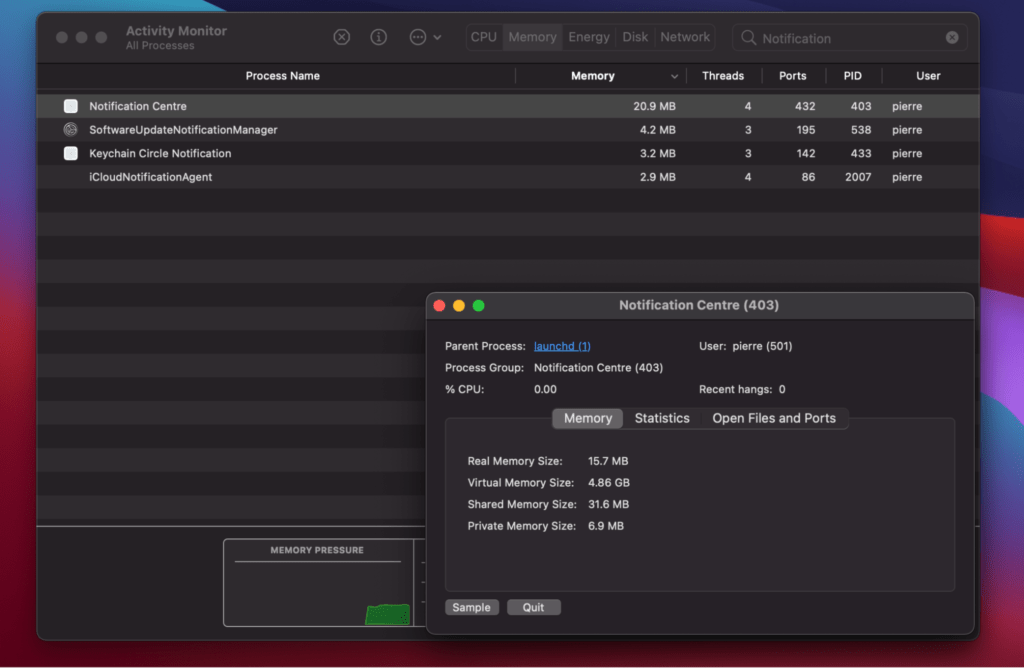
- Finally, open up Slack.
12. Configure the Web Browser Notification Settings
It’s great that pretty much any popular web browser now has rather granular controls when it comes to granting permissions on almost every aspect of your computer. Ever seen your browser prompt you to allow or block notifications for a website you just loaded? It’s great that this has become the norm now, especially with everyone so conscious about their security and privacy online. As such, it’s a good idea to check if your web browser has allowed or blocked notifications.
Here’s how to do it for Google Chrome, Microsoft Edge, Mozilla Firefox, and Safari:
Google Chrome
- First, select Preferences (the kebab icon) from the Chrome menu at the top of the window.
- Then, click on the Settings option in the drop-down menu.
- Next, in the newly opened Settings tab, click on Privacy and security in the left sidebar.
- After that, click on the Site Settings option.
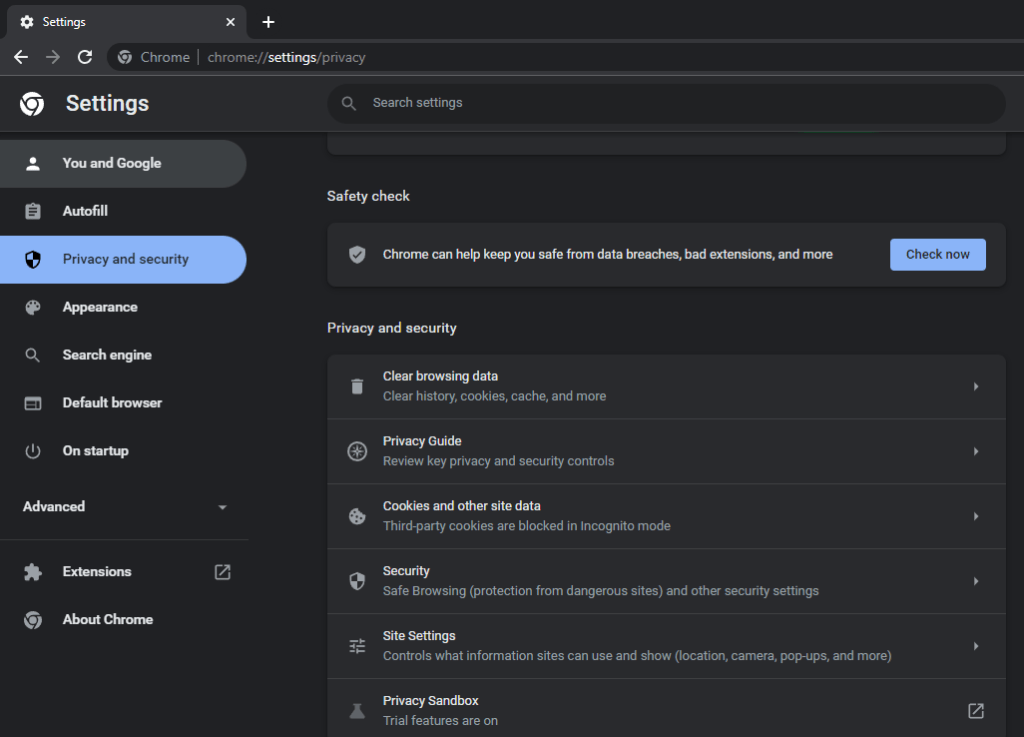
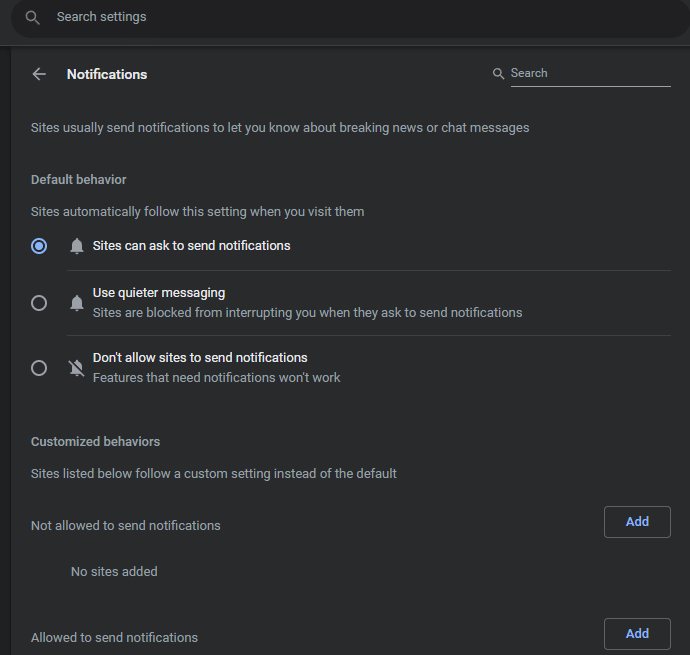
- Below Permissions, select Notifications.
- Here, you can tweak the settings to make sure it works correctly for Slack.
Microsoft Edge
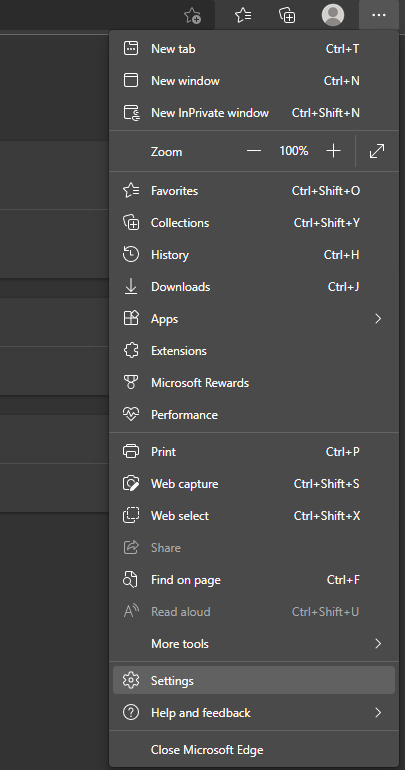
- First, click on the three dots icon in the top-right corner of Edge.
- Then, in the drop-down menu, click on Settings.
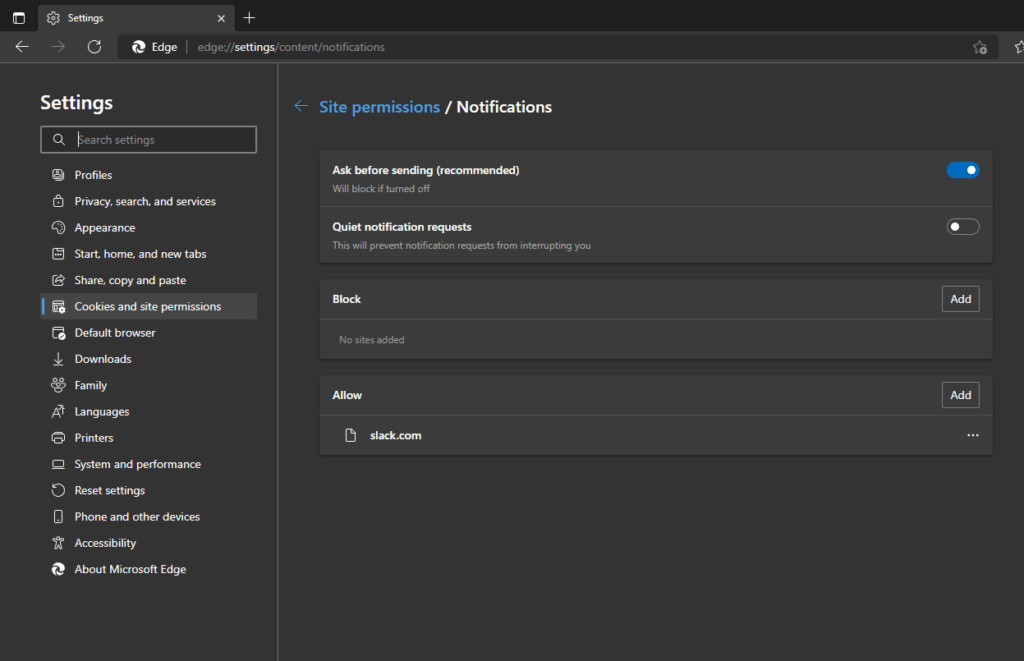
- Next, in the newly opened Settings tab, click on Cookies and site permissions in the left sidebar.
- Below Site Permissions, click on Notifications.
- Finally, make sure Slack is added in the Allow section. There’s an Add button to the right.
Firefox
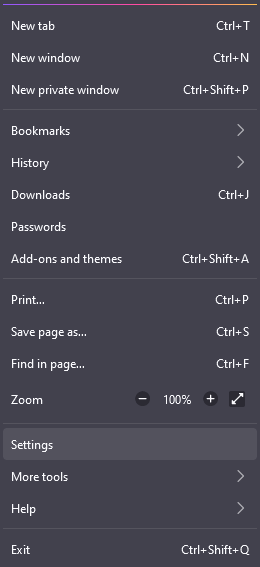
- To start, click on the hamburger icon in the top right corner of the app.
- Then, in the drop-down menu, click on Settings.
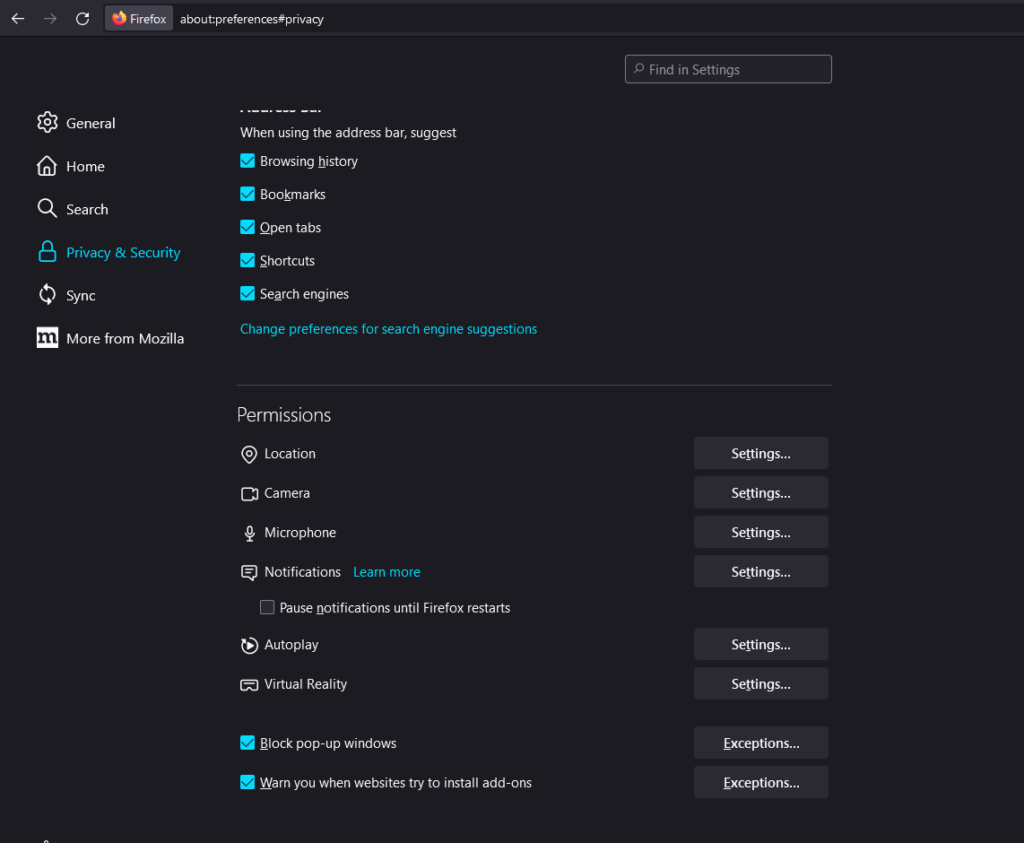
- Next, in the newly opened tab, click on Privacy & Security in the left sidebar.
- Scroll down until the Permissions section.
- Click on the Settings… button for the Notifications entry.
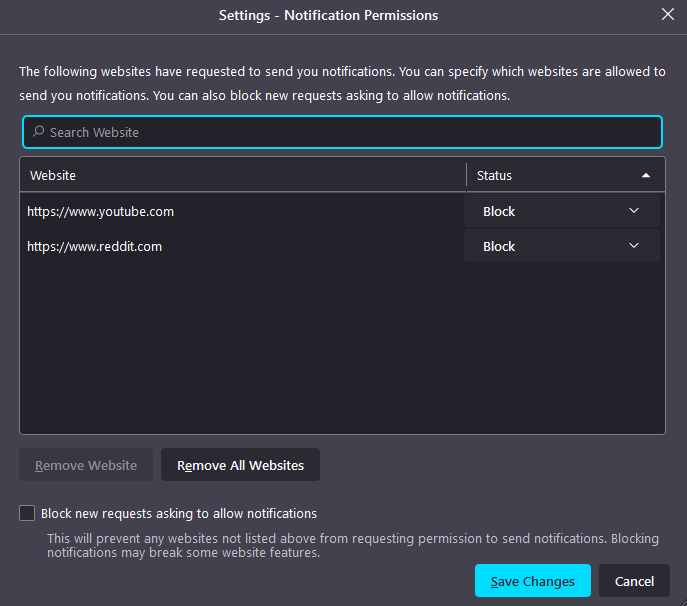
- Here, ensure Slack’s URL status has been set to Allow.
- Finally, click on Save Changes.
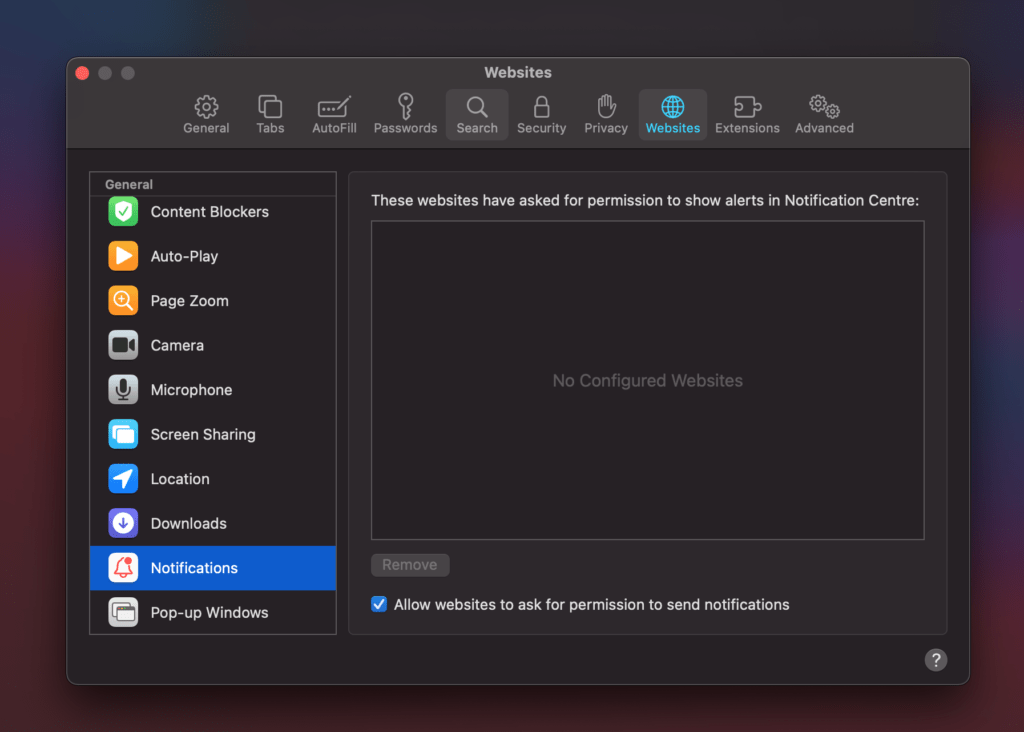
Safari
- First, open Safari and have it focused.
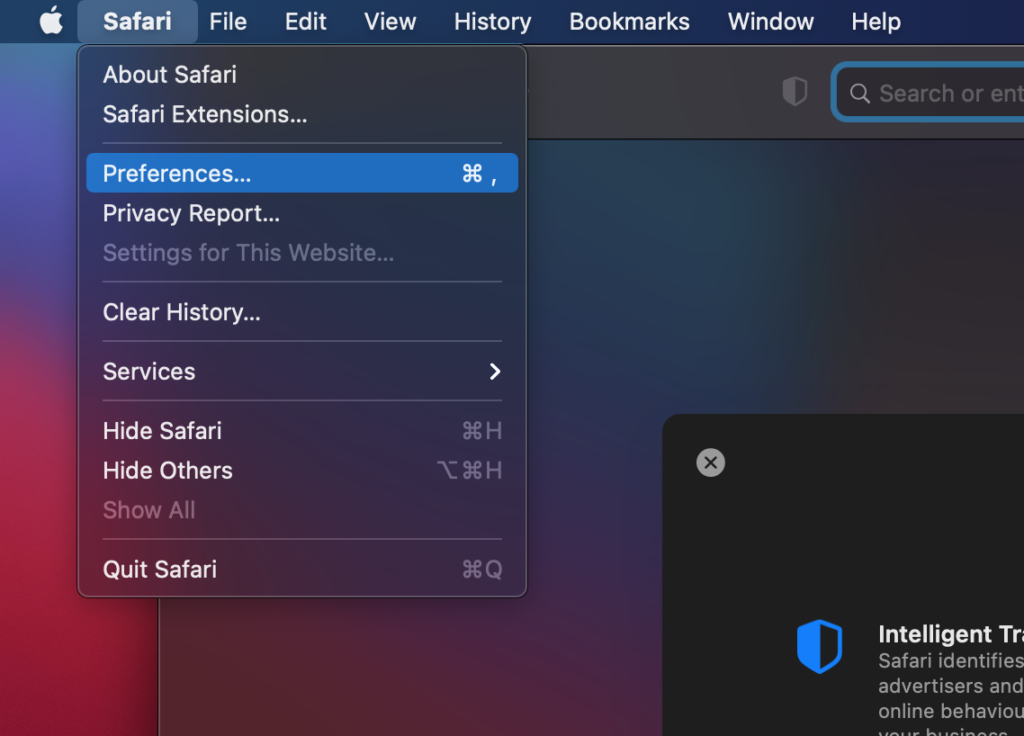
- Then, click on Safari in the top bar.
- In the drop-down menu, click on Preferences.
- In the newly opened window, select Websites.
- Then, in the left sidebar, select Notifications.
- Here, ensure your Slack workspace is allowed to send notifications.
13. Clear Slack Cache
Another great fix for these kinds of issues has to do with clearing the cache of the app. Apps utilize cache to quickly load frequently visited resources or data, resulting in a more responsive and quicker experience. It’s far faster to keep it on your computer than to keep accessing it over the Internet.
Unfortunately, they’re prone to corruption as well, so you should try to clean them out anytime you have problems. This makes Slack construct fresh new caches, which are unlikely to be corrupted and may be the solution to the notification problem.
Of course, you’ll need to clear your web browser’s cache/data instead if you mainly use the web browser version.
Here’s how to clear the cache for the Slack app for Windows and macOS.
Windows/macOS
Fortunately, it isn’t as complicated as compared to other apps since Slack already has this feature built in.
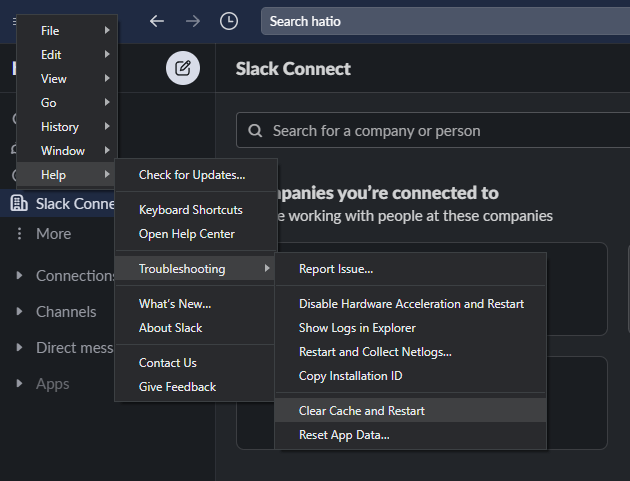
- Start by opening up the Slack app.
- Then, for Windows, click on the hamburger icon on the top-left corner of the app. macOS users can skip to the next step.
- In the drop-down menu, hover your cursor over the Help section. This should be in the top bar for macOS.
- In the extended drop-down menu, hover over Troubleshooting and then finally click on Clear cache and restart.
- Additionally, we recommend using the Reset App Data… option as well.
For the Web Version
Although the online version of Slack isn’t technically an app, clearing the cache in your web browser comes the closest to achieving the same effect. There are a variety of alternative browsers to choose from, but we’ll show you how to do it using Chrome, the most popular one.
The steps are pretty much the same regardless of the web browser you use:
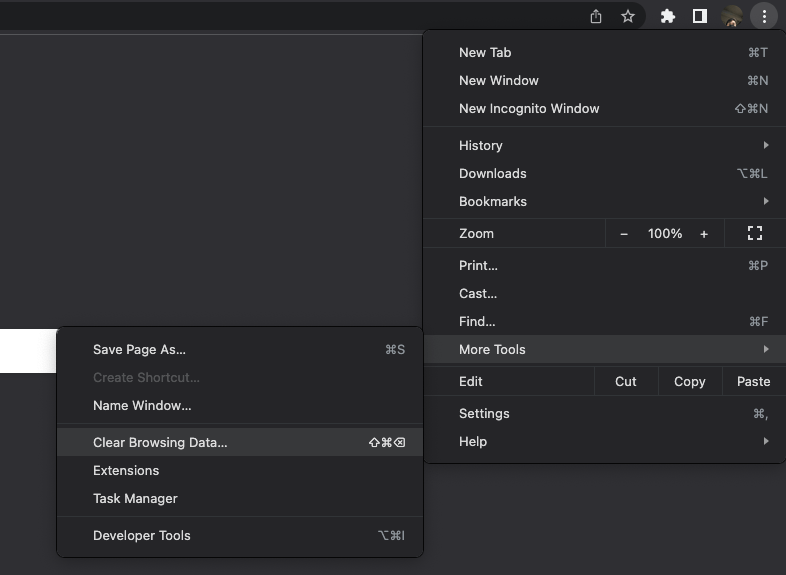
- First, open up your web browser.
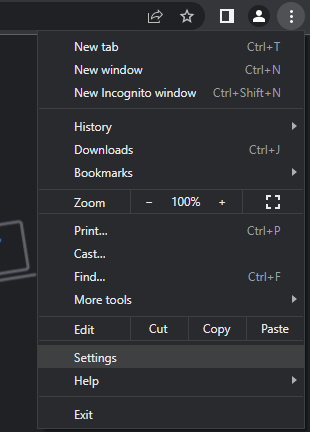
- Then, click on the kebab icon (more) in the top-right.
- In the drop-down menu, hover on More Tools then click on Clear Browsing Data.
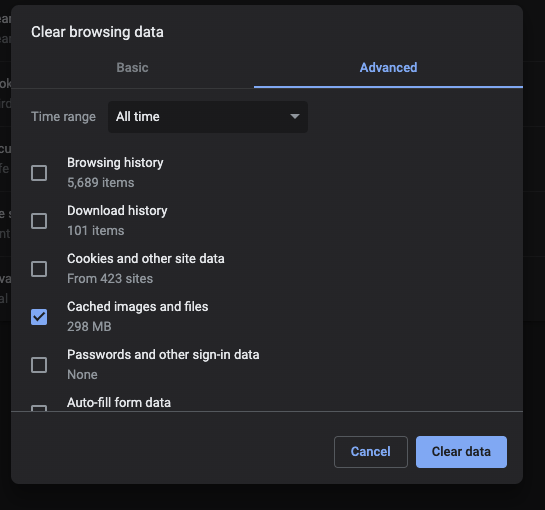
- Next, ensure the Time range is set to All Time and that only Cached Images and Files are checked.
- Then, click on the Clear data button in the bottom right.
- Finally, restart your web browser.
14. Restart Your Device
Most likely, you’ve heard this before: “Try turning it off and on again.”
Yes, that can sound very cliche, but there’s a good reason for it! Since rebooting your device soft resets it, along with all of your open programs and memory, it’s not wholly a joke. The failure of Slack’s reminder or notification features may be one of the unintended consequences of having a gadget that is constantly on without periodically restarting it. If there’s any corrupted memory, it’s sure to be gone on reboot. It’s rather common for extremely sophisticated smart devices, such as our laptops and smartphones.
Because it’s so easy to do and won’t take too long, we advise trying a quick reboot.
15. Use Another Network
Virtually every service you use nowadays is reliant on the Internet, so it’s only natural to check if your device’s network is the culprit. So, one way to check is to have your device connect to a different network. There might be a network setting such as a firewall 🔥 that’s preventing Slack from properly communicating with its servers. As a result, we can see if this is the problem by letting Slack connect to a different network, which would probably have different settings.
For example, the network you typically use could be your home network and the test network could be your friend’s home network. Using your mobile data network, on the other hand, would be a great candidate in this case. This is because mobile data networks are typically unadulterated, which would make for the perfect test scenario.
Of course, we assume you use Slack on your PC regularly. Using the mobile hotspot function on your computer is a simple way to connect to your smartphone’s mobile data network. As a result, your computer may connect to your phone as if it were a Wi-Fi router or a wireless access point. It’s a really easy procedure that’s usually saved in your phone’s Wi-Fi and Connections settings.
So, what happens if it works on your test network? Then it’s likely that there’s some setting on your usual network that’s preventing Slack from sending you notifications. You’ll have to dig around in your network’s settings or contact your network’s administrator to see what is preventing Slack messages from coming through.
16. Reinstall Slack
By extension, since the app files will be renewed, this also ensures that your Slack install will be of the latest version which usually has the latest bug fixes, features, and security updates. Hence, we recommend reinstalling Slack since it fixes corrupt files and updates your app all in one fell swoop.
Okay, the next step is to uninstall and reinstall the Slack app on your smartphone. This is due to the possibility of a corrupted Slack installation or corrupt files on your device, which are essentially giving you a headache by restricting the app’s ability to interact with the servers. By reinstalling, you obtain the application directly from the source, ensuring that every component of the code is fresh and free of corruption.
As a result of the app files being updated, your Slack installation will be the most recent version, which generally includes the most recent bug fixes, features, and security upgrades. As a result, we recommend reinstalling Slack because it restores faulty files while also updating your app.
This fix won’t apply to you if you use Slack on a web browser. The closest fix would be clearing the web browser’s cache, which we detailed in Step 12.
Here’s how to uninstall Slack on Windows and macOS:
For Windows
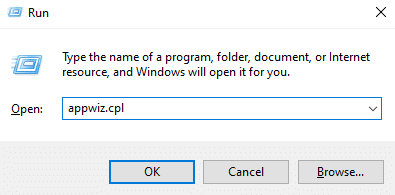
- Firstly, open the Run prompt by pressing the Windows and R key together, then type appwiz.cpl and press OK.
- After that, from the list of programs, look for Slack by the publisher Slack Inc.
- Select it, then right-click it, and select Uninstall. Follow the instructions in the uninstaller. It should tell you when it’s done uninstalling.

For macOS
Here is the main article from Apple themselves should you want to refer to it.
Using Launchpad to Delete an App
- To begin, open Launchpad by clicking it in the Dock or opening it from your Applications folder. You can also pinch closed with your thumb and three fingers on your trackpad.
- Next, type “Slack” in the search field at the top of the screen. Alternatively, you can swipe right or left with two fingers on your trackpad to show the next or previous page to manually find its icon.
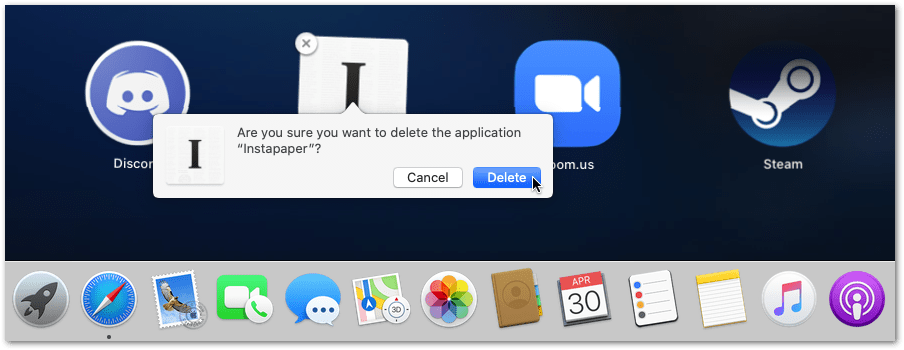
- Then, press and hold the Option (⌥) key, or click and hold any app until the apps jiggle.
- Finally, click the “x” next to the app that you want to delete, then click Delete to confirm. The app is deleted immediately.
Apps that don’t show “x” either didn’t come from the App Store or are required by your Mac. To delete an app that didn’t come from the App Store, use the Finder instead.
Using Finder to Delete an App
- Firstly, locate the Slack app in Finder. Most apps are in your Applications folder, which you can open by clicking Applications in the sidebar of any Finder window. Or use Spotlight to find the app, then press and hold the Command (⌘) key while double-clicking the app in Spotlight.
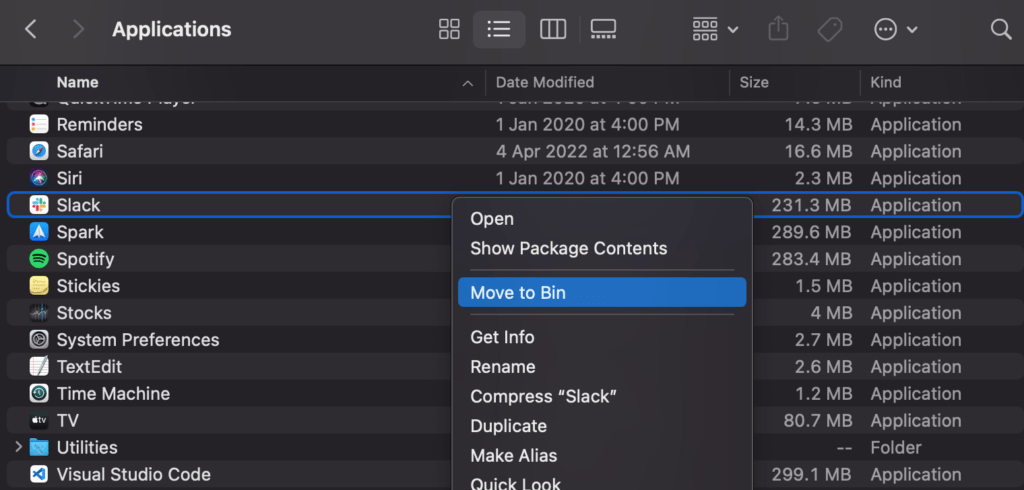
- Then, drag the Slack app to the Bin, or right-click the app and choose Move to Bin.
- After that, if you’re asked for a username and password, enter the name and password of an administrator account on your Mac. This is probably the name and password you use to log in to your Mac every time.
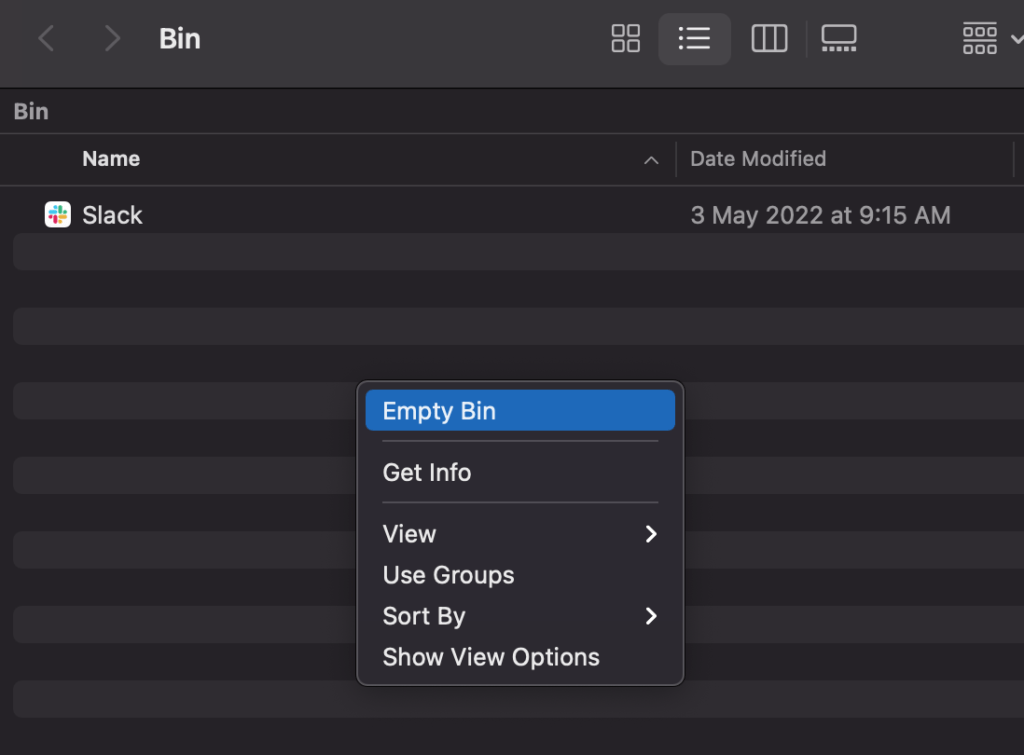
- Finally, to completely delete the app, open the Bin, right-click it, and select Empty Bin.
17. Try Slack on a Different Platform
Slack is available on almost any platform you can think of, as we indicated in the intro. As a result, we recommend attempting to utilize Slack on a different platform. This is because various systems are likely to have different codes, which means defects on one platform may not be handled while they are on another.
Slack is available on various platforms, most notably on web browsers, macOS, Windows, iOS, and Android. So, simply load up Slack on a website or a platform different from yours depending on your scenario.
Here are the appropriate links for your convenience:

18. Report the Problem to Slack
Yikes! If you’re down here, we’re guessing none of the fixes worked for you. Unfortunately, you’ll have to leave this to the Slack devs themselves 👨💻.
You can do so by informing them about the problem using one of their official channels. As always, be sure to explain in detail what exactly the issue is with your notifications with as much context as possible and what you’ve attempted so far to fix it.
Lucky for you, Slack has also got a reporting feature implemented in the app itself!
Here’s how to report an issue through the Slack app:
- Start by opening up the Slack app.
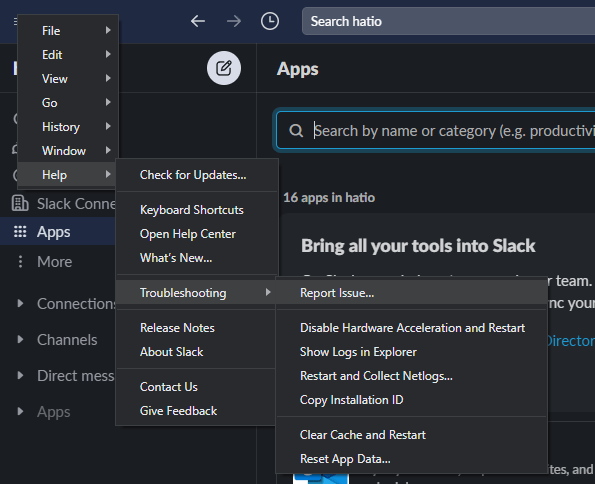
- Then, for Windows, click on the hamburger icon on the top-left-hand corner of the app. macOS users can skip to the next step.
- In the drop-down menu, hover your cursor over the Help section. This should be in the top bar for macOS.
- In the extended drop-down menu, hover over Troubleshooting and then finally click on Report.
- A new window should pop up displaying Slack’s Help Center.
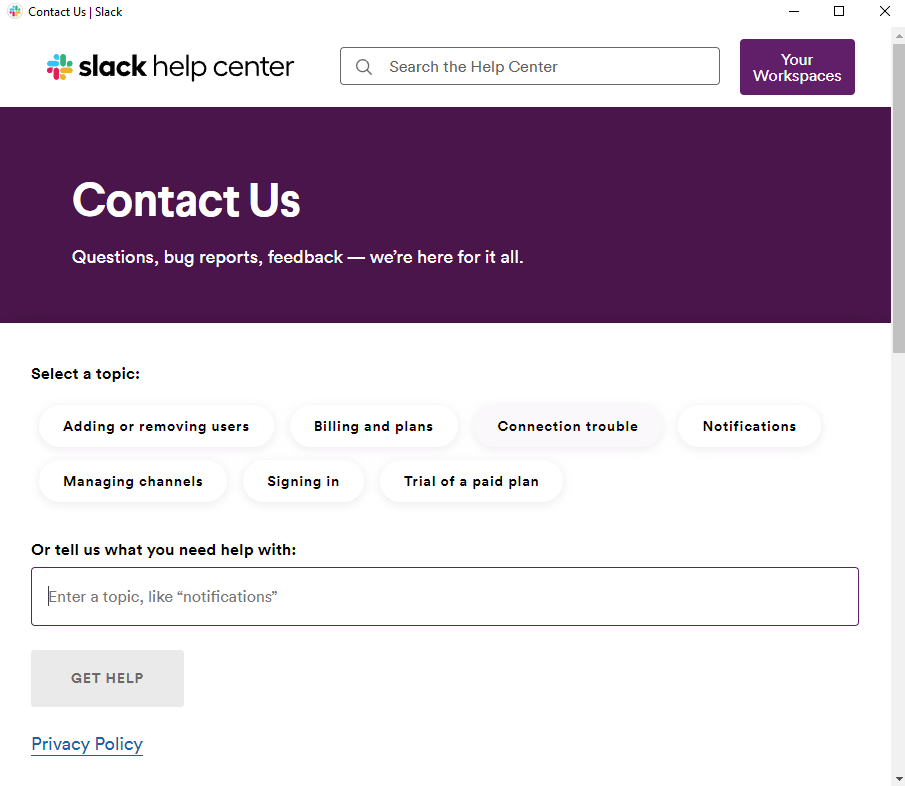
- Additionally, we recommend using the Show Logs in Explorer option so that you can send them the logs for even more detail on what went wrong.
Otherwise, we suggest reporting the issue to them through any of their official outlets, which we’ve listed below:
Conclusion
That about sums up this article. Those were our 18 fixes for how to fix Slack notifications and reminders if they’re not working. If you would like more information or would like to fix this Slack mobile notification issues, we recommend checking out our other guide here.
Slack is a pretty ubiquitous tool in most workplaces, especially tech-oriented ones. So, it’s paramount that notifications or reminders from your team come through reliably!
This time around, there were a lot of possible fixes. This is because an app’s notifications are deeply rooted in the system’s OS, as well as how the app itself is designed. Inevitably, it results in a bunch of troubleshooting where you need to check for every single point of failure. For example, it can be pretty tedious to solve this issue since both the Slack app and your operating system itself have identical notification setting features – à la Slack’s Notification Schedule and Windows’ Focus Assist. Yet, sometimes it could still be an issue on Slack’s side – their servers.
Like we always say, it’s good practice to test out the problem at hand, notifications or reminders in this case, after each attempted fix. We recommend asking a friend or colleague to drop you a message to trigger the notification, for example. That way, you’ll know what caused the problem for your particular scenario so that you can save time in the future if it ever happens again!
We hope our extensive guide managed to help you out, at least a little!
Be sure to comment down below if you have:
- Any questions for us
- Any errors in the article
- Other suggestions to fix this issue
Feel free to share this post with your colleagues or someone you know who has trouble with their Slack notifications on their desktop not showing up or working correctly!