
Are you also having issues sharing Instagram posts to your personal or business Facebook page, where they aren’t posting or sharing to Facebook? Here’s what we’ve found to help fix when your Instagram upload is not posting or sharing to Facebook.
Needless to say, the ability to instantly cross-post your Instagram uploads to your Facebook page is certainly time-saving and effortless. You can share your Instagram photos and videos directly to your timeline, and your Instagram Stories to your Facebook Stories.
Thus, eliminating the need to boot up facebook, write out your “banger” caption 💥, and upload the same post. This feature works given that you’ve correctly linked your Instagram account and Facebook page.
Sounds good, right 😃?
However, this feature has been buggy and non-functional for many users. According to some users, even though they were notified with “Your post was shared successfully”, when checking their Facebook timeline, there were no new uploads found. This can be frustrating, especially if you rely on cross-posting to save time and reach a wider audience.
On other occasions, users may be stuck on the endless loading wheel while attempting to link the accounts. To our knowledge, the exact cause of this issue is unknown. It could be a pesky bug or a faulty setting Facebook has to fix. 
On that note, here’s a list of 12 quick and easy fixes to help solve when Instagram sharing to Facebook is not working. Plus, the steps in this guide are applicable whether you’re on an Android or a IOS device, including your iPhone.
How to Manually Share Posts from Instagram to Facebook?
Before proceeding, note that, after each step, we suggest performing a test share. This is to see if the issue with the cross-posting feature is rectified. Therefore, it’s essential that you know how to properly share posts from your Instagram account to your Facebook page manually. This step is to check whether your posts can be shared smoothly across the two platforms.
For this, simply go to the post you want to share, tap the 3 dots at the upper right corner, then tap Share. Next, turn on the switch next to Facebook, and tap Share.

Then, head over to the corresponding Facebook page to check if the sharing was successful.
It’s that simple. You can use this method to check if the issue has been resolved.
Knowing that, let’s dive into the steps to fix this Instagram not posting to Facebook error.
Why Are Your Instagram Posts Not Sharing or Posting to Facebook?
There are several potential reasons why Instagram might not be sharing or posting to Facebook:
1. Poor Internet Connection
Instagram may have trouble posting to or sharing to Facebook if your internet connection is unreliable or poor.
2. Out-Of-Date App or Device
Ensure that your Instagram app is updated and that the operating system on your device is current (Fix 5).
3. Incorrect Privacy Settings
Sharing and uploading may not work properly if your Instagram account is set to private or if you have not given Instagram permission to post to Facebook. For this you need to ensure that both accounts are properly linked to each other (Fix 1 & Fix 2).
4. Incorrect Facebook Settings
Sharing and uploading may not work properly if your Facebook account is set to private or if you have not given Instagram permission to post to Facebook. Similar to the previous reason, to overcome this you have to ensure that both accounts are properly linked in order for cross-posting to be possible (Fix 1 & Fix 2).
5. Problems with Facebook’s Servers
Instagram may be unable to post or share content to Facebook due to problems with Facebook’s servers. So, ensure that Facebook is not currently undergoing server-side issues that may be causing this crossposting issue (Fix 3).
12 Fixes for Instagram Not Sharing or Posting to Facebook
1. Ensure Your Instagram Account and Facebook Page are Correctly Linked
This step would essentially be your first course of action. If your accounts aren’t linked properly, you won’t be able to share posts efficiently. Thus you’ll come across multiple errors when attempting to share your posts across the two platforms.
At times this step may be overlooked, when in fact an update may have caused the auto-sharing feature to be halted and turned off. Due to this, you may even be required to relink the accounts again for sharing.
Thus, with this step, check the link between your Instagram account and Facebook page and confirm that it’s correct. Before proceeding, ensure that you’re logged into the right Instagram account so that the right accounts are linked together.
The following are the steps for you to check or relink your Instagram and Facebook accounts.
- Firstly, from the Instagram app, tap your profile icon, on the bottom menu, then tap the menu icon at the upper right corner, and select Settings at the list that pops up.

- Now, in the Settings menu, select Account, and choose Linked Accounts.

- From the list of Linked Accounts choose Facebook. Here, if the Facebook icon is grey, that means your accounts aren’t linked. So, proceed to tap on Facebook.

If you’ve pre-installed and have logged into the Facebook app on your phone, then it’ll automatically proceed with the next step. You’ll be prompted with the “Connect to Facebook?” message, where you need to tap Connect. 
Conversely, If the Facebook app isn’t pre-installed or you haven’t logged into it, you’ll be prompted to sign in to your Facebook account. So, log into the account you wish to share posts to.

- Next, at the “Turn on Facebook sharing?” message, tap “Start Sharing to Facebook” to begin cross-posting.

Subsequently, you can choose to switch on the “Share your story to Facebook” and “Share your posts to Facebook” tabs, depending on your preference. Additionally, from here, you can choose which page (given you’re an admin) you would like to share posts to. This can be either your own profile and timeline or even a business page that you manage. By default, you’ll be sharing posts directly to your main Facebook account.
Thus to share posts to a particular page, tap Share to, then you’ll be prompted with pages you can choose.

With a proper link between your Instagram and Facebook account, you can rest assured that the next cross-post proceeds smoothly.
2. Unlink and Relink Your Instagram Account with Your Facebook Page
If the previous step came to no avail, then reestablishing the link would be the next go-to step for you. For this, essentially what we’re doing is unlinking the accounts, then similar to the previous step, relinking it back. By doing this, you can fix issues or bugs that may have lied with the prior link, especially if you’ve recently just changed your Facebook account’s password.
For this, you’ll need to reach the same Linked accounts page as stated in the previous step. You can easily head there by tapping your profile icon, then the menu icon at the upper right, choose Settings, Account, Linked Accounts, and tap on Facebook.

On this page, tap Unlink account, then at the subsequent message tap “Yes, Unlink”.

Now, you should attempt at reconnecting the accounts. For this, just tap Facebook from the list of apps under the Linked accounts page. Then, at the “Connect to Facebook?” message, tap Connect.

Just like that, you managed to successfully unlink your Instagram and Facebook accounts and relink them back. Easy, right?
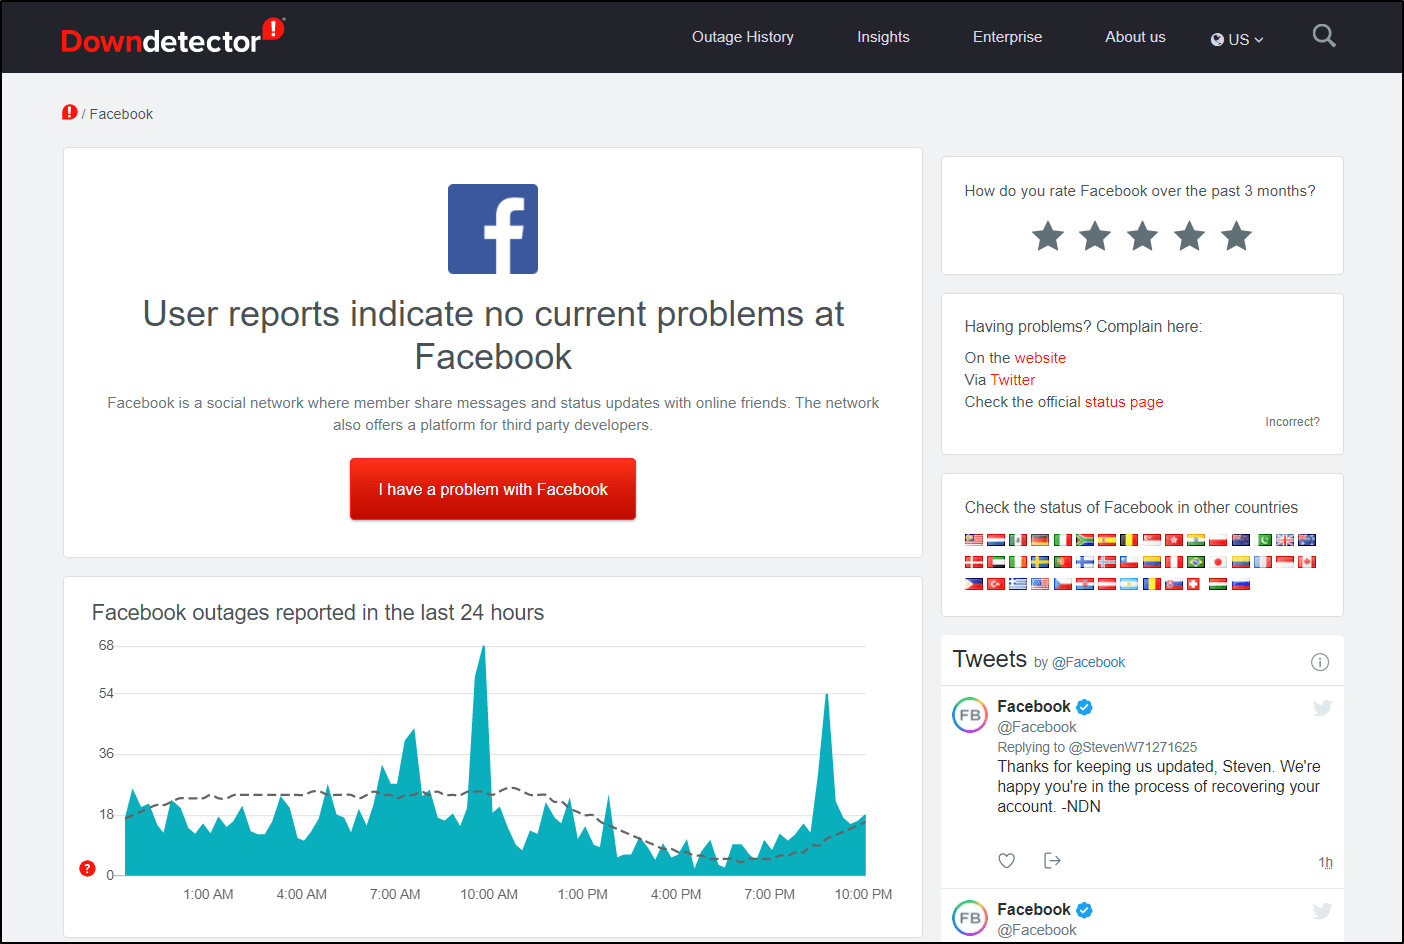
3. Check the Facebook Server Status
It’s also worth noting that there may be issues with Facebook’s servers that are preventing Instagram from posting or sharing to the platform. In this case, there may not be much you can do except wait for the issue to be resolved on Facebook’s end.
To check for issues with Facebook’s servers, you can visit the Facebook Developer page. This page displays the current status of Facebook’s services and any known issues.
If you see an issue listed under the “API” section, it may be causing problems with Instagram’s ability to post or share to Facebook. In this case, you will need to wait for the issue to be resolved before you can post or share to Facebook from Instagram.
Additionally, you can refer to third-party server status checkers, such as DownDetector, where regular people report ongoing issues with the platform. So, you can use this platform to identify whether Facebook is currently experiencing issues that may be inhibiting Instagram from sharing posts with it.
4. Log Out of Instagram and Facebook on Your Device
This step is fairly simple to perform, and known to solve various issues with both apps effectively. This includes problems with the cross-posting feature, since you can potentially resolve issues with the connection between the applications. Basically, it sort of has the same effect as doing a reset. Thus, we would definitely recommend giving this step a try.
Before logging out of your Instagram and Facebook accounts on your phone, we would strongly suggest, keeping a note of your login credentials for the accounts. That way, you can avoid confronting any login issues when signing in to your accounts.
To log out of your Instagram account on your phone:
On the Instagram app, tap your profile icon at the bottom right, tap the menu icon at the upper right, then choose Settings and finally tap Log Out at the bottom.

On the other hand, to sign out of your Facebook account from your phone:
From the Facebook app, tap the menu icon at the bottom right, scroll all the way down and select Log Out and tap it again at the subsequent “Are you sure?” message.

After logging out of each app, try exiting the app, and removing it from your Recently Opened. Then you can reopen the app, and sign in using the same login credentials as before. With that done, you can try checking whether the cross-post feature is still down.
5. Update the Instagram and Facebook App
As with all apps, it’s essential to keep the Facebook and Instagram app running the latest updates. Especially since these apps are a crucial part of your everyday schedule. With these latest updates, Facebook may have addressed the issue and released a bug fix to resolve these issues, including the Instagram not posting to Facebook error. Plus, it’ll only take a minute for you to check any pending updates that haven’t been installed yet.
Hence, make sure you have the latest version of the Instagram app and that your device’s operating system is up to date.
To check if there are any updates for the Instagram app.
- First, open the Play Store (For Android) or the App Store (for IOS)
- Type and search for Instagram.
- Then, if there’s an update available, the Update button will be visible, so tap on it.

In the same way, perform these steps to check for the Facebook app as well. To make matters simpler, turn on auto-updates for these crucial apps, so they’re always running the latest versions.

6. Clear the Instagram App Cache
App cache may interfere with various functionalities or features of the app. Hence, leaving you with a laggy user experience as well as being prone to bugs and with the app. At the same time, this step can be very effective to solve a variety of technical issues with the app. For this, we pinpointed clearing the Instagram app cache, since Instagram would be the primary app you’re sharing posts from.
For IOS devices, the only possible way to remove Instagram app cache from your iPhone is by deleting and reinstalling the Instagram app. We’ll cover this in a little more detail in the next step.
On the other hand, for Android devices, within the Settings, you can clear the cache of each app by tapping a button. The following are steps on how you can delete the Instagram app cache.
The steps may vary depending on your phone model. However, the following steps give a general idea to remove the unnecessary cached files on Android.
Firstly open the Settings app, then tap on Apps & notification, and select See all apps. Next, from the list of installed apps, look for Instagram, then tap on it.

After that, choose Storage & cache, and finally tap Clear cache.

As you can see it’s that quick and simple to delete the Instagram app cache. Therefore, it’s a good idea to clear the Instagram app cache occasionally to prevent certain unwanted technical issues.
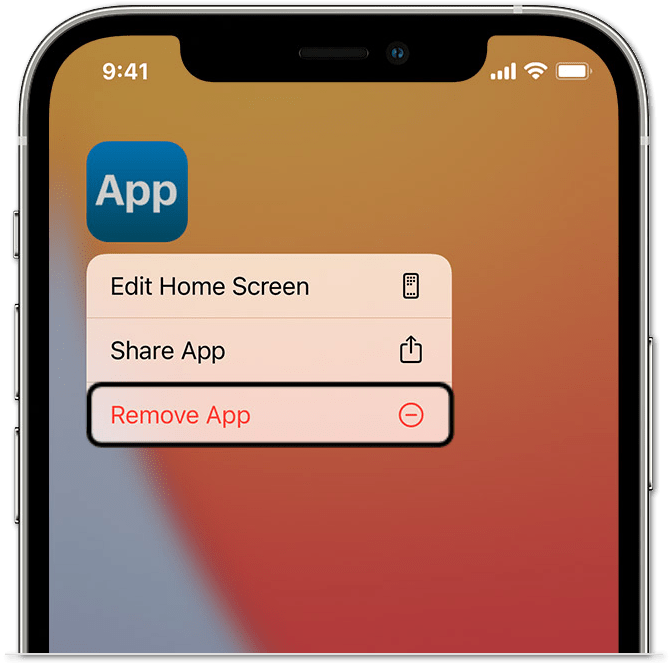
7. Reinstall the Instagram App on Your Phone
This is an effective method to clear the Instagram app cache. Plus, it’s especially applicable if you’re using an IOS device, as unlike for Android devices, there isn’t a button that deletes an app’s cache directly. Hence, the only way to remove the Instagram app cache on your iPhone is to delete the app altogether before reinstalling it.
However, if you’re on an Android, feel free to perform this step as well, to further clear the app data occupying your internal storage. Additionally, reinstalling Instagram is an effective way to resolve issues with the app. Essentially, you’re installing a brand new copy of the app on your phone.
In short, for this step, just uninstall the Instagram app as usual by long-pressing it and tapping the X button. After that, go to either the App Store(For IOS) or the Play Store(For Android), search for Instagram and proceed to Install it.
8. Check Your Facebook Post’s Privacy Settings
Occasionally, the issue may be that the posts you share from Instagram are only visible to you. Thus, you find there’s no engagement or movement with the posts. Due to a faulty link between the accounts, your posts may be automatically set as hidden to the public. In that case, you’ll need to look over your Privacy Settings to ensure your posts are set to Public instead of Only Me.
The simplest way to check this would be to individually edit the privacy settings of each of your Facebook posts. Firstly, tap the 3 dots at the top of the particular post to bring up the settings, then select Edit Privacy.

From here, choose which audience to show the post to, and make sure it’s not set to Only Me. Therefore, choose Public, so that just about anyone can view the post, and tap Done.

By doing this, your followers on Facebook should be able to view the posts you shared from Instagram. These posts would have otherwise been hidden.
9. Change Your Facebook Account Password
Setting a new password for your account is reported as an effective fix for many users experiencing the “unable to cross-post” error. Essentially, through this step, you’re exiting all other sessions linked with the Facebook account. Thus, beginning a brand new session with the app free from any bugs that may have resulted with this error. Overall, it should only take you about a few minutes to set a new password for your Facebook account.
To change your Facebook account password from your IOS or Android device:
- Firstly, from the Facebook app, tap the Menu button at the bottom right, then from there, choose Settings & Privacy, then tap Settings.

- After that, under the Security section, tap on Security and login, and then under Login, tap the Change password prompt.

- Now you’ll need to input your existing password as well as your new password, then once you’re done, tap Save Changes.

By doing these few steps, you can successfully change your Facebook account’s password. Now, you can try logging back into the account with the new password. Then, relink it with your Instagram account to see if the sharing issue still occurs.
10. Use a Third-Party Sharing App such as IFTTT
If your Instagram upload is still not posting to Facebook, then the best solution is using a third-party sharing app. From our experience, we recommend using IFTTT to do the job without having to spend a single cent.
If This Then That (IFTTT) is a great automation tool that takes care of various basic tasks. This includes posting across all your social media platforms efficiently. So, how does it work?
In brief, you create an “Applet” where you set a trigger (every time you post on Instagram) and a response (share the post to Facebook). With that, every time you do the action or trigger, the response will be the same.
Hence, your Instagram posts will automatically be shared each and every time. Once this service is all set up, you can continue to effortlessly share your Instagram posts to your Facebook page. You can even share across all your other social media accounts.
Plus, it has a very minimal UI design that seems very clean and fluid which we dig. Nonetheless, for a beginner, setting it up may be tricky. However, the following steps demonstrate setting up IFTTT to share posts from your Instagram account to Facebook.
- Firstly, open the IFTTT app and ensure that you’re signed in to use the app.
- Then, tap the + button, to begin making the “applet” that’ll allow you to cross-post on multiple social media accounts.

- After that, tap the + button next to “This”, and on the following page, choose Instagram as the “trigger service”.

- Next, depending on your preference, choose an action as a trigger. For example, we went with “Any new photo by you”, so that each photo we upload will be shared to Facebook.

- Now, you’ll need to connect your Instagram account, so tap Add, then enter your account login info, and at the Instagram page, tap Authorize. This is to allow access to the IFTTT app to share your posts.

- Subsequently, you’ll need to tap the + button next to “That”, to add an “action service” or a response. Look for Facebook Pages within the extensive list of apps, and then select it.

- Now, from the list of actions available, choose whichever applies to you, then tap Add. For instance, we went with “Upload a photo from URL”.

- Subsequently, you’ll need to sign in to your Facebook account, then grant permission to the IFTTT app by tapping OK. This step is for it to share your posts from Instagram to your Facebook page.

- Following that, you can choose which one of your pages to share to, given you’re an admin, then click Update.

- Finally, once it all checks out, tap Create action and tap Finish. You can also choose to switch on “Receive notifications” so you’ll be notified when the cross-posting is successful.

Feel free to edit the IFTTT applet, to edit the caption or remove the link if it seems out of place. It’s very straightforward to do so.
Just like that, you’ve managed to connect your Instagram and Facebook accounts with the IFTTT app. So every time you post a picture on Instagram, it’ll automatically be uploaded to Facebook within 30 minutes or so. If not, you can always tap the Check now button at the Settings page of the applet.

11. Remove Instagram from Facebook Apps
This step should be among your last resorts to confront the “Instagram not posting to Facebook” issue. Essentially, with this step, you’re completely removing the link between your Facebook and Instagram accounts. Through this step, you’ll also have the option to remove all of your prior Instagram posts shared to your timeline. If you use Facebook to log in to your Instagram account, then you’ll be able to find Instagram under the linked apps on your Facebook account.
For this step, visit the Facebook site, and log into the account which is linked with the particular Instagram account. After that, click the downwards arrow at the top right corner, and select Settings from the drop-down.

Next, on the left sidebar, click the Apps and Websites prompt. Following that, search and tick Instagram from the list, and at the subsequent pop-up click Remove.

Once you’re done with that, you can follow the steps stated in step 1, to relink your Instagram account and Facebook page properly. With this new link established, you should check if the “Instagram not posting to Facebook” error is still occurring.
12. Report the Issue to Instagram Support
When all else fails, you can always attempt to bring up the inability to share post error to the Instagram Support team. The downside is Instagram may take a while to reply to your complaint. Especially since they need to filter through tonnes of complaints from other users. Nonetheless, this step can get you a conclusive explanation of this “Instagram not posting to Facebook” error from Instagram themselves.
In the meantime, you can use the IFTTT app, as mentioned in step 9. This app acts as an alternative to handle your cross-posting from your Instagram account to your Facebook page.
The following steps demonstrate how you can report the issue to Instagram Support:
- Launch the Instagram app, tap on your profile icon, and tap the menu icon at the upper right corner. Then, choose Settings from the following list.

- In the Settings menu, select Help, then tap on Report a Problem.

- After that, for this case, choose “Something Isn’t Working” from the list. This option would be more applicable since the entire cross-post feature isn’t functional.

- Following that, you’ll need to describe the issue you’re facing briefly. Ensure that you mention useful info, including the affected feature (Sharing to Facebook), the device you’re using (Android/IOS), when the issue began occurring, and any other relevant details.

- Once you’re done, tap Send to submit your brief report to the Instagram Support team.
With that done, all there’s left is to wait for the Instagram Support to respond to your complaint. Occasionally, do check your email inbox linked to that Instagram account for a reply from them.
Conclusion
Without a doubt, it can be infuriating when you can’t share your posts from Instagram to your Facebook page. Especially if these two are your most used social media platforms. Plus, it can truly hurt your social media growth, when your posts aren’t being regularly uploaded or shared. All because of a pesky error preventing you 😤.
That being said, this is a definitive list of steps that you can take to help resolve the Instagram not posting or sharing to Facebook error, whether on your IOS or Android device.
Let us know in the comments if you’ve faced a similar issue with Instagram and Facebook. How did you resolve it?
As always, feel free to share this post with someone who can’t share their Instagram posts to Facebook.
Frequently Asked Questions About the “Instagram Not Sharing or Posting to Facebook” Issue
Why are my Instagram stories not posting or sharing to Facebook?
There are a few reasons why your Instagram stories might not be posting to Facebook:
- You have not linked your Instagram and Facebook accounts: If you have linked your Instagram and Facebook accounts, your Instagram stories will automatically be shared to Facebook. You can check if your accounts are linked by going to your Instagram settings and selecting the “Account” tab. Under the “Linked accounts” section, you should see Facebook listed if your accounts are linked. For a more detailed explanation regarding this solution, you may refer to fix 1 and 2.
- You have not granted Instagram permission to post to Facebook: When you first set up your Instagram account, you may have granted Instagram permission to post to Facebook. You can check if you have granted this permission by going to your Instagram settings and selecting the “Privacy” tab. Under the “Account privacy” section, ensure that the “Connect to Facebook” option is enabled.
- You are using a third-party app: If you are using a third-party app to access Instagram, it may be posting your Instagram stories to Facebook. Try accessing Instagram through the official app to see if the issue persists.
By considering these potential reasons and trying the solutions outlined in this article, you should be able to troubleshoot and fix issues with Instagram stories not posting or sharing to Facebook.
Thank you so so much! Clearing the Facebook cache really did the trick.
Like!! I blog frequently and I really thank you for your content. The article has truly peaked my interest.