Do you feel ChatGPT isn’t working properly or consistently prompting the “Failed to Get Service Status” error?
This error message usually arises due to a connection issue between your device and OpenAI servers. This can happen if the OpenAI servers suffer downtime due to an increased influx of users or maintenance.

Another probable reason can be the stability of your internet connection or an issue within the API you are using to access ChatGPT.
If you encounter this issue, don’t worry because this guide explores 6 solutions to resolving ChatGPT’s “Failed to Get Service Status” error.
So without further ado, let’s get started!
6 Fixes for the ChatGPT “Failed to Get Service Status” Error
1. Verify Your Internet Connection
A stable and fast internet connection is crucial for accessing ChatGPT smoothly. A slow or unstable internet connection can lead to issues with transmitting requests from the client side to OpenAI servers.
Thus, leading to response delays and prompt error messages like“Failed to Get Service Status”.
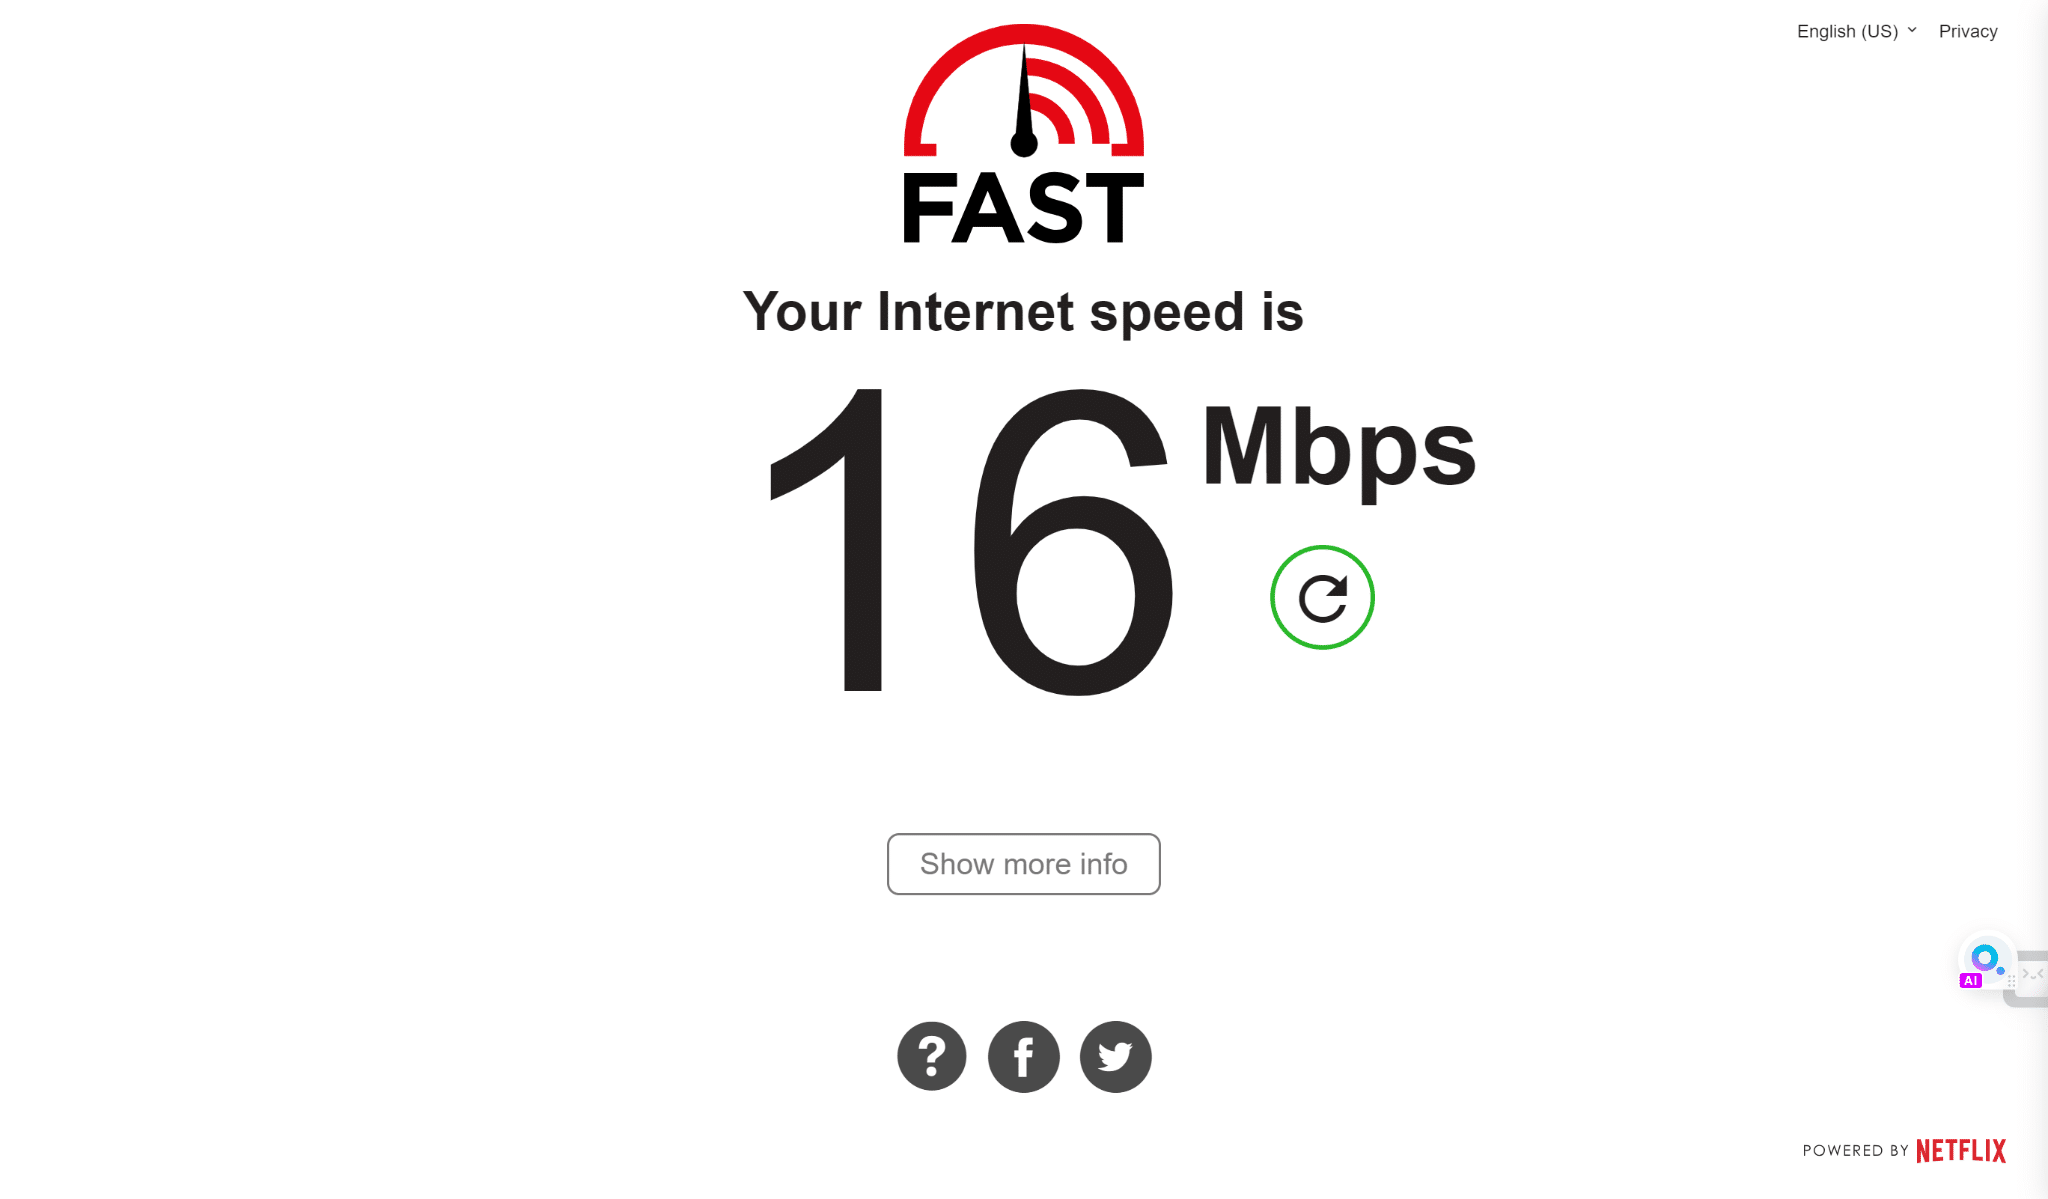
To verify the status of your internet connection, you can use any of the commercially available speed-checking sites, such as SpeedTest.net or Fast.com. In our tutorial, we will use Fast.com to verify our internet speed.
If your internet connection is stable and fast enough, then this issue is likely caused by another factor.
2. Clear Your Browser Cache and Cookies
Your browser cache is an incredibly helpful tool that records and stores data from frequently visited websites. This enables it to load these websites and their media, and images at greater speed, thereby reducing your site loading time.
Although the cache is immensely helpful, sometimes the data stored in the cache becomes obsolete or corrupted, leading to issues with ChatGPT like the “Failed to Get Service Status”.
Additionally, OpenAI uses JavaScript and CSS files to manage their communication with end users and style their user interface. Therefore, if these files become corrupted, users can be prompted with the “Failed to Get Service Status” error.
Clearing your browser cache and cookies gives you a clean slate to start over. Thus, eliminating potential conflicts and ensuring smooth communication between the ChatGPT and OpenAI servers.
To clear your browser’s cache and cookies, simply follow the steps below:
For Google Chrome
- First, open up your web browser.
- Next, look for the three dots menu in the browser’s top right-hand corner and click on it.
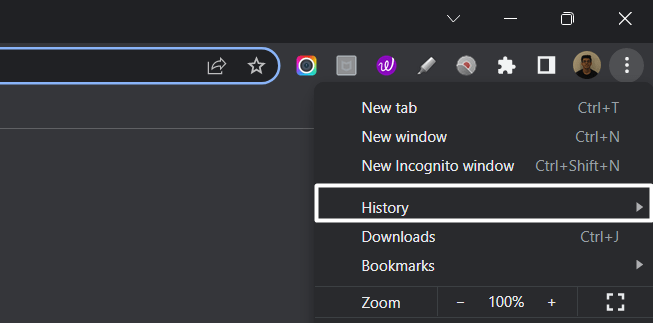
- Then, select the “Privacy and Security” section and click “Clear browsing data“.
- Afterward, the browser will ask you to select the time range to clear your browsing data. For instance, if you want to clear browsing data for the past hour, select “Last hour“.
- Then, Check the boxes next to “Cookies and other site data” and “Cached images and files“.
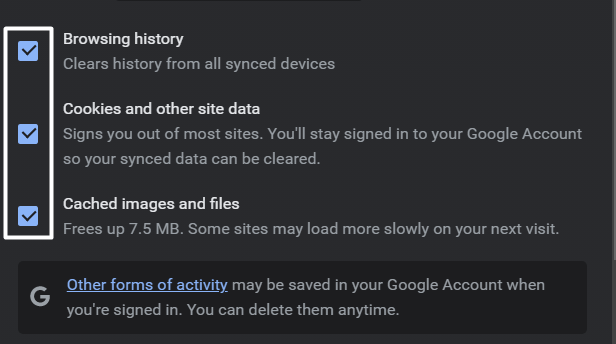
- Finally, Click on “Clear data“.

For Safari (macOS)
- To do so, click on Safari in the top menu and select the Preferences… option from the dropdown menu.
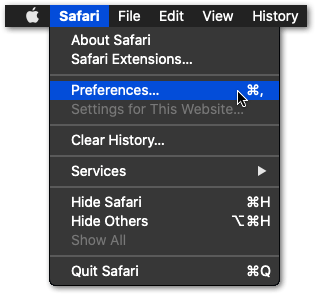
- Next, click on the Advanced option in the top menu and tick the box next to the Show Develop menu option.
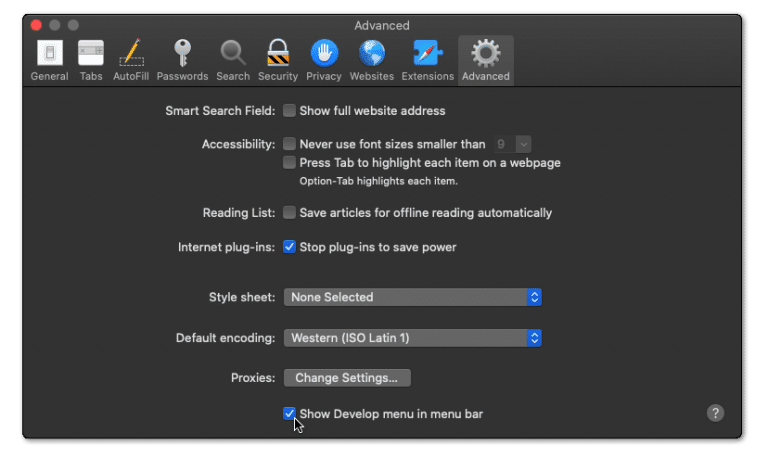
- Then, click on Develop in the menu bar at the top and then choose the Empty Caches (🗑️) option.

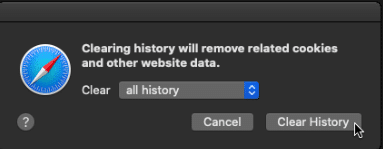
- Once done, again select the Safari option from the top menu and click on the Clear History… option.

- At last, choose Clear History from the Clear history section to clear the web browser’s cookies and other temporary data.
For Microsoft Edge
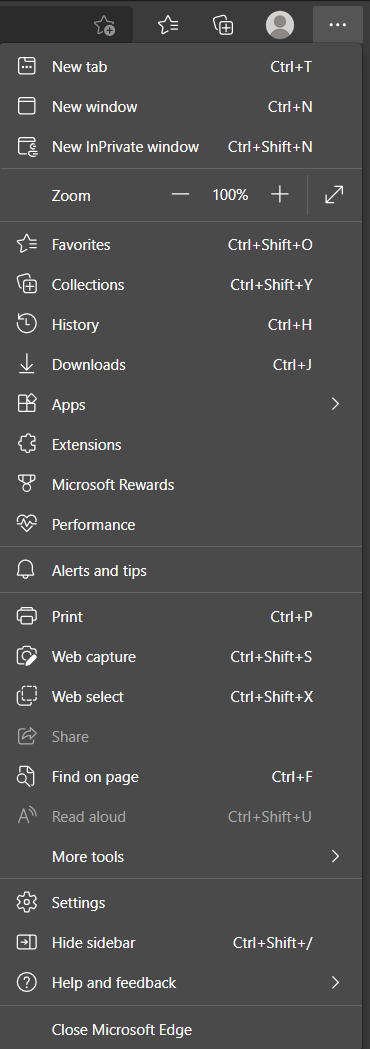
- Begin by clicking on the kebab menu in the window’s top right corner.
- Then, in the drop-down menu, select Settings.
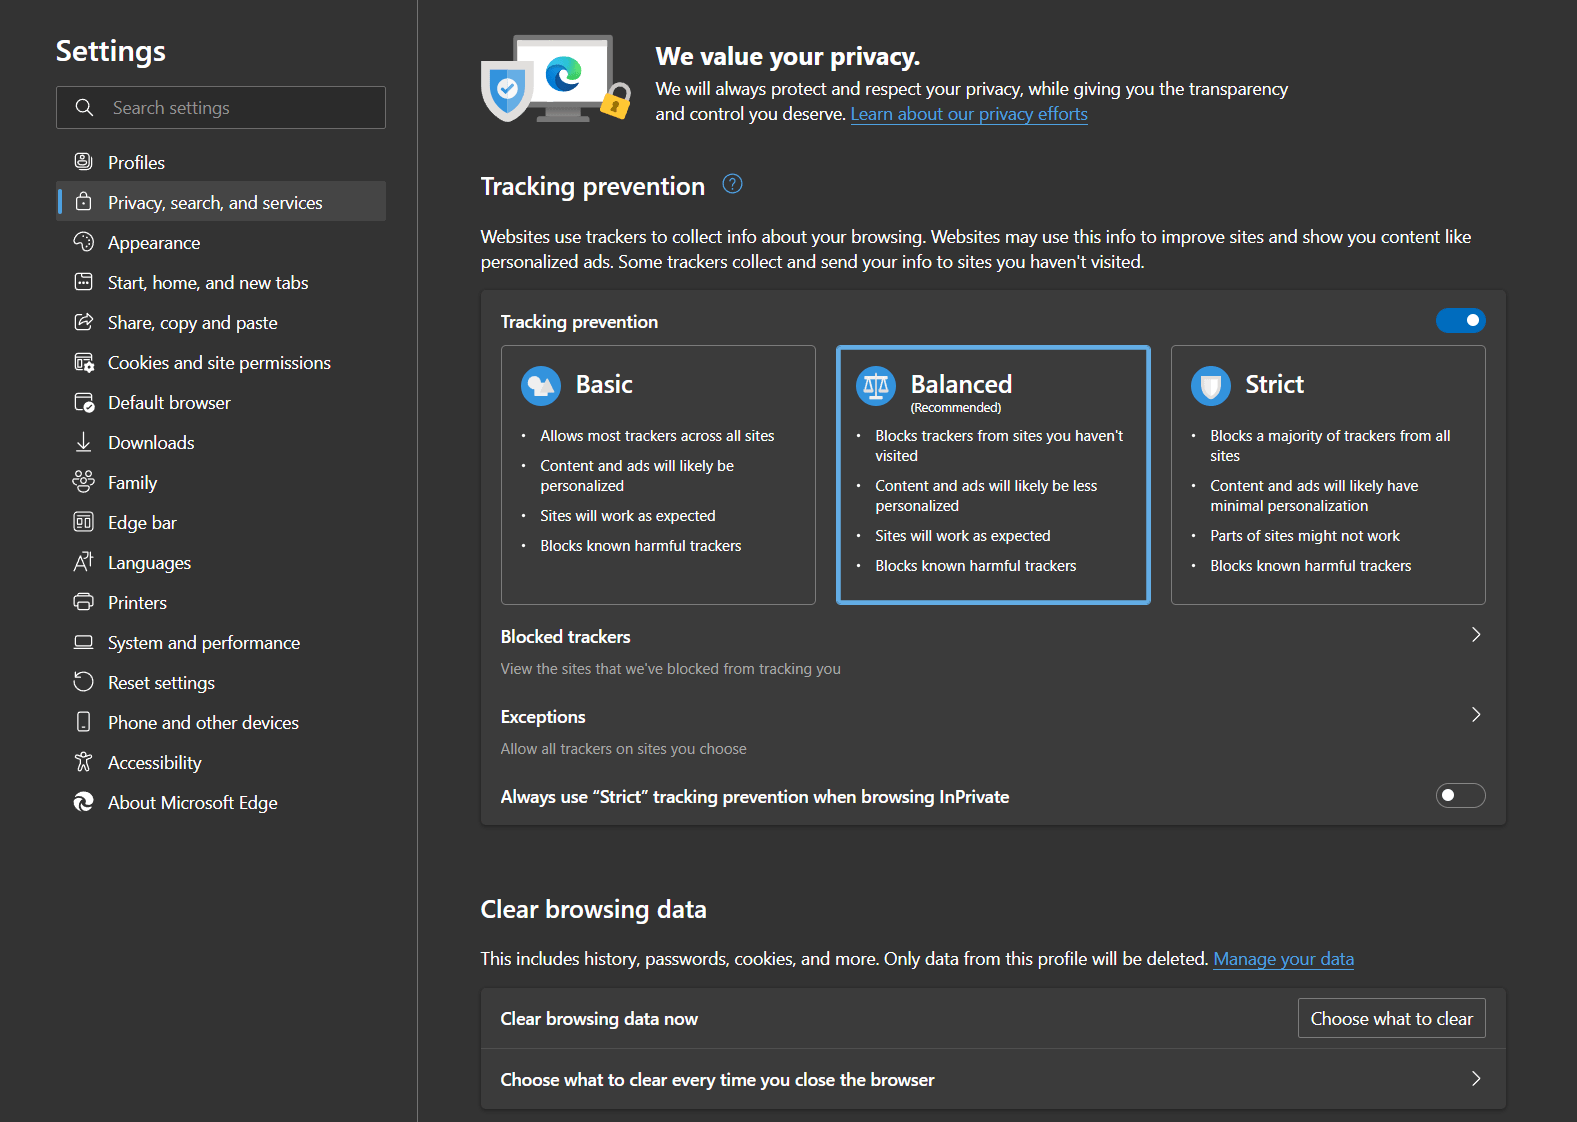
- In the newly opened page, click on Privacy, search, and services in the left sidebar.
- Then, under the Clear browsing data section, click on the Choose what to clear button.
- After that, in the popup window, ensure the Time range is set to All time.
- Next is to ensure that only the Cached images and files option is checked.
- Click on the Clear now button in the popup window to get rid of the cached data.

- Finally, restart your browser to ensure all changes take effect.
For Mozilla Firefox
- Start by clicking on the hamburger icon in the window’s top right corner.
- Then, in the drop-down menu, select the Settings option.
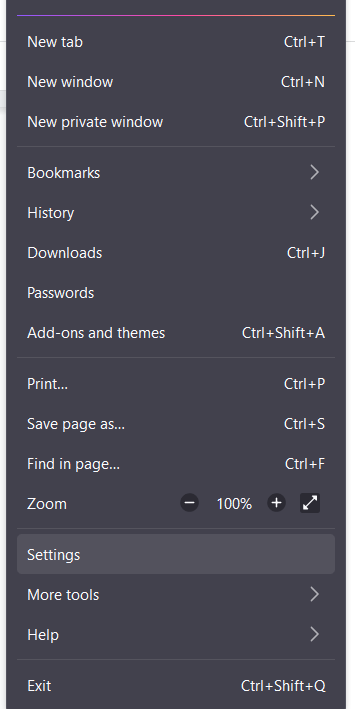
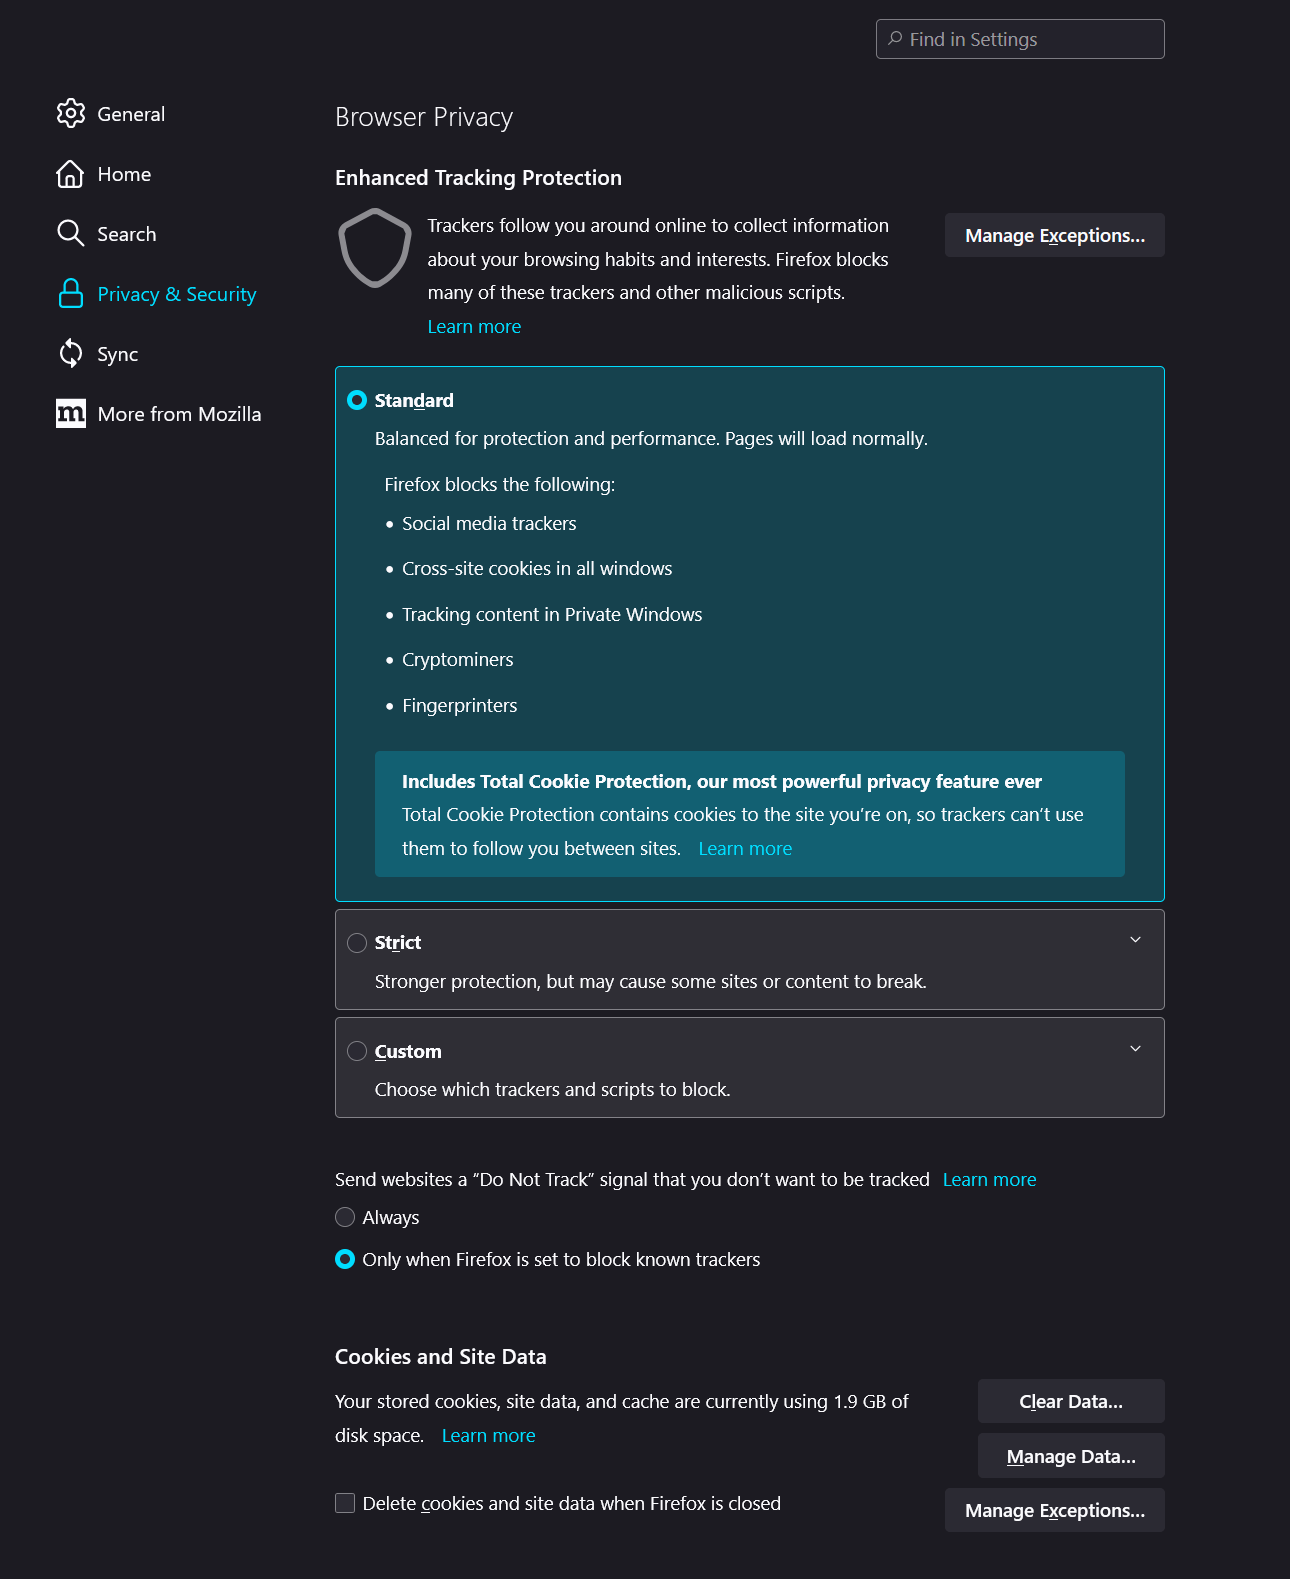
- Afterwards, select the Privacy & Security tab in the newly opened Settings window.
- Under the Cookies and Data section, click on the Clear Data… button.
- Then, in the new popup window, ensure only the Cached Web Content option is ticked.
- Click on the Clear button to clear the changes.
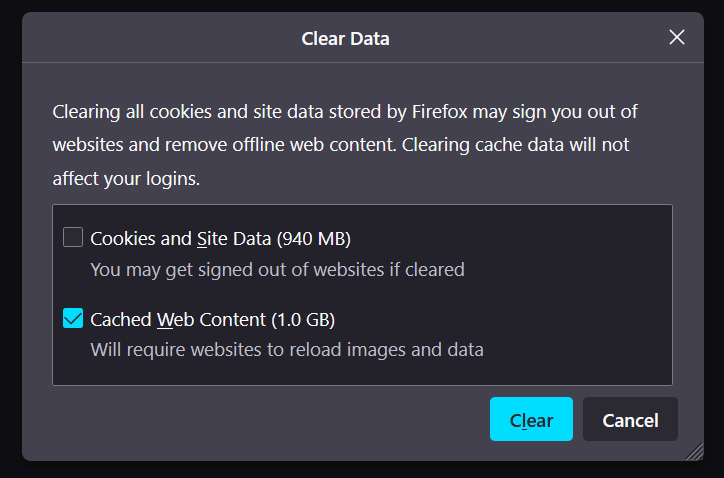
This step will successfully clear out your cache and cookies. Finally, try accessing ChatGPT again to see if the error persists.
3. Disable Your VPN or Proxy
Using a Virtual Private Network (VPN) can sometimes cause ChatGPT issues and prompt error messages like the “Failed to Get Service Status” error.
VPNs route your traffic through servers located in a different location than your actual location. This can lead to issues with OpenAI’s geolocation checks which can prompt error messages.
Additionally, some VPNs have a built-in firewall feature that can restrict access to ChatGPT and prevent it from establishing a successful connection to OpenAI servers.
Lastly, VPNs can introduce additional latency on your network because the internet traffic has to hop between your devices and the VPN server. This high latency can lead to connection instability and timeout, which eventually causes issues with ChatGPT.
To disable your VPN, simply follow the steps below:
Steps to Disable VPN Through the System Settings (For Windows)
To disable your VPN, simply follow the steps below:
- First, click on the Start menu in the bottom left corner of your desktop.
- Next, click on the gear icon to launch the Windows Settings.
- Now, click on the “Network and Internet” option.
- Afterward, locate the VPN tab and click on it.
- Now, find the VPN connection that you want to disable.
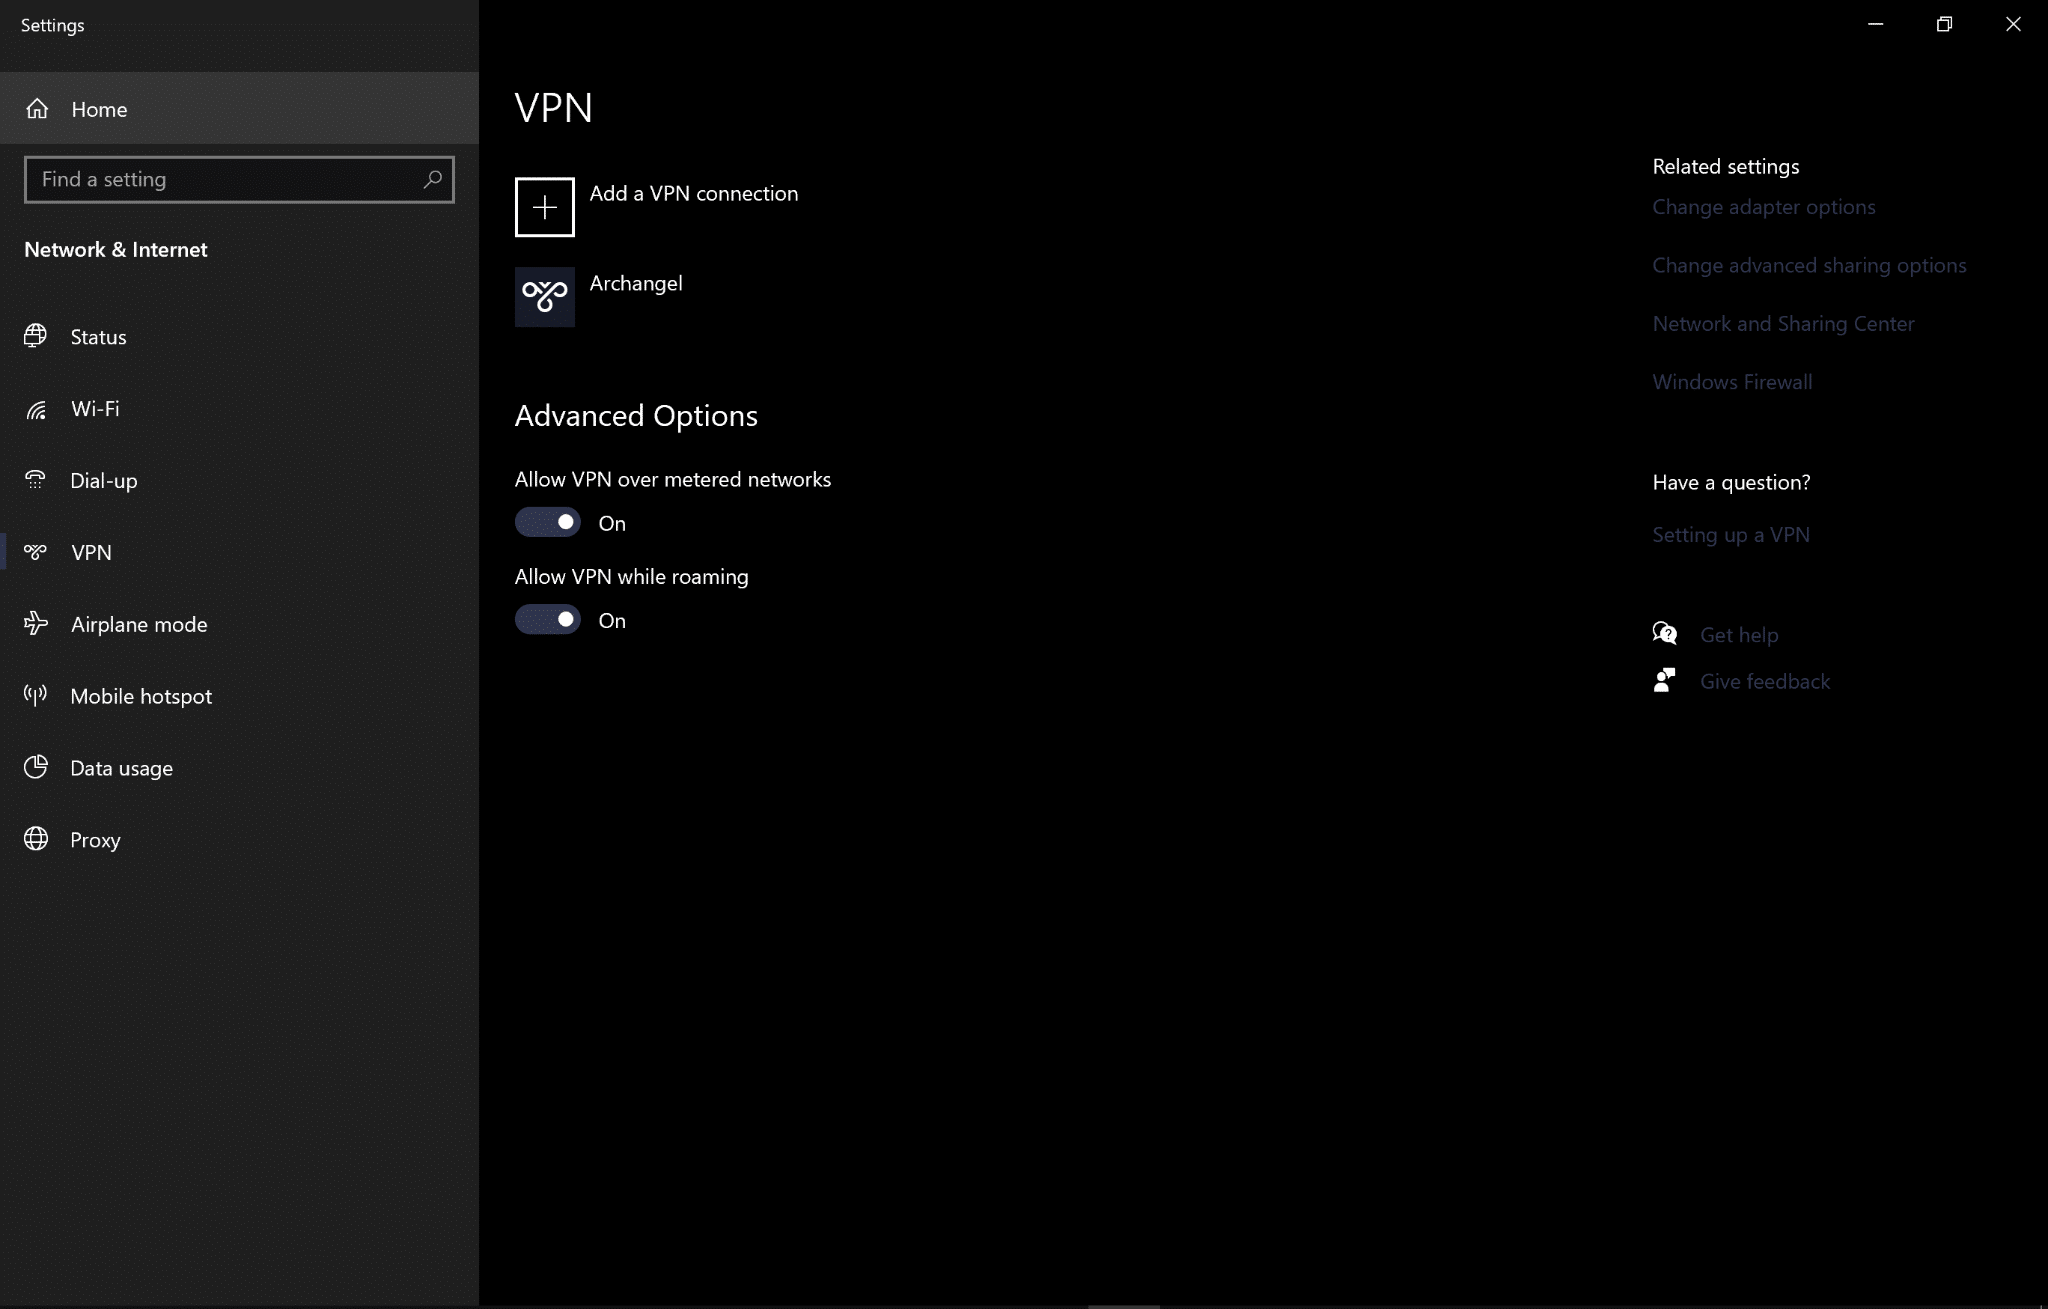
- Lastly, click on the “Disconnect” button to disconnect from VPN.
Steps to Disable an Application-Based VPN
It’s fairly simply to turn off application-based VPN services, such as NordVPN. Therefore, you can try to temporarily disable any VPNs that have been activated on your device through these simple steps:
- Locate the VPN application or settings on your device. This can typically be found in the system tray on a Windows computer or the menu bar on a Mac.
- Open the VPN application or settings and look for an option to disconnect or turn off the VPN. Click on this option to disable the VPN connection.
- If you’re using a browser extension or add-on to connect to the VPN, you can typically disable it by clicking on the extension icon in your browser and selecting the option to disconnect or turn off the VPN.

Steps to Disable Proxy Settings
For Windows
Click the Search button at the bottom left corner, then search for Internet Options and open it. After that, from the top menu, choose Connections and select LAN settings. Next, uncheck the boxes under Automatic configuration and Proxy server. Once done, click OK.

For macOS
Firstly open the Apple Menu, by clicking the apple icon, then select “System Preferences…”, and choose Network.

From the list of internet connections on the left, select your WiFi network that you wish to disable the proxy settings, then click “Advanced…”. Next, choose the Proxies tab, and uncheck all the boxes under “Select a protocol to configure:”. Once you’re done with that, click OK.

4. Check OpenAI Servers for Downtime
If the solutions mentioned above fail to solve the issue that you are facing, then it is probable that the problem is at OpenAI’s backend or servers.
Therefore you need to verify their status and there are two methods to do this:
Method 1: Using Official ChatGPT Page
If you are looking to get information regarding ChatGPT’s server downtime, then the best option is to make use of ChatGPT’s Official Server Status Page.
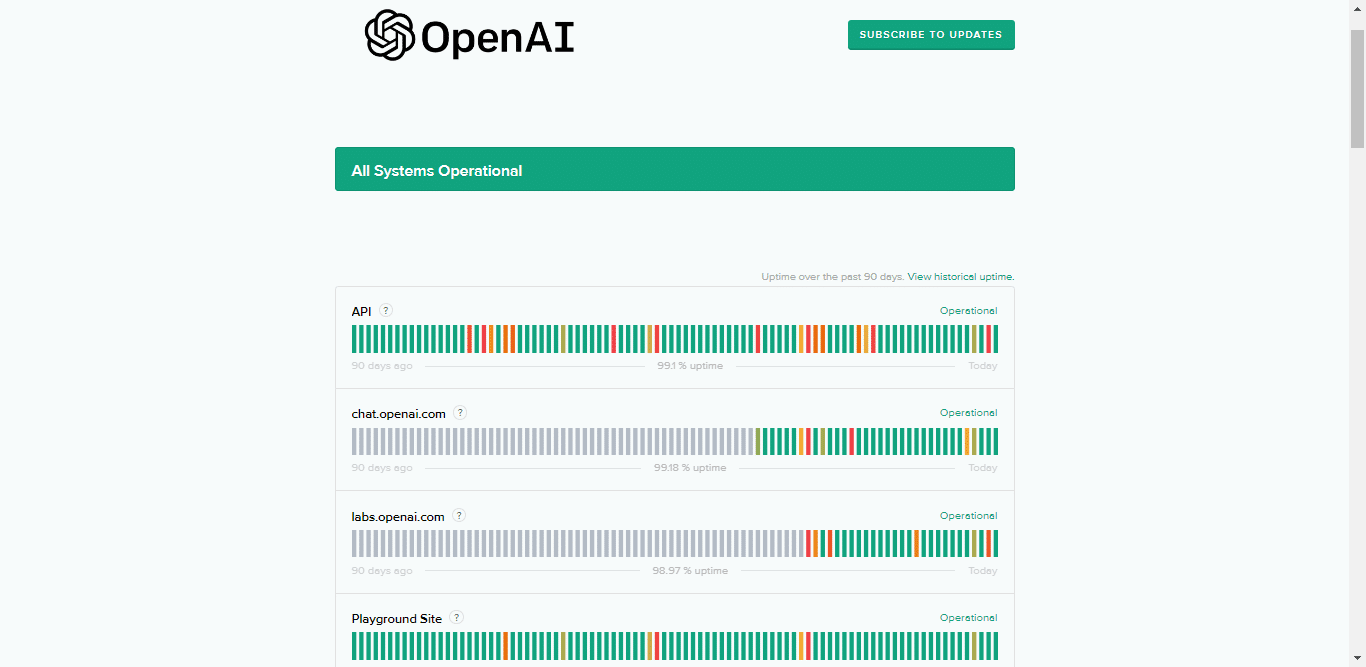
After browsing the site, you can easily look for server failures or downtime preventing ChatGPT from loading properly. On top of that, you can also view past ChatGPT server failures and scheduled downtime, along with graphs regarding the regions affected and estimated time for resolution.
During our investigation, we found out that ChatGPT was undergoing server failure due to an unexpected surge in traffic. If you are facing similar issues, you should check out the status of OpenAI servers.
Method 2: Using Downdetector
Next, you can check out any third-party site like “Downdetector for OpenAI”. Downdetector collects crowdsourced data from users who report server failures on the website as well as scanning official social media pages.
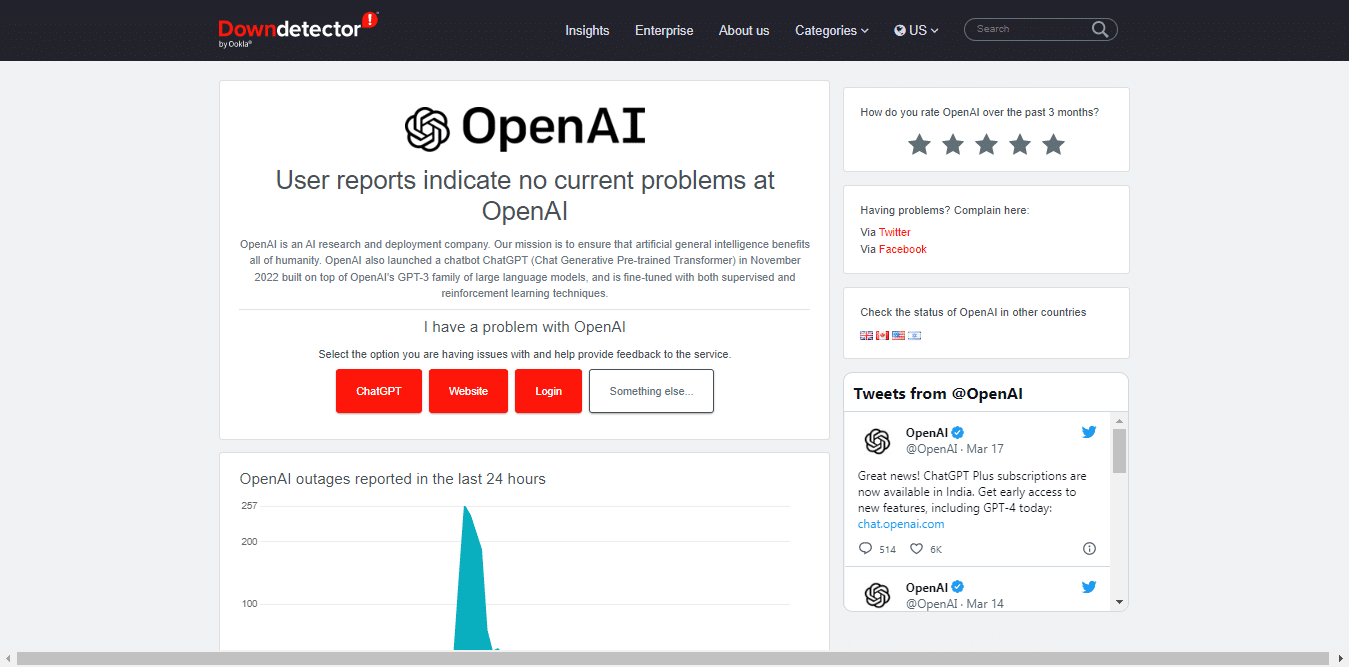
This allows Downdetector to accurately diagnose the cause behind ChatGPT’s server failure and provide real-time updates on the operational status of the OpenAI servers. Users can also check out live graphs and maps on their website or scroll through the comment section to know if other users face the same problem.
5. Try ChatGPT in Incognito Mode
Opening ChatGPT in incognito mode can help resolve the “Failed to Get Service Status” error because it blocks out the browser extensions can settings that interfere with ChatGPT’s ability to return responses.
Some browser extensions like Ad-blockers can block certain scripts or content on webpages from running; this can hinder ChatGPT from functioning properly. By disabling these extensions in incognito mode, ChatGPT can run freely without interruption.
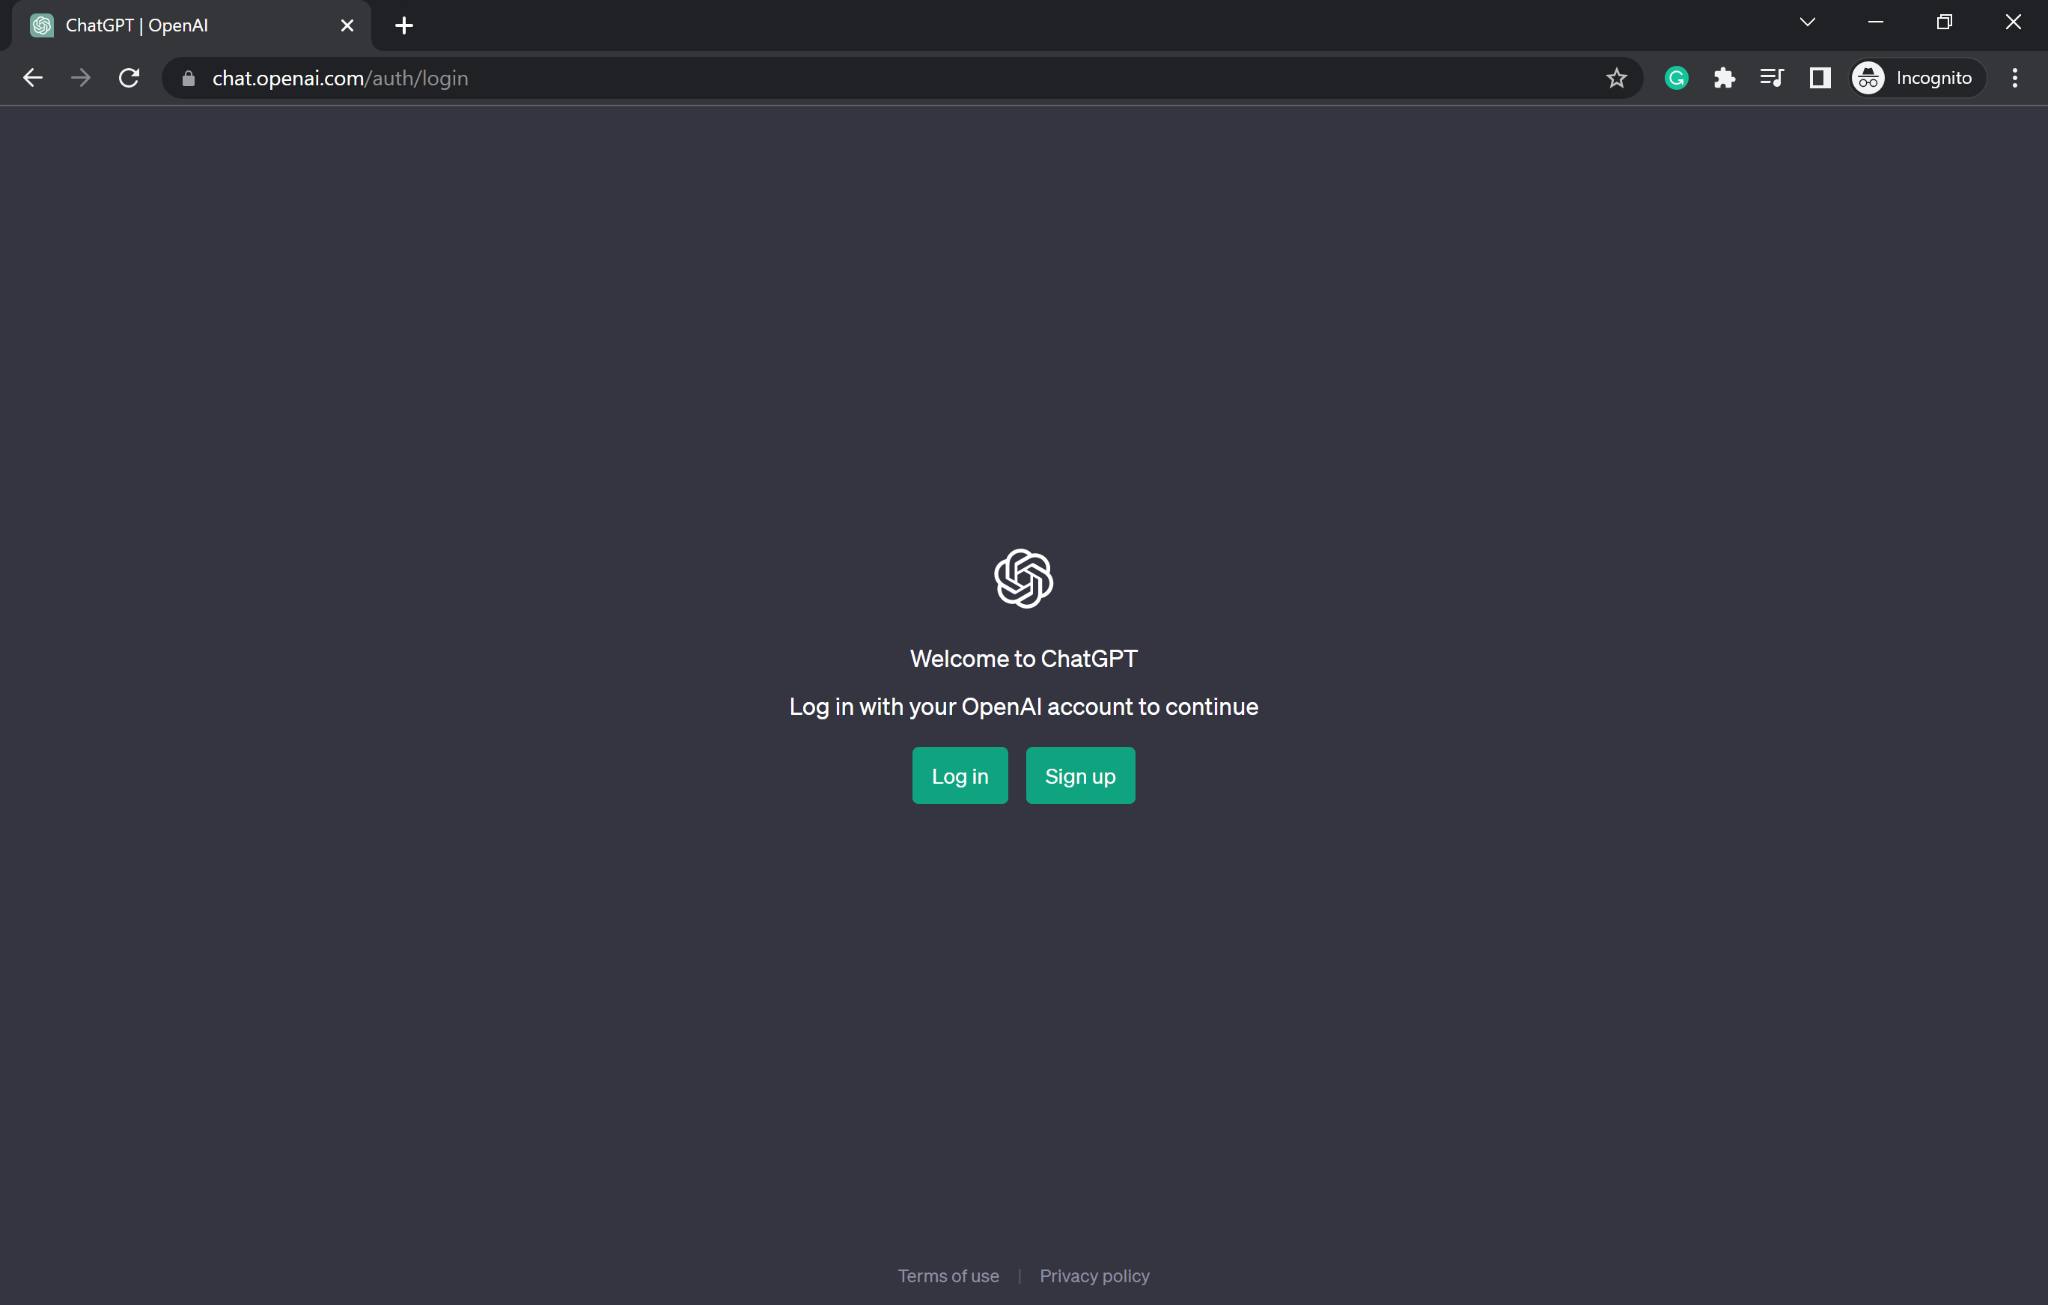
Additionally, incognito mode starts a fresh browsing session without using your browser’s cache or cookies, eliminating the possibility of errors resulting from a corrupted cache or problematic cookies.
Lastly, the incognito mode also disables some privacy-related settings that can restrict access to specific websites like ChatGPT; this allows ChatGPT to function properly.
To open up ChatGPT in incognito mode, simply follow the steps below:
Google Chrome
Shortcut keys: Ctrl + Shift + N
- Click on the kebab menu

- Select New incognito window.

Mozilla Firefox
Shortcut key: Ctrl + Shift + P
- First, click on the hamburger menu (三) on the browser’s top-right corner.
- Then, select New Private Window.

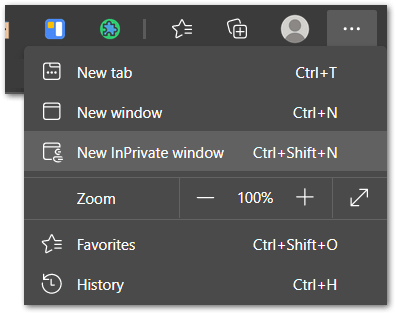
Microsoft Edge
Shortcut key: Ctrl + Shift + N
- First, click on the meatball menu icon

- Then, select New InPrivate window.
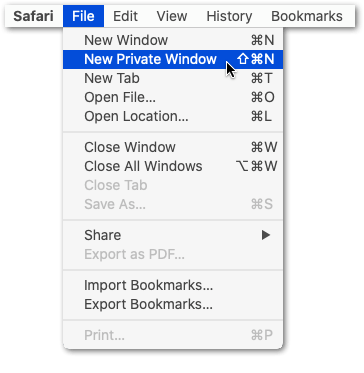
Safari (macOS)
Shortcut key: Command + Shift + N
- First, click on File. It is on the top-left corner of the browser.
- Then, from the drop-down menu, select New Private Window.
6. Contact OpenAI Support
If none of the solutions mentioned above work, then your best bet is to contact OpenAI support, as it is probable that the issue is at their end. You can approach OpenAI through multiple channels, including their social media handles and their community forums.
Additionally, customers can fill out a contact form with precise detail about their issue, and OpenAI gets back to them with the solution.
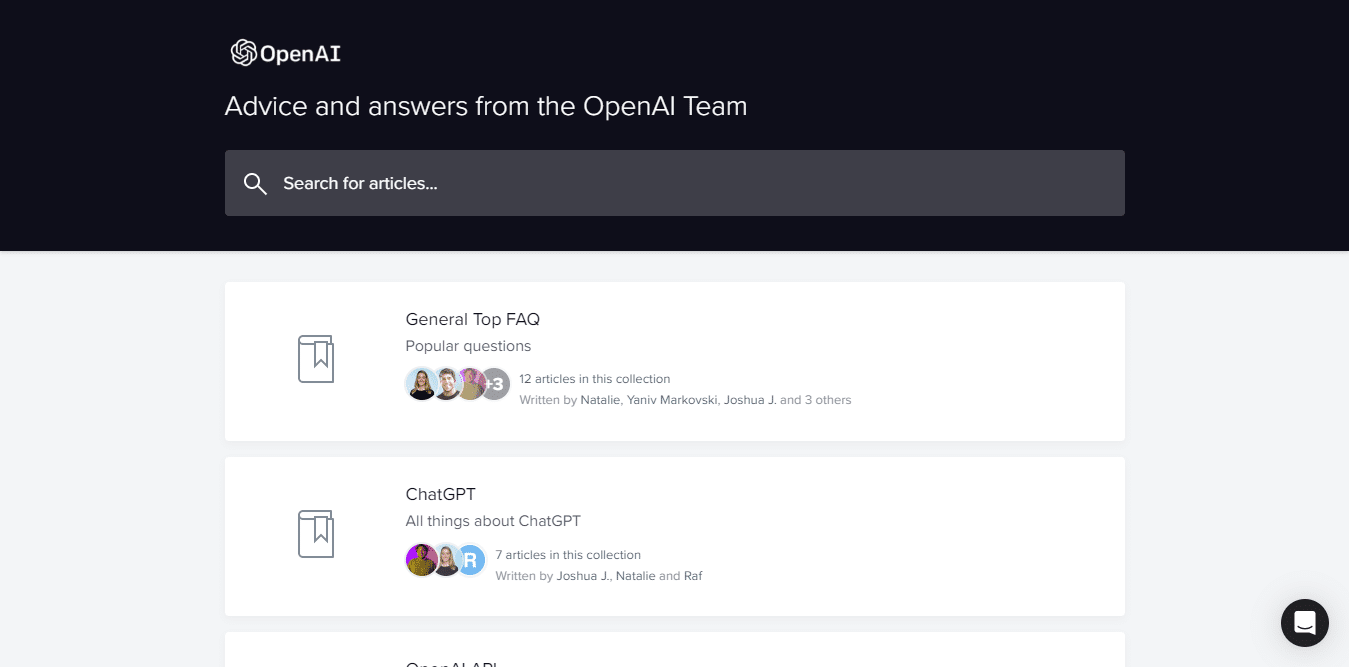
You can fill out the contact form with your information and a description of the issue you are facing while trying to access ChatGPT.
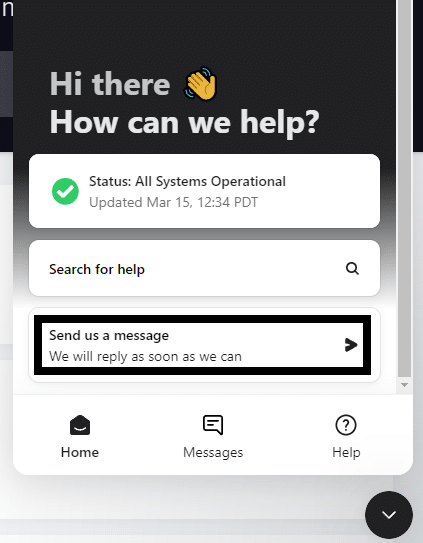
- Open the OpenAI Help Center in your internet browser.
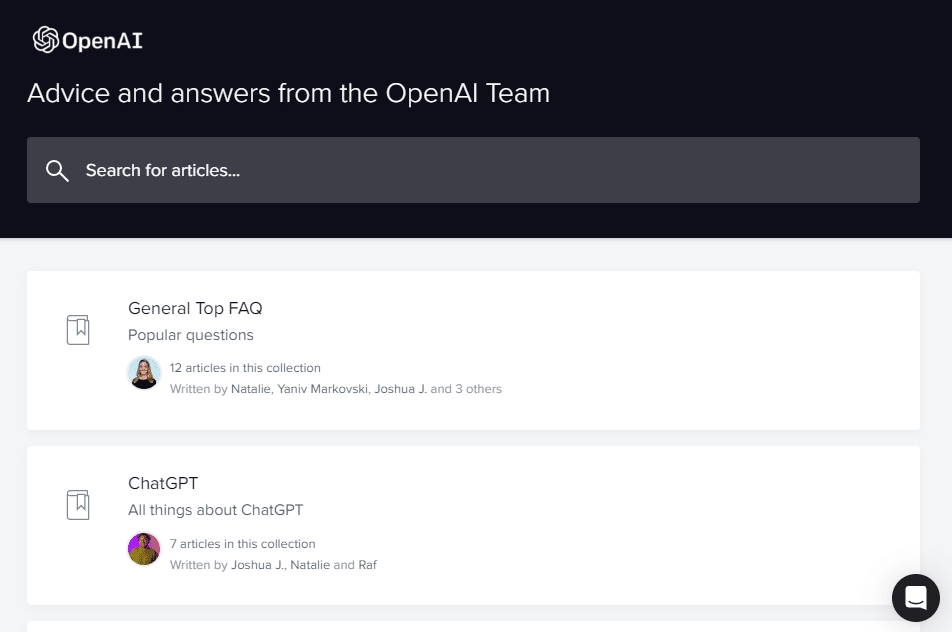
- Click on the message bubble in the lower right portion of the OpenAI Help Center page.
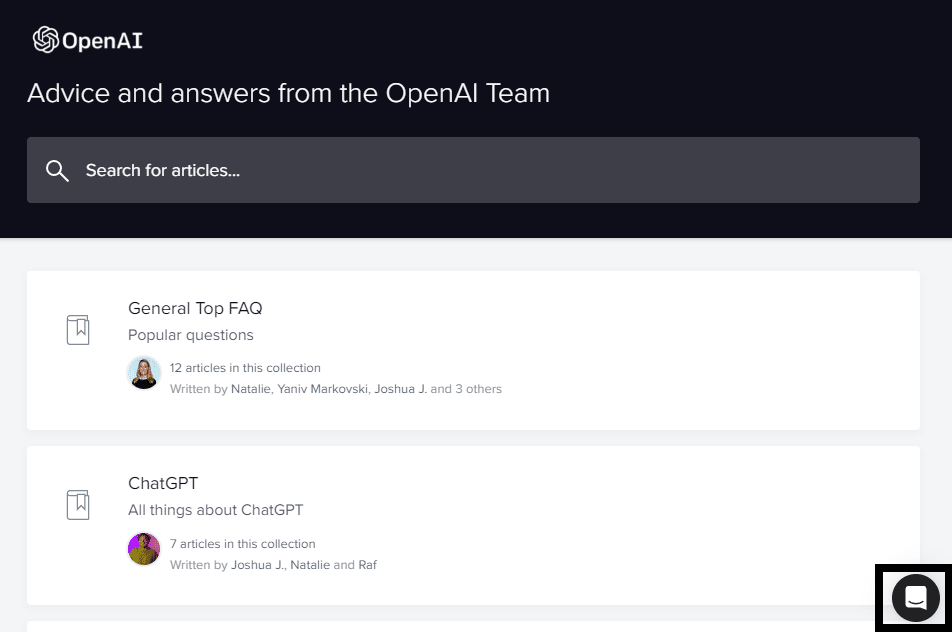
- In the chat box, click on the “Send us a message” option.
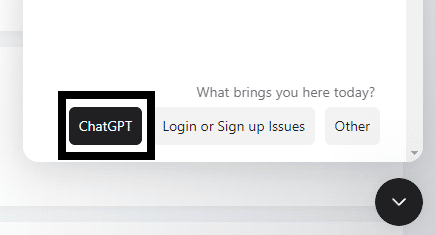
- When asked the question, “What brings you here today?” select the “ChatGPT” option.
ChatGPT Plus subscribers get the additional perks of having a dedicated email address or phone support line. If you need OpenAI support to solve your issue promptly, we recommend providing full details about the problem you are facing, including the frequency and timeframe of the issue.
We recommend disclosing all the information regarding your issue, including the frequency, onset, and duration of your problem, along with any steps you have taken to fix it. This enables experts at OpenAI to figure out your problem’s root cause and understand where you are standing in the diagnostic cascade so they can devise a solution tailored to you.
Conclusion
In conclusion, encountering errors like ChatGPT “Failed to Get Service Status” are fairly common and can be quite frustrating for users, but thankfully there are several workarounds for this issue.
If you follow the steps and solutions in this guide closely, you will get back to using ChatGPT in no time. We hope our guide helped you fix your problems with using ChatGPT.
Lastly, don’t forget to share this guide with peers encountering service issues with ChatGPT.
