Are you encountering the “Our systems have detected unusual activity from your system” error messages when attempting to use OpenAI’s ChatGPT?
ChatGPT, the OpenAI-based model, has garnered immense attention from users globally due to its creative user interface and the ability to create AI prompts and code.
However, some users cannot have a pleasant experience with ChatGPT because they are consistently prompted with the “Our Systems Have Detected Unusual Activity From Your System” error.
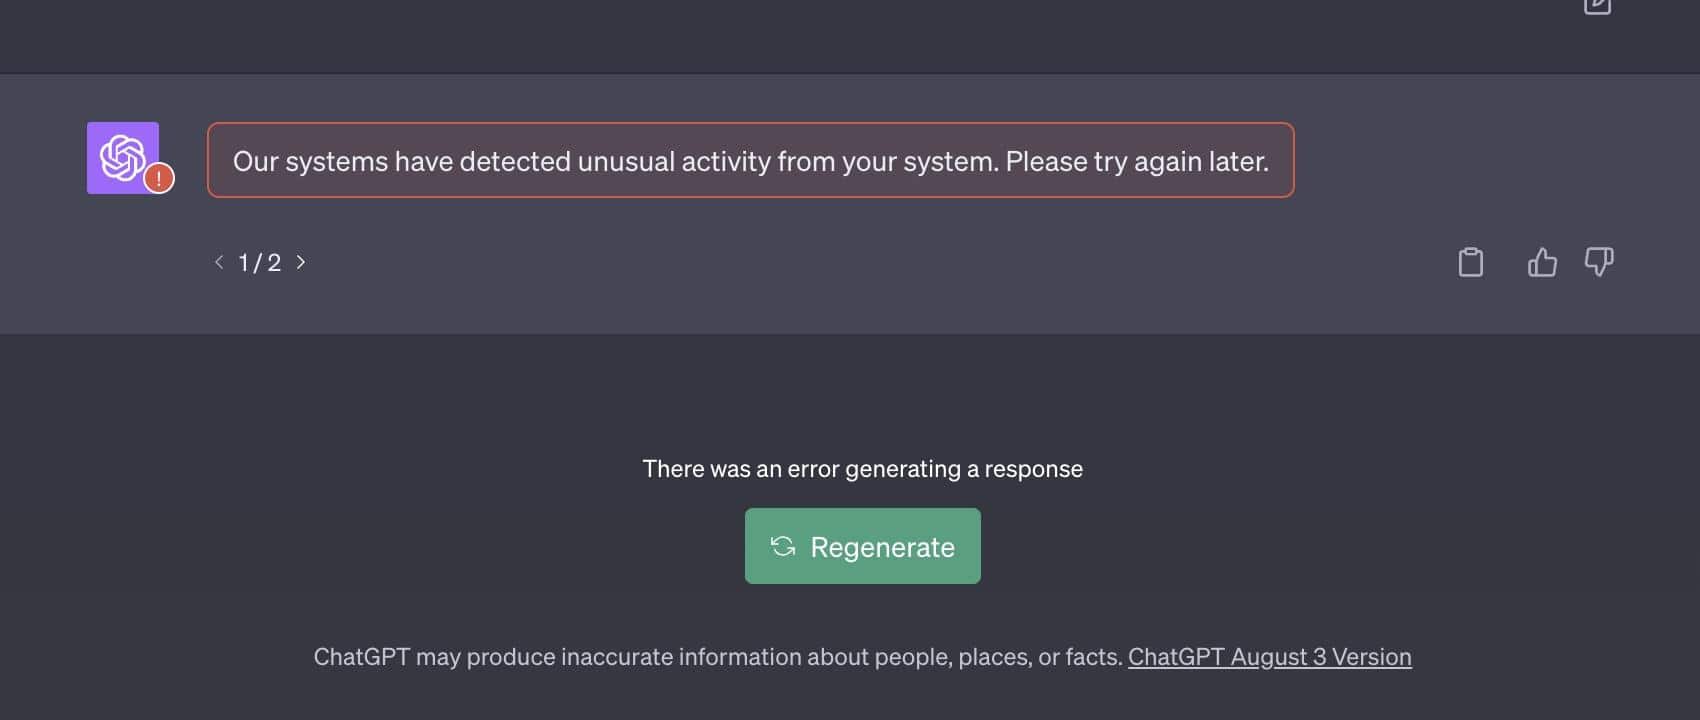
If you are experiencing similar issues, then don’t worry. We have got your back. This guide contains 8 solutions to ChatGPT’s “Our systems have detected unusual activity from your system” error.
So, let’s get started!
8 Fixes for the ChatGPT “Our Systems Have Detected Unusual Activity From Your System” Error
1. Verify Your Internet Connection
The first step to solving this problem is verifying the speed and stability of your internet connection. A stable and fast internet connection is imperative for accessing ChatGPT smoothly.
Whenever you try querying ChatGPT, your request is transmitted to OpenAI servers, and the approval is sent back to the client. If your internet connection is not stable or fast enough, this can add latency to this process, raising the likelihood of running into errors.

To verify your internet connection, you can utilize any of the commercially available speed-checking sites, such as SpeedTest.net or Fast.com.
If your internet connection is stable, this issue is likely caused by another factor. Therefore, our guide recommends checking out other solutions to address this issue.
On the other hand, if your Internet is currently experiencing low speeds or high Ping and latency, you can try the below-mentioned tips to improve your internet speed:
- Turn on and turn off airplane mode ✈️
- Reboot the device 🔁
- Re-enable the Wi-Fi 📶
- Restart or power-cycle the Wi-Fi router
- Stop all downloads 🚫
- Contact the ISP provider ☎️
2. Log Out and Log In to Your OpenAI Account
Additionally, you can also try re-signing in to your OpenAI account on ChatGPT to check if it fixes the error. By doing this, you’re essentially refreshing your login and account information, as well as refreshing your session with the platform. Thus, it’s seen as a potential solution to the ChatGPT error.
Therefore, follow the below-mentioned steps to re-log in to the ChatGPT platform:
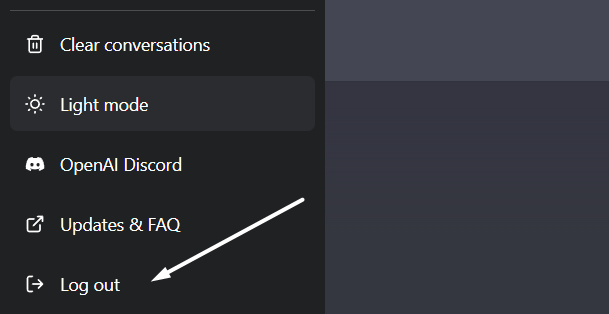
- To start, navigate to Chat.openai.com (🌐) and click on Log out at the bottom of the left sidebar to log out of your ChatGPT or OpenAI account.
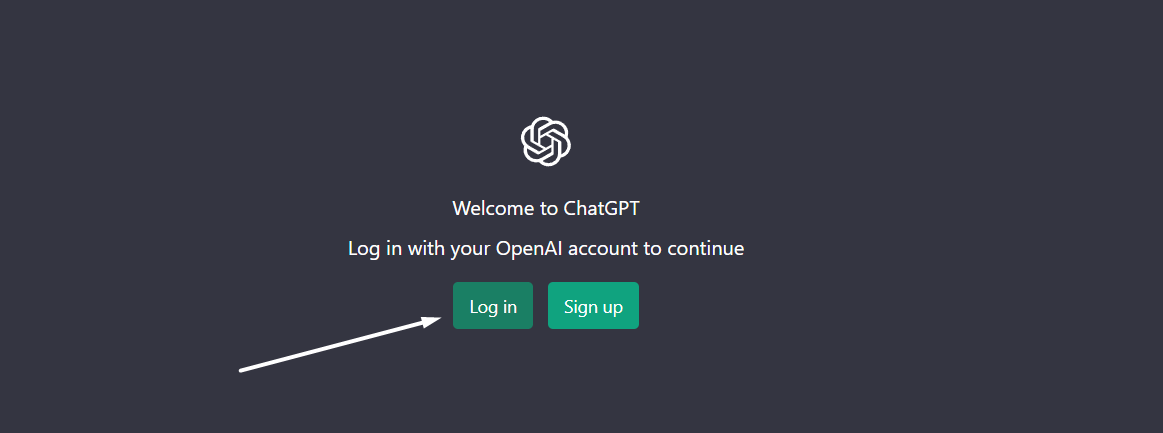
- Once you’ve logged out of your OpenAI account, click on login (🔁) on the same webpage to sign in again to your OpenAI account.
3. Access ChatGPT in Incognito Mode
In Incognito or private browsing mode, the browser doesn’t use the stored cache of the content to load or view the websites we visit, including ChatGPT. So, there won’t be any cache-related issues. Similarly, browser extensions do not interfere with the page-loading (unless those extensions are allowed to operate in incognito).
Therefore, you can follow the mentioned steps to open the ChatGPT page in Incognito mode, so you can check to see if you still encounter the “Our systems have detected unusual activity from your system” error when submitting prompts.
Remember you’ll have to log in to your ChatGPT/OpenAI account when accessing the page in Incognito mode.
Google Chrome
Shortcut keys: Ctrl + Shift + N
- Click on the kebab menu

- Select New incognito window.

Mozilla Firefox
Shortcut key: Ctrl + Shift + P
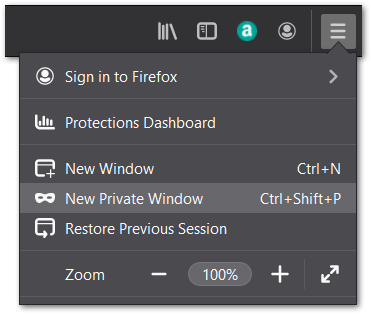
- First, click on the hamburger menu (三) on the browser’s top-right corner.
- Then, select New Private Window.
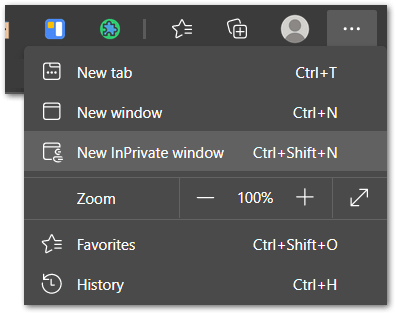
Microsoft Edge
Shortcut key: Ctrl + Shift + N
- First, click on the meatball menu icon

- Then, select New InPrivate window.
Safari (macOS)
Shortcut key: Command + Shift + N
- First, click on File. It is on the top-left corner of the browser.
- Then, from the drop-down menu, select New Private Window.

4. Clear the Web Browser Cache and Cookies
Your browser’s cache is an incredibly handy tool that stores images, videos, and other temporary media files to load up your frequently visited sites faster.
But over time, this cache might become corrupted or obsolete, leading to performance issues like ChatGPT’s “Our systems have detected unusual activity from your system” Error.
Clearing your browser’s cache lets you start fresh and reestablish the connection to OpenAI servers. This enables you to retrieve the latest data and credentials from OpenAI and drastically reduces your possibility of experiencing various performance errors.
To clear your browser’s cache and cookies, simply follow the steps below:
For Google Chrome
- Firstly, open your web browser. In this guide, we are going to use Chrome.
- Next, locate the three dots menu in Chrome’s top right-hand corner and click on it.
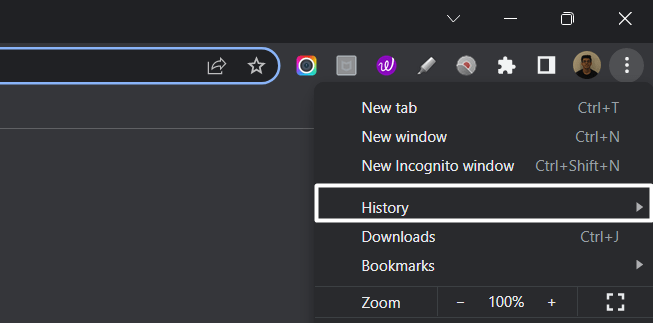
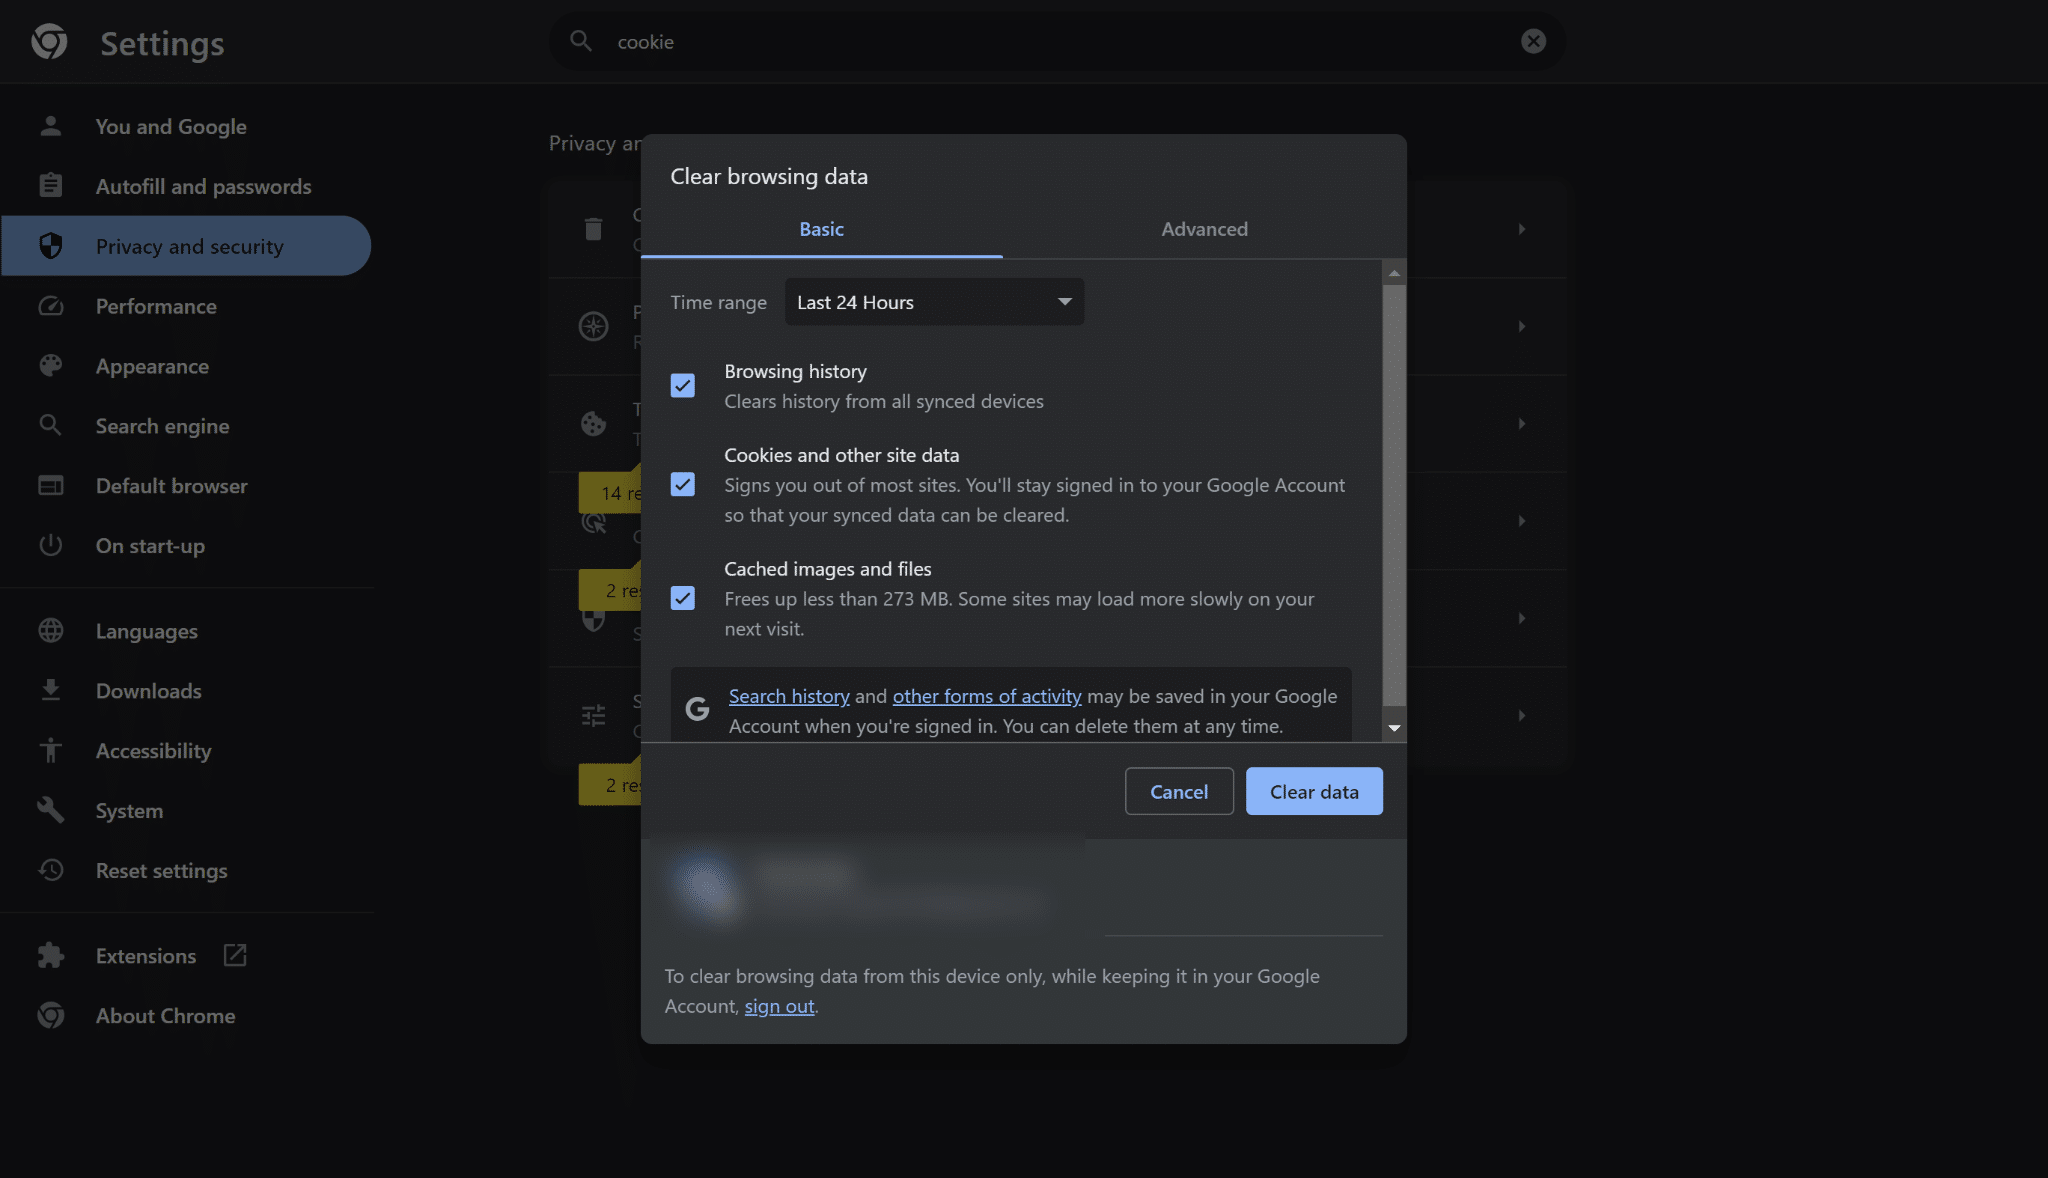
- Then, navigate to the “Privacy and Security” section and click on “Clear browsing data“.
- Afterward, Chrome will prompt you to select the time frame to clear your browsing data. For instance, if you want to clear browsing data for the past month, select “Last Month“.
- Then, click on the checkboxes adjacent to “Cookies and other site data“.
- Repeat the same step with the “Cached images and files” section.
- Now, click on the “Clear data” option.
For Safari (macOS)
- To do so, click on Safari in the top menu and select the Preferences… option from the dropdown menu.
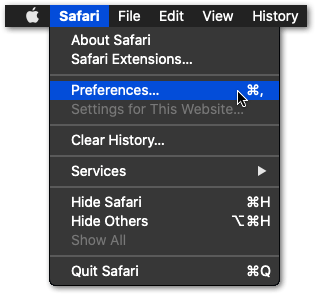
- Next, click on the Advanced option in the top menu and tick the box next to the Show Develop menu option.
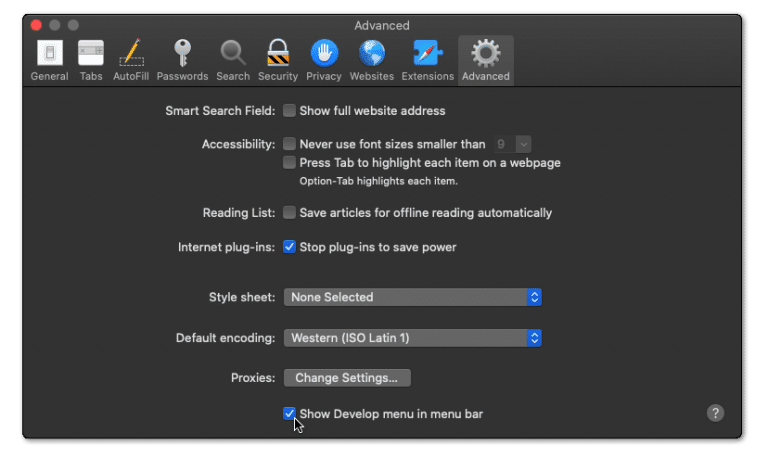
- Then, click on Develop in the menu bar at the top and then choose the Empty Caches (🗑️) option.

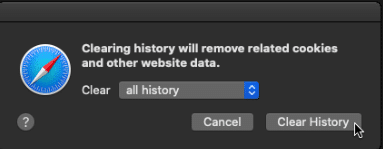
- Once done, again select the Safari option from the top menu and click on the Clear History… option.

- At last, choose Clear History from the Clear history section to clear the web browser’s cookies and other temporary data.
For Microsoft Edge
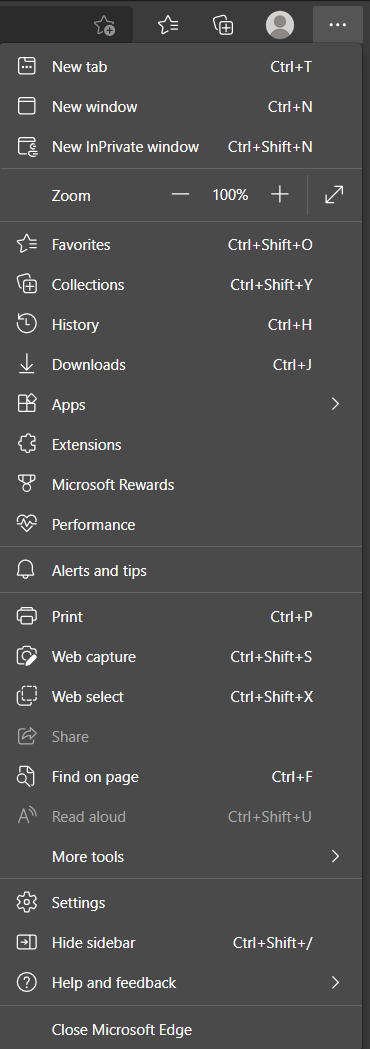
- Begin by clicking on the kebab menu in the window’s top right corner.
- Then, in the drop-down menu, select Settings.
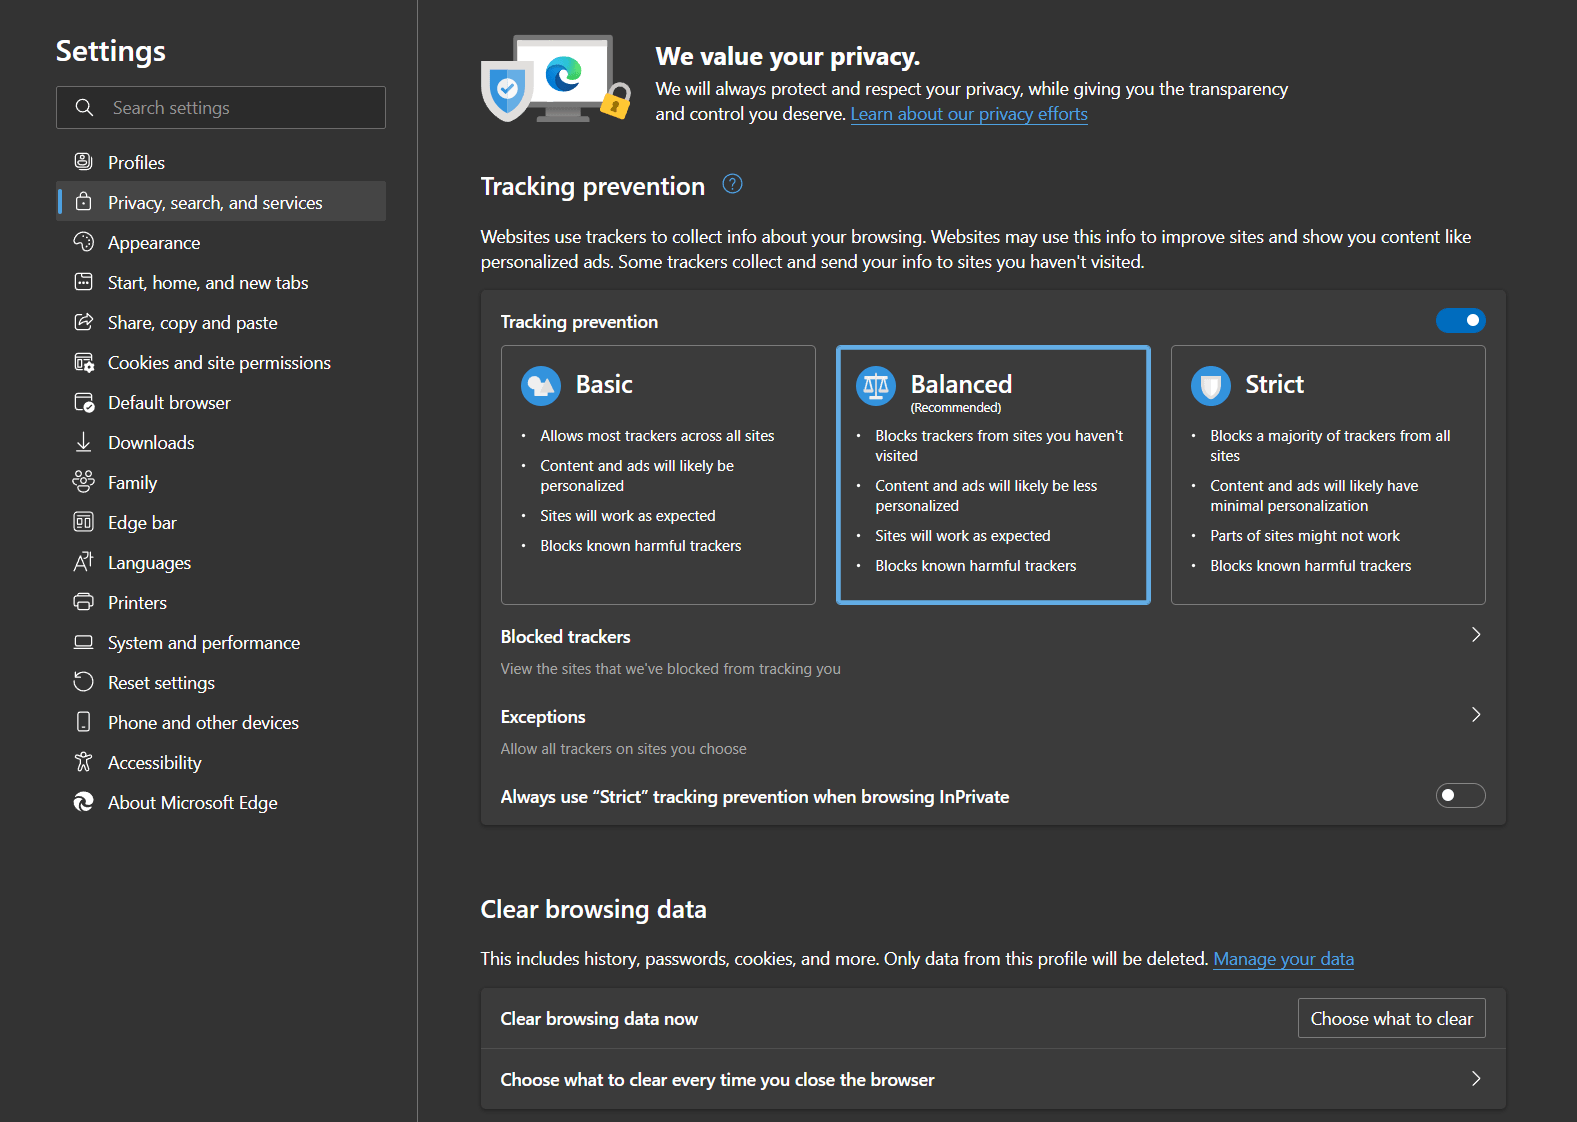
- In the newly opened page, click on Privacy, search, and services in the left sidebar.
- Then, under the Clear browsing data section, click on the Choose what to clear button.
- After that, in the popup window, ensure the Time range is set to All time.
- Next is to ensure that only the Cached images and files option is checked.
- Click on the Clear now button in the popup window to get rid of the cached data.

- Finally, restart your browser to ensure all changes take effect.
For Mozilla Firefox
- Start by clicking on the hamburger icon in the window’s top right corner.
- Then, in the drop-down menu, select the Settings option.
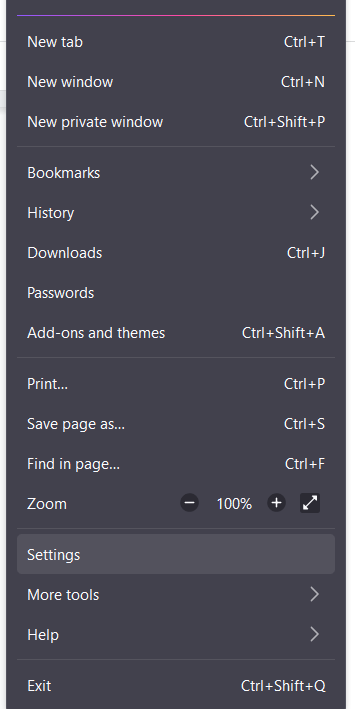
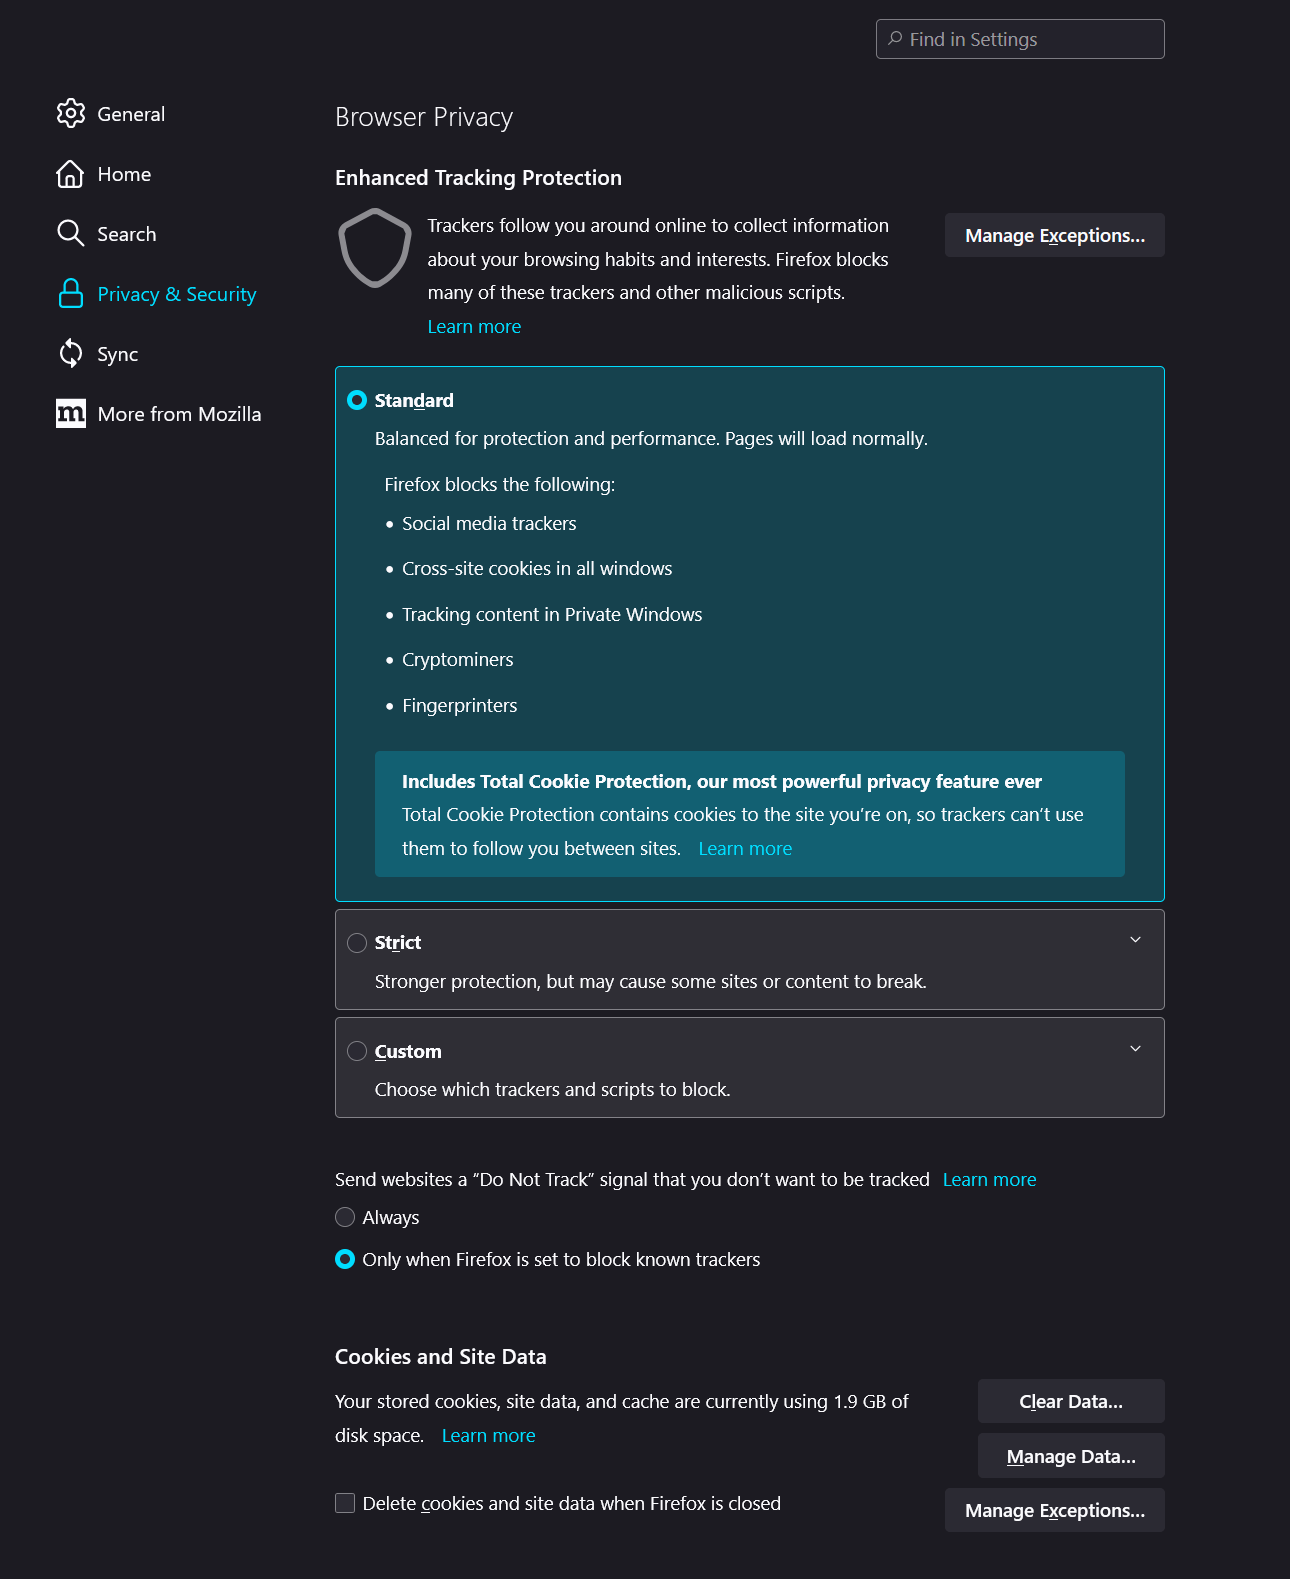
- Afterwards, select the Privacy & Security tab in the newly opened Settings window.
- Under the Cookies and Data section, click on the Clear Data… button.
- Then, in the new popup window, ensure only the Cached Web Content option is ticked.
- Click on the Clear button to clear the changes.
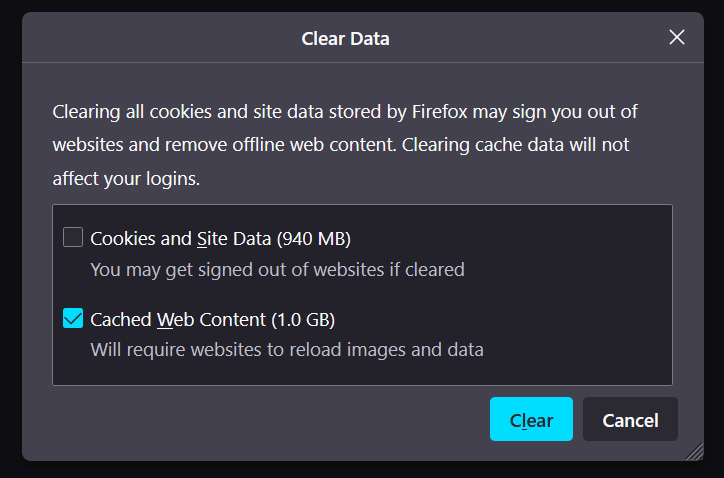
This step will successfully flush out your cache and cookies. Finally, try querying ChatGPT again to see if the issue persists.
5. Disable Problematic Extensions
Some of your browser’s extensions, such as certain Ad-blockers, are designed to block certain web scripts from loading. While this is beneficial for users who are looking to block unnecessary ads, it can also hinder ChatGPT’s ability to function properly by preventing some of its scripts from running.
Additionally, these adblockers can contain privacy features that prevent tracking and data collection. While this is advantageous for maintaining user privacy, it can also prevent ChatGPT from functioning optimally, as it relies on user data to generate tailored responses to user queries.
Disabling problematic extensions like certain adblockers allows ChatGPT to run its scripts fully and retrieve data.
To disable problematic extensions, simply follow the steps below.
For Google Chrome
- First, open your browser and navigate to the “Settings” menu.

- Now, locate the “Extensions” tab and “click” on it.
- Now, disable extensions individually and query ChatGPT to see if the issue persists.
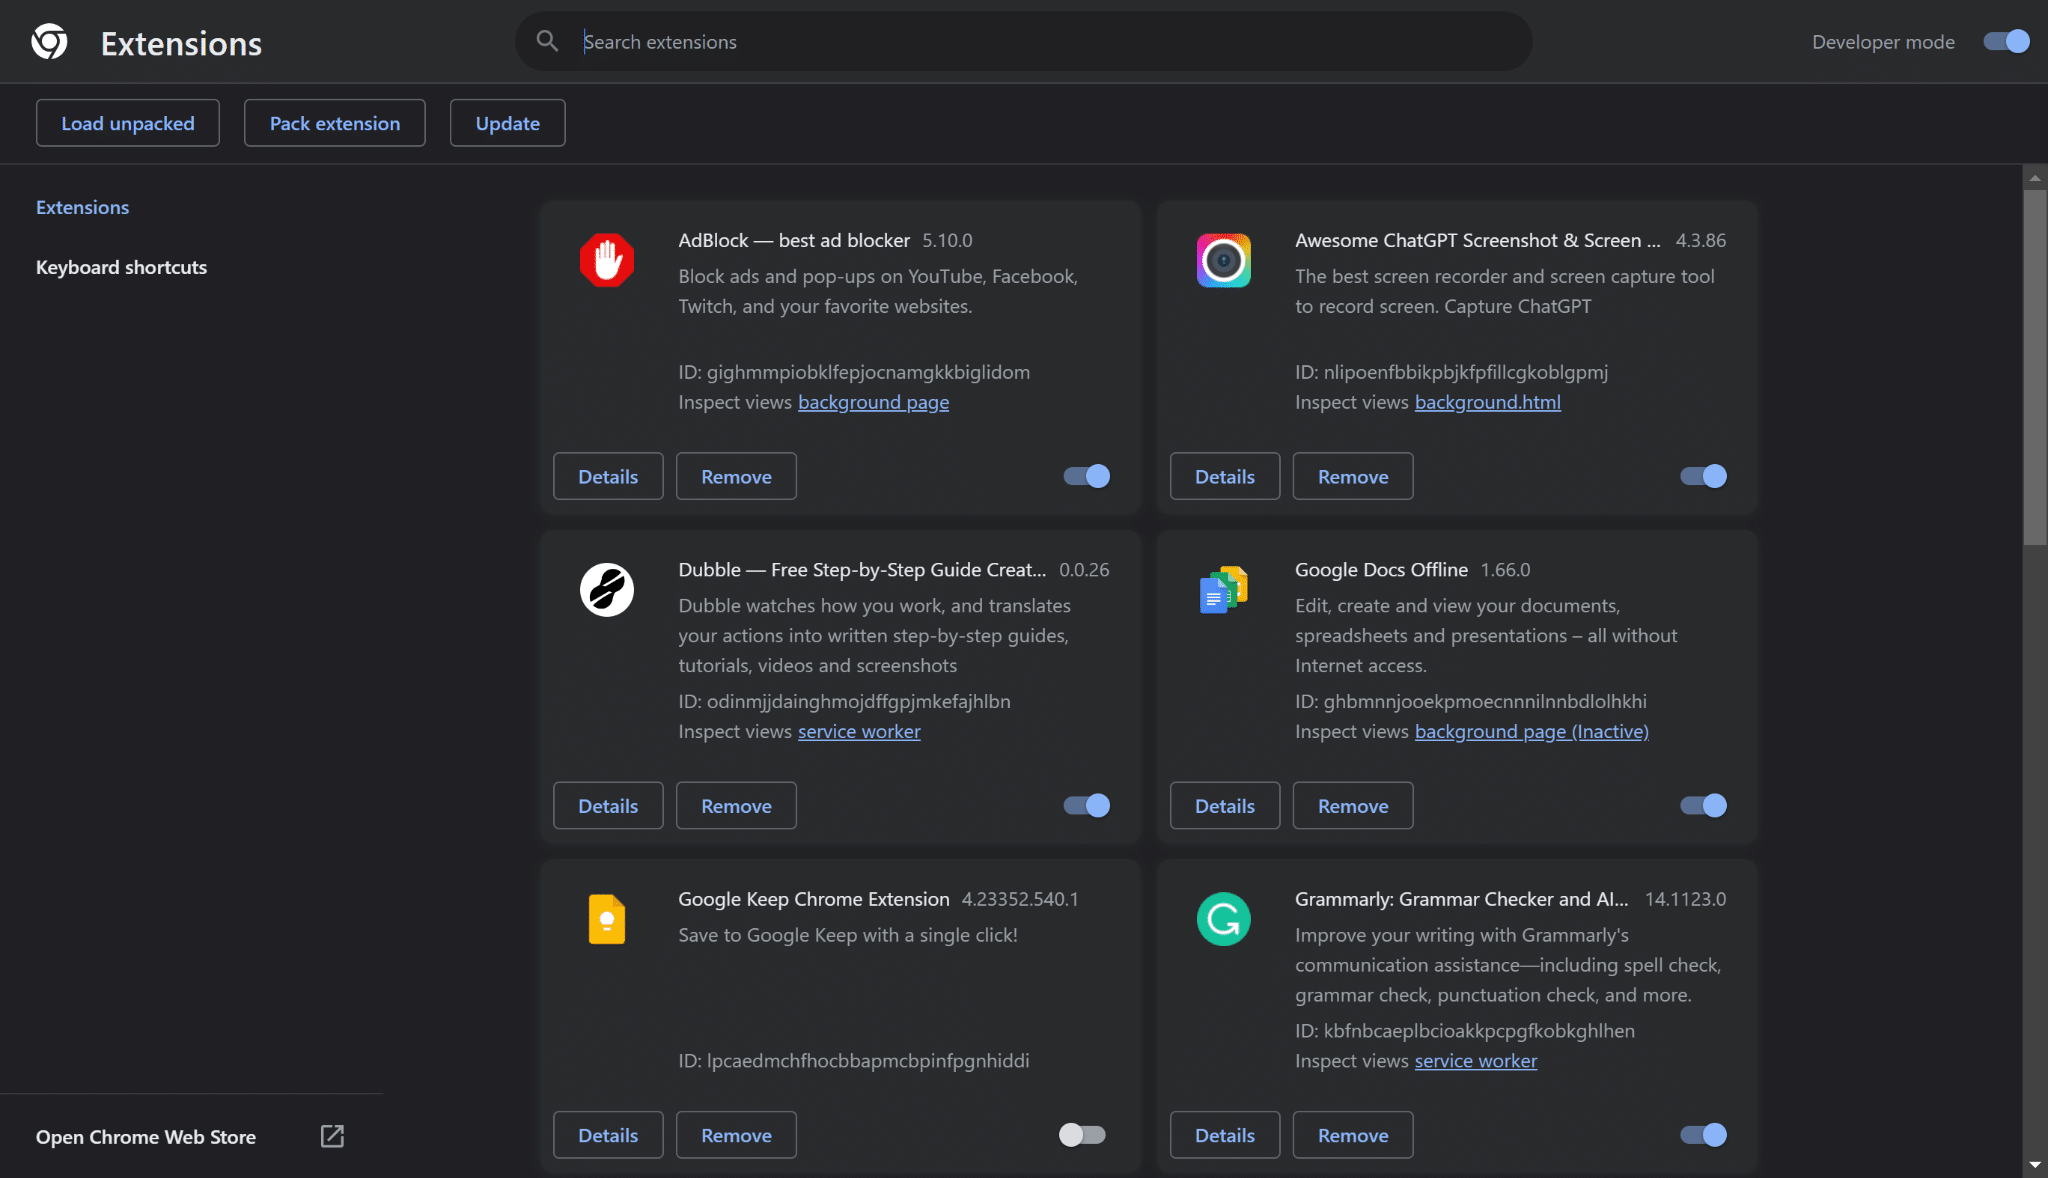
- Finally, if the issue persists, keep disabling the remaining extensions until you identify the problematic extension.
For Safari (macOS)
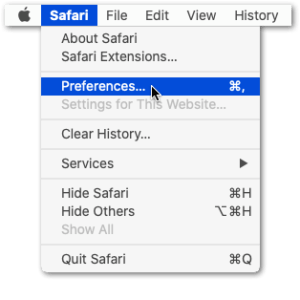
- To do so, click on the Safari option next to the Apple logo in the top menu and then select the Preferences… option from the menu.
- Once the Preferences section is opened, select the option from it to open the Extensions section.
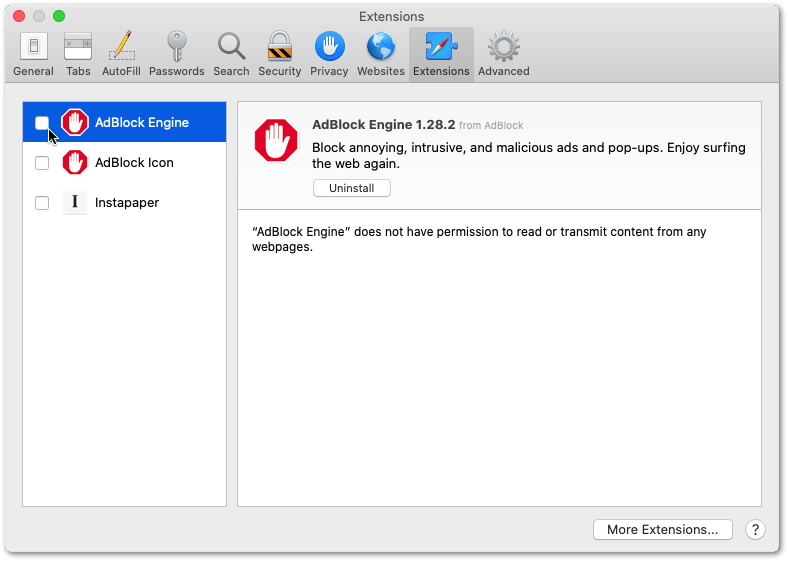
- Now, select the extension from the left sidebar of the Extensions tab that you want to disable and then check the checkbox to disable it.
6. Disable Your VPN or Proxy Settings
A Virtual Private Network or a VPN is a tool that routes user traffic through various global servers, enabling users to bypass geo-restrictions. However, OpenAI relies on your IP address and geolocation to determine the legitimacy of your request.
If your geolocation changes abruptly, it might trigger OpenAI’s security system, which might flag your activity as suspicious. Thus, leading to various ChatGPT errors like the “Our systems have detected unusual activity from your system” error.
Additionally, for using VPNs with ChatGPT and troubleshooting VPN-related issues when accessing ChatGPT, we recommend checking our other guide catered to that, here.
To disable VPN on your device, simply follow the steps below:
Steps to Disable VPN Through the System Settings (For Windows)
To disable your VPN, simply follow the steps below:
- First, click on the Start menu in the bottom left corner of your desktop.
- Next, click on the gear icon to launch the Windows Settings.
- Now, click on the “Network and Internet” option.
- Afterward, locate the VPN tab and click on it.
- Now, find the VPN connection that you want to disable.
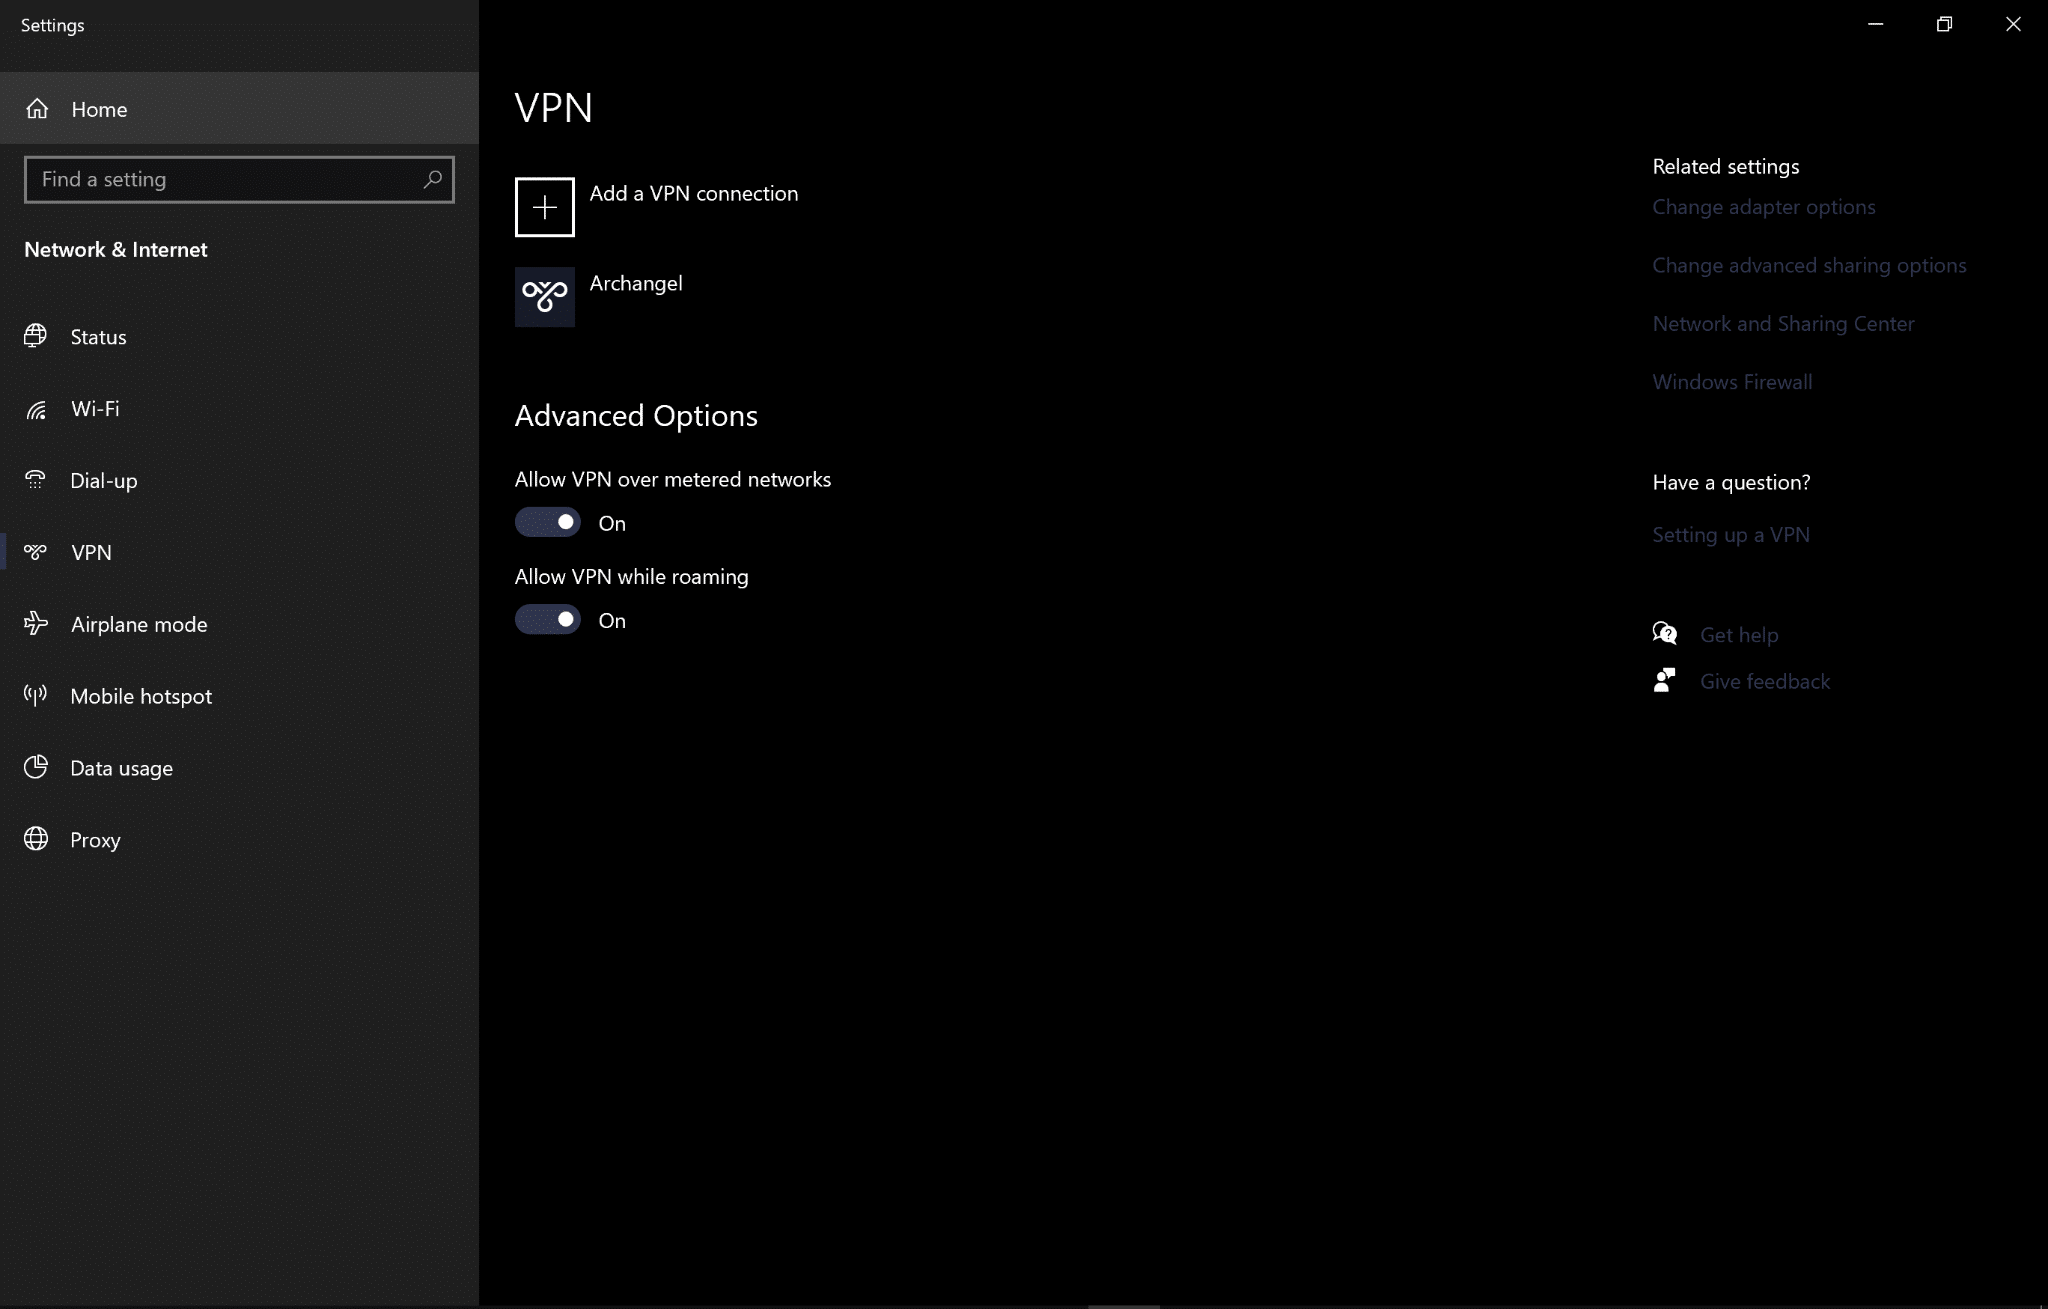
- Lastly, click on the “Disconnect” button to disconnect from VPN.
Steps to Disable an Application-Based VPN
It’s fairly simply to turn off application-based VPN services, such as NordVPN. Therefore, you can try to temporarily disable any VPNs that have been activated on your device through these simple steps:
- Locate the VPN application or settings on your device. This can typically be found in the system tray on a Windows computer or the menu bar on a Mac.
- Open the VPN application or settings and look for an option to disconnect or turn off the VPN. Click on this option to disable the VPN connection.
- If you’re using a browser extension or add-on to connect to the VPN, you can typically disable it by clicking on the extension icon in your browser and selecting the option to disconnect or turn off the VPN.

Steps to Disable Proxy Settings
For Windows
Click the Search button at the bottom left corner, then search for Internet Options and open it. After that, from the top menu, choose Connections and select LAN settings. Next, uncheck the boxes under Automatic configuration and Proxy server. Once done, click OK.

For macOS
Firstly open the Apple Menu, by clicking the apple icon, then select “System Preferences…”, and choose Network.

From the list of internet connections on the left, select your WiFi network that you wish to disable the proxy settings, then click “Advanced…”. Next, choose the Proxies tab, and uncheck all the boxes under “Select a protocol to configure:”. Once you’re done with that, click OK.

7. Check the OpenAI or ChatGPT Server Status
ChatGPT is an incredibly popular tool, and OpenAI regularly experiences exceptionally high traffic on its servers. This can cause servers to experience downtime or be down for scheduled maintenance, resulting in issues like ChatGPT’s “Our systems have detected unusual activity from your system” error.
If OpenAI servers are down, then your request may not be transmitted to them properly, and the approval is not relayed back, which can cause various performance issues.
To check OpenAI servers’ status, you can visit OpenAI’s Status Page, which contains the latest information regarding past and current outages.
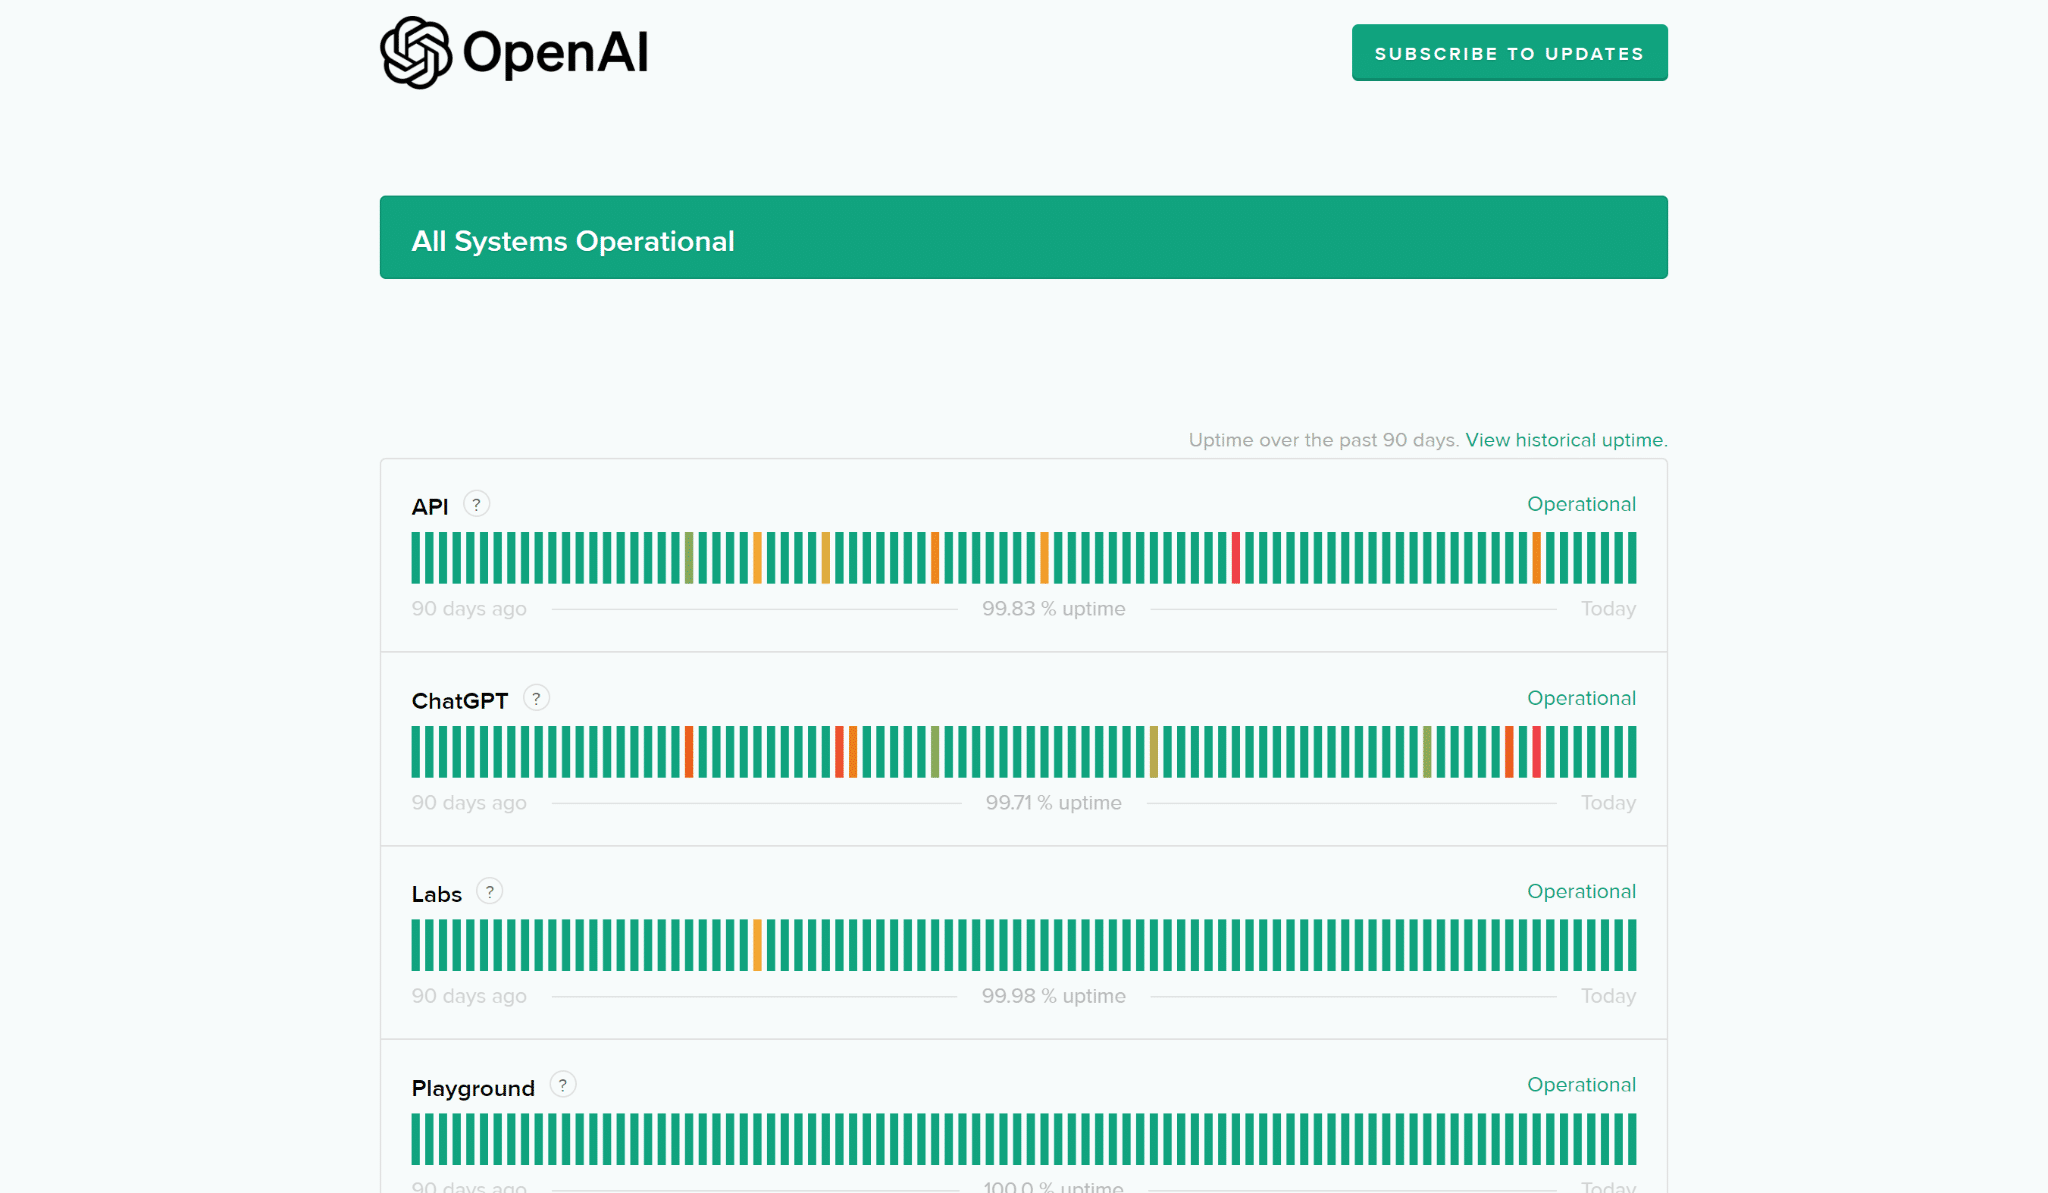
Additionally, you can refer to a third-party sites like Downdetector. Downdetector is an incredibly useful tool that relies on user data to determine current outages.
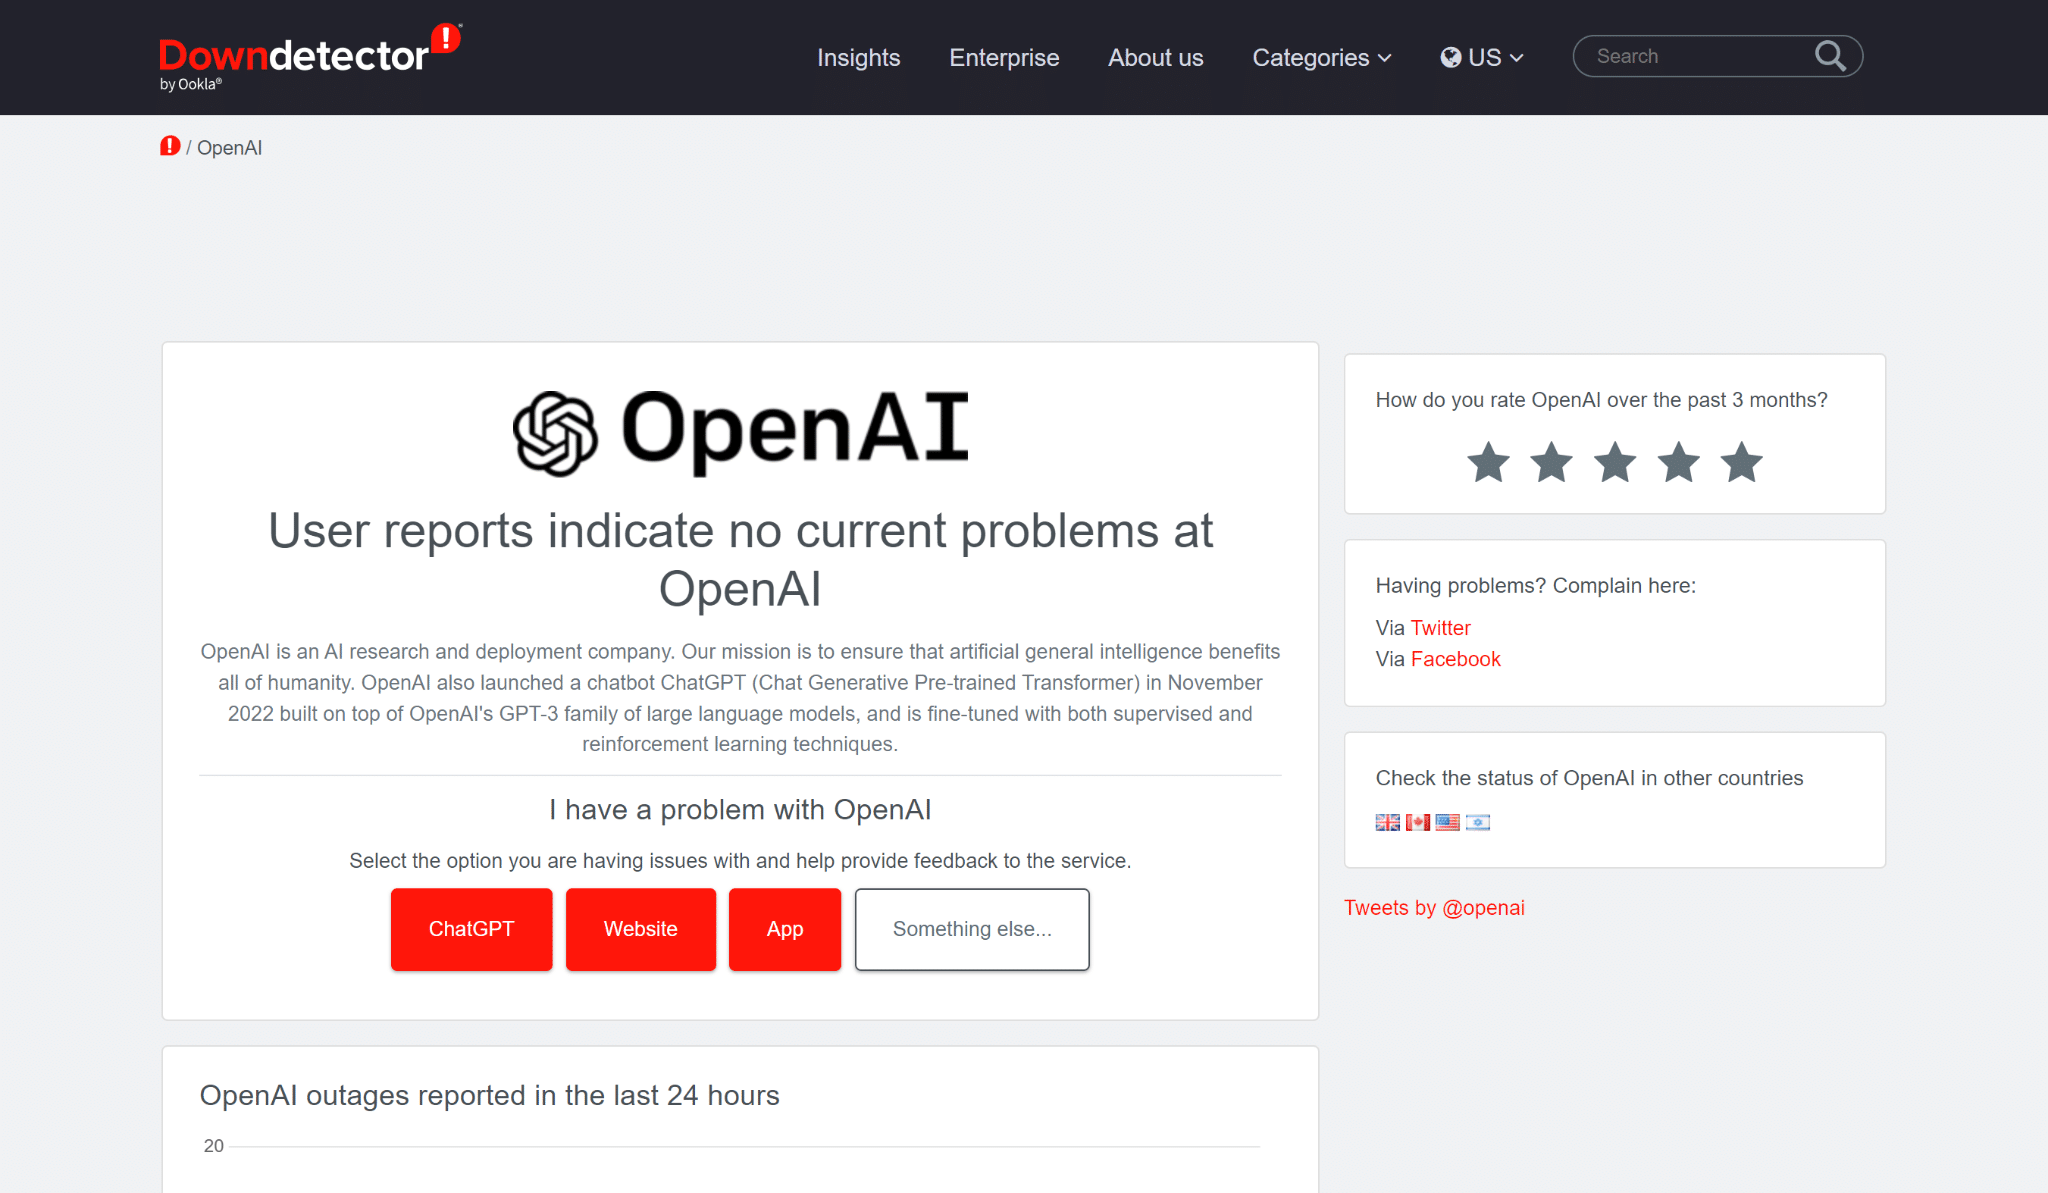
Besides updating users with the current status of OpenAI servers, Downdetector gives a detailed review of past incidents along with a dedicated comment section where users can discuss and resolve their issues.
To check for server outages, simply navigate to Downdetector for OpenAI and check the graph to verify any outages.
8. Report the Error to OpenAI Support
If none of the fixes mentioned above work, we recommend contacting OpenAI Support because the issue is likely at their end.
OpenAI allows users to contact it via multiple avenues. Users can get in touch with OpenAI via their Twitter handle, email their support team, avail guidance from the Live Chat option, or post their questions in OpenAI’s community forums, where experts respond to the issue and ensure that it is resolved.
In addition to this, you can visit OpenAI support to browse through extensive documentation or the FAQs section to see if your issue can be resolved there. If your issue is unique, you can email the OpenAI support team or fill out a contact form.
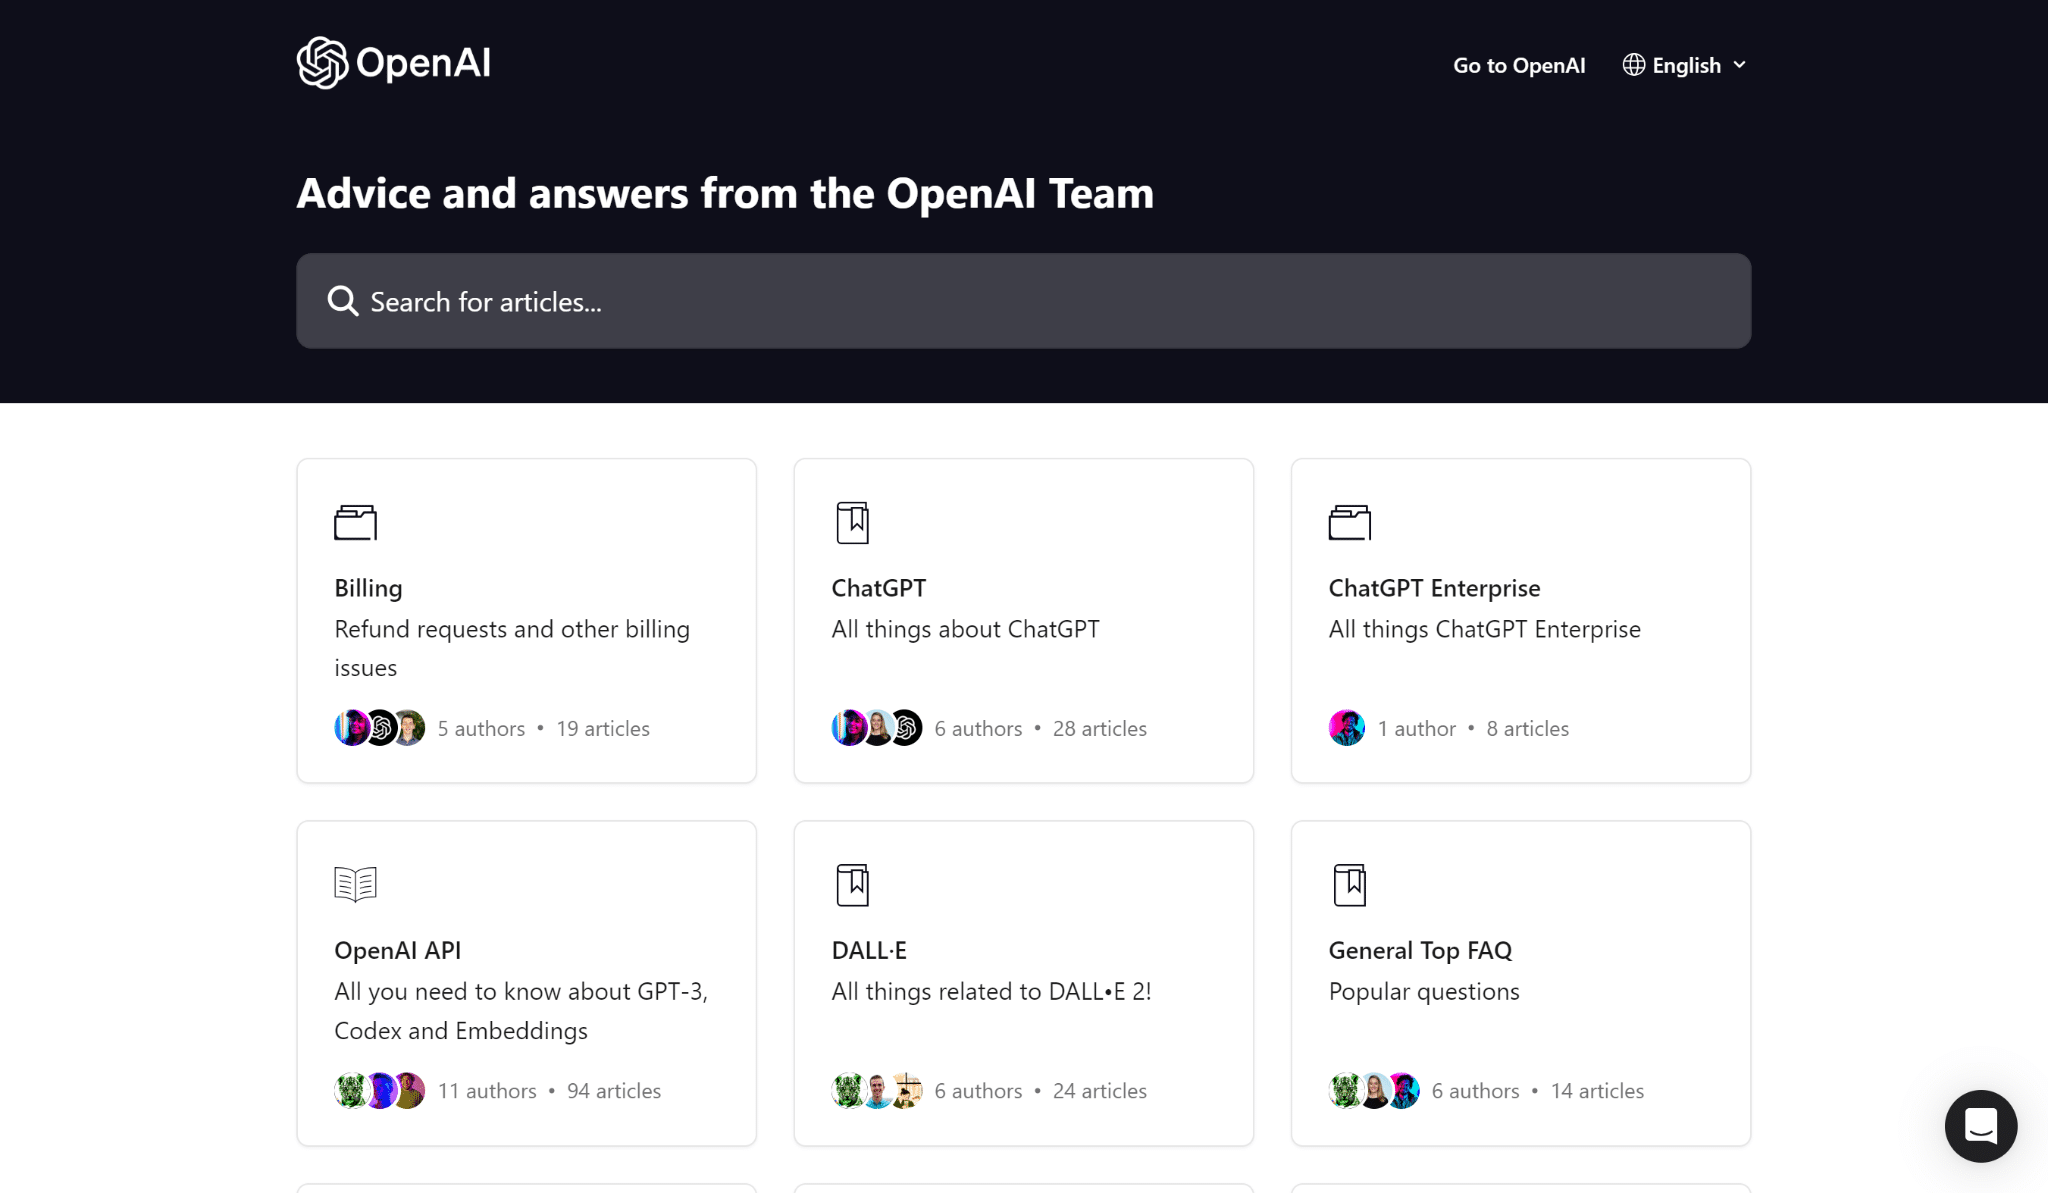
You can fill out the contact form with your information and a description of the issue you are facing while trying to access ChatGPT.
- Open the OpenAI Help Center in your internet browser.
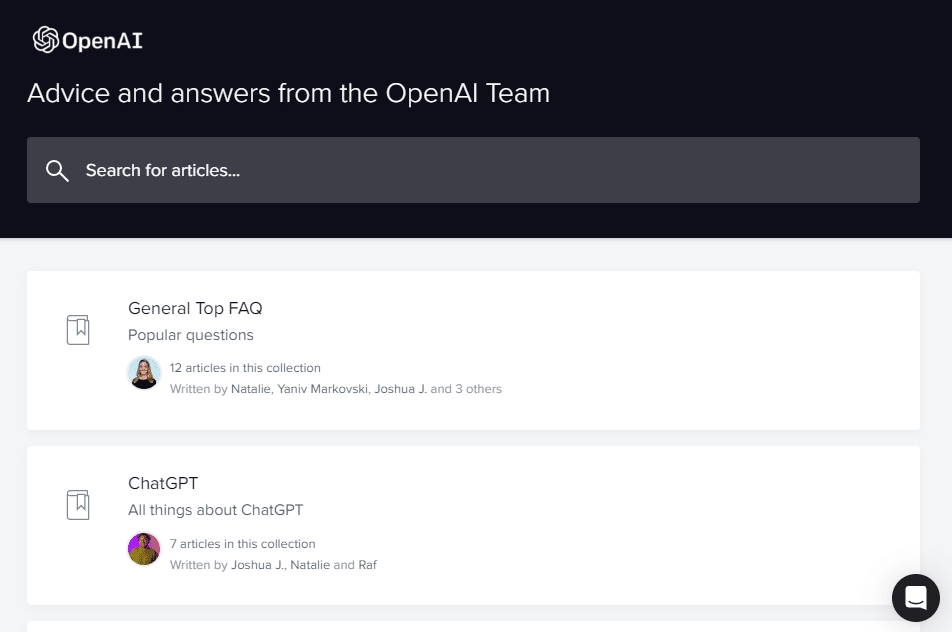
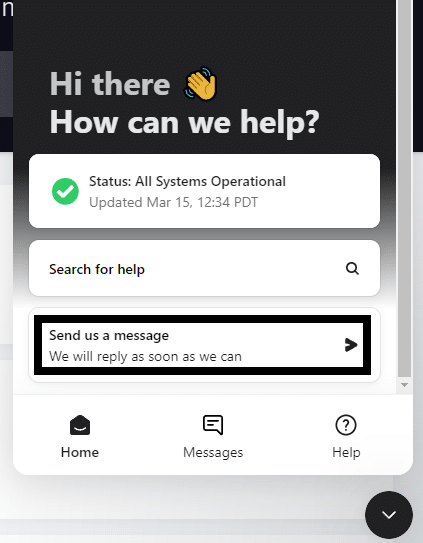
- Click on the message bubble in the lower right portion of the OpenAI Help Center page.
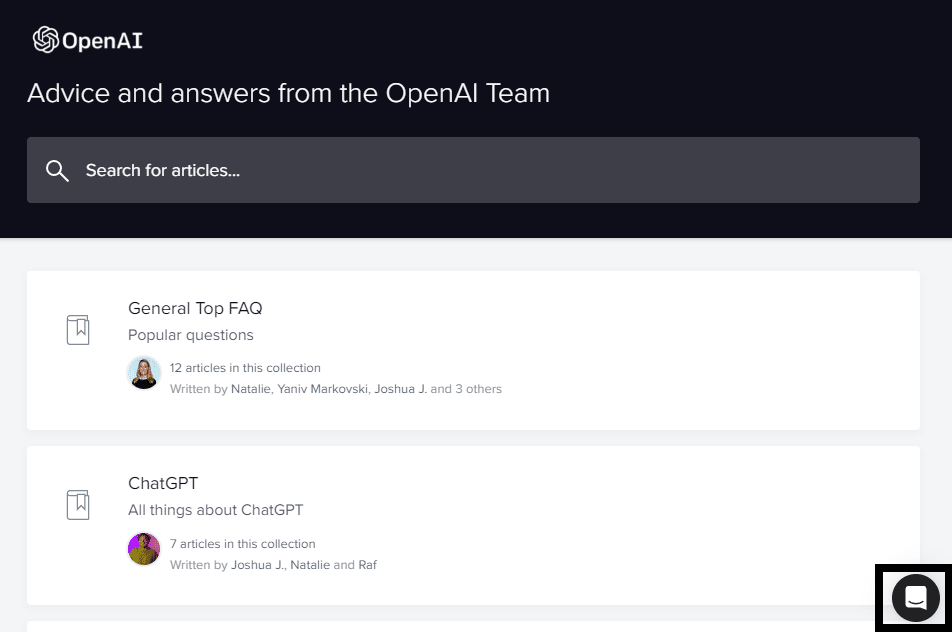
- In the chat box, click on the “Send us a message” option.
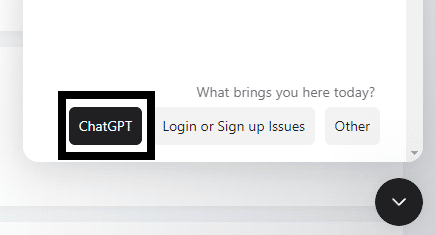
- When asked the question, “What brings you here today?” select the “ChatGPT” option.
ChatGPT Plus subscribers get the additional perks of having a dedicated email address or phone support line. If you need OpenAI support to solve your issue promptly, we recommend providing full details about the problem you are facing, including the frequency and timeframe of the issue.
Conclusion
In conclusion, experiencing issues like “Our systems have detected unusual activity from your system” with ChatGPT is a common frustration for users. But the problem can be easily resolved with several workarounds. If you closely follow the guide’s solutions and instructions, you can quickly resume using ChatGPT.
We hope our guide helped you resolve your issues with ChatGPT.
Lastly, don’t forget to share this guide with peers experiencing issues querying ChatGPT.
