Find that the screen share feature on Microsoft Teams isn’t working no matter what you try?
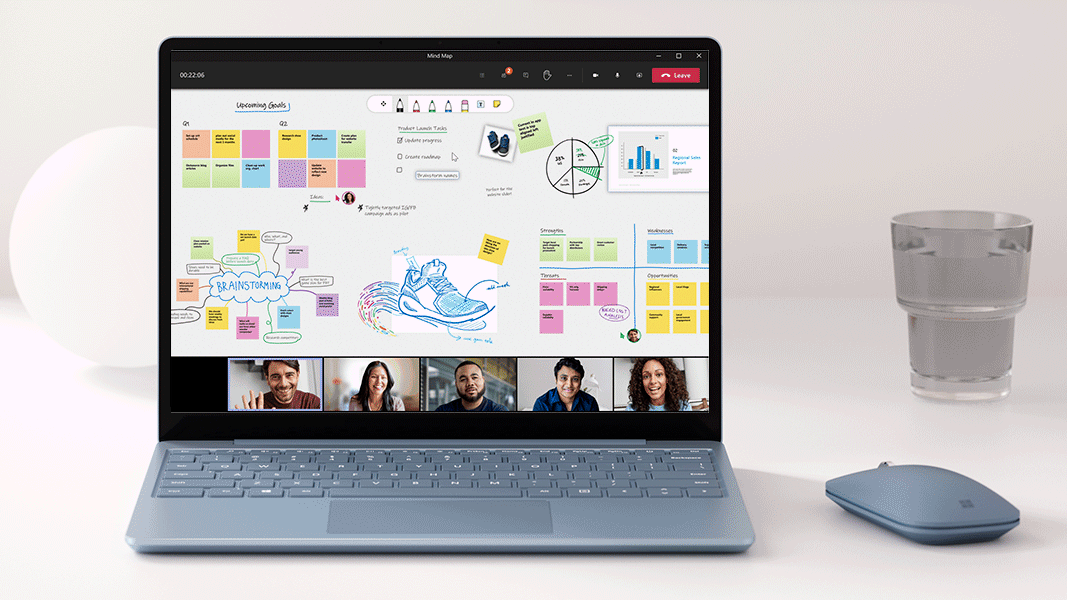
It’s no secret that most of the world has adapted to work-from-home systems given the current pandemic at the time of writing. This sudden change is partly thanks to the use of various online conferencing software such as Zoom or, in this case, Microsoft Teams.
One of the most essential features of software like Teams is the ability to share your screen. However, what do you do if it doesn’t work and you’re in the middle of a meeting? 😓
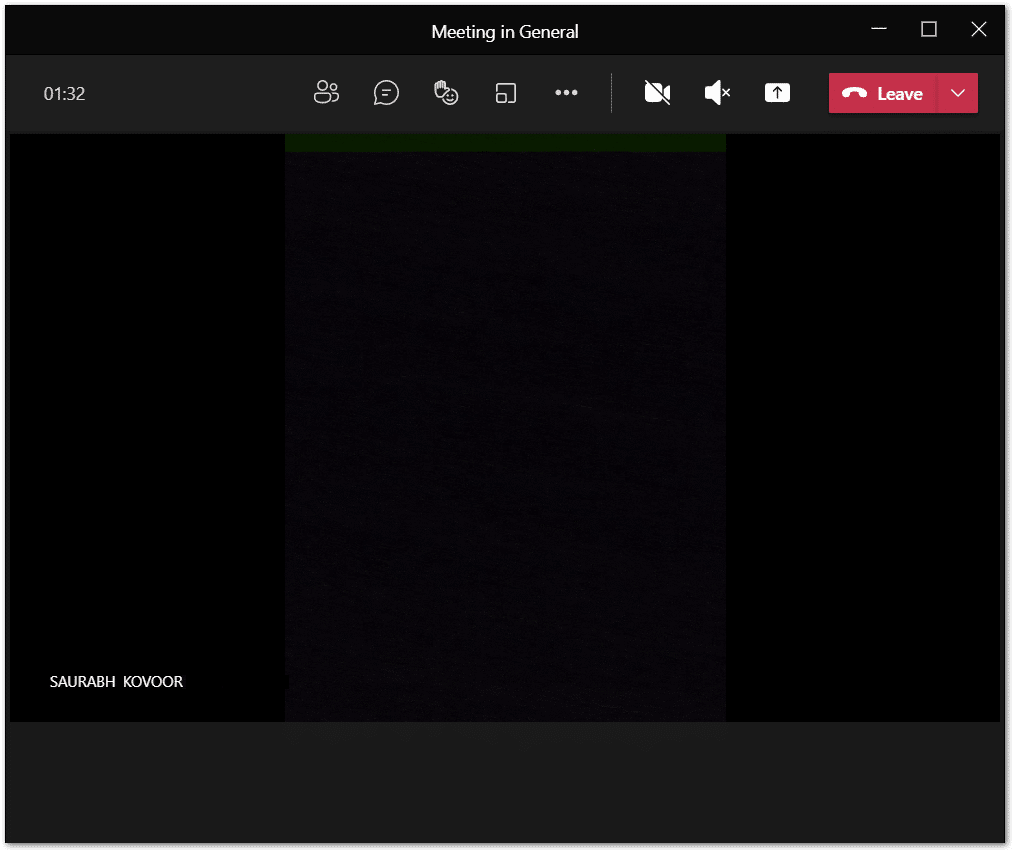
A common issue that users encounter with screen sharing on Microsoft Teams is the black/blank screen error. In this case, participants on the other end report only seeing a blank screen while you’re busily presenting or troubleshooting the error.
However, not to worry, we’ve got your back on this one as we know how important it is to have a smooth presentation for your co-workers or clients.
With that said, here are 15 fixes to fix a Microsoft Teams screen share that’s not working, whether that’s for the application on Windows or macOS, the web version, or the Android or iOS app.
Now let’s get that feature back up and running!
Table of Contents
- Ensure You’re Sharing the Right Screen
- Exit and Reenter the Call and Restart the Microsoft Teams App
- Clear All Other Background Apps
- Update the Microsoft Teams Application
- Try the Web Version of Microsoft Teams
- Ensure You Have Sufficient Internet Speeds for Screen Sharing
- Check if Your Device Fulfils Team’s Minimum Hardware and OS Requirements
- Disable GPU Hardware Acceleration
- Make a New Policy
- Enable Security & Privacy Permissions (For macOS)
- End NetAuthAgent (For macOS)
- Decrease the Screen Resolution
- Clear the Microsoft Teams App Cache
- Reinstall the Microsoft Teams Application
- Allow the Teams App Through Your Firewall
1. Ensure You’re Sharing the Right Screen
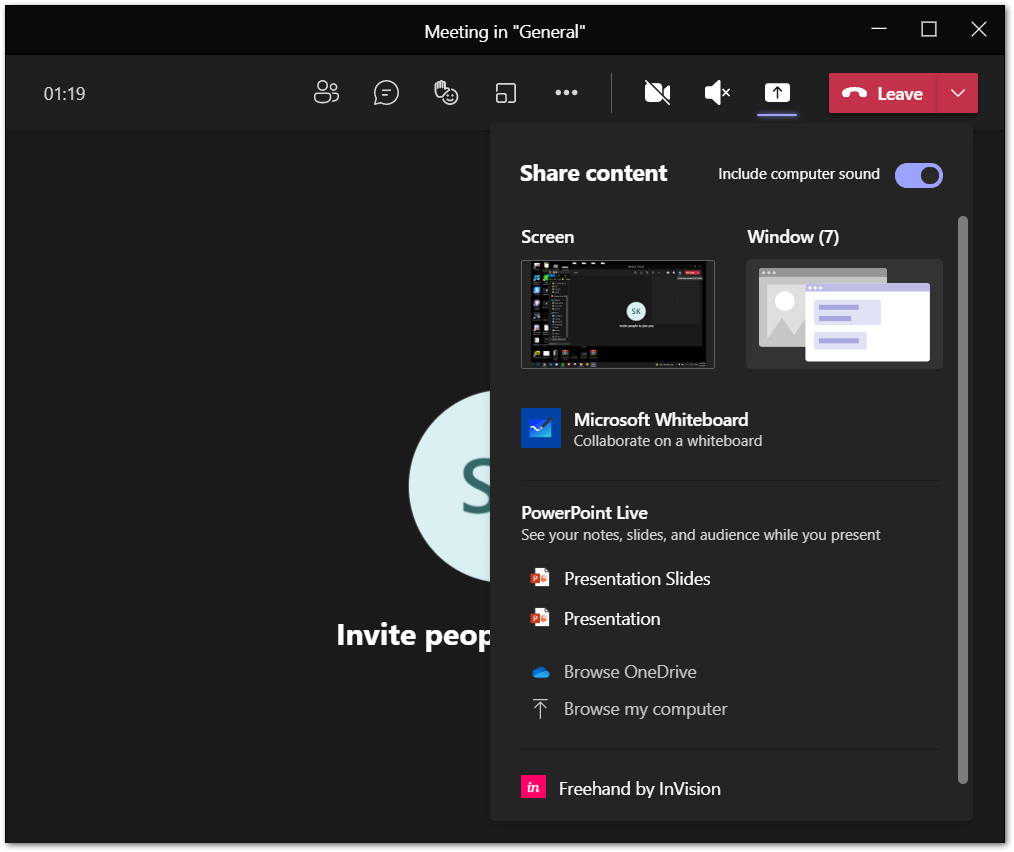
When you share your screen, you’re first given the option of what to share. It may be a specific application or window, such as Powerpoint or the entire screen. Hence, you may have simply chosen the wrong option.
This can give you the impression that your shared screen is stuck on a blank or black screen or has crashed.
Therefore, it’s good to check on that before we proceed to anything else more involved.
Simply click the Share Content button to open the drop-down window, showcasing the apps and windows you can share. Also, if you find that the sound in your Microsoft Teams screen share isn’t working or seems muted, remember to enable Include computer sound.
2. Exit and Reenter the Call and Restart the Microsoft Teams App
Moving on, this is yet another preliminary step you should definitely try out before getting into more technical fixes. Basically, through this fix, we’re restarting your session in the Team’s video call and reattempting to share your screen. Plus, during your first entry, there may be temporary issues blocking you from sharing your screen or affecting its execution.
So, after exiting the call, we also recommend restarting the Teams application for an improved effect. For many users, performing these 2 simple steps in tandem managed to rectify their Teams screen share issue.
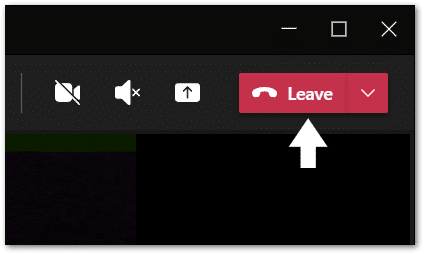
Hence, start off by exiting the meeting by clicking the Leave button. Remember to politely excuse yourself before leaving the meeting temporarily. 😉
After that, to restart the app, you’ll have to completely close the Microsoft Teams app before reopening it again:
Note: You can find more detailed steps to close the Teams app completely on Windows or macOS in Step 3.
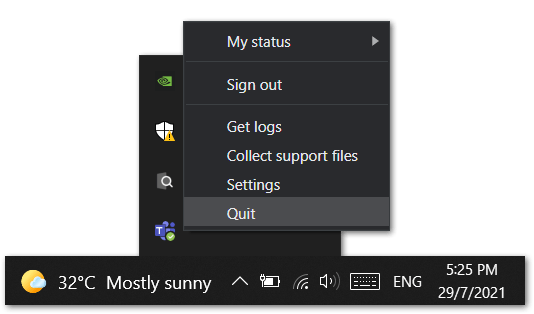
For Windows: From the Windows tray on the Taskbar, right-click the Microsoft Teams icon and select Exit.
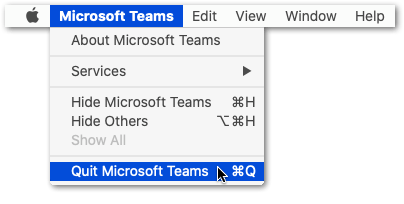
For macOS: From the Menu Bar on top, click the Microsoft Teams icon, and from the drop-down, select Quit Microsoft Teams.
For Android or iOS: Exit the Microsoft Teams app, and close it by removing it from your Recent Apps or App Switcher.

Lastly, reopen the Teams application and rejoin the video call, as per usual. With that done, try sharing your screen or application in the video call again!
3. Clear All Other Background Apps
Sharing your screen takes up a lot of system resources, so it’s paramount that you have sufficient processing power for the job. That’s why we suggest closing any unnecessary background programs or apps so that Teams can perform more smoothly. Hence, there could be conflicting background apps or processes resulting in your Microsoft Teams screen share that’s not working.
That being said, the following are steps to close background apps on your device:
Windows
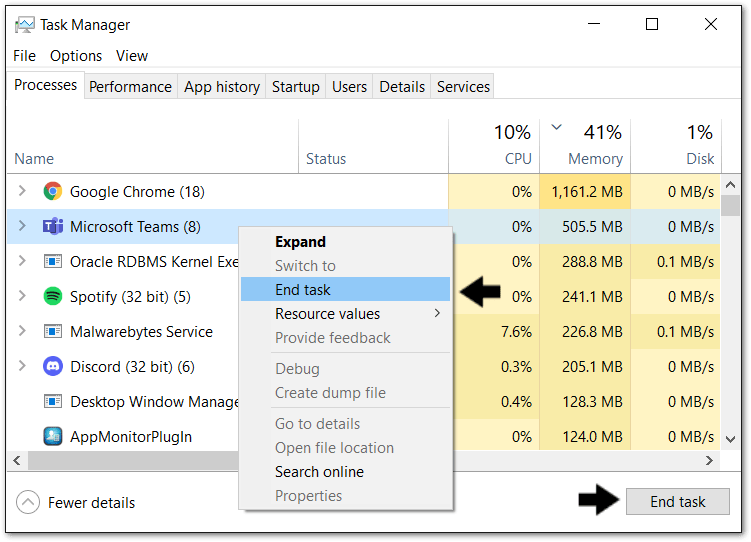
- First, open Task Manager (Ctrl + Shift + Esc).
- In the Running Programs list, highlight any of the apps you don’t need running.
Note: Make sure you have any important work saved as this will instantly kill the program! Additionally, if you’re unsure of what a certain program is or does, it’s better not to highlight it since it may be integral to the system functionality.
- Finally, click on End Task in the bottom right corner of the window. Alternatively, you can right-click the task and select End task.
macOS
There are two ways to do this, either quit your apps normally through the Dock, or use the Force Quit Applications window.
Dock Method
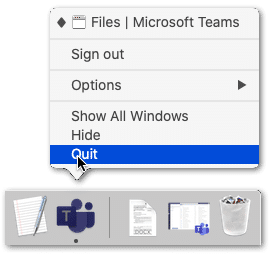
- For the Dock method, running apps have a dot under their icon.
- Simply right-click the running app and select Quit.
Force Quit Applications Method
- First, open up the Force Quit Applications window by pressing Command+Option+Escape.
- Then, in the new window, select any unnecessary apps and click the Force Quit button.
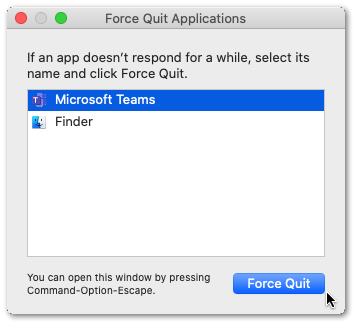
Note: Make sure you have any important work saved as this will instantly kill the program!
Android/iOS
There are a bunch of different flavors of Android with slightly different ways to access Recent Apps. But, these are generalized steps that will apply to both Android and iOS.
- To start, access the Recent Apps menu or similar by selecting the multitasking button in the navigation bar or swiping up from the bottom of your screen.
- Then, swipe away or close all the unnecessary background apps.

4. Update the Microsoft Teams Application
Moving on, this is another easy and general fix for you to quickly get this pesky problem resolved – updating the software in question. There’s a chance that the Microsoft Teams screen share feature isn’t working for you because of a bug 👾 lurking in the program’s code. Well, we need to get rid of that bug, and that’s one of the purposes of updates!
Basically, these updates contain bug fixes released by the Microsoft Teams developers 👨💻 to solve various app issues. Thus, other than adding new features, they could be resolving some issues with the existing screen share feature as well.
Of course, this won’t apply to you if you use the web version of Teams, as updates are integrated with the platform directly without user intervention.
Nonetheless, it’s really easy to do on the Windows, macOS, Android, or iOS apps. So, just jump to the relevant section and follow along:
Windows/macOS
The client’s user interface for both Windows and macOS is the same, so naturally, the same steps will apply to both operating systems. This one’s really straightforward:
- To start, open the Microsoft Teams app.
- Then, click the three-dotted button beside your profile photo in the top-right of the app.
- Next, select Check for updates in the drop-down menu.
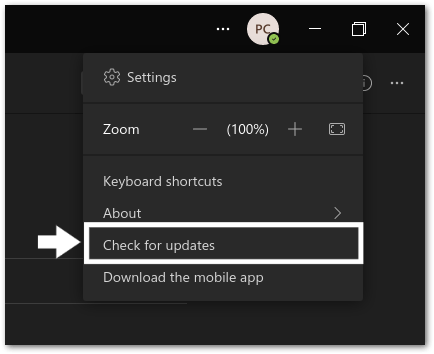
- Finally, if there are any updates, let them download and install.
Android/iOS
Again, similar to the Windows and macOS reasoning, since both of these apps come from app stores, the process will be similar for both. That’s the Google Play Store and the App Store for Android and iOS respectively:
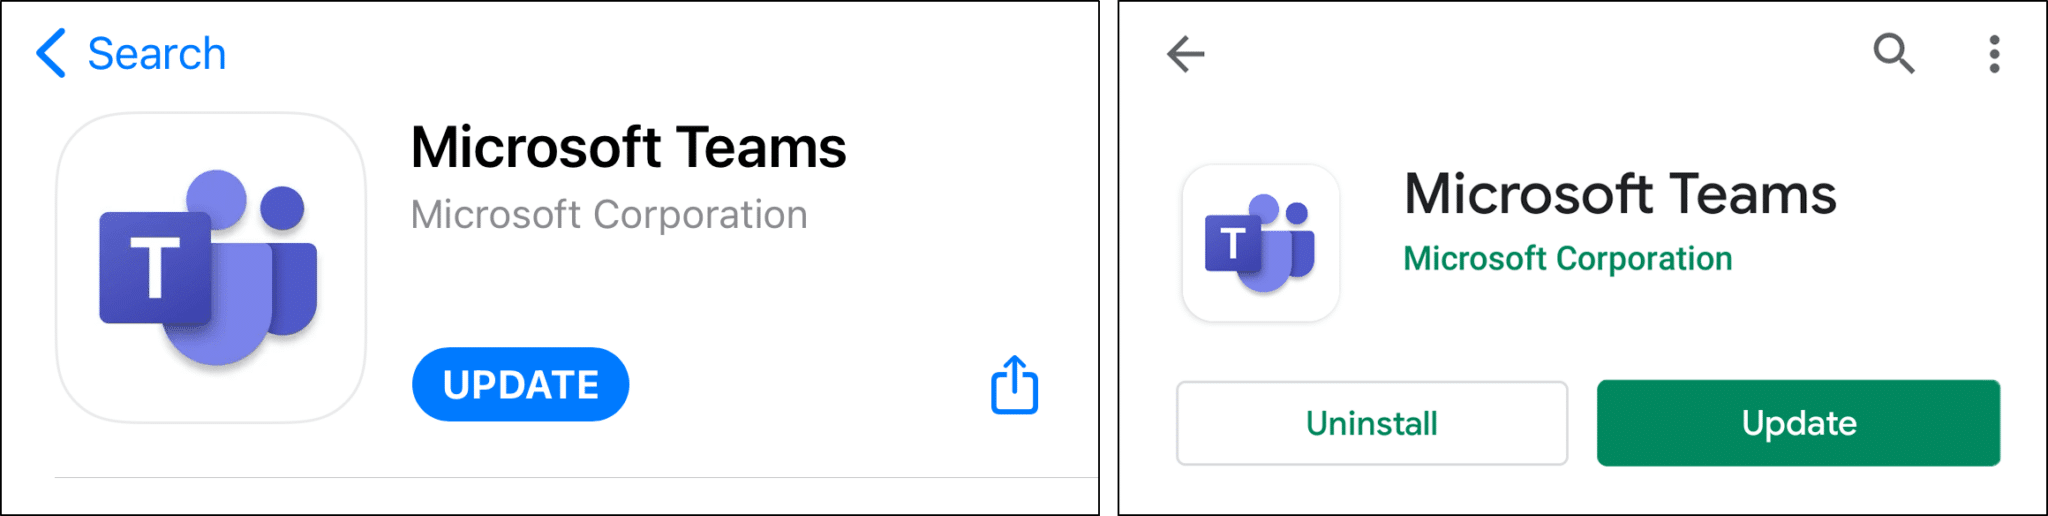
- First, open the appropriate native app store for your device.
- Then, search for Microsoft Teams and select the listing. Here’s a link to the listing for Google Play and the App Store.
- If there’s an update for the app, you can tap the Update button and let it do its thing.
5. Try the Web Version of Microsoft Teams
Perhaps even after updating the client, the Microsoft Teams screen share function is still not working. It may very well be a bug that they haven’t fixed yet. So, it’s worth trying out the web version of Teams as it may have a different build without the bug.
The web version only works on Chrome, Edge or Safari, so keep that in mind. We only recommend doing this for those on Windows or macOS as trying to navigate a desktop website on a phone would be a nightmare.
Click here to visit the web version of Microsoft Teams. There, you’ll have to Sign in to your Microsoft account that you use for Teams to access your teams and calls.

6. Ensure You Have Sufficient Internet Speeds for Screen Sharing
Just like taking part in a regular video call, if you’re screen sharing, you’ll also need a stable and sufficient internet connection. Having the optimal download and upload speeds will make sure your content is being shared correctly.
At the same time, you’ll need a stable internet connection with minimal latency or no disconnections. Overall, it’ll need to meet the minimum bandwidth requirements to ensure your screen sharing on a Teams call is smooth, not buffering, and error-free.
According to Microsoft, you’ll need between 200 to 4000kbps of download and upload speeds for one-to-one screen sharing. Whereas for larger meetings with more participants, it’ll require between 250 to 4000kbps of download and upload speeds.
With that in mind, we recommend testing your internet connection if it fulfils these requirements. For this, you can use Speedtest.net for a quick report on the speeds and PING/latency. Simply press Go and wait about 2 minutes for the site to measure your internet.
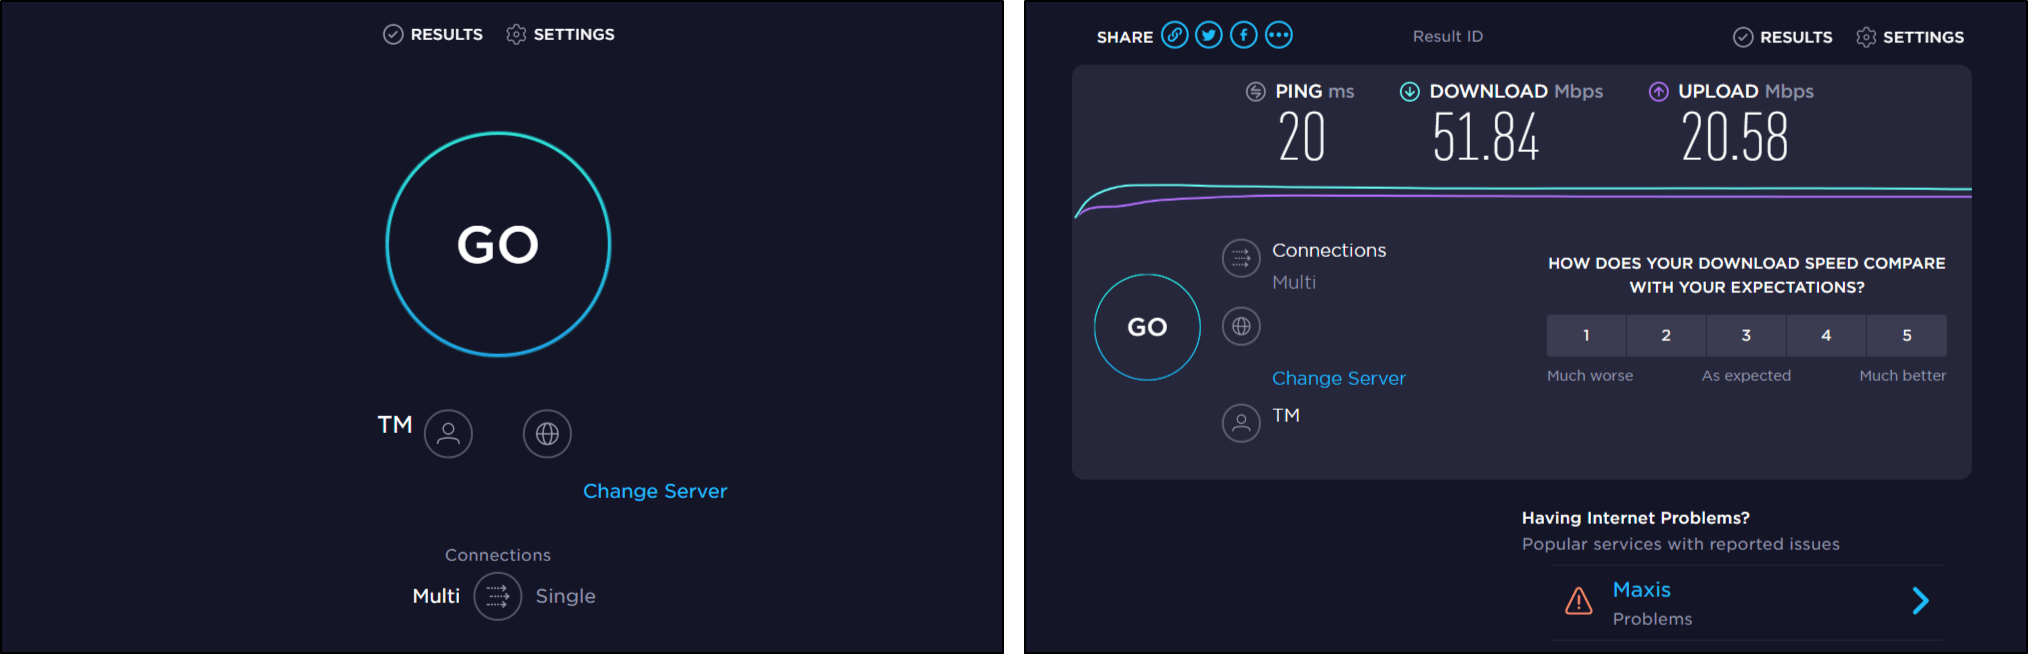
Aside from the download/upload speed, you should aim for lower ping times, which indicate internet stability. Ideally, you should achieve 50ms to 100ms of ping times to prevent network connectivity issues and problems with your screen share.
From there, suppose you notice an unusual drop in your internet speeds. In that case, we recommend trying the following steps to improve your internet connection:
- Power-cycle or restart your Internet router
- Move to a position closer to your Internet/Wi-Fi router
- Switch between mobile data and Wi-Fi
- For mobile internet users, turn on Airplane Mode, wait 1 minute, then turn it off
7. Check if Your Device Fulfils Team’s Minimum Hardware and OS Requirements
Aside from bandwidth and network requirements, your device will also have to meet the minimum hardware and OS requirements for Teams video calling, let alone screen sharing. As you might know, screen sharing and even video calling are notable resource-hungry processes, since you’re running multiple applications simultaneously.
So, to ensure all these processes run and execute smoothly it’ll require resources such as processing power, memory (RAM), hard disk space (for storage), graphical power, etc.
Aside from that, your device’s OS will need to be kept updated to ensure it’s optimised for newer apps, like Teams. This will allow the app to access various system resources more efficiently.
Therefore, we recommend checking this article by Microsoft themselves, which detail the hardware and software requirements for Teams, whether you’re running on Windows, macOS, the web version, or mobile devices.
8. Disable GPU Hardware Acceleration
This feature essentially uses your computer’s GPU to help with processing video in Teams. By default, it’s enabled and could be why screen sharing isn’t working whether that may be due to incompatibility or faulty implementation. As such, this only applies to those using the Teams app on Windows or macOS.
That being said, here’s how to disable it:
Note: Disabling GPU Hardware Acceleration may make the interface slightly choppy, so you may want to re-enable it once you’re done sharing your screen.
- To start, open the Teams app.
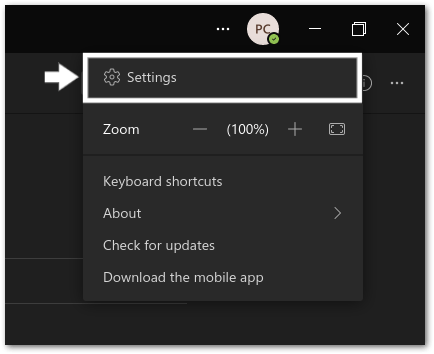
- Then, click the three-dotted button beside your profile photo in the top right of the app.
- In the menu, select Settings.
- Then, in the new window, make sure the General tab is selected in the column on the left.
- Under General, check the Disable GPU Hardware Acceleration checkbox.
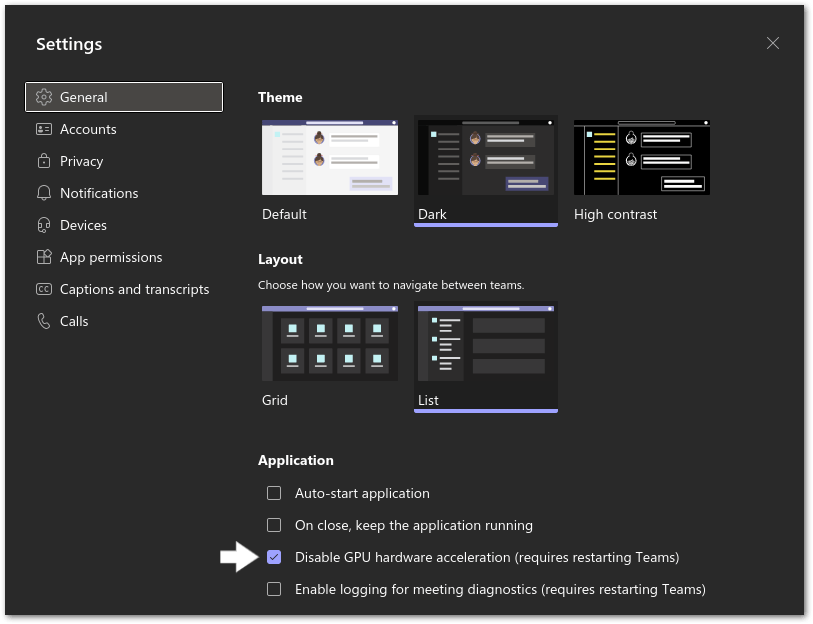
- Finally, restart the Teams app (Step 2).
9. Make a New Policy
Next up would be to dig into the settings of Teams itself. First, we’re going to check for the policy settings. It could vary depending on what your company has set for its employee group policy or what you changed by your own accord. As such, it’s good to check if this is what’s preventing you from sharing your screen.
Note: You won’t be able to access these settings unless you’re an admin of the group policy. So, contact your admin and ask about the setting if you’re having trouble sharing your screen.
- To start, go to the Microsoft Teams Admin Center.
- Log in with your admin account.
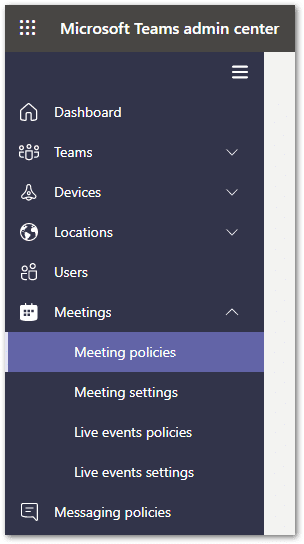
- Then, in the hamburger menu on the left, click on the Meetings drop-down menu, then click on the Meeting Policies button.
- On the new page, click the +Add button to add a new policy.
- Next, give it a memorable name.
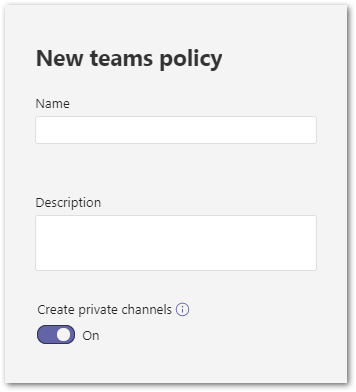
- Once that’s done, under the Content Sharing section, choose Entire Screen in the drop-down menu for Screen Sharing Mode.
- There are lots of other options here like Allow a participant to give or request control, so change them as you see fit for the situation.
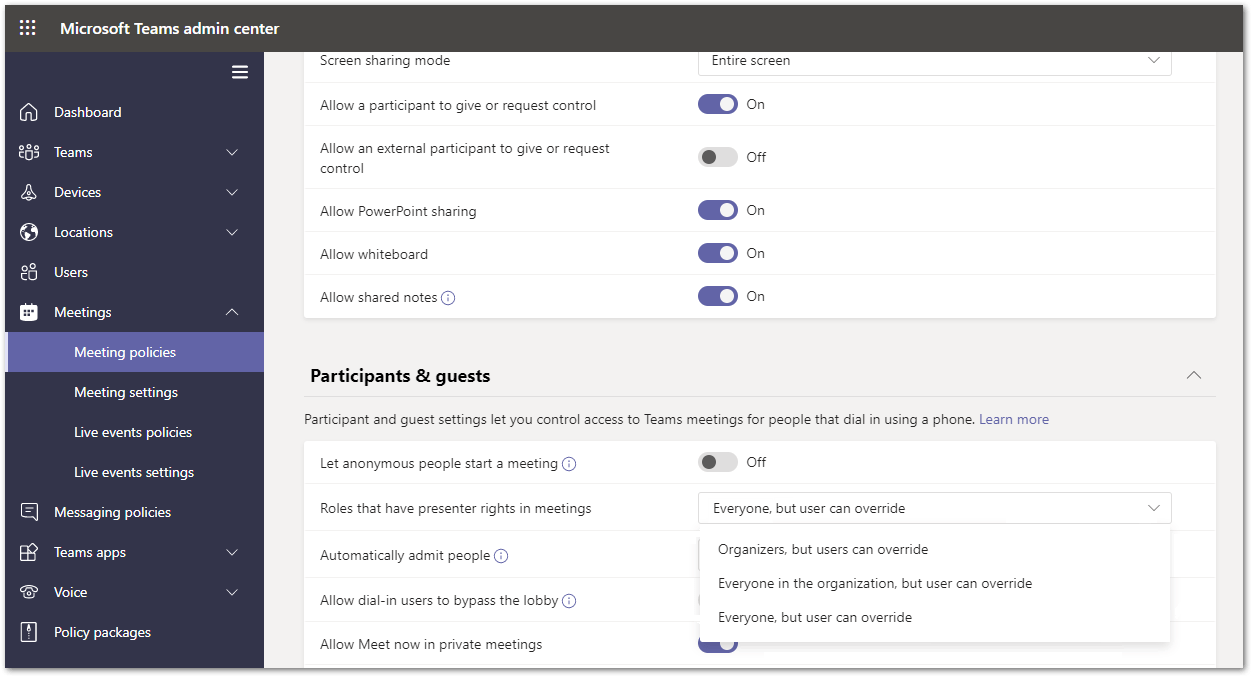
- Finally, click Finish at the bottom of the page to save the policy.
10. Enable Security & Privacy Permissions (For macOS)
No luck with the policies? Let’s check the app’s permissions instead. The Teams app will require access to certain resources or services on your device, to allow you to perform certain functionality, including screen sharing. Primarily, the app will need access to your devices Microphone, Camera, Files, and Screen Recording (on macOS).
Initially, you can try enabling access to all the permissions to test this fix out, as you can disable it afterwards with the exact same steps.
For now, this will only apply to those using macOS since they’re particularly strict about what apps have access for the sake of your privacy – which is a good thing!
- Start by opening the System Preferences app.
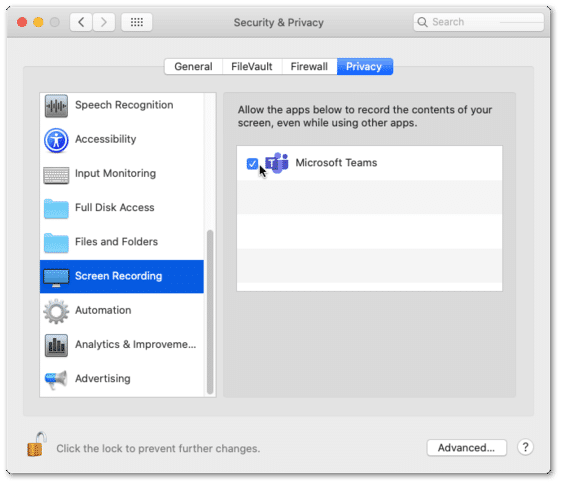
- Then, go to the Security & Privacy preference.
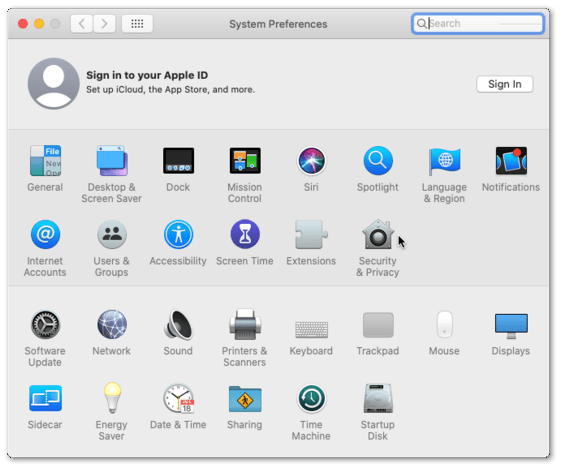
- After that, select the Privacy tab.
- In the scroll pane on the left, select Screen Recording.
- Make sure the padlock on the bottom-left is unlocked to allow changes. You’ll need to enter your password for this.
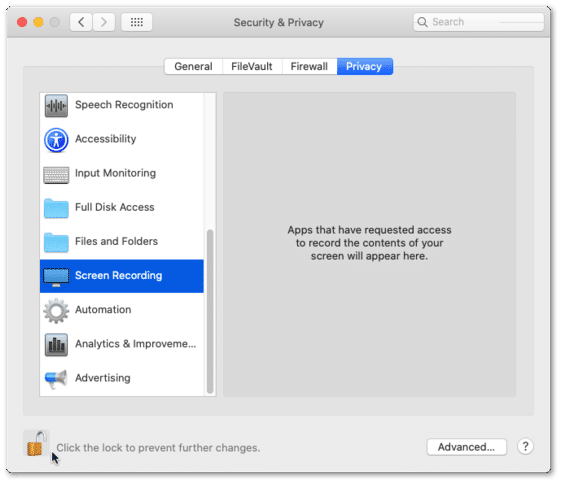
- After that, make sure the checkbox for Microsoft Teams is checked.
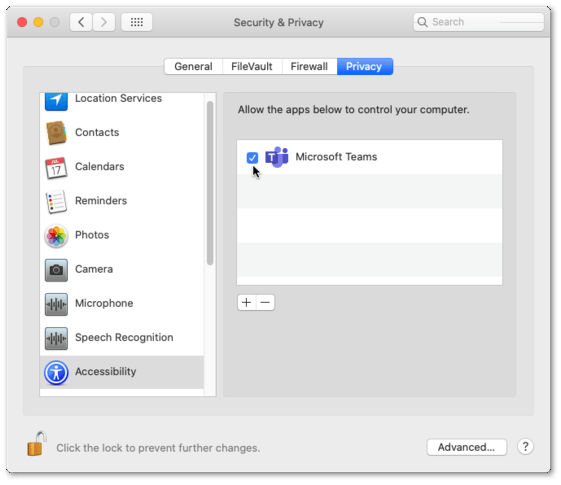
- Repeat steps 4 – 6 but for File and Folder Access and Accessibility.
- For these two, click the + button and add the Microsoft Teams listing in the Applications section
- Finally, restart the Teams app (Step 2) so that it begins with the new permissions.
A peculiar fix is to leave the System Preferences window open while you run Teams. So that could be an option to explore!
11. End NetAuthAgent (For macOS)
On macOS, NetAuthAgent is required for a screen share to work. Thus, the service may have been bugged or corrupted, resulting in your screen share issues. So, forcing it to restart by manually ending it is worth a shot.
With that said, to end and restart the NetAuthAgent process:
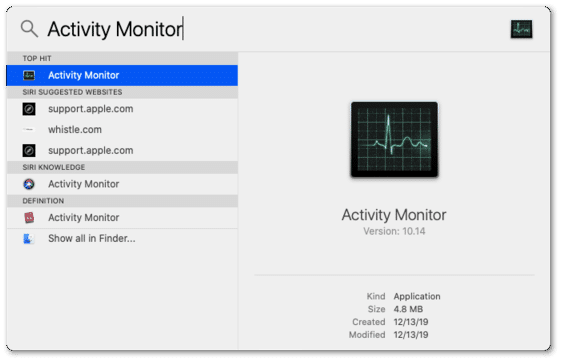
- First, open Spotlight and search for Activity Monitor.
- Then, in Activity Monitor, under the CPU tab, look for NetAuthAgent.
- Next, select it and click on the Quit button in the new window.
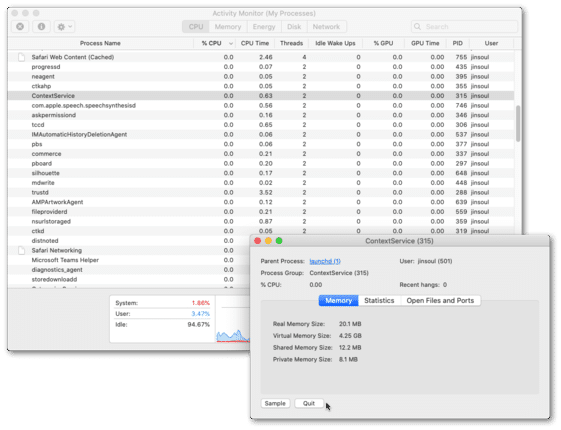
- Finally, restart Teams. (Step 2)
12. Decrease the Screen Resolution
We’ve been digging around for solutions and one of the fixes is to lower the resolution of your device’s screen. This issue mainly affects those with ultrawide monitors with resolutions such as 2560x1080p or 3440x1440p. Whether or not you have an ultrawide screen, we still suggest trying to decrease your resolution to something more standardized such as the 16:9 aspect ratio, like 1920x1080p.
Evidently, this only applies to those on Windows or macOS, so here’s how to change your screen’s resolution:
Windows
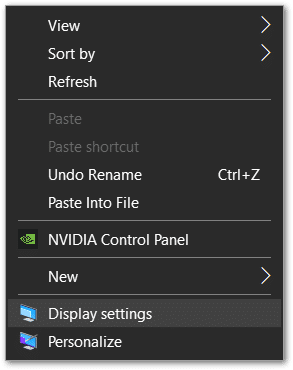
- Start by going to your Desktop (Win + D).
- Then, right-click an empty spot and select Display settings.
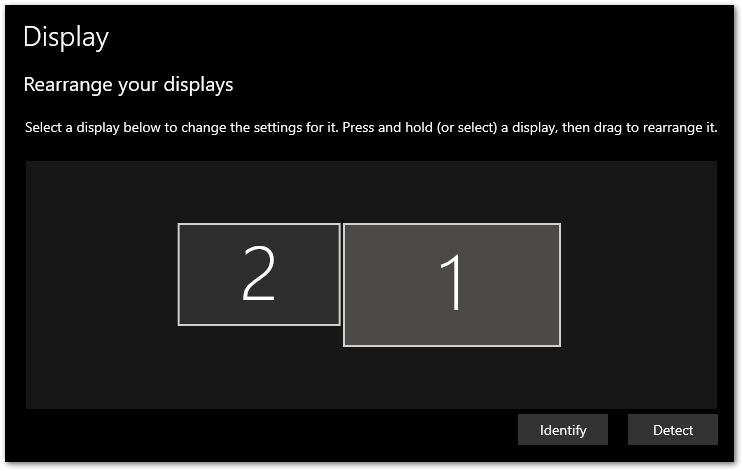
- If you have a multi-monitor setup, select the monitor you want to share from in the Rearrange your displays tab.
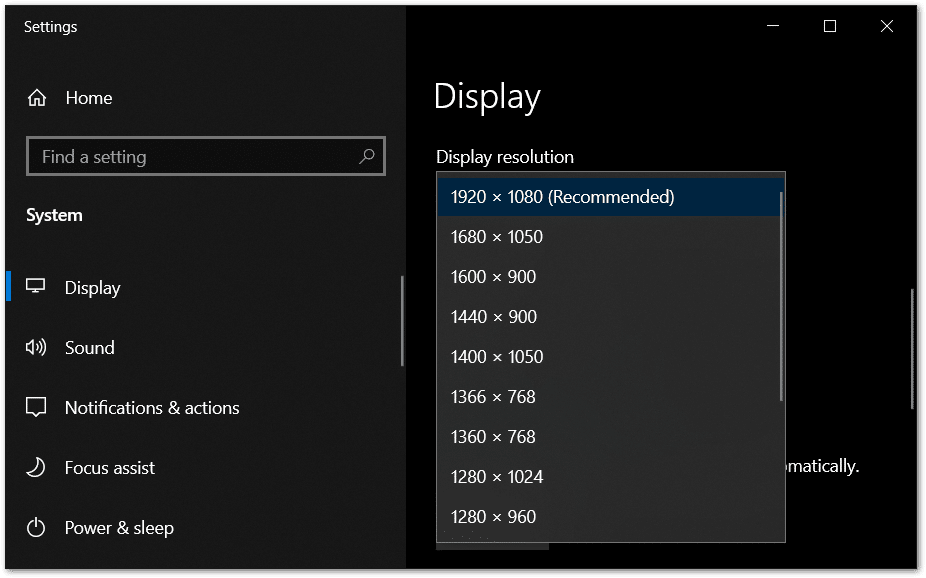
- Then, once selected, scroll down until you see the Display resolution drop-down menu.
- Simply click on it and choose a lower one than the default. We advise choosing 16:9 aspect ratio resolutions like 1280 x 720 or 1920 x 1080 depending on what is chosen by default.
macOS
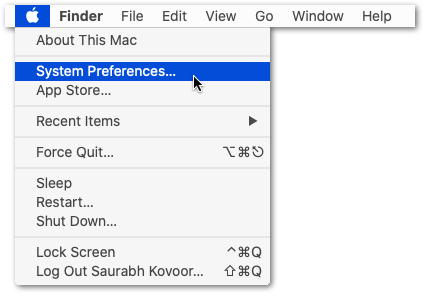
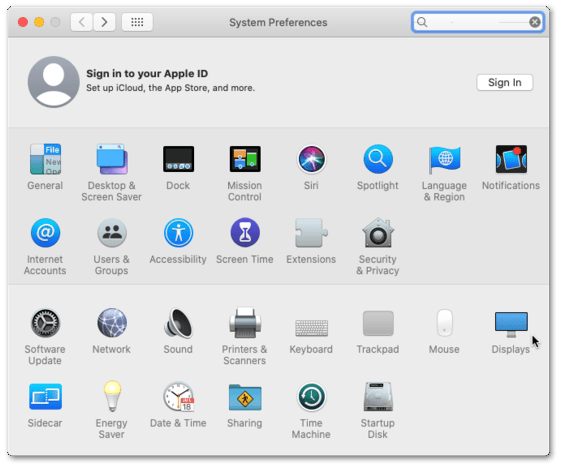
- Firstly, click on the Apple menu icon at the top left in the menu bar.
- Then, select System Preferences.
- Next, select Displays.
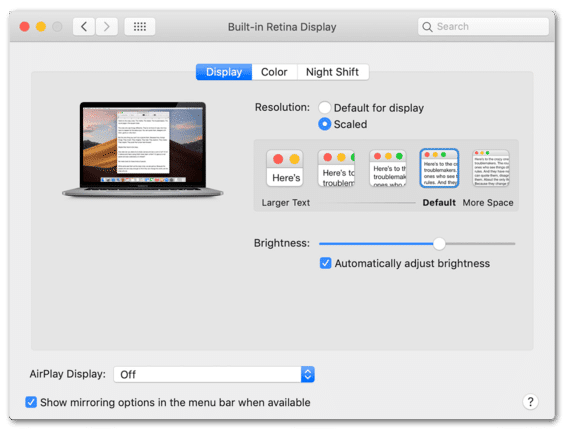
- On this next page, select the Display tab on the top bar.
- After that, select Scaled. If macOS doesn’t explicitly tell you what the resolution is, it instead gives you a spectrum between Larger Text and More Space.
- To decrease your resolution, you’ll have to drag the slider to the left towards the Larger Text end.
- If you’re changing a secondary monitor’s resolution, you’ll need to hold the Option key on your keyboard while you select Scaled.
13. Clear the Microsoft Teams App Cache
Apps need to store frequently accessed resources as cache to improve performance, so they can be more easily accessed in the future that way. However, these cache can sometimes become corrupted and as such, we should clear it. This forces Teams to create brand new caches which are likely not corrupted and could solve your screen sharing problems.
The same process also applies to those using the web version, but in this case, you’re clearing the data and cache stored on your web browser.
Windows
- Firstly, ensure the Teams app is fully closed and not running. You can double-check by looking in the Task Manager (Ctrl + Shift + Esc). End the Teams process in there if you see it running. (Step 3)
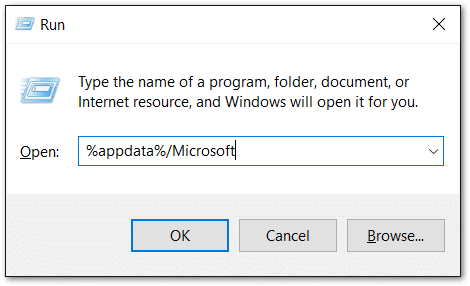
- Next, open up the Run dialog. (Win + R)
- Copy and paste the following address to access Teams’ cache: %appdata%/Microsoft
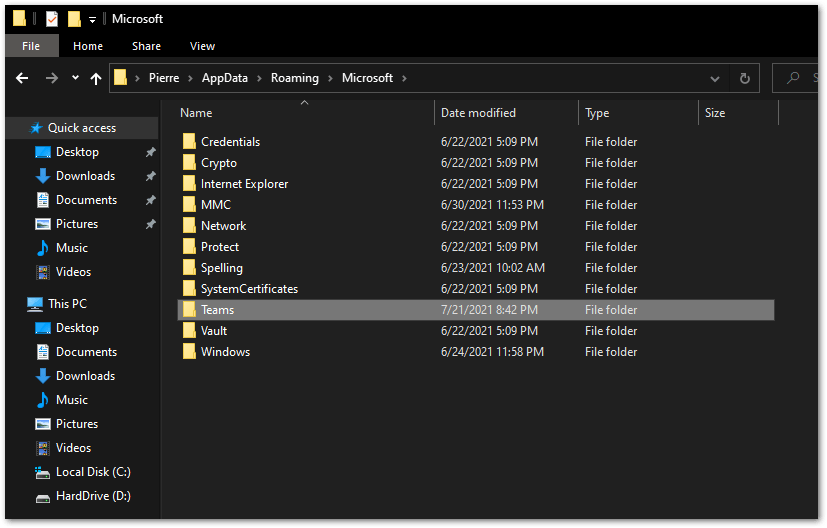
- You should see a list of folders in here like in the screenshot.
- Then, simply select Teams and delete it.
- Finally, open up Teams and let it set up all the new cache.
macOS
- To start, make sure Teams is fully closed.
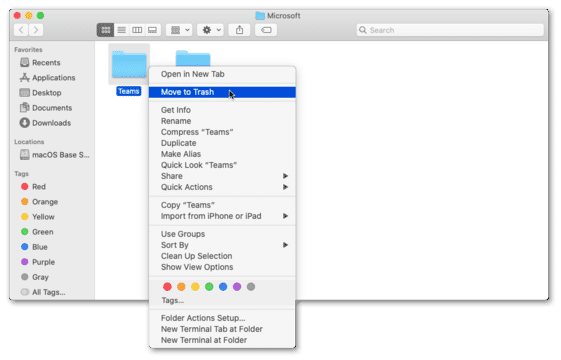
- Then, hold down Command+Shift+G and paste the following directory: ~/Library/Application Support/Microsoft

- Here, simply delete the Teams folder.
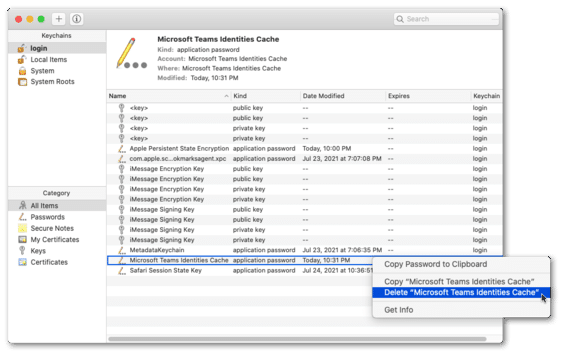
- After that, open up the Keychain Access app through Launchpad.
- Next, while login is selected in the left sidebar, delete the Microsoft Teams listing.
- Finally, open up Teams and let it set up all the new cache.
Web Version
When using the Microsoft Teams website for video calling and what-not, the platform data is stored on the web browser. This data consists of browser cache, cookies 🍪, and other site data. Therefore, you can clear this data within the browser settings.
That being said, the following steps were performed on Google Chrome, but are generally similar regardless of whichever browser you’re using:
- First, navigate to the Teams web version and log in to your Microsoft account.
- On the left side of your address bar, click the lock icon or similar.
- Then, click the Clear cookies and site data… option or similar.

- Finally, in the new window, click Remove in the bottom-right corner.

Note: Clearing cookies and site data will log you out of the website, so save everything before you perform these steps.
Android
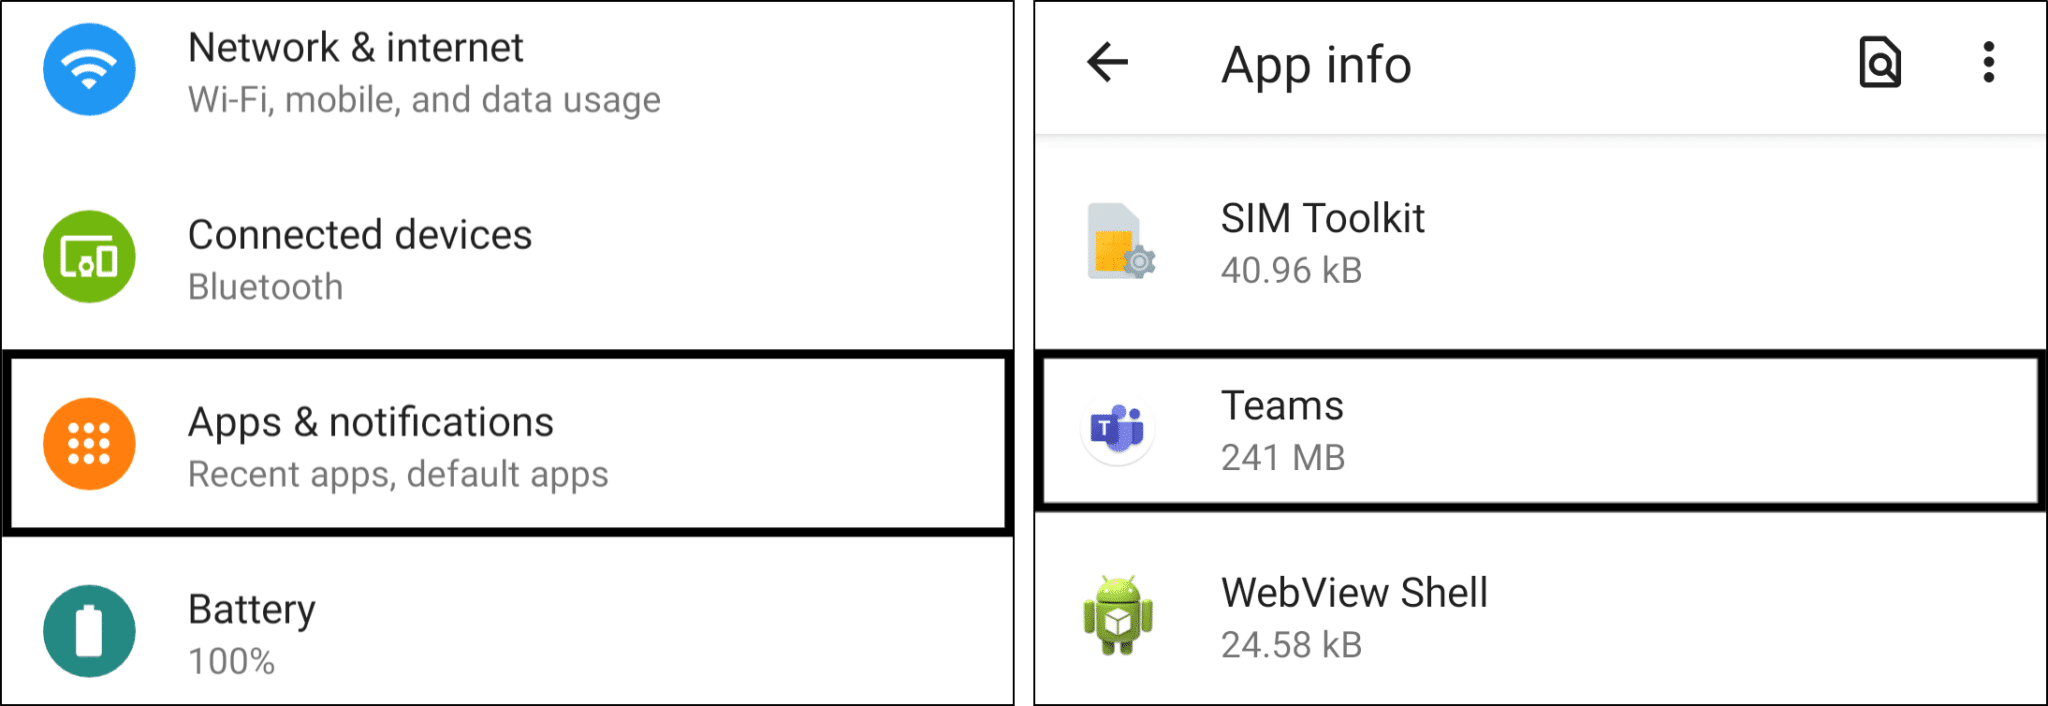
- Firstly, open the Settings app, and tap on Apps & notifications.
- Then, select Microsoft Teams from the list of apps.
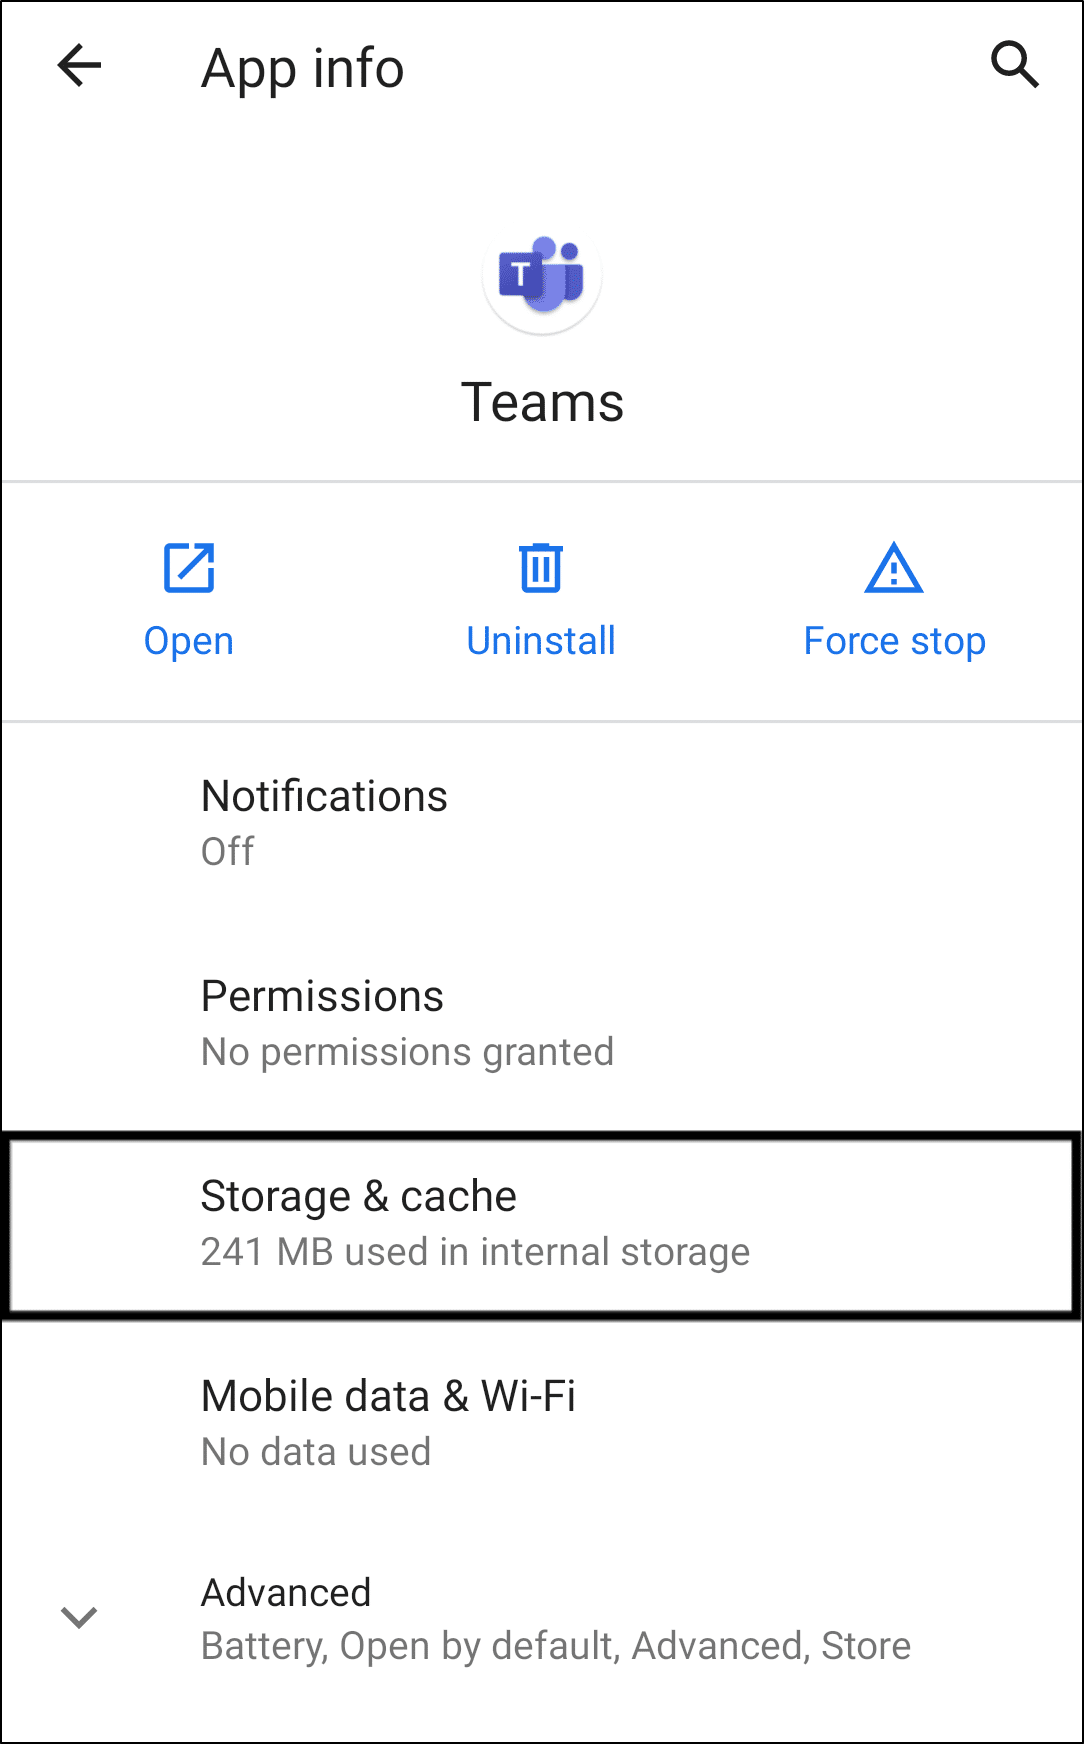
- Next, tap Storage & cache.
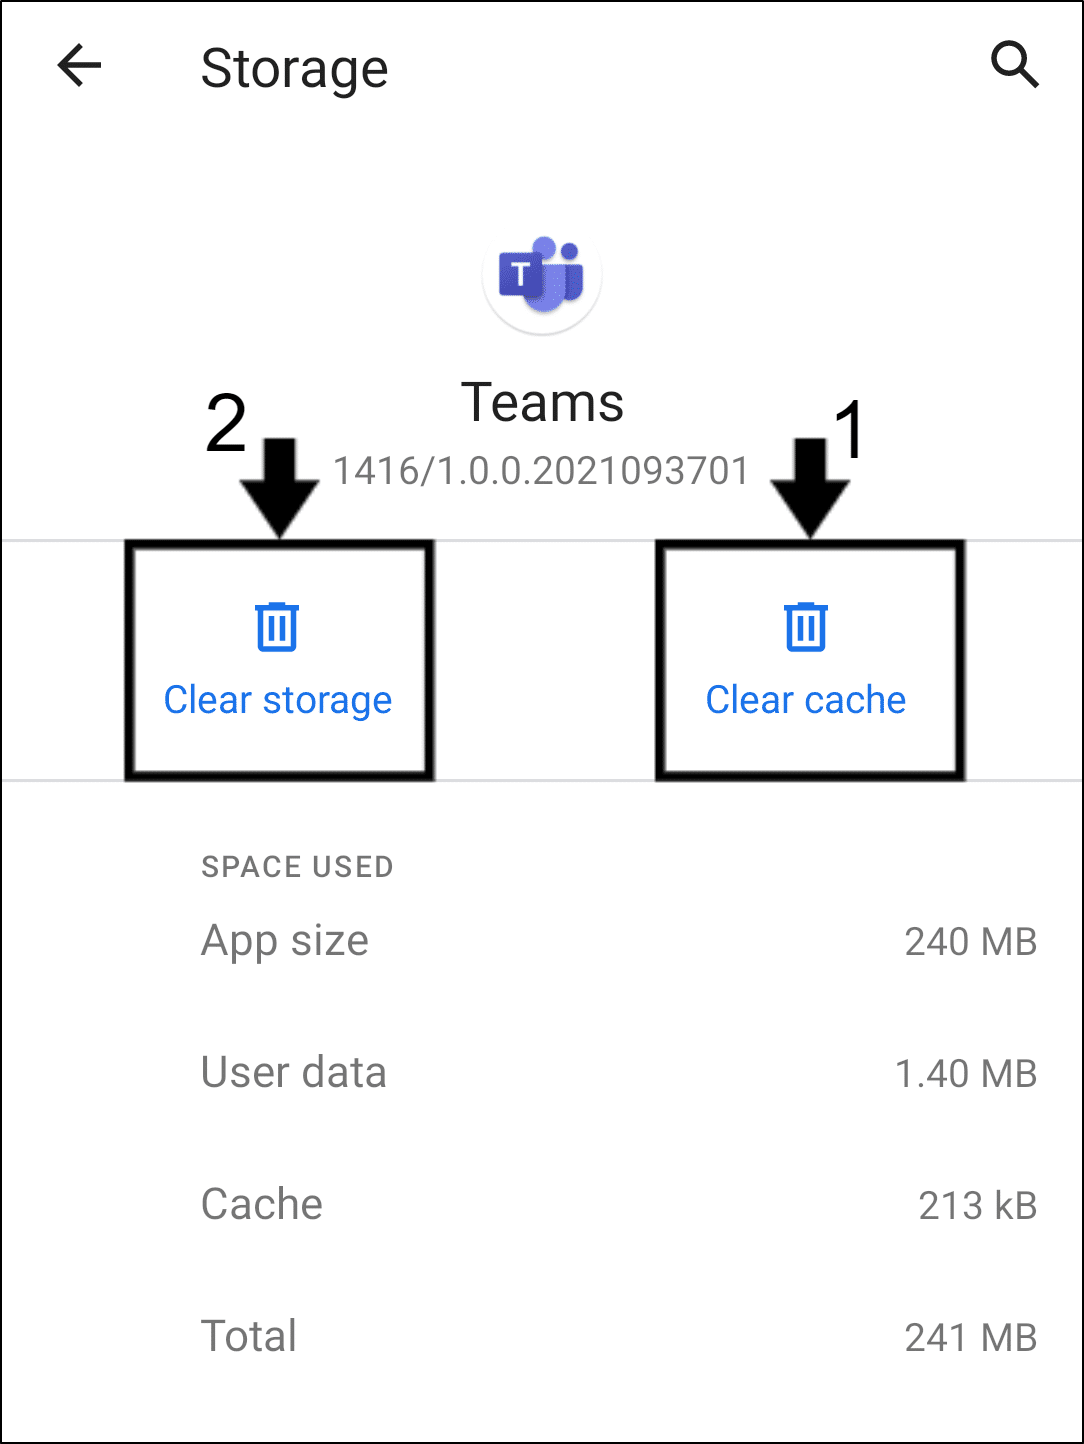
- Following that, start by tapping Clear Cache, and then you can choose Clear Storage.
Note: Another way to clear the Teams cache on mobile OSes without digging into system files is to simply reinstall the app (Step 14). Uninstalling the app removes the stored cache so this approach works. Plus, this is the only method available for iOS users.
14. Reinstall the Microsoft Teams Application
Moving on from the previous fix, you can take another step and uninstall the Teams application. Since you’ve deleted the app files already in the previous step, you can perform one last step to completely remove and uninstall all its traces from your device. After that, you can download and install a fresh copy of the Teams application from their website, free from any corrupted installations or hidden bugs.
Overall, a complete reinstall of the app, is an effective fix for various issues with the Microsoft Teams app, even for when the screen share isn’t working.
Note: For a complete reinstall, you can delete the Teams files through the previous step beforehand. Additionally, restarting your device after the uninstallation is helpful for a complete reinstall as well.
Windows
- First, open the Run prompt by pressing the Windows and R keys together.
- After that, enter appwiz.cpl and click OK.

- From the list of apps, select Microsoft Teams and click Uninstall.
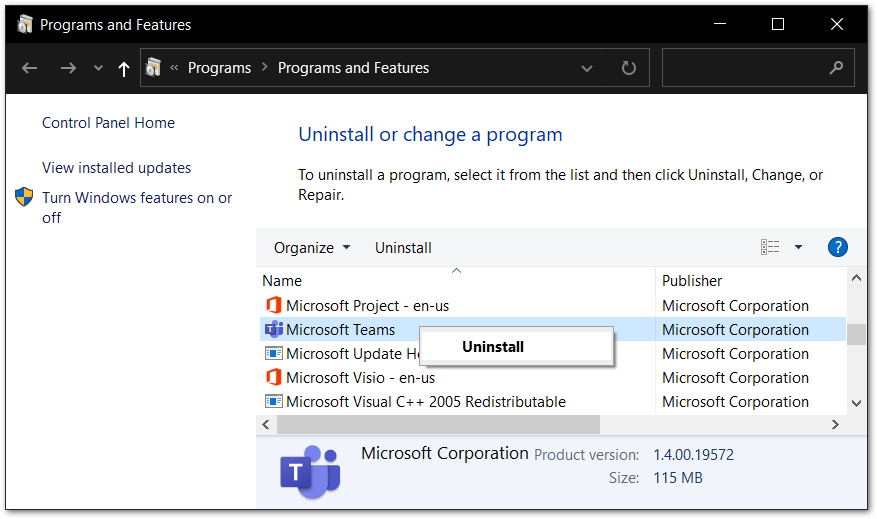
- After that, proceed with the rest of the guided uninstallation steps.
- Finally, you can visit this Microsoft page, to download the Teams client installation file and proceed to run it.
macOS
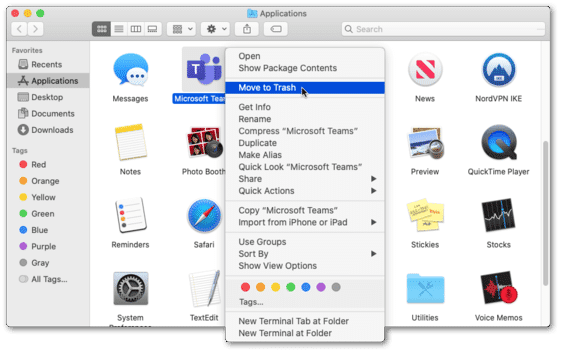
- Firstly, open up Finder and look for the Microsoft Teams app. It’ll likely be in the Applications tab, which you can open by clicking Applications in the Finder’s sidebar. Alternatively, you can use Spotlight to find the app, then press and hold the Command (⌘) key while double-clicking the app in Spotlight.
- Then, drag the Microsoft Teams app to the Trash, or select right-click the app and choose Move to Trash.
- After that, if you’re asked for a user name and password, enter the name and password of an administrator account on your Mac. This is probably the name and password you use to log in to your Mac.
- Next, to delete the app, open the Trash, right-click it, and select Empty Trash.

Finally, like before, visit this Microsoft page, then Download the Teams client and proceed to install it.
Android/iOS
- Start by opening the appropriate app store for your device.
- Next, search for Microsoft Teams and select the listing. Here’s a link to the listing for Google Play and the App Store. Then, on the app page, select the Uninstall button.
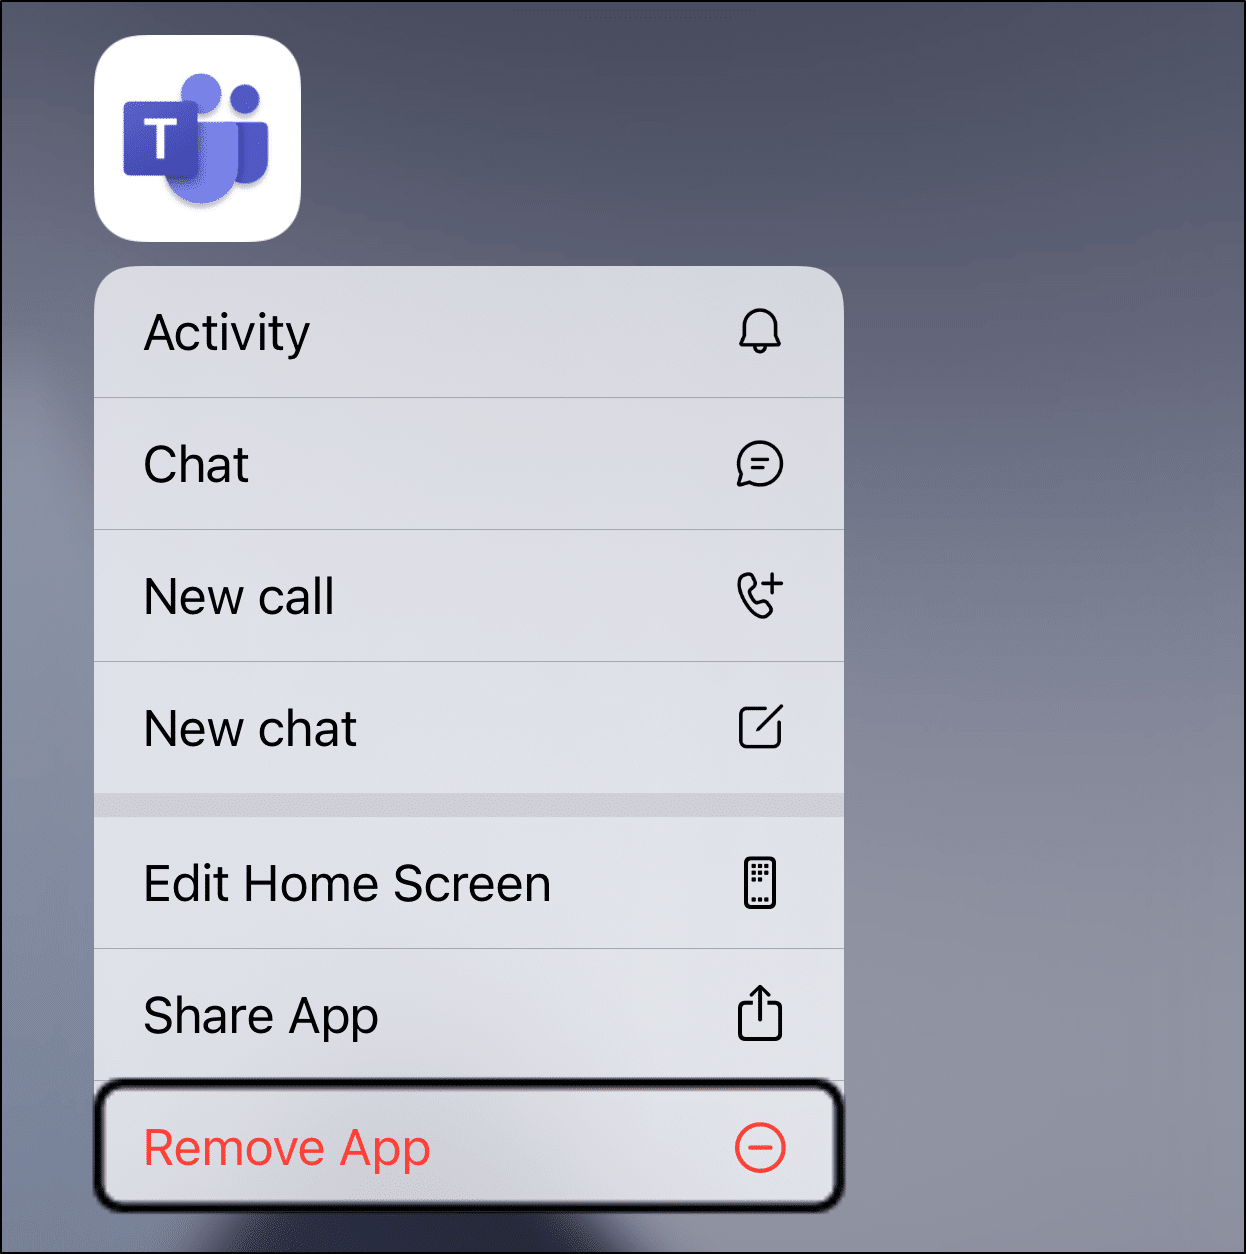
- Alternatively, from your app list or menu, long-press the Microsoft Teams app for the selection menu. Then select Uninstall or Remove App.
- Finally, reinstall it by selecting the Install button.
15. Allow the Teams App Through Your Firewall
Windows, macOS, and other desktop operating systems usually have a firewall 🔥 to block and allow ingoing and outgoing connections for your safety. Usually, when installing Teams, it should have been given all the permissions to connect to the Internet.
However, restrictive firewall settings on your PC’s OS could be the cause resulting in the Microsoft Teams screen share not working. Therefore, it’s still a good idea to check if it truly has been allowed.
Note: This fix does not apply to Android or iOS.
Windows
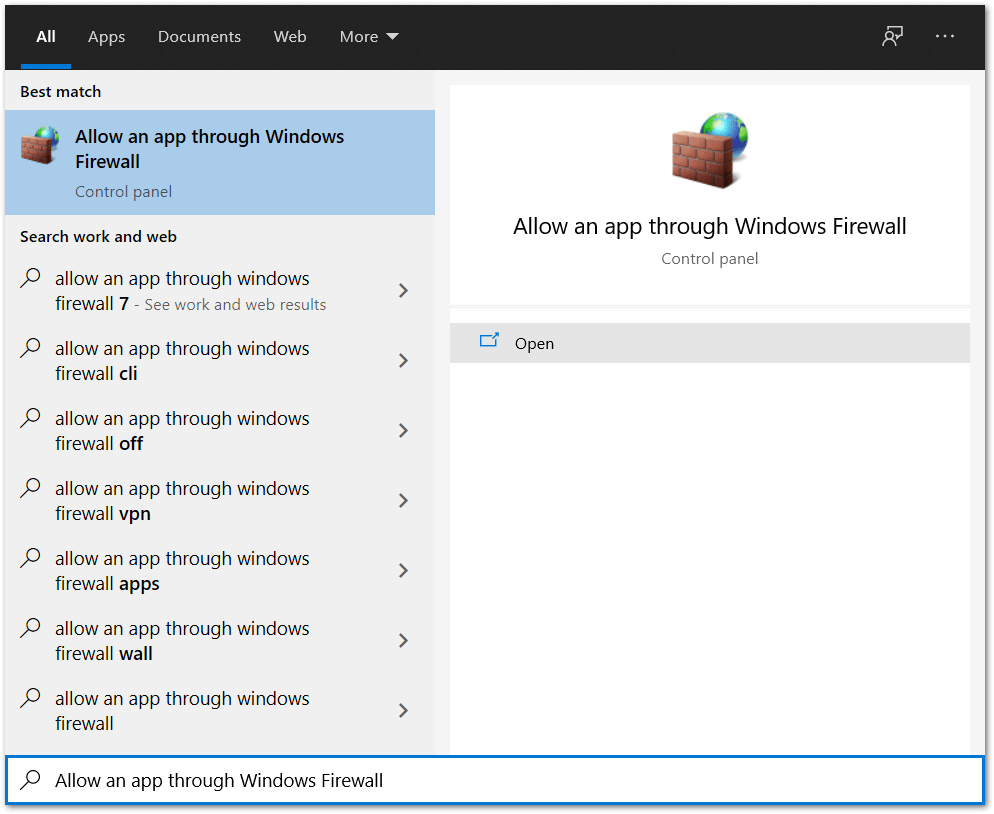
- Start by holding Win + S or click the search bar in the bottom left.
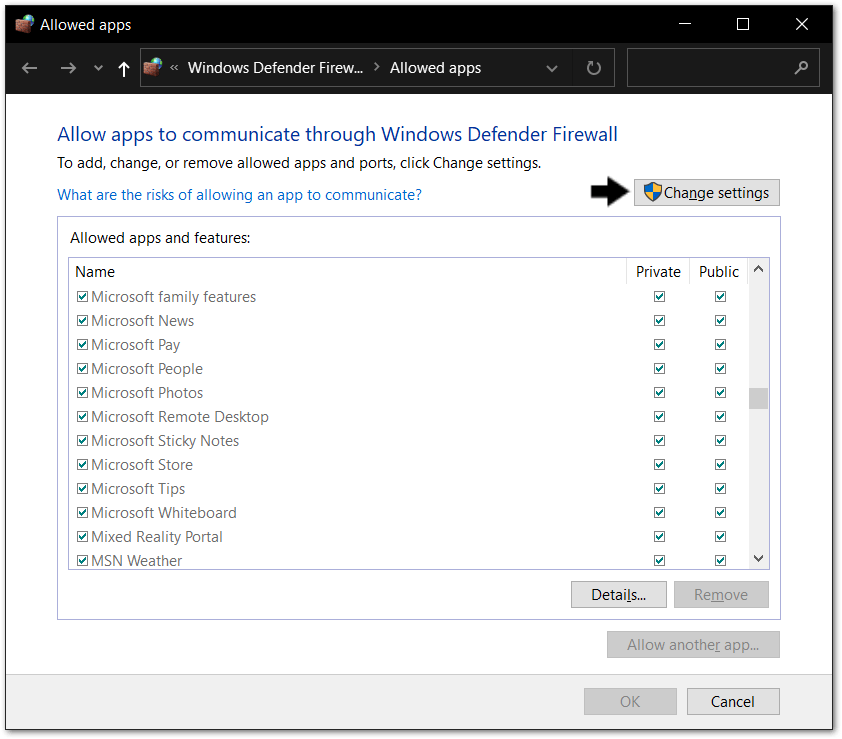
- Then, search and select Allow an app through Windows Firewall.
- Then, click the Change Settings button.
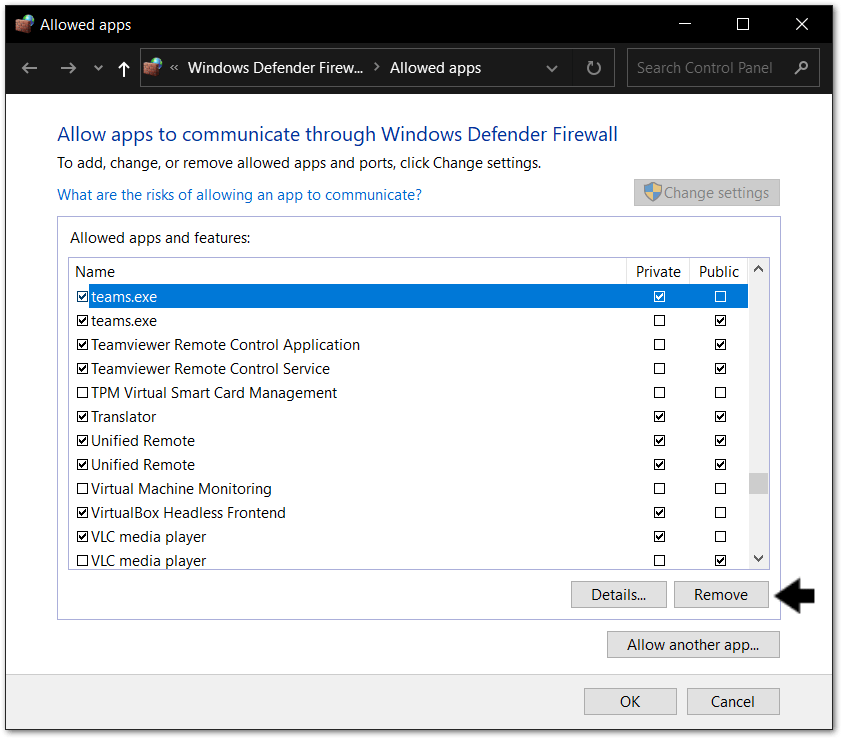
- Find Microsoft Teams in the list of programs. If it’s there, select it. Else, skip to Step 6.
- With Microsoft Teams selected, click the Remove button. Then, confirm that you want to remove the entry.
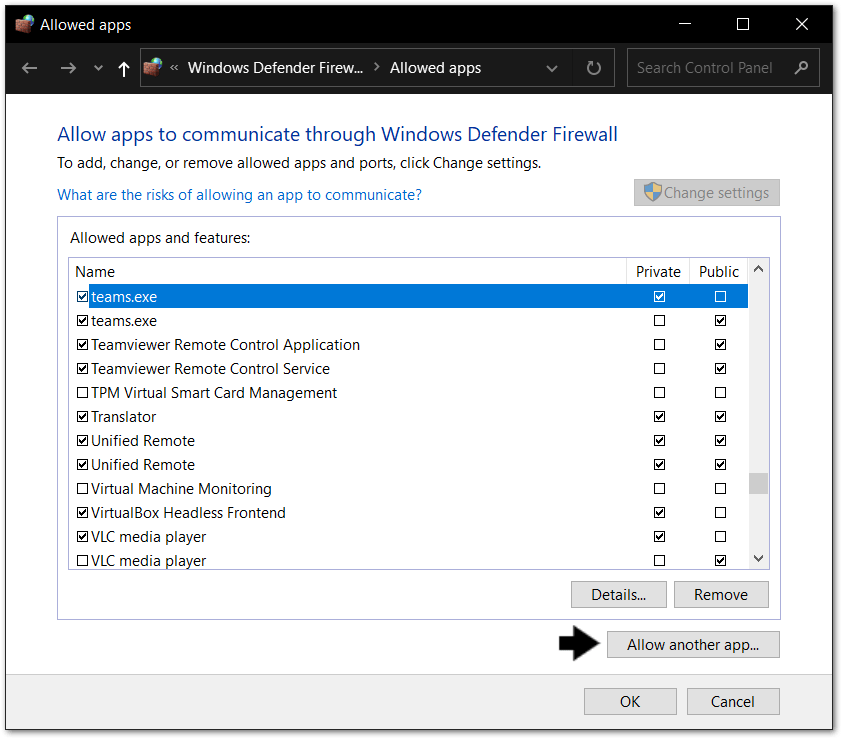
- Next, click the Allow another app button. The Add a Program window will appear.
- In the Add an app window, click the Browse button.
- After that, navigate to the Teams program directory (e.g. C:\Users\[YOURNAME]\AppData\Local\Microsoft\Teams\current) and double-click on the Teams.exe file.
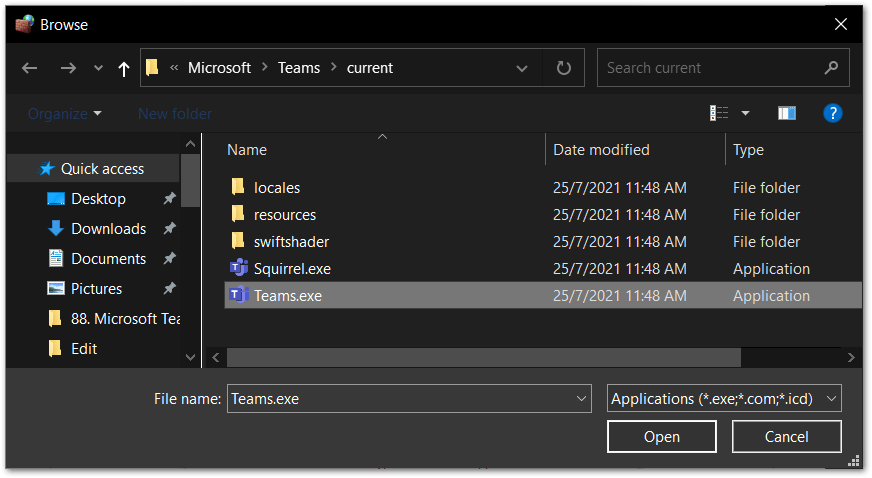
- Then, click the Add button.
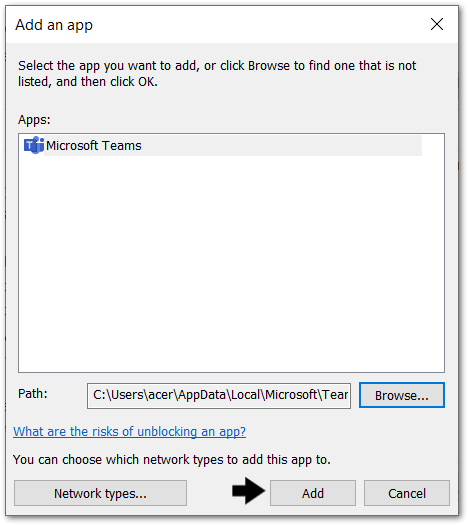
- Lastly, click the OK button to close the Allowed apps panel.
macOS
- First, select the Apple menu and from the drop-down choose System Preferences.
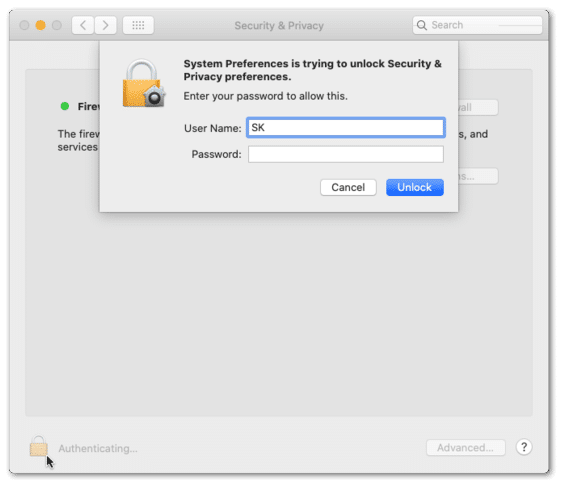
- After that, click Security & Privacy.
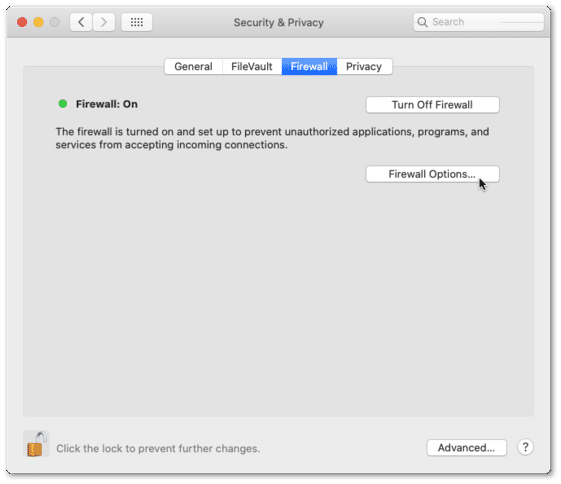
- On the following window, select the Firewall tab. If the lock at the bottom left is locked, click it to unlock the preference pane.
- Next, click Firewall Options. If the Firewall Options button is disabled, first click Turn On Firewall to turn on the firewall for your mac.
- After that, click the Add button under the list of services, then select the services or apps you want to add – in this case, Microsoft Teams. After an app is added, click its up and down arrows to allow or block connections through the firewall.
Conclusion
To sum up, Microsoft Teams is one of the most popular online conferencing services to date. So, we know just how important it is to have every feature working, especially screen sharing, no matter what device you’re using. Most of these fixes can actually be applied to other apps, with the exceptions of the peculiar screen resolution fix and macOS’s tight permissions.
Now, if none of our fixes worked, we suggest contacting Microsoft themselves and telling them about your situation. By doing this, they can get to fix your problem ASAP.
To conclude, those were our 15 fixes for when your Microsoft Teams screen share isn’t working. Hopefully at least one of them managed to get the screen share feature working again!
Be sure to comment down below:
- Are you encountering problems with screen sharing on Microsoft Teams?
- Have another fix for this Teams screen share issue?
- What other Microsoft Teams problems are you facing?
Feel free to share this post with someone you know whose Microsoft Teams screen share isn’t working. 🤗