Have you ever encountered an issue where Netflix is not playing shows or movies correctly, whether the stream keeps buffering, freezing, or is stuck in an endless loading screen?
One of the leading entertainment services across the globe and a name not unheard of, Netflix is a streaming service that goes against its competitors, such as Amazon Prime Video and Disney+. As of 2022, Netflix has accumulated nearly 214 million paid memberships and is still growing! 🤯
There are many benefits to Netflix to justify why their streaming service is one of the best; otherwise, why would people be attracted to their streaming subscription? Let’s explore a few of what they have to offer.
A significant benefit presented by Netflix is simultaneous viewing for members who are on standard or premium subscription plans. Thus, the same movie or television show can be viewed on different devices simultaneously without worrying about who’s using the account. If your family members each have a highly anticipated series they would like to binge, then Netflix is the place to go!
Another benefit that Netflix offers is streaming your favorite movies or TV shows in HD or Ultra HD quality. This perk comes in the premium subscription plan, which costs approximately $13.99. Nonetheless, if you would like to opt for a cheaper plan, Netflix also offers that capability with the standard subscription plan that includes SD streaming quality at $7.99. 🤩
Like Amazon Prime Video and Disney+, Netflix has its original content called Netflix Original Series. A few popular shows you might have heard of include Dark, Stranger Things, and House of Cards.
All the benefits mentioned above are a few of the many benefits that Netflix provides. However, like any other service, the popular streaming service faces bugs and issues threatening the company’s reputation. Now and then, users have reported incidents of their Netflix stream buffering, freezing, stuck in loading, or just now playing at all. 🧐
Are you one of the victims who face this issue and want a quick fix so you can continue binge-watching your favorite shows? Not to worry, we’ve covered you with fixes you could try on your issue.
Before diving into the fixes, it is best to first understand the issue’s source and what might be causing the problem. The outline for this guide will start with common causes of our concerns and detailed explanations, followed by a compiled list of 24 fixes you can try when the platform is experiencing issues.
Note: This guide provides pictures and steps taken from the Netflix website or app on Windows, macOS, Android, iPhone, and iPad. However, the steps work effectively and similarly for other streaming devices, including game consoles (PS4, PS5, Xbox, Nintendo 3DS), Smart TVs, and set-top boxes (Roku, Firestick, Apple TV).
23 Fixes for Netflix Not Playing, Stream Buffering, Freezing, or Stuck Loading
1. Check the Netflix Server Status
Before we jump into any fixes associated with your device, we must ensure the problem is not occurring from Netflix’s end.
When a significant entertainment service experiences, internal issues can often affect the end user. With many Netflix subscribers on the platform every second, people will be talking about outages or server crashes affecting their overall experience with Netflix.
If the problem does occur from Netflix’s end, try logging back into your account after a few hours to see whether the server is up and running again.
The internet offers various trusted sources that allow us to check whether the Netflix service is healthy. Here are a few ways we can do so:
Method 1: Check Netflix Server Status through Help Center
The final way to check whether the Netflix server is indeed up and running is via their official Help Center.

Once you’ve clicked on the link above, you’ll be redirected to their server status page. Over there, you’ll be able to view the status of its service. If there’s no issue, there’d be a statement saying ‘Netflix is up!’ with a green tick beside it. Else, a different summary will be displayed.
Method 2: Check Netflix Server Status on Downdetector
Downdetector is a well-known website that allows us to view real-time information about the status of popular websites and services such as Netflix.
To view the status of the Netflix server in the last 24 hours, navigate to Downdector by clicking on this link.
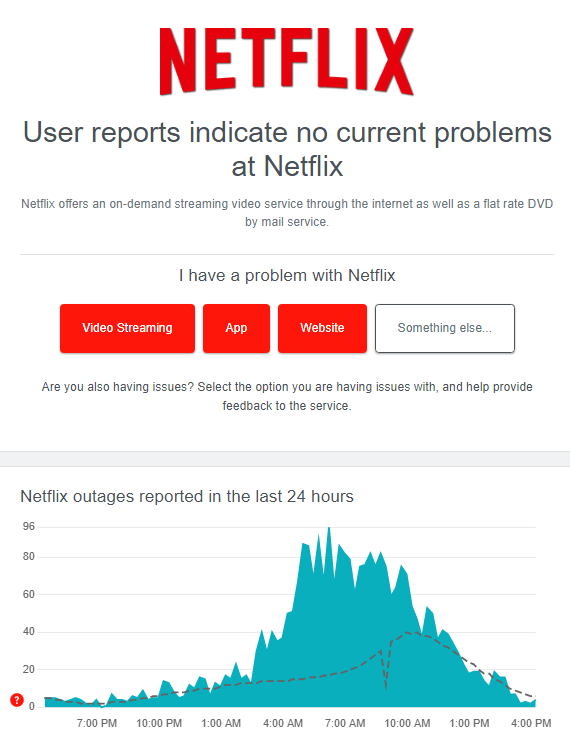
Based on historical data, Downdetector summarizes whether Netflix is experiencing an issue. The summary can go either two ways. If no point is found on Netflix’s side, a green bar labeled ‘No problems at Netflix’ will be shown. However, if an issue such as server outage or maintenance does occur, a red bar labeled ‘Problems at Netflix’ will be shown.
The page also provides handy statistics on the most reported problems and the percentage of people experiencing each one. For example, reported video streaming problems can be 61%, reported app problems can be 31%, and reported website problems can be 8%. Looking at the statistics, we can conclude that most users are experiencing an issue with video streaming, and the cause is from Netflix’s end.
Method 3: Search on Twitter for a hashtag such as #Netflixdown
Twitter is the central hub for all news, including possible issues on Netflix’s servers. When you’re on the platform, do take the time to search and look for hashtags relating to the Netflix server being down. A hashtag you can look up would be #Netflixdown.
Once you’ve found a relatable hashtag, scheme through the timestamps of each tweet to see whether there are any similarities among each of them and how frequently the tweets appear. By doing so, we can find a solution to our problem or conclude an assumption that Netflix is down.
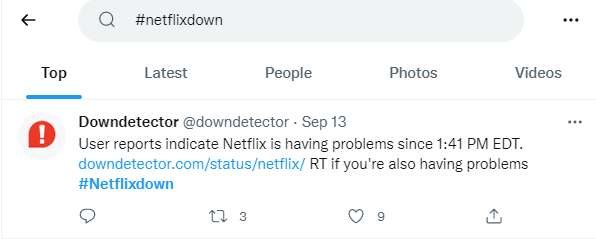
Furthermore, ensure that the tweets were posted close to the day/time you lost your connection to Netflix. Thus, it helps prevent us from reading outdated tweets and making false assumptions.
2. Check Your Netflix Subscription
Another possible explanation for why your stream suddenly froze midway is your Netflix account being barred from watching. The primary source of this issue is your subscription plan has been terminated.
Netflix isn’t 100% free, and for us to have complete access to the platform, we need to pay a monthly subscription fee to Netflix.
Here are the steps on how to check whether your Netflix account is still active:
- First, enter the Netflix app or website on your device and sign into your account.
- Afterward, select Billing Details to check your Netflix plan and billing history.
- Lastly, you can view your subscription status on the page. If you don’t see yourself subscribed to Netflix anymore, chances are your account has been unsubscribed from Netflix.
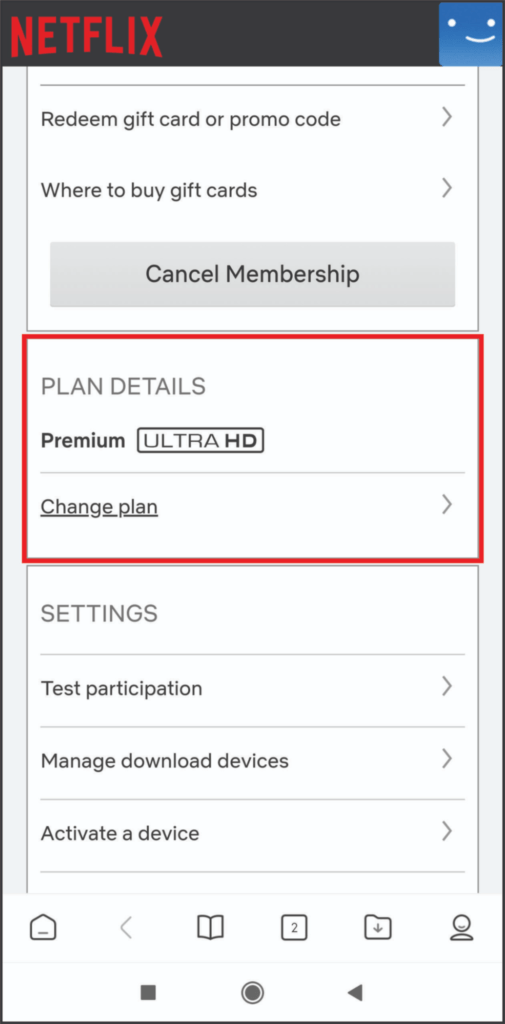
After verifying your Netflix account status is active, move on with the next fix. Otherwise, if your account subscription has expired and you can’t find it, try renewing the plan and using the Netflix app again.
3. Check Your Internet Connection
When streaming a video on Netflix, we must keep a close eye on our internet connection and speed.
A poor internet connection is one of the most common issues regarding a bad video streaming experience. Hence, we must ensure that our internet speed meets the minimum requirements for streaming:
- Standard Definition (SD) videos of 480p, we would need 3Mbps.
- High Definition (HD) videos of 720p, we would need 5Mbps.
- Ultra HD/4K videos at 2160p, we would need 25Mbps.
Note that the above requirements are only sufficient if we’re streaming Netflix alone. Any other connected devices or internet users in the household would require far more internet speed than mentioned.
Testing Your Internet Connection Strength and Speed
To test your internet connection, turn off any downloads or uploads occurring in the background and deactivate your VPN software for the entire duration of testing (if you’re using one). Consequently, you’ll be able to get a more accurate reading of the traffic to and fro the internet as the connection speed is not over-estimated.
One of the more popular services out on the internet that allows us to test our internet speed is called Ookla Speedtest. The test result measures the time taken for data to transfer between our device and the remote server through a local ISP connection. There are many ways we can test our device, either through the mobile app to try our smartphones, such as Android or iOS, as well as native apps for Windows, macOS, Google Chrome, and Apple TV.
This website is sought for internet speed testing as the instructions are simple. When we’re on the platform, all we need to do is press the ‘Go’ button, and all the work will be handled for us. After 1 to 2 minutes, the process is complete, and we can watch the service run in real-time. However, ensure your location is allowed for the website if prompted, as it uses your site to pair with a local Speedtest server.
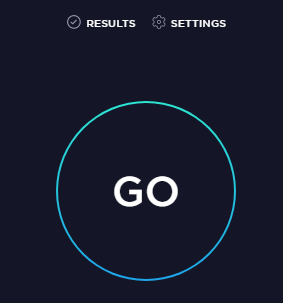
Your internet connection speed and download speed are measured in megabits per second (Mbps) and can be viewed once the testing process has been completed. The results can be compared with Netflix steam minimum connection speed.
Besides Ookla Speedtest, there’s also another platform available for use called FAST.com. Interestingly enough, FAST.com is powered by Netflix to provide internet speed measurements so people can check how fast their internet is and whether it meets Netflix’s streaming or download connection requirement.
When we open the website, a download speed test will immediately start and does not require us to click a button. After the process is complete, we’ll be able to view the latency and upload test results through a ‘Show more info’ button. In terms of trust and ease of use, this can be an alternative for you to try as well.
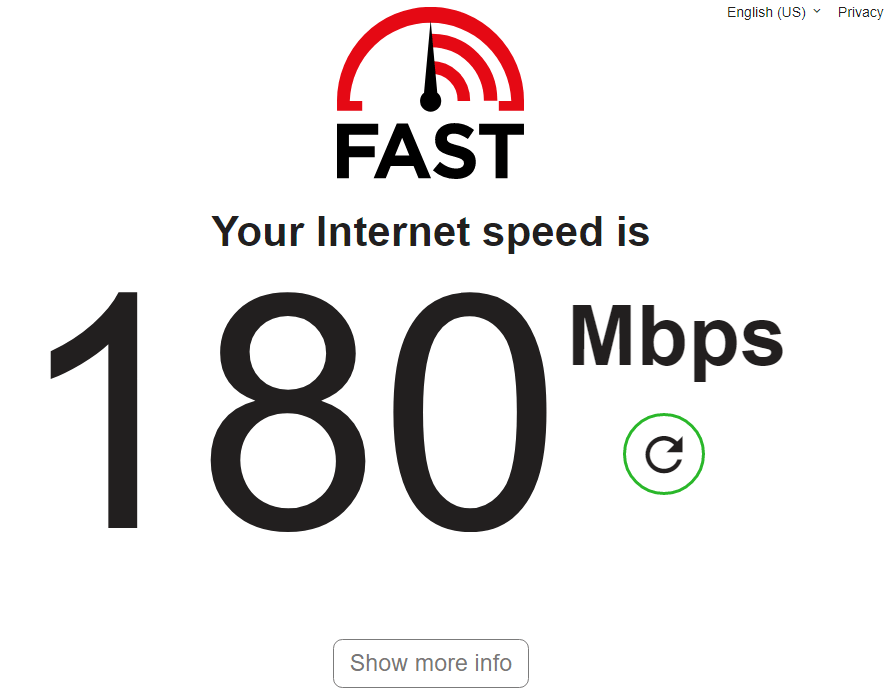
If you find your internet connection slower than usual or not working as you’ve paid for your internet subscription, you may continue with the following fix below. Else, you can skip to fix 4.
4. Fixes for Internet Connection Issues
Let’s say your Netflix has run into unexpected errors, and the cause for it is a bad internet connection. Fret not. We’ve listed below a few ways you can try to fix your internet and possibly help your Netflix.
Without further ado, let’s get started! Here are 4 ways to resolve a slow internet connection:
Note: If you’re not sure whether the reason for your Netflix buffering or video freezing issue is due to a bad internet connection, you can follow the previous fix above titled ‘Check your Internet Connection.
a. Restart Your Wi-Fi Modem
The quickest way to solve a slow internet connection is by checking your modem and ensuring it is working correctly. In most cases, restarting your modem can solve many internet issues.
- You first want to turn off your internet router, disconnect the power cable, and wait for 5 to 10 minutes.
- Afterward, you can reconnect it to the power source, turn the power back on for the router, and check whether the internet speed has been restored and your Netflix is working well again.

If this method doesn’t work in your favor, give the following process below a shot!
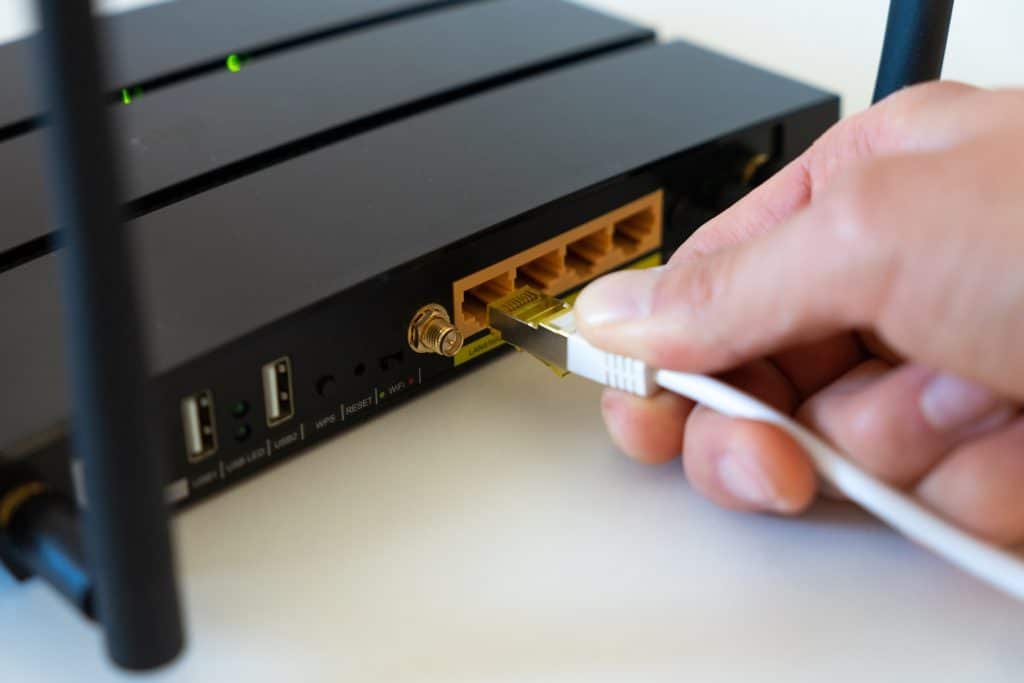
b. Try a Wired Connection between your Router and Laptop
This fix only works well if you’re using your laptop or computer to watch Netflix. A Local Area Network (LAN) cable can connect to the Wi-Fi router, thus producing a faster internet speed than a wireless connection.
Besides laptops, we can connect intelligent TVs to the internet using a LAN cable, and modern smart TVs nowadays have a built-in LAN port.
Till now, there’s no way for you to connect a LAN cable between your smartphone and the router as the port is way too small. However, if you’re willing to invest, an external LAN adapter will help fix that issue.
c. Reposition your Device Closer to the Wi-Fi Router
Another method you can try is moving your device closer to the Wi-Fi router. It may sound ridiculous, but it does work in most cases.
As you move further away from the router, your signal strength will reduce exponentially, as will your internet speed. Hence, the distance between your device and the router also plays a role in determining your internet speed.
Remove any obstacles that might hinder your wireless connection to the router. It might get your video buffer to work as it initially should. However, you’ll get a better link compared to previous ones.
d. Get In Touch With Your Internet Service Provider
The final method you can try, and it’s the worst-case scenario, would be to contact your Internet Service Provider (ISP) about the internet speed. This should only be done after trying all the above methods, and your internet speed still falls short of what was promised in the package.
A recommendation would be calling customer care on the under-promising internet speed. They can restart your connection from their end and provide you with the promised one.
In some circumstances, the internet service might fail due to bad weather or damage to the internet cable. Hence, it’s also best to check relevant sources on whether your ISP’s side has issues. If so, temporarily switch to your mobile data or wait for your ISP to resolve the matter.
After trying each method, continuously refresh your Netflix video and see whether the issue persists. For cases where the problem isn’t bad internet speed, follow on with fix 4.
5. Adjust the Stream Quality of the Video
Netflix automatically selects the most suitable streaming video quality per your internet speed. Let’s say your internet speed is high, which means Netflix will choose for you the highest stream quality allowable. Nonetheless, all this is only possible if you’ve set your streaming quality on Auto.
Hence, if you’ve set the default stream quality on High, try lowering it so less bandwidth is used, thus producing a smoother stream for yourself. Switching your stream quality to a lower one sounds compromisable compared to sacrificing your binge-watching time on a favorite show.
This trick is beneficial when watching on your smartphone with limited mobile data. Now, let’s see how we can manually change our video streaming quality on Netflix.
- Firstly, begin by opening the Netflix website in a web browser.
- After that, hover over your profile icon at the top-right corner and click on ‘Account’.
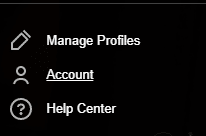
- Following, scroll down and click on the profile you want to change the streaming quality.
- Subsequently, click on the Playback settings option.

- Next, select Medium or Low for a lower-quality video and a smoother stream. If you trust Netflix and want the platform to automatically set the stream quality, click on Auto.

- Lastly, click on the Save button to confirm your changes.
6. Clear Cache from the Netflix App or Web Browser
What is Netflix app cache?
A cache is a reserved storage location that stores temporary data so our apps or web browser can be loaded faster.
In this article, the cache is used to store clusters of Netflix so the platform can be loaded quicker, thus improving user experience. Unfortunately, the developers of Netflix will experience a considerable obstacle when they want to perform an update for the entertainment platform.
Why should you clear the Netflix app cache?
Typical scenario developers face when they want to modify the files stored in our cache. The chances of success for the files to be minimal are low. During the update, old cached files belonging to Netflix will keep getting pulled, thus preventing any modifications from occurring. Thereby, bug fixes for specific features or any new updates are hindered.
If you don’t clear your cache, a few complications occur. For example, your app can experience runtime errors, certain features not working as intended, or trouble streaming a video. Moreover, your cache can become overloaded or corrupted as time prolongs. Hence, it’s always good to keep your cache once in a while.
Clearing your cache and data from the Netflix app or web browser can solve buffering or freezing issues for the streaming video.
Before clearing the Netflix app cache
Before we move on with how to do it, it’s best to note down all your login credentials from the web browser or the Netflix app. This is a precaution if you forget the login credentials for specific apps or web services.
Once you’ve jotted down all necessary credentials, proceed to sign out from the Netflix app or the web browser. Next, you can move on with clearing the cache from the app or web browser. The result will be all data from the app or browser is wiped from your device, and login credentials need to be re-entered to recover the saved data.
Without further ado, let’s begin!
Steps to Clear the Netflix App Cache and Data
For Android
- First, locate and select the Settings app on your phone.
- Afterward, tap on Apps and select Netflix once you’re inside the app.
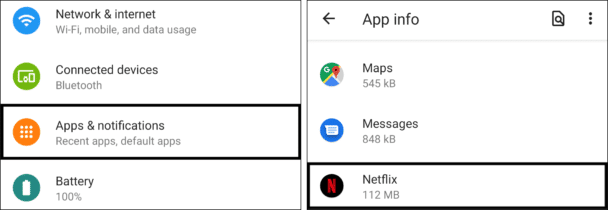
- Subsequently, find your way to Storage and tap the Clear Cache button.

- Lastly, launch the Netflix app and sign into your account with the credentials you’ve jotted down.
For iOS
- First, locate and open the Settings app on your device.
- Then, continue scrolling down the list of apps until you’ve located the Netflix app.
- Enter the app’s settings and tap on Clear App Data.
- Finally, launch the Netflix app and sign into your account with the credentials you’ve jotted down.
For Web Browser on Desktop (Windows/macOS)
Google Chrome
The steps performed below were done using Google Chrome. The process works just as well if you use similar web browsers, such as Mozilla Firefox or Internet Explorer.
- First, on the computer, open your web browser.
- Following after, at the top-right corner of the page, click on More.
- Subsequently, select More Tools → Clear browsing data.

- After that, pick a time range; it can be either the Last hour or All time.
- Next, check the boxes next to Cookies and other site data, along with Cached images and files.
- Then, click on Clear data.

- Lastly, launch the Netflix website and sign into your account with the credentials you’ve jotted down.
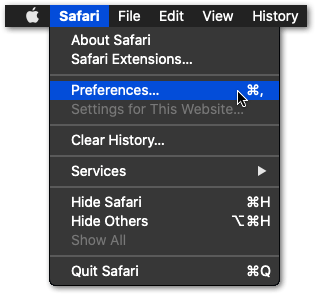
For Safari
- To do so, click on Safari in the top menu and select the Preferences… option from the dropdown menu.
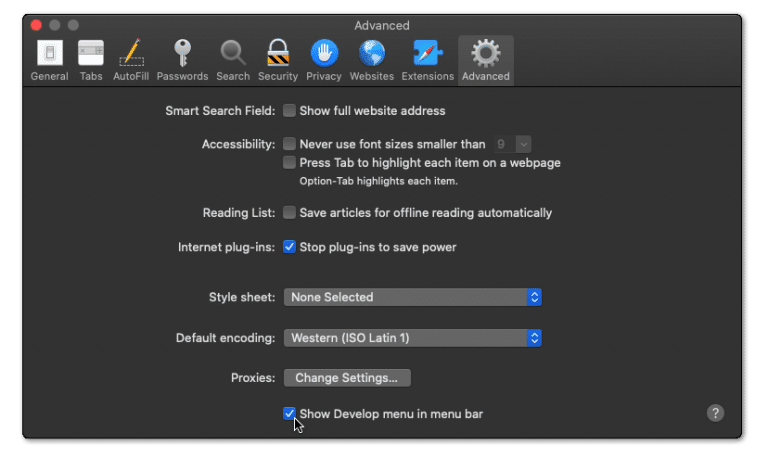
- Next, click on the Advanced option in the top menu and tick the box next to the Show Develop menu option.
- Then, click on Develop in the menu bar at the top and then choose the Empty Caches (🗑️) option.

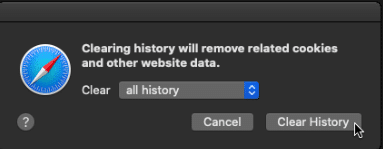
- Once done, again select the Safari option from the top menu and click on the Clear History… option.
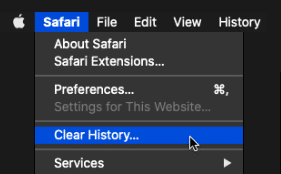
- At last, choose Clear History from the Clear history section to clear the web browser’s cookies and other temporary data.
For Web Browser on Android, iPhone & iPad
The steps performed below were done using Google Chrome. The process works well if you use similar web browsers like Mozilla Firefox or Internet Explorer.
- First, on your mobile device, open your web browser.
- Next, at the top-right corner of the page, tap on More.
- Following after, tap History > Clear browsing data.
- Subsequently, pick a time range, it can be either Last hour or All time.
- After that, check the boxes next to Cookies and other site data as well as Cache images and files.
- Then, tap on Clear data.
- Finally, launch the Netflix website and sign into your account with the credentials you’ve jot down.
For Smart TV
The following steps below were done on a Samsung Smart TV. Depending on your television brand, the menu will be slightly different, but the steps below remain applicable.
The method below applies to the Netflix app:
- First, tap the Home button on your Samsung Smart TV’s remote control.
- Subsequently, head over to Settings.
- Following after, select Apps > System apps.
- Next, choose the app you want to clear the cache from. In our case, it would be Netflix.
- After that, click on Clear Cache and OK to confirm the data wipe. The process might take a while if you haven’t cleared the cache for a long time.
- Lastly, access the Netflix app on your TV and log into your Netflix account using the credentials you’ve jotted down earlier.
The method below applies to a web browser if you’re using it to watch Netflix on TV:
- First, tap the Home button on your Samsung Smart TV’s remote control.
- Following that, head over to Settings and choose Broadcasting.
- Then, on the Broadcasting menu, select Expert Settings.
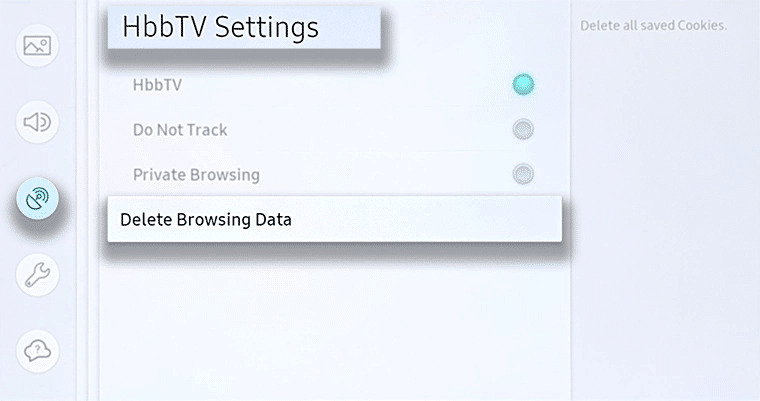
- Subsequently, pick on HbbTV Settings.
- After that, tap on Delete Browsing Data and confirm the data wipe by tapping Yes.
- Lastly, access the Netflix website on your TV and log into your Netflix account using the credentials you’ve jotted down earlier.
Once you’ve cleared your cache, the new files should be pulled instead of the old ones. However, to ensure you’ve got the new updated files, uninstall your Netflix app and reinstall it again from the App Store or Google Play Store. For more information on how to do it, follow fix 6.
7. Uninstall and Reinstall the Netflix App
This fix is intended to solve some common problems of Netflix being buggy or if you’ve cleared the cache and want to ensure you’ve got all the new updated files installed (refer to fix 5).
By uninstalling and performing reinstallation, the latest version of the Netflix app will be released by developers, and a bug fix to your problem might be included as well. Hence, it’s always good to keep your apps up to date.
With no time to spare, let’s jump right into the steps on how to reinstall the Netflix app for each device:
Note: Before continuing with the fix, it is highly suggested to note down your login credentials to the Netflix app, as you may need to refer to it when logging back into your Netflix account.
For Windows
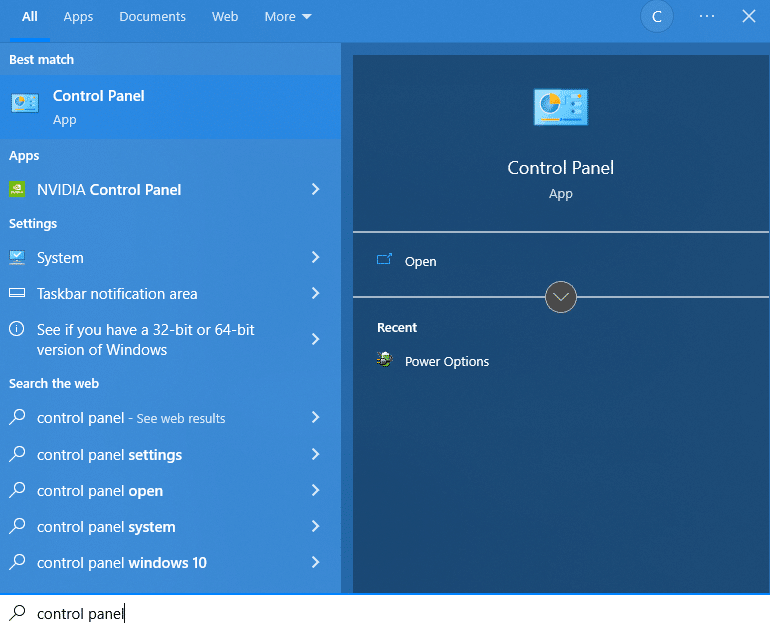
- Firstly, click on the Search icon, which can be found next to the Windows logo at the bottom right of the computer screen.
- Next, type ‘control panel’ in the search bar and click on the top search result. The clicked result should give you the Control Panel program.
- Afterward, in the Control Panel, go through the list of programs installed on your computer.
- Subsequently, once you’ve located the Netflix app, right-click on it and select ‘Uninstall a program.
- Lastly, stick to the prompt on the scream, and you’ll be shown a progress bar that takes you to remove the Netflix app from your computer.
For Android
- First, locate and open the Google Play Store app on your device.
- Following after, at the top right corner of the app store page, tap on your Profile icon.
- Subsequently, tap Manage apps & devices > Manage.

- After that, tap on the name of the app you would like to delete from your phone. In our case, the app should be titled ‘Netflix.’
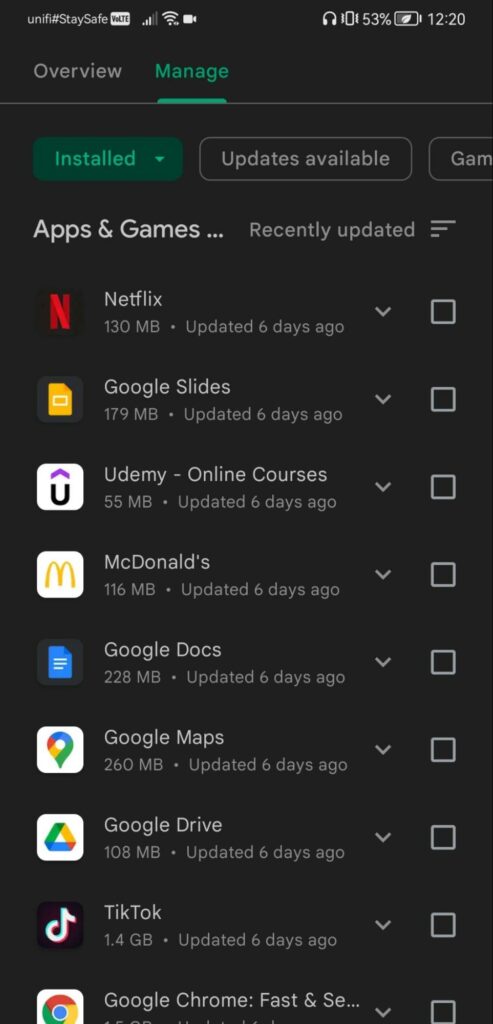
- Finally, tap the Uninstall button. The app should be removed entirely from your phone.
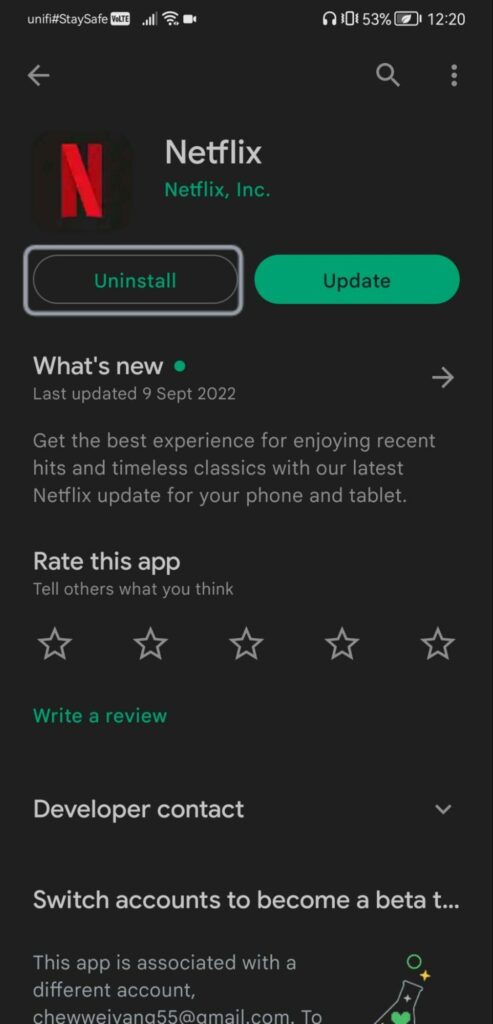
For iPhone & iPad
- First, long press on the Netflix app until you see a quick action menu appear for it. Otherwise, you can perform the same action with app icons on your Home screen or in your App Library.
- After that, tap Remove App.
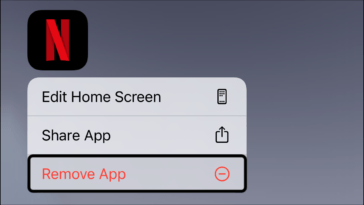
- Following after, tap Delete App from the menu that appears.
- Finally, tap on Delete from a popup confirmation that will appear. The app should be removed entirely from your phone.
For Smart TV
The following method was done on the Samsung Smart TV. However, any other television brands will work similarly with a little difference.
- First, press the Home button on your remote.
- Following that, head over to the Apps tab.
- Next, select on Settings and find Netflix.
- Lastly, click Delete to remove the Netflix app from the TV.
After successfully removing Netflix from our device, we can reinstall the app on our machine.
Here’s how to reinstall Netflix for each device:
For Windows
- First, click on the Start icon on your computer screen’s bottom left.
- Following that, locate the Microsoft Store app and click on it. Alternatively, you can search for the keyword ‘Microsoft store’ to obtain the search result.
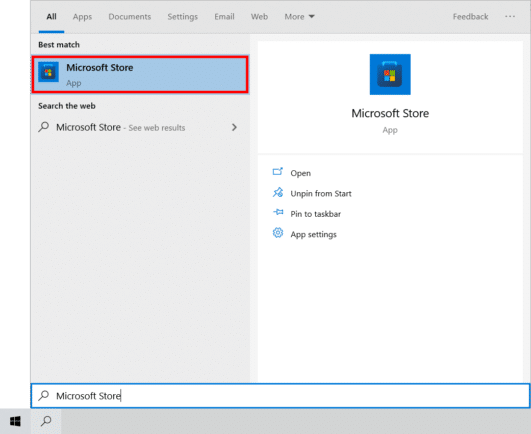
- Then, click on the Search icon at the top right of the store homepage.
- After that, in the search box, search ‘Netflix.’ This should result in the Netflix app being the most related to our search.
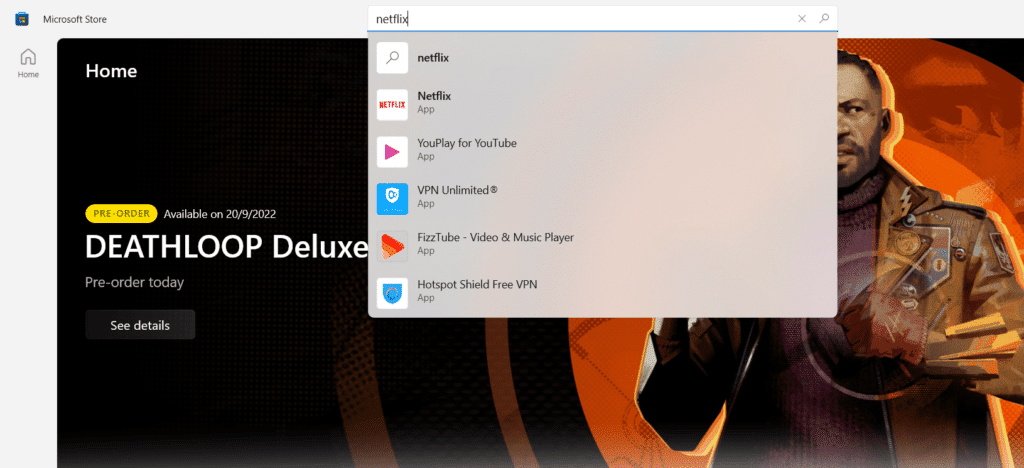
- Subsequently, click on the Netflix icon to open its page details.
- Then, tap on the blue Get button to begin the installation of the app.
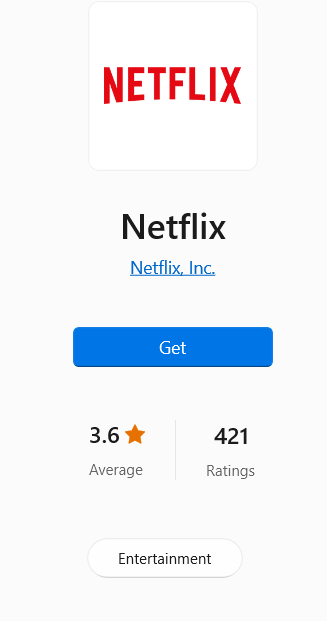
- After successfully installing and launching the Netflix app, log into your Netflix account by entering the account credentials you’ve jotted down earlier.
- Lastly, try replaying the videos you’ve encountered an issue with before app installation to see whether the problem has been resolved.
For macOS
Unfortunately, there is no Netflix app available from the Apple App Store. The only way to access the platform is by using a web browser such as Google Chrome, Mozilla Firefox, Opera, or Safari Browser!
For Android
- First, open the Google Play Store app on your Android or tablet.
- After that, tap Manage apps & device > Manage.

- Next, tap on the name of the app you want to delete from your phone. In our case, it’s Netflix.
- If you can’t find the app you’re looking for, tap Installed > Not installed at the top of the page.
- Finally, tap the Install button to begin reinstallation for Netflix on your phone.
- After installation and you’ve launched the app, log into your Netflix account by entering the account credentials you jotted down earlier.
- Lastly, try replaying the videos you’ve encountered an issue with before app installation to see whether the problem has been resolved.
For iPhone & iPad
- First, open the Apple App Store on your phone.
- Next, tap the Search icon at the bottom of the store page and enter Netflix.
- Subsequently, tap on Netflix from the search results page. The app icon should be listed as the top search result.
- After that, tap the ‘GET’ button to begin the installation of the app.
- Right after you’ve clicked on the button, there’ll be an authentication prompt that will appear. You must enter your Touch ID or password to continue the installation.
- Next, after picking and successfully bypassing either option, the app will begin download and installation.
- After installation and you’ve launched the app, log into your Netflix account by entering the account credentials you jotted down earlier.
- Lastly, try replaying the videos you’ve encountered an issue with before app installation to see whether the problem has been resolved.
For Smart TV
The following method was done on the Samsung Smart TV. However, any other television brands will work similarly with a little difference.
- First, head to the Smart Hub screen and navigate around using the magnifying glass.
- After that, search the term Netflix using either the keyboard or the voice button.
- Lastly, select Install to begin the download and installation process for Netflix. After a few minutes, the app should complete the download and reappear on your home screen.
8. Restart Your Device
Sometimes, your device might not work correctly after a long period. This can lead to a negative effect on the Netflix app and possible lag here and there.
What does restarting your device achieve?
Restarting your computer or phone is an excellent way to resolve the lag. By doing so, you are clearing the device’s Random Access Memory (RAM). Think of RAM as your computer’s primary type of memory, storing temporary data and handling short-term tasks. All the unimportant data clogging and bugging your device will be removed once you’ve performed a restart.
Fun fact, turning your computer on for an extended period also causes it to be more susceptible to bugs and glitches. It’s good to use your computer to be productive. However, always remember to restart your computer now and then to prevent the system’s processor from overloading and provide it with sufficient time to recharge itself.
Let’s move on with the steps on how to restart for different devices:
For Windows
- First, click the Start icon at the lower left corner of your computer screen.

- After that, select the Power option.
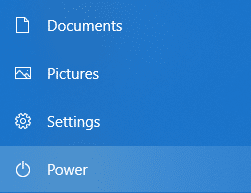
- Subsequently, select the Restart option from the list of options in the Power menu.

- Lastly, wait a few minutes for the computer to stop all background processes and reboot.
For macOS
- First, click on the Apple menu or Apple logo.
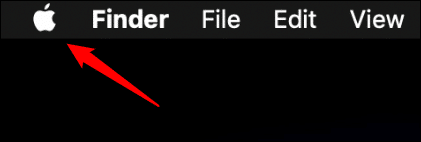
- Following that, click Restart from the drop-down menu. The option should be located near the end of the drop-down menu.

- Lastly, wait a few minutes for the computer to stop all background processes and reboot.
For Android
- First, hold the power button on your device’s side for a few seconds.
- Afterward, a menu should materialize with a Power Off and Restart options.
- Then, click on the Restart option to reboot your phone. If you can’t find the Restart option, you can always click on the Power Off option.
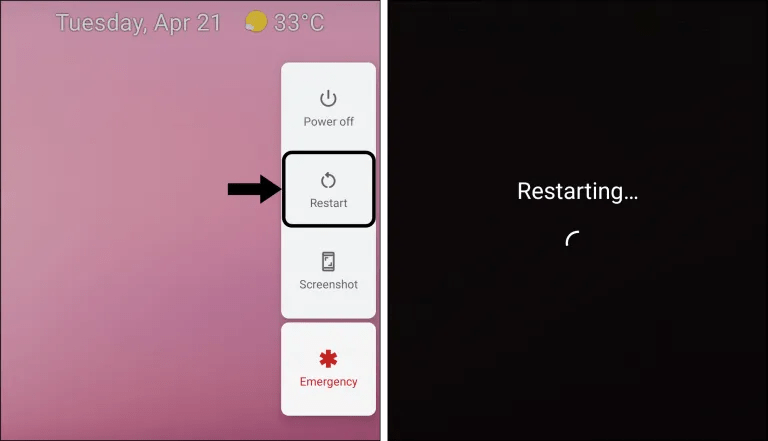
- If you happen to click Power Off for your device, press and hold the power button for a few seconds to restart your phone.
For iPhone (iOS)
- First, locate the power button located on the side of your phone.

- Following after, for older models beginning with iPhone 8 and older, press and hold the power button for a few seconds. For those using newer models starting from iPhone X and above, press the power and volume up buttons.
- Subsequently, a slider should appear on your phone screen. Swipe right to turn the device off.

- After that, turn on your iPhone again after waiting a minute or two.
- Finally, hold the power button for several seconds until you spot an Apple Logo lit up on your phone screen.
Once you’ve performed a restart on the device you’re using to watch Netflix, try entering the app again and stream the video you’d like to watch. If the fix didn’t work for you, fret not, as we have plenty more spots to help you!
9. Stream Netflix on Another Device
Apart from trying to solve the streaming issue on your current device or speculating your internet connection, we highly suggest you try streaming your video on another device. The purpose of switching is cause there might be a possibility the Netflix stream buffer or video freezing is related to your device issue.
For us to confirm this theory, you can try switching to another device and inspecting whether the problem shows itself on that device as well. You only need to stream the same television show or movie on another machine and let Netflix do its work.
If the problem also exists on your alternate device, there would be no choice but to move on with our other fixes or report the problem to Netflix Customer Care.
Opposingly, if the video you’re streaming works well on the alternate device, there are a few choices you can follow from:
- If you want to enjoy your binge-watching session and ignore your streaming device, you can temporarily continue using Netflix on the new device.
- If your device screen is too small and you would like to watch it on a bigger screen, there is a solution for that as well. All you need to do is utilize a screencast feature to mirror your streaming device to the television or use an HDMI cable.
10. Close Unnecessary Applications and Tabs
Without restarting or powering off our device, we can permanently close other unnecessary apps to provide more RAM usage for Netflix. It may not sound like a fix. Nonetheless, it still offers more power for your Netflix to run.
A few heavy applications like Photoshop or a game running in the background can cause significant lag for your computer when streaming Netflix. This is because the more processes you run in the background, the more computer resources are fetched and distributed.
The same concept applies to opening too many tabs on a web browser. By opening too many bills, our computer uses more resources. Unless you have a supercomputer or one with high computational power, it’s good to avoid cluttering your computer.
The following steps are for those who want to deny apps from running in the background or choosing some to run. Without further ado, let’s get started!
For Windows
To those who want to control which apps they want to run in the background, here’s how you can do it:
- First, select the Start icon and click on the Settings app. If you can’t find the app, try keying in the keyword ‘settings’ and searching for it.
- Following after, click on Privacy > Background apps.
- Lastly, choose which apps can run in the background, and turn individual apps and services settings On or Off.
To those who want to stop most apps from running in the background, here’s how you can do it:
- First, select the Start icon and click on the Settings app. If you can’t find the app, try keying in the keyword ‘settings’ and searching for it.
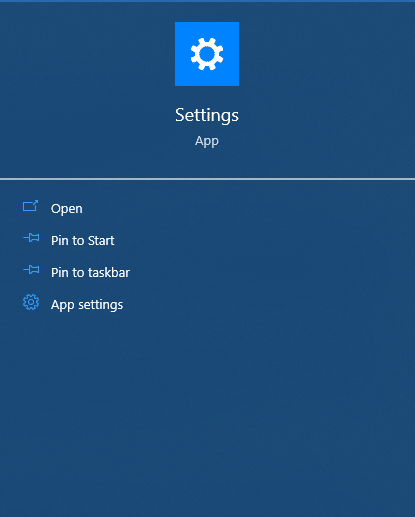
- After that, click on Privacy > Background apps.
- Lastly, under Background Apps, ensure that the Let apps run in the background is toggled to Off.
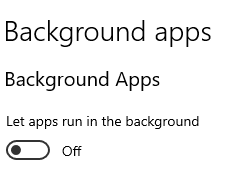
Note that desktop apps won’t appear in your Choose which apps can run in the background list and are not affected by the Let apps run in the background setting. To allow or block these desktop apps, you must use the settings in those applications.
To identify which app is a desktop app, it can be recognized easily as they are usually downloaded from the internet or with some media such as a CD, DVD, or USB storage device. Additionally, these apps are launched using a .EXE or .DLL file and run on your device, unlike web-based apps which run on the cloud.
For macOS
There are many ways to kill background processes. The first one would be to use Activity Monitor. This app shows you a running process list and how much CPU, RAM, and power usage each consumes. We can use it to identify which method is acting abnormally and needs to be ended. Here’s how to proceed:
The first action you’d need to do is open Activity Monitor, and follow the steps accordingly:
- First, open Finder on your Mac, then click Applications in the sidebar.
- Following after, open the Utilities folder.
- Subsequently, double-click Activity Monitor to open it.
- Alternatively, you can also open the monitoring app by using Spotlight Search. Press Command + Space on your keyboard and search ‘activity monitor’.
- Finally, once the app opens, you’ll be welcomed with a list of running processes on your mac.
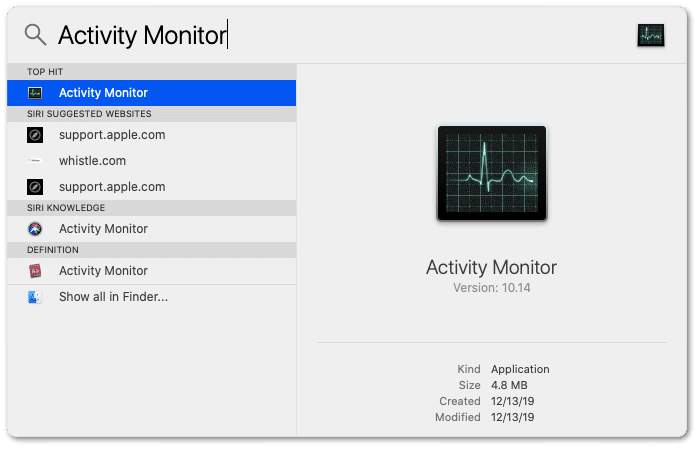
The second action you’d need to do is figure out which processes are responsible for slowing down your computer. Follow the steps accordingly:
- First, click the CPU tab located at the top of the Activity Monitor window.
- Next, in the list of processes, click the %CPU column header to sort all processes by CPU usage. The list will be sorted in terms of highest to lowest processing power, with the highest at the top.
- After that, to check which apps are responsible for consuming the most RAM, click on the Memory tab.
- Lastly, click the Memory header in the list of processes to sort all processes by RAM usage from highest to lowest, with the highest at the top of the list.
The last action you’d need to do is end any processes that consume too much computer resources. Follow the steps accordingly:
- First, double-click on the process you’d wish to terminate via the list of functions.
- In the popup window that appears, click on the Quit button.
- Subsequently, when prompted, click on Quit again to confirm the termination.
- Lastly, check whether the process has been terminated by scrolling through the running process list.
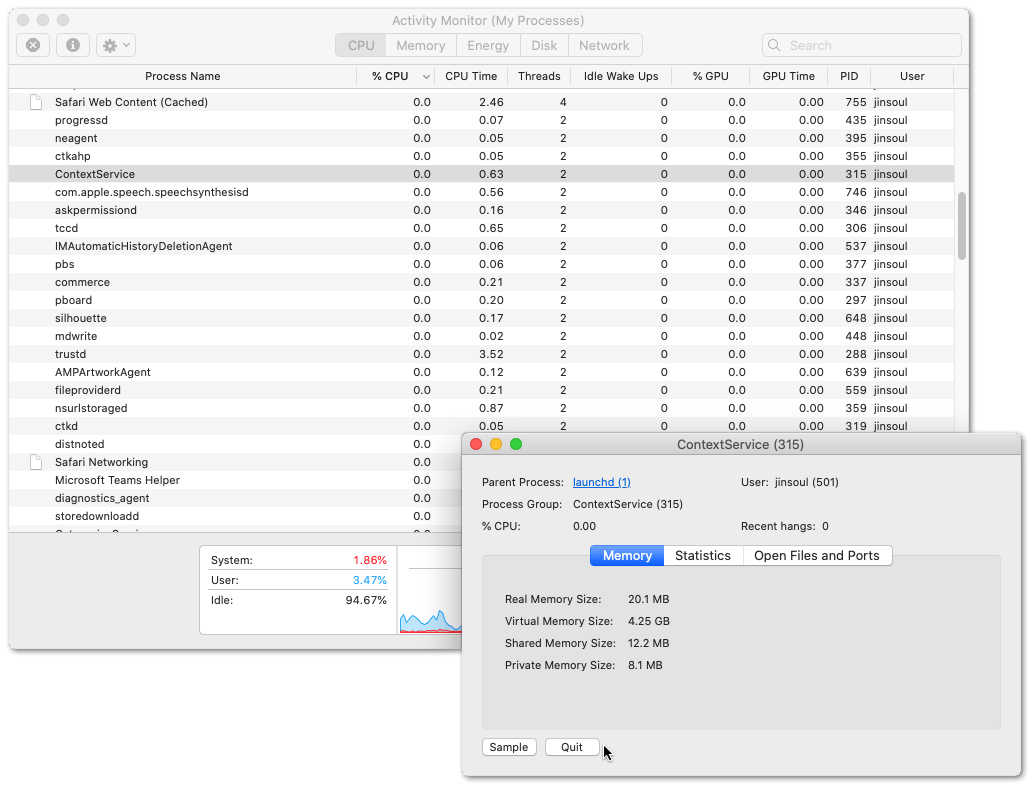
Note: Any processes or tasks you’re unfamiliar with should be left untouched in the Activity Monitor. Not knowing which method is essential for your computer, you may accidentally close something that macOS heavily relies on, thus causing the system to be unstable or frozen entirely. An alternative to using Activity Monitor would be using a third-party tool to maintain system resources.
For Android
An Android phone usually comes with a Developer option available. By activating developer access, we’ll be able to view which apps take up our phones’ limited memory, aka RAM. The app may not use a lot of battery. However, it can still take up a few hundred megabytes (MB) from your device’s available RAM, thus causing your phone to be choppy.
Here’s how to check the RAM usage used by each process on your device:
- First, locate and open the Settings app on your device.
- Subsequently, tap on System > About phone.
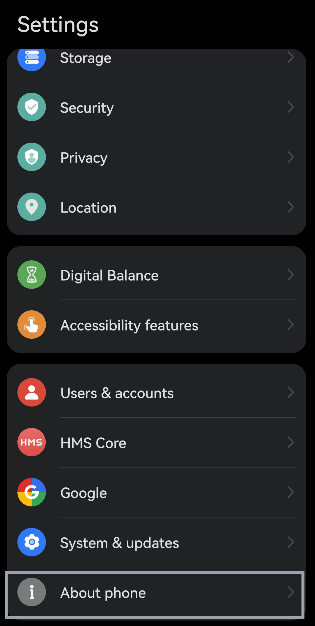
- Following after, scroll down to the Build number and tap on it seven times to enable Developer options.
- Once you’ve tapped an appropriate number of times, you’ll be prompted to enter your PIN for verification purposes.
- After filling in the correct PIN, you’re officially authorized as a ‘Developer’.
- Next, head back to the main Settings menu and go to System.

- Lastly, select Developer options and tap on Running services.
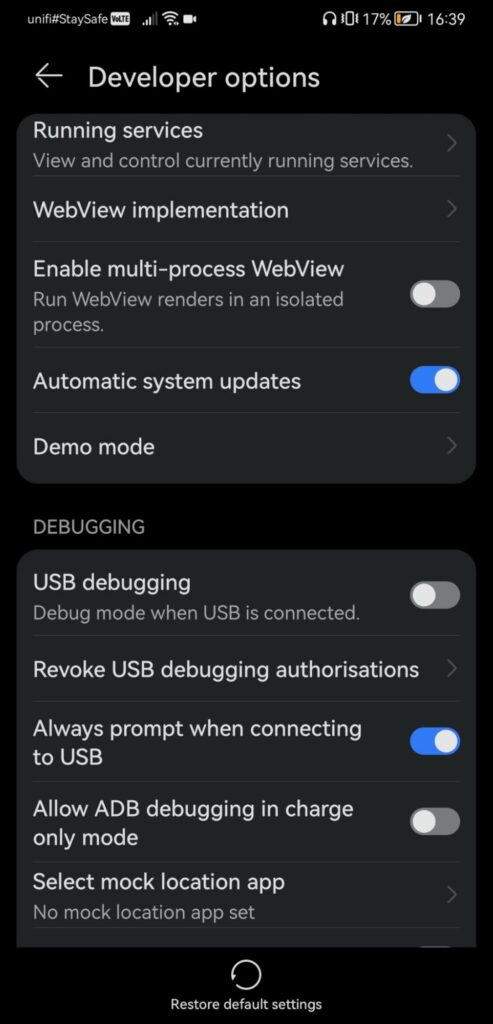
Once you’re in, you’ll be able to view which processes are running, your used and available RAM left, and which apps are currently occupying your phone’s resources. Do remember that some of these apps are in charge of keeping your phone running. Thus, it is best to look into apps you’ve downloaded.
After figuring out the apps, you want to terminate, proceed with either one of the two options listed below:
Close the Background App Using Developer options
- First, locate and open the Settings app on your device.
- Subsequently, head over to System.

- Following that, select the Developer options and select Running services.

- Next, tap on the apps you want to terminate from the list of running background apps. Be mindful not to stop essential processes.
- After that, hit Stop on each terminating app.
- Lastly, tap OK to officially terminate the running app.
Force Stop the Background App
- First, locate and open the Settings app on your device.
- Next, select the Apps section.
- After that, head into See all apps.
- Subsequently, find the app you want to force stop and tap on it. You can also try it out with Netflix to see whether it will fix streaming problems.
- Then, tap on Force Stop to officially terminate the running app.
For iOS
Your data is consumed daily via email updates, text messages, videos, and photos. Unfortunately, this data might be burned for the wrong apps and services constantly running and updating in the background under our noses.
Maybe one app won’t affect data consumption much. However, accumulating them can cause a severe problem, mainly if you have limited data. Moreover, updating apps in the background can hurt your phone’s battery life.
Up-to-date information isn’t needed for every app on your phone. Hence, allowing a limited number of apps to refresh and run in the background is always good, thus improving our phone’s battery life.
There are many ways to turn off background refresh on an iOS device. Here are two ways how:
Turning Off Background App Refresh on Your iPhone or iPad
- First, locate and open the Settings app on your device.
- Following after, find for General and tap into it.
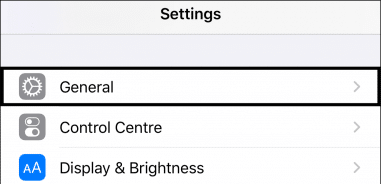
- Next, select Background App Refresh.
- Lastly, toggle Background App Refresh to Off, so all apps don’t refresh and update themselves unless we open it.
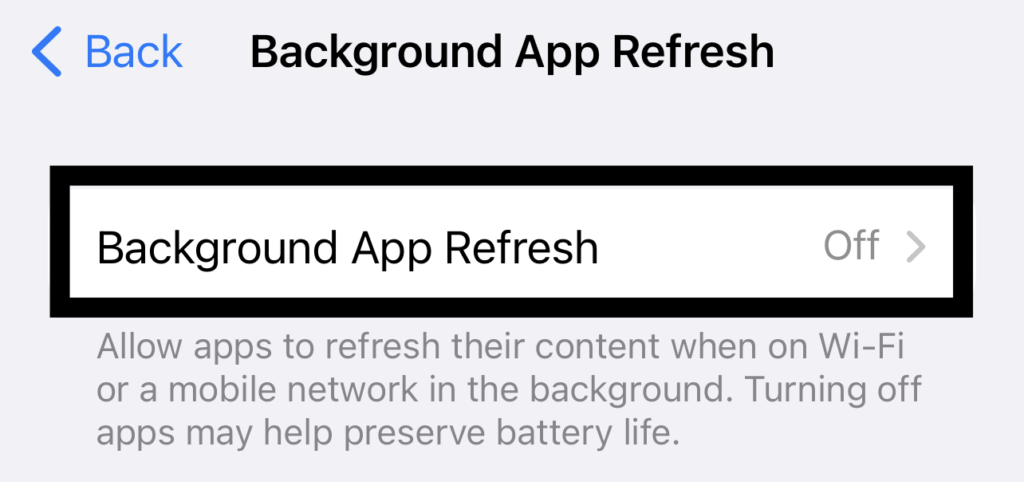
Turning Off Background App Refresh for a Specific App on Your iPhone or iPad
- First, locate and open the Settings app on your device.
- Following after, find General and tap into it.
- Subsequently, select Background App Refresh.
- Lastly, from the list of apps shown, toggle Background App Refresh for each app either on or off.
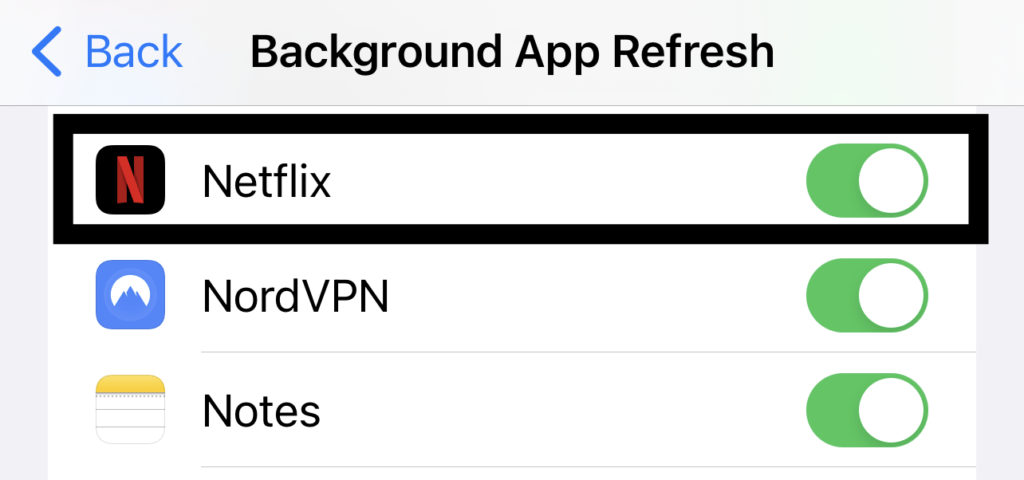
After performing the necessary steps, don’t forget to log back into your Netflix to check whether the streaming issue has been solved or your device has become less choppy. If this fix hasn’t worked for you, don’t worry, as we have more fixes in store!
11. Sign Out and Log Back In to Your Netflix Account
Temporary bugs and glitches from Netflix’s end may affect your user data and cause it to be corrupted. This issue is even more common for a large entertainment companies as more users are on the platform.
If that’s the case, we might run into unexpected issues while watching our favorite show, and it would require us to refresh our account data. You might find streaming your videos difficult when our account data is affected.
If you’re encountering issues signing in to your Netflix account, you can check out our guide catered to solving Netflix login errors here.
Below are steps to log into our Netflix account and resume our binge-watching session:
For Windows
- First, on your computer, launch the Netflix app from the desktop.
- Following, click on More Options.
- Lastly, click the Sign Out button to log out of your Netflix account and return to the login page of the platform.
For macOS & Web Browser
The process was done on Google Chrome. However, it will work similarly when we’re using other web browsers.
- First, head over to Netflix.com.
- Once you’ve loaded into the platform, place your cursor over your profile name in the upper right corner of the page.
- Lastly, select Sign Out of Netflix to log out of your Netflix account and return to the login page of the platform.
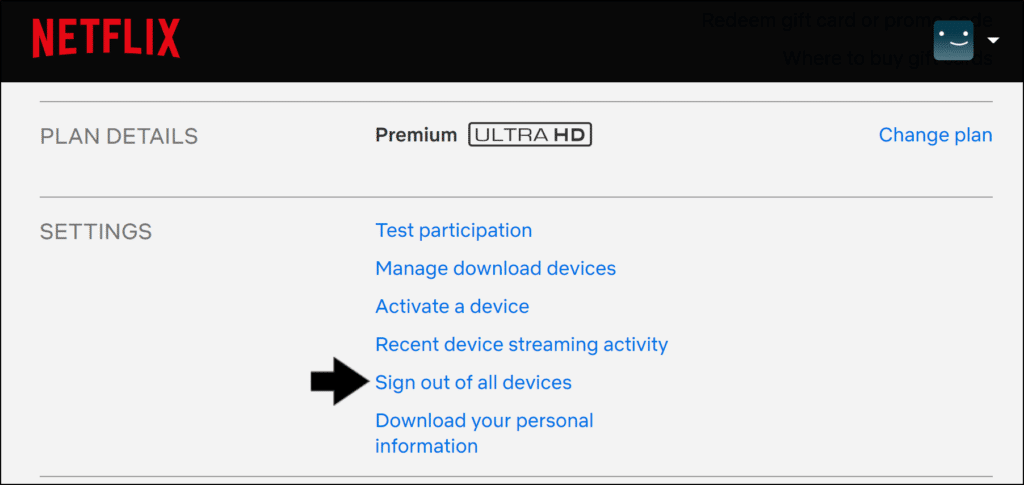
For Android, iPhone & iPad
- First, locate and open the Netflix app from your home screen.
- Following after, open your Profile by tapping on its icon at the top right corner of your phone screen.
- Lastly, tap the Sign Out button to log out of your Netflix account and return to the login page of the platform.
After you’ve signed out of Netflix, log back into your Netflix account after a few minutes and check whether the problem still exists.
12. Disable VPN
When you’re using Netflix to watch a video title, ensure you’re not connected to a Virtual Private Network (VPN). On many occasions, Netflix will block your VPN connection, and the video you’re watching might no longer be available.
Netflix is notorious for going against users who connect to VPN services on their devices. The fear comes when some users use VPN to access restricted content only made available to specific regions due to licensing issues. If the word was to get out that users from other areas have access to the restricted content, Netflix would be in deep trouble and might face legal action.
Therefore, checking whether you’re connected to a VPN service is always good before using the Netflix app or website. You can follow different preliminary checks to ensure the cause is VPN.
- Firstly, ensure you aren’t connected to another VPN before proceeding with the next solutions. This means all other running VPN programs should be shut down before using the VPN you used for Netflix.
- Secondly, check whether your antivirus or firewall software is not the source of the connection issue, as sometimes the software might block the VPN service we’re using. Try disabling the antivirus software and reconnecting your VPN to access Netflix. If it does work, you can count VPN out as an exception before enabling your security software again.
- Thirdly, observe whether your internet connection works well by disconnecting from your VPN and accessing the web normally
- Fourthly, make an effort to connect to the nearest server location around you. In case the buffering issue has been solved, we can conclude the server you were connected to earlier was the cause of your problem.
- Lastly, change your Domain Name System (DNS) or switch to a different network. If you’ve used an other network, such as a public Wi-Fi connection or another internet service provider (ISP), the issue is associated with your current ISP.
Follow the steps below to turn off the VPN for varying devices. For application-based VPNs, the option to disconnect or disable your VPN is available clearly upon opening the VPN application.

For Windows
To disconnect from a VPN on Windows, the process only takes a few seconds. The steps may vary depending on the Windows version you’re using. However, the steps are similar.
- First, head over to the Settings app on your computer.
- Subsequently, click on Network and Internet.
- Following after, select VPN in the left-side menu.
- Next, select the VPN you’d like to disable.

- Then, click Disconnect or Remove to officially cut your connection to the network.

- Lastly, refresh your Netflix app or website and check whether the problem has been removed.
For macOS
Disconnect from a VPN on Mac. It can be done through the macOS network settings.
- First, click on System Preferences > Network.
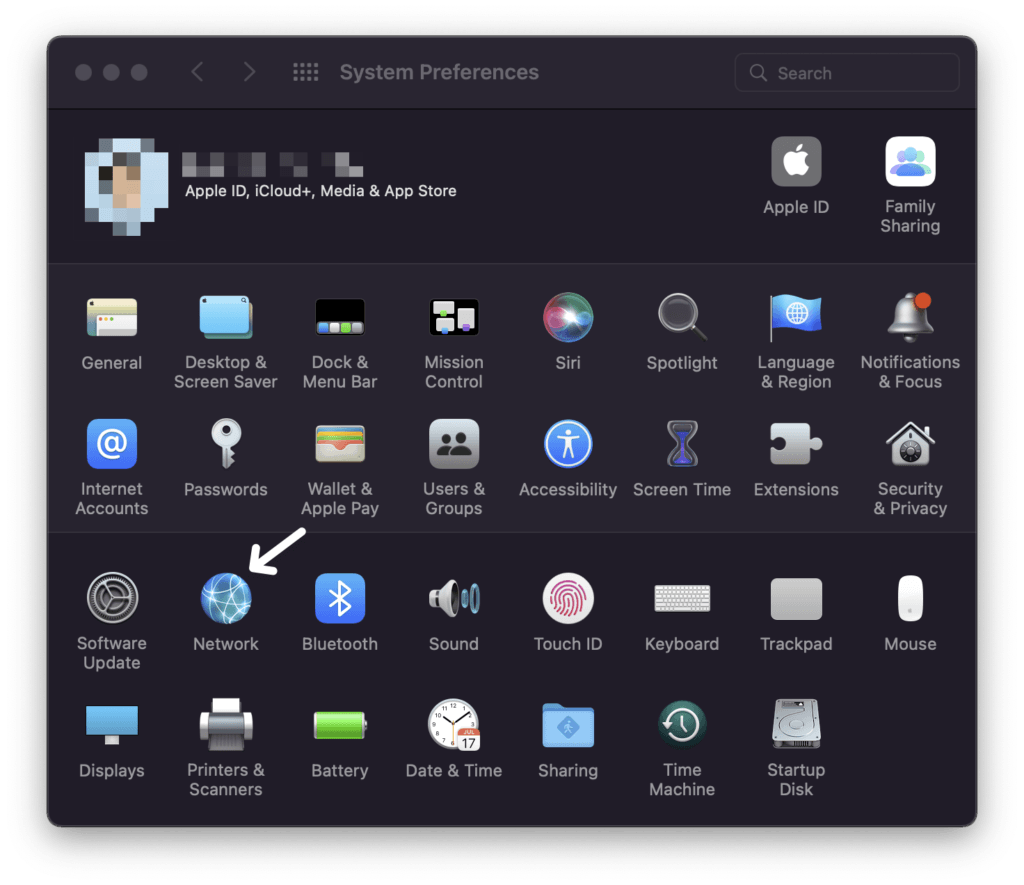
- After that, select your VPN connection from the left panel.
- Subsequently, click Disconnect to officially cut your connection to the network.
- Finally, refresh the Netflix website you’re on and check whether the problem has been resolved.
For Android
The VPN you’re connected to can be disabled through your smartphone’s VPN settings or directly from the VPN app.
- First, locate and open the Settings app on your device.
- Subsequently, tap on Network & Internet.
- After that, select VPN.
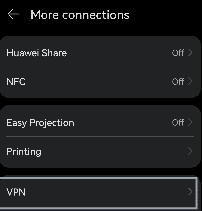
- Then, toggle off VPN. If the toggle was set to the left already, then leave it there.
- Lastly, refresh your Netflix app or website and check whether the problem has been removed.
For iOS
Disable a VPN on your device. It can be completed by using your smartphone’s VPN settings.
- First, locate and open the Settings app on your device.
- Following after once you’re in the app, tap on General.
- Next, find and select VPN.
- After that, toggle the VPN status to Not Connected. If the status is set as not connected, then leave it there.
- Lastly, refresh your Netflix app or website and check whether the problem has been resolved.
The procedures above are associated with how we can turn off VPNs for different devices. If you’ve disconnected from your VPN and the app still doesn’t work, you can try disabling your antivirus or ad-blocker.
Warning: By following the steps below, you are putting your device at risk of cyber threats. Please follow at your own risk.
For Windows
The procedure below shows you how to turn off real-time Microsoft Defender antivirus protection in Windows Security.
- First, select the Start icon in your computer’s bottom left corner.
- Next, type ‘windows security’ as a keyword to search for that app.
- Next, select the Windows Security app from the search results. It should appear as the top one.
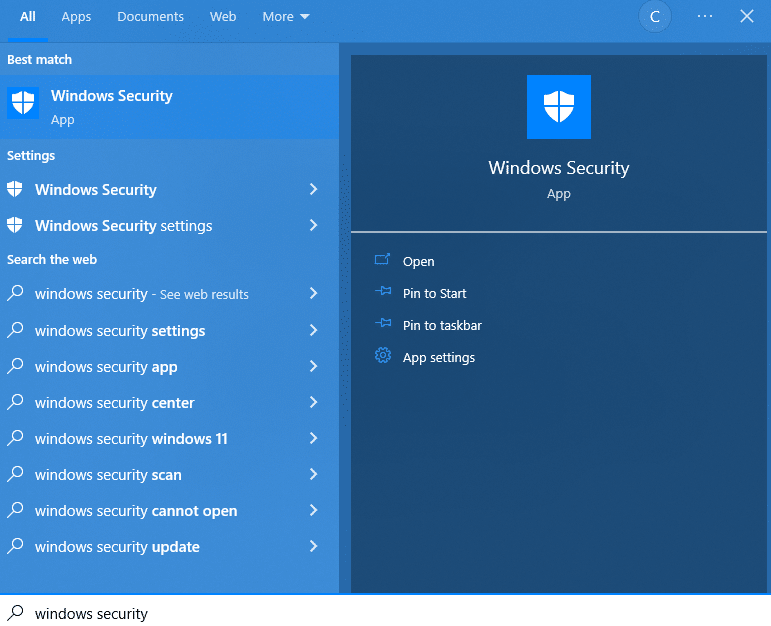
- Then, head over to Virus and threat protection, and under Virus and threat protection settings, select Manage settings.
- Lastly, switch Real-time protection to Off.
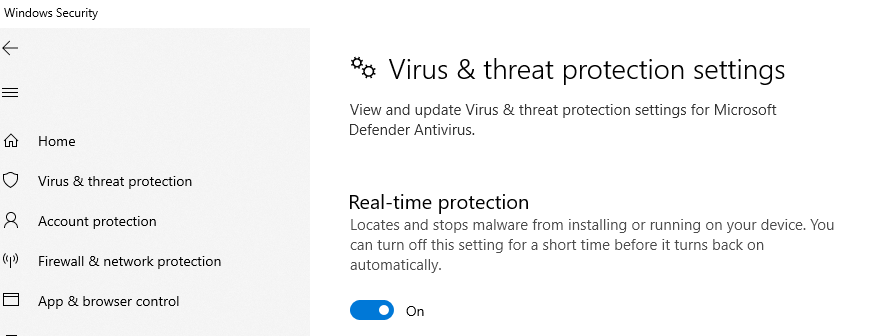
- Lastly, refresh the Netflix app or website to check whether the problem still exists. If so, turn your antivirus software back online, as turning it off for an extended period leaves your computer vulnerable.
If you wish to disable other antivirus software, you can follow the steps accordingly:
- First, head over to your computer’s taskbar.
- Following that, locate the antivirus software icon at the bottom right corner.
- Then, right-click on the program and find an option to disable the shield or turn off the protection.
- After that, once you’ve clicked on the disable option, there’ll be a prompt asking how long you would like to disable the security.
- Finally, choose the amount of time you wish to disable the antivirus. If you want to do testing on Netflix, it is recommended to put in a few minutes to an hour.
For macOS
- First, access the Spotlight search box on your Mac.
- Subsequently, enter the name of the antivirus software you’re currently using.
- After that, once you’ve typed in the name, it should present itself on the computer screen. Click on its icon and wait for the program to launch.
- Once the program interface is shown, find the term Stop or Disable.
- Next, tap the function and on confirm, click Yes or OK.
- Lastly, refresh the Netflix website to check whether the problem still exists. If so, turn your antivirus software back online, as turning it off for an extended period leaves your computer vulnerable.
For Web Browser
The steps performed below were done using Google Chrome. The web browser platform has its very own antivirus to prevent any threats. To turn the software off, follow them accordingly:
- First, head over to the browser and click on the Settings icon, which can be found at the top-right corner of the browser page.
- Subsequently, on the Settings menu, click ‘Options.’
- From there, you would need to find an option called ‘Under the Hood.
- Afterward, once you’re there, you should find something that says, ‘Enable phishing and malware protection.
- Following that, the checkbox for the option should be unchecked to remove protection, and you can close your window afterward.
- Lastly, refresh the Netflix website to check whether the problem still exists. If so, turn your antivirus software back online, as turning it off for an extended period leaves your computer vulnerable.
Additionally, you should use a good-quality VPN subscription to avoid your new virtual IP from getting blacklisted or flagged by Netflix, hence preventing your connection. Plus, these days, you can get premium VPNs at an affordable rate.
For instance, we recommend using NordVPN, which we’ve found works flawlessly in our daily tasks from surfing the net to streaming titles from all over the world without buffer on streaming services like Netflix and Disney+. Plus, it’s just a click away to activate!
So, do check out their exclusive offers:

Get NordVPN with up to 68% OFF today!
13. Deactivate Browser Extensions
A web browser is an essential tool needed in everyday tasks for personal and work life. Without it, we wouldn’t be able to access the internet.
Often, we want to make our life easier by installing extensions as some functionalities on the web browser are a little troublesome. These extensions enable us to be more productive by providing us with a shortcut over a complex task.
However, there are cases where the tool we’re relying on gives us more trouble than what we have on our hands already. An extension bug could possibly explain why your Netflix suddenly stopped working.
Luckily, there is a way for us to disable extensions for troubleshooting rather than removing it from our web browser. Here’s how to do it:
For Google Chrome
- First, on your computer, locate and open the Chrome web browser.
- Subsequently, at the top right corner of the homepage, click on More (a three-vertical dot icon).
- Following, click on More tools > Extensions.

- Next, for each of the extensions you’ve installed, toggle to the left (Off). Else, if the toggle is already switched for Off, then leave it as so.
- After that, if you can’t determine what the extensions does or you don’t expect to use it anytime soon, it is best to uninstall by clicking the Remove button and confirm it by clicking Remove again.
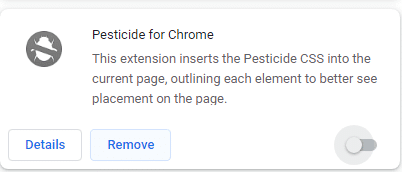
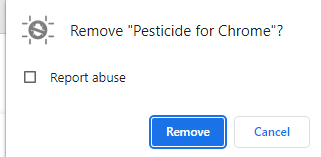
- Lastly, close and reopen or refresh the Netflix tab to check whether the stream is working smoothly.
For Safari
- First, on your computer, locate and open the Safari web browser.
- Next, select Preferences > Extensions.
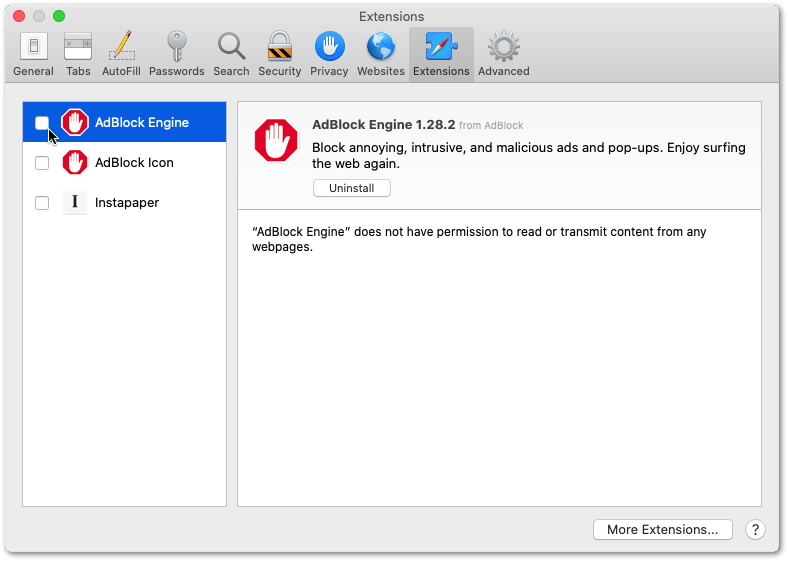
- Following that, disable all extensions on the browser by deselecting each extension’s checkbox; this will cause it to turn Off.
- Subsequently, if you can’t determine what the extension does or you don’t expect to use it anytime soon, it is best to uninstall by clicking the Uninstall button.
- Lastly, close and reopen or refresh the Netflix tab to check whether the stream is working smoothly.
For Mozilla Firefox
- First, locate and open the Mozilla Firefox web browser.
- Following after, click the menu button and then click Add-ons and Themes.
- Next, select Extensions.
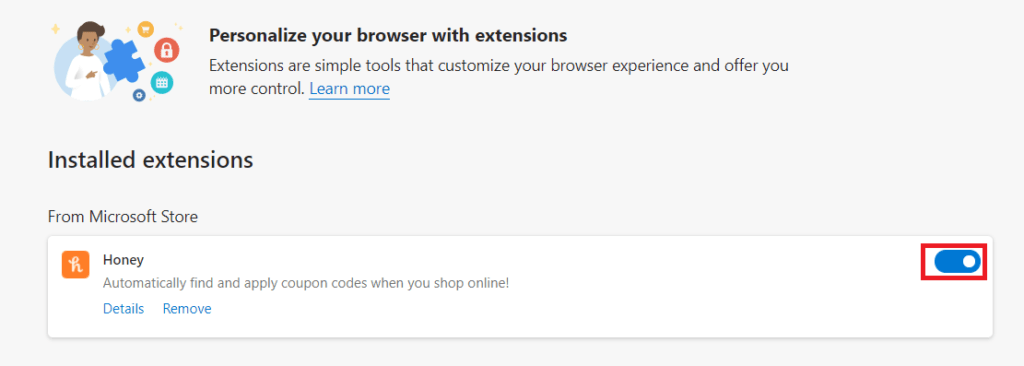
- After that, disable all extensions on the browser by clicking the blue toggle to the left (Off). Else, if the toggle is already switched for Off, leave it as so.
- Then, if you can’t determine what the extension does or don’t expect to use it anytime soon, it is best to uninstall by clicking the ellipsis (3-dot) icon for the extension and selecting Remove.
- Lastly, close and reopen or refresh the Netflix tab to check whether the stream is working smoothly.
After using the following method and you still have an issue with playing your favorite show, move on to the next fix.
14. Check for Netflix App Updates
Netflix deploys updates from time to time on their app to ensure it is optimized and bugs are patched quickly to avoid disruption. If you haven’t checked your app version in a long time, check to see if the latest version of Netflix is installed.
By performing an update for our app, we are improving its overall performance, as bugs reported by users might be fixed in the new update. The issue you’ve been frustrated over might have been eliminated in the latest app release.
Follow the guides below on how to update your Netflix on various platforms.
For Windows (Manually)
- First, locate and open the Microsoft Store app on your computer’s taskbar.
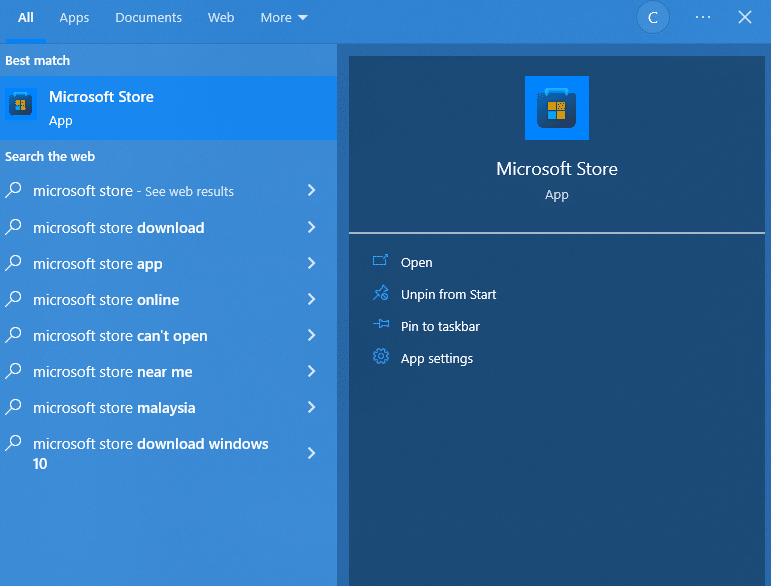
- If you’re having trouble finding Microsoft Store, it might have been unpinned from the taskbar. Try clicking on the Search icon along the toolbar and entering ‘Microsoft store’ as a keyword to select it from a results list.
- Subsequently, after you’ve entered the Microsoft Store app, click on More > Downloads and updates.
- Following after, select Get updates.
- Then, click the Update All option to install the latest updates for all installed apps on your computer. If you’d like to update individual apps, it is doable by clicking the Download button for the apps you want to edit.
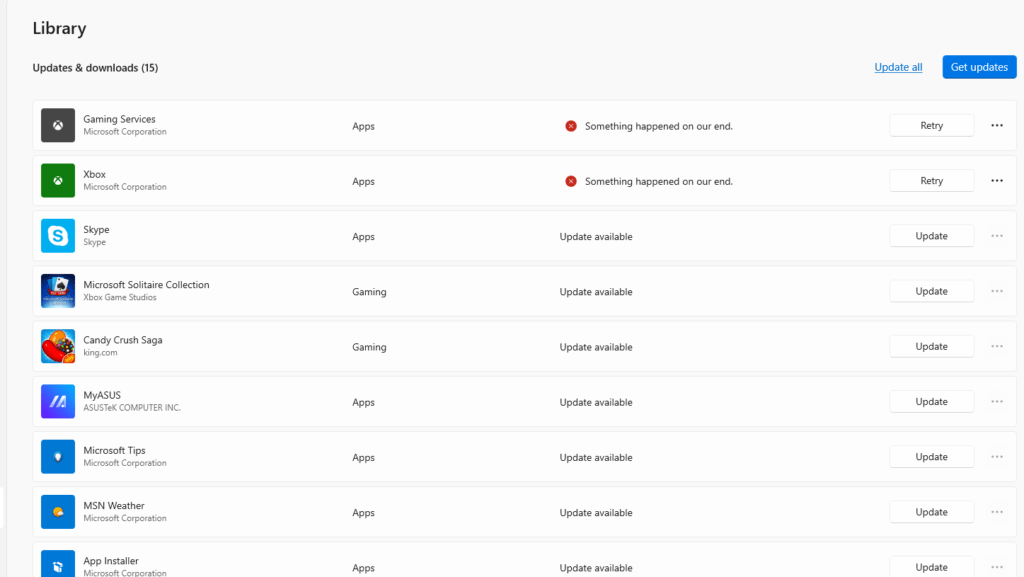
- Lastly, open the Netflix app and check whether the issue has been resolved.
For Windows (Automatic)
If you want the Windows operating system to update your apps without involvement, here’s how to do it.
- First, locate and open the Microsoft Store app on our computer’s taskbar.
- Following, click the See more (ellipsis) button from the top-right corner of the store page and click on the Settings option.
- Subsequently, toggle Update apps automatically to On. If it is already toggled blue, leave it as it is.

By following the steps above, when new app versions are released, updates for it will be installed automatically, and you don’t need to check up on app updates from time to time.
For macOS
Since Netflix can only be accessed through a web browser, we’ll discuss how to check and update the browser.
We’ll only be covering update checking for Google Chrome in this fix. Other web browsers like Mozilla Firefox or Safari will work similarly according to the instructions. Without further ado, let’s get started!
- First, locate and open Google Chrome on your computer.
- Then, click on the three dots icon at the top right of the page.
- Following that, click Update Google Chrome. You are on the latest version if the button is not visible.
- Subsequently, click on Relaunch to update and refresh Google Chrome.
- Lastly, enter the Netflix platform and check whether the issue still exists.
We’ll discuss various ways if you would like to check on how to update your apps on Mac.
- Update from the App Store
- Update from the Updates pane: Click Updates in the sidebar. From there, click Update beside the app you want to perform an update on or click Update All.
- Update from the Discover, Work, Play, Develop, and Categories areas: Click the Update button next to an app.
- Updates from the Apple menu
- First, click on the Apple menu to see if you have any updates available. The number of updates will appear to the right of the App Store in the menu.
- Subsequently, select the App Store to retrieve the app updates.
- Lastly, click on updates in the sidebar once the App Store has opened. This will activate any pending updates for your apps.
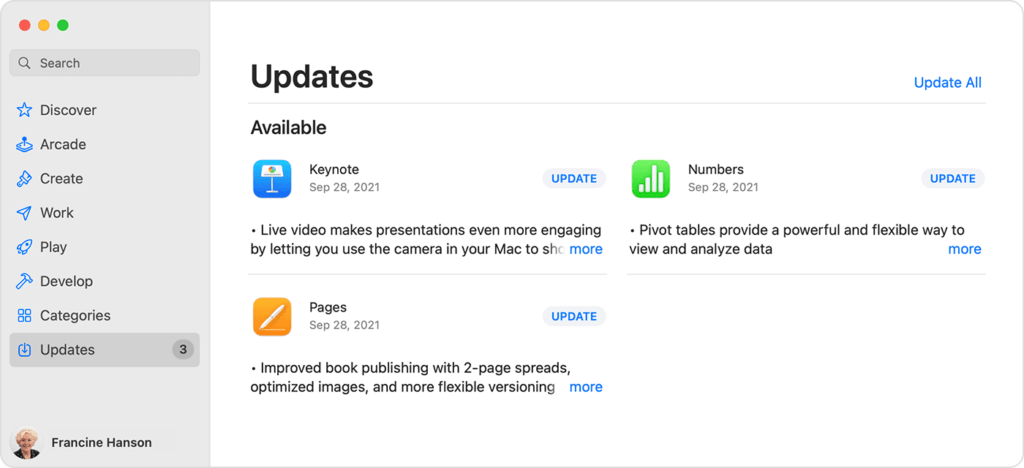
- Updates from a notification
- Click Install if you are notified that an app update is available for installation.
For macOS (Automatic)
Manually updating apps on the Mac might be exasperating sometimes, so Mac developers created a way to automatically download and install all the latest app updates. Here’s how:
- First, locate and open the App Store on your Mac.
- Following after, choose App Store > Preferences.
- Lastly, click on Automatic Updates.
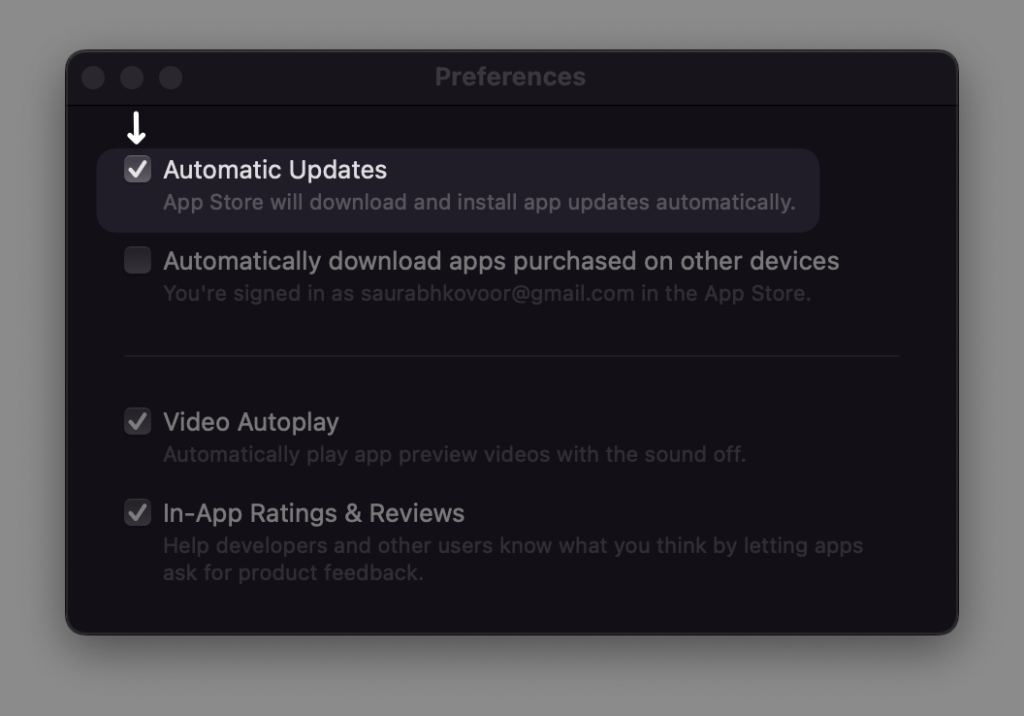
By following all the steps above, you’re allowing your computer to install all available updates for yourself, saving you the trouble of manual updating.
For Android
- First, locate and open the Google Play Store app on your phone.
- Subsequently, tap on the search bar at the homepage’s top.
- Following after, type ‘netflix’ and tap Enter.
- Then, once you’re redirected to the search results page, look for Netflix and select it.
- Lastly, on the app’s page, tap Update to obtain the latest version of the app. If an Update button doesn’t appear for you, your Netflix app has installed the latest version.

For iPhone & iPad
- First, locate and open the App Store app on your phone.
- Following, tap the Updates tab found at the bottom of the App Store page.
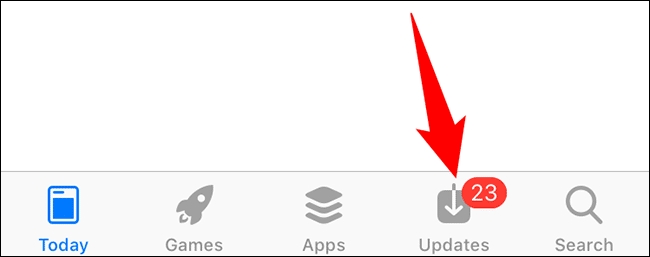
- Next, on the Updates screen, find the Netflix app.
- Lastly, once you’ve found the app, tap Update to the right of it to begin update installation. If the Netflix app doesn’t appear under the Updates tab and you have it installed, then we can conclude your app has the latest version installed.
Note: Try not to use the Netflix app while the update is ongoing, as doing so might cause the process to stop. After completion, your device should have the latest Netflix installed with all its latest features and bug fixes.
15. Check for Network Driver Updates
If the video titles you’re watching constantly buffering without end, you may want to check and update your network driver on your device.
An outdated or faulty network driver can cause your computer to face random connection issues to the internet. This is dangerous, especially if you’re in an important meeting or test. Hence, ensuring our network driver is up-to-date and working well is always good.
Follow the steps below to determine how to get the latest network adapter driver for various devices.
For Windows
- First, on your computer, click the Windows icon on the taskbar.
- Afterward, type ‘device manager and click on the top search result.
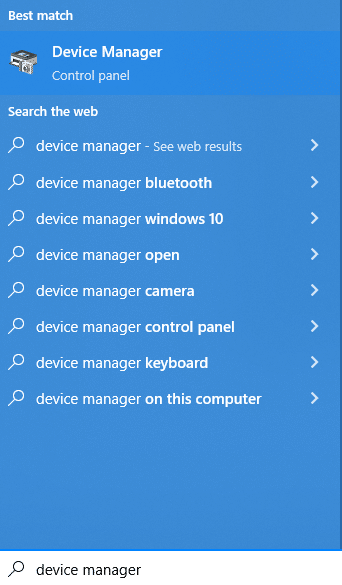
- Subsequently, once the program has opened, find Network adapters in your main panel and double-click to expand the options.
- Then, right-click on the network driver you’d like to update and click the Update driver option to begin the installation.
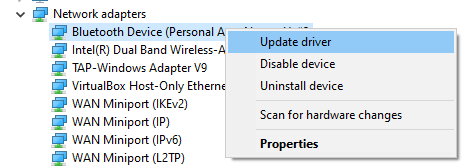
- If you have multiple network adapters and you don’t know which one, to begin with, it is best to update all of them to ensure they are the latest version and avoid connection issues caused by anyone.
- After that, click Select for drivers to locate and install a driver automatically.
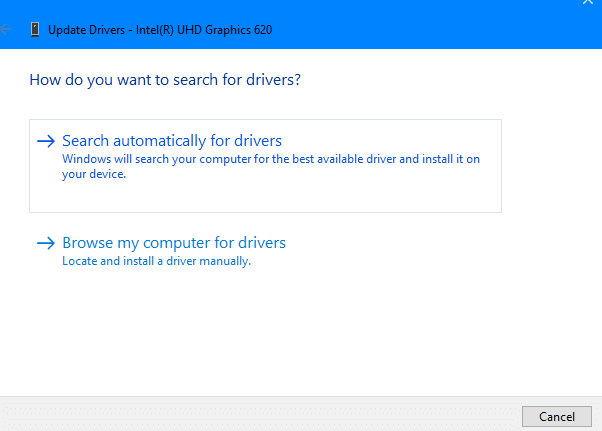
- Next, the drivers will update to the latest version if they haven’t already. Restart your computer to perform the updates. If your device is already in the updated stage, your computer screen should display the following message: The best drivers for your device are already installed. Click on Close to exit the window.
- Lastly, open the Netflix app and check whether the buffering issue has been resolved.
For macOS
- First, on your Mac, click the Apple logo.
- Following that, on the Apple menu, click on Software Update.
- It will be done if a Mac OS update is ready for installation. Network adapter drivers are also included when an update is performed.
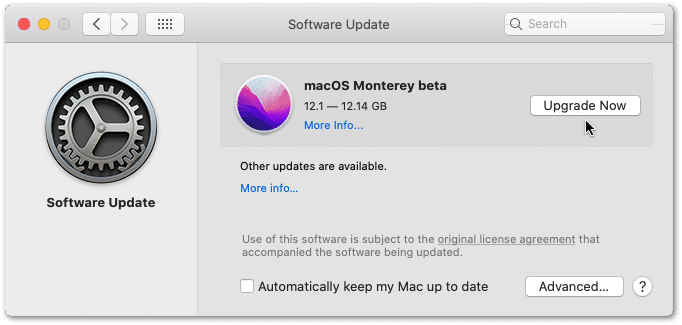
- Lastly, open the Netflix website on your preferred web browser and check whether the buffering issue has been resolved.
For Android & iOS
There are no methods to update the network driver for a phone. The only way to do so is by ensuring our device has installed the latest software version. Please refer to fix 19 on how to perform device checking and update.
16. Adjust Netflix Buffering Rate
If there is an issue with Netflix and you don’t find it coming from your internet connection, try adjusting Netflix’s buffering rate. Netflix has an option where you can choose how choppy you want your video title to be, a hidden feature that not many people know about.
To perform the fix on various devices, follow the steps below:
For Windows
- First, on your computer, open the Netflix app or website.
- Subsequently, open a video you want to watch, and while it is playing, press Shift + Alt + left click.
- Following after, a hidden buffering rate menu should appear, allowing you to adjust the rate of the buffer.
- Lastly, tweak the buffer rate and attempt to watch your video.
Note: Lowering the buffer rate will cause your video to load more slowly. In return, the video you’re watching will take less likely pause for buffering when you’re watching it.
For macOS
- First, on your computer, open the Netflix website.
- Subsequently, open a video you want to watch, and while it is playing, press Shift + Option + click.
- Following after, a hidden buffering rate menu should appear, allowing you to adjust the rate of the buffer.
- Lastly, tweak the buffer rate and attempt to watch your video.
For Smart TV
If you’re using a controller or remote to control navigation for Netflix on television, then you may follow the steps below:
- First, open the Netflix app on your television.
- After that, open a video you want to watch and while it is playing, press up > up > down > down > left > right > left > right > up > up >up.
- Next, a hidden buffering rate menu should appear, allowing you to adjust its rate of buffer.
- Lastly, tweak the buffer rate and attempt to watch your video.
17. Avoid Peak Times for Streaming
When you feel your internet is slower than usual, it could cause network congestion from your Internet Service Provider (ISP) side.
Often, there is a timeframe when traffic on the road is higher than usual, and we would be stuck in a jam for an extended period. The same concept can be applied to networks as well.
There are peak hours in the day when more people are watching Netflix. Thus, the bandwidth needs to be distributed among more people. As a result, this can cause Netflix to face buffering issues.
One way around this issue is to avoid watching Netflix when loads of people are watching simultaneously. We can estimate the peak period for watching Netflix to be after working hours or late at night.
18. Download Netflix Video Titles To Watch Offline
If you are desperate to know what happens after the cliffhanger episode, you watched on Netflix. You can also opt to download the episode and watch it offline. While not all content on Netflix is available for download due to streaming rights, most of them are. You can proceed to this article when you encounter problems with downloading Netflix episodes.
A significant advantage of downloading a video is watching the whole episode without interruption from occasional buffering or freezing. The disadvantage of downloading would be that the storage space is ample, but you can always discard the video once you’re done watching it.
Before we continue on with the fix, please ensure you have the latest version of Netflix installed on the device you’re watching Netflix on. Refer to the bullet points below for a comprehensive list of devices.
- iPhone, iPad or iPod Touch: running on iOS 9.0 or later
- Android phone or tablet: running on Android 4.4.2 or later
- Amazon Fire Tablet: running on Fire OS 4.0 or later
- Windows 10 (version 1709 or newer) or Windows 11 tablet or computer
- Select Chromebook and Chromebox models
After ensuring you have the latest version of Netflix on one of these devices, we can proceed on how to download video titles for various devices:
Note: Netflix only allows video titles downloaded from the Netflix app. If you are using the website, this option is not available.
Downloading Titles on Netflix
For Windows
- First, locate and open the Netflix app on your computer.
- Once the app has opened, select Menu found at the upper left of the page.
- Then, select Available for Download.
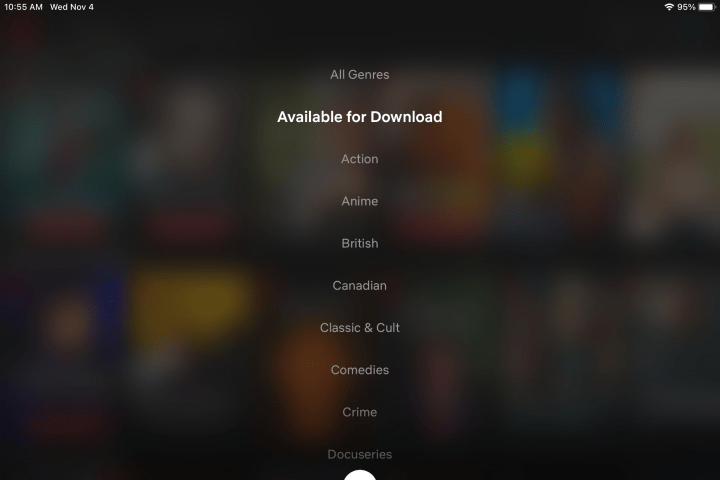
- Next, select a TV show or movie you want to download.
- Subsequently, ensure that the title you’re downloading isn’t saved by someone else using your plan for offline viewing on a single-screen project. Additionally, make sure your laptop has enough storage allocated for the title.
- Lastly, click the Download icon from the description page to begin the process.
- For TV Shows: the Download icon will appear next to each available episode.
- To save on data usage, download the titles over Wi-Fi.

For Android, iPhone, or iPad
- First, locate and open the Netflix app on your device.
- Subsequently, once the app has opened, tap on Downloads.
- After that, select See What You Can Download, Find Something to Download, Find More to Download or Available for Download, depending on your device.
- Next, select a TV show or movie you want to download.
- Subsequently, ensure the title you’re downloading isn’t saved by someone else using your plan for offline viewing on a single-screen project. Additionally, make sure your laptop has enough storage allocated for the title.
- Lastly, tap the Download icon from the description page to begin the process.
-
- For TV Shows: the Download icon will appear next to each available episode.
-
- To save on data usage, download the titles over Wi-Fi.

Netflix allows a user to have up to 100 active downloads available at a time per device on many devices subject to the membership plan you’re subscribed to.
Accessing Your Downloads On Netflix
To find your downloaded video titles, we’ll be discussing how to access them.
For Windows
- First, locate and open the Netflix app and sign into your account on the computer.
- Subsequently, once the app has opened, select Menu found at the upper left of the page.
- After that, click on My Downloads.
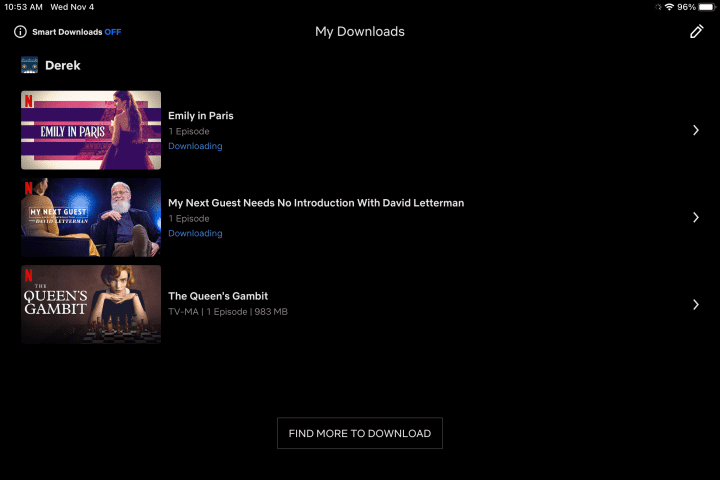
- Lastly, find the title you want to watch and select Play.
- For TV Shows: select a show, then tap Play next to the episode you want to watch.
For Android, iPhone, or iPad
- First, locate and open the Netflix app and sign into your account on the device.
- Following after, once the app has opened, select Downloads.
- Subsequently, find the title you want to watch and tap Play.
- For TV Shows: select a show, then tap Play next to the episode you want to watch.
Unfortunately, the title you download on your device has a time limit for you to watch before it expires. The amount of time you’re given depends on individual licenses and varies by title. Luckily, titles expiring from your device in less than 7 days will display the amount of time you have left on the Downloads page on the Netflix app.
The same can be applied to downloaded video titles you’ve clicked Play into. After the first press, some titles will expire after 48 hours. Once you play one of these titles, Netflix will display how many hours you have left on the Downloads page.
After the title expires, you will need to renew it. Even for renewal, this depends on the title you want to continue, as some may only be restored a certain number of times.
After watching a downloaded TV show or movie, you can remove it from your device to free up space and perhaps download the next episode of your favorite show.
There are multiple ways to perform the deletion, here’s how:
To delete a single TV show or movie
- First, open the Netflix app on your device and tap on Downloads.
- For a tablet or computer running on Windows 10 or 1, select Menu from the Netflix app and click My Downloads.
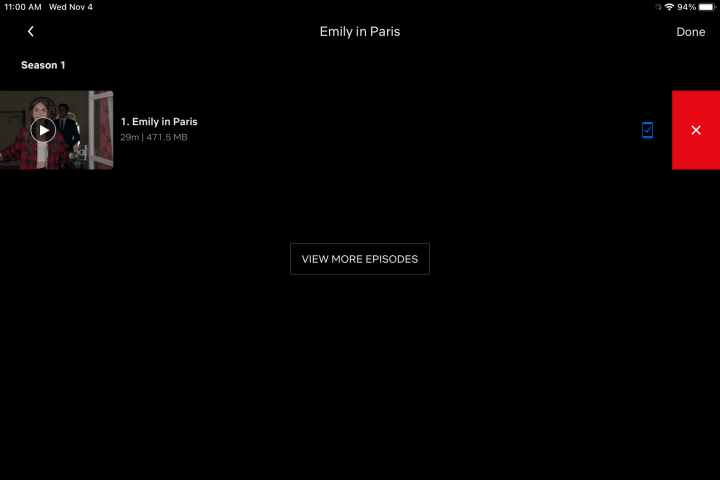
- Following after, in the upper right corner of the screen, select Edit.
- If you’d like to delete an individual episode from a TV show, select the TV show first, then proceed.
- Lastly, check the box next to the TV show or movie and tap Delete or a red X.
To delete all downloads from your library
- First, open the Netflix app on your device and select More, the 3-dot More icon (…), or the Profile icon.
- After that, select App Settings or Settings.
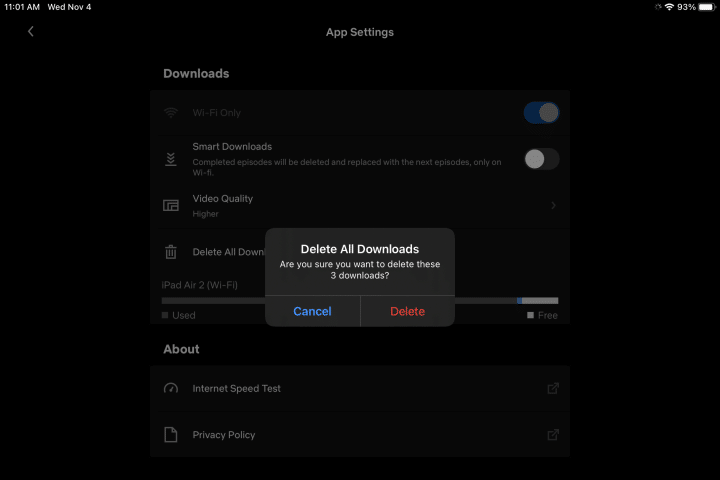
- Subsequently, under Downloads, tap on Delete All Downloads.
- On the confirmation screen, select OK or Delete to wipe all downloaded videos from the library.
- Lastly, check whether the videos you’ve removed are available by checking the storage freed up or opening the Downloads library.
Apart from deleting downloads from a device, you can also perform deletion from a device you don’t have access to using the following methods.
To remove a device using iOS, Android, or Fire Tablet
- First, sign into your Netflix account on a mobile browser or the Netflix app.
- Following after, tap on the Profile icon or the More icon.
- Next, select Account.
- Subsequently, under Settings, select Manage Download Devices.
- Lastly, tap on Remove Device on any device you want to remove. By doing so, these devices will not have access to the video titles they’ve downloaded.
To remove a device using Windows 10 or Windows 11
- First, open the Netflix app and click on the 3-dot More (…) icon.
- Subsequently, select Settings > Account Details.
- Following, click on Manage Download Devices.
- Lastly, select Remove Device on any device you want to remove. By doing so, these devices will not have access to the video titles they’ve downloaded.
19. Check for Device Updates
Apart from trying to fix your Netflix or your internet connection, there is no harm in checking for any updates meant for your device. By performing a software update for your device, you are improving a few qualities, such as security features, compatibility with other devices or applications, and the stability of your device to run programs without freezing.
If you are constantly pestered to update your device software, it is best not to delay it any longer, as doing so might cause your device to face serious issues. Updating your device software provides a better experience when interacting with the applications on your phone, and you’ll gain the most out of your device.
Additionally, Netflix is constantly updating its platform from time to time. This means your software also needs to be updated to the latest version possible, so it is compatible with the application.
In summary, this fix is a sought way to solve device-related issues that may obstruct your user experience with Netflix.
Without further delay, let’s get into the methods to check for updates on various devices.
For Windows
- First, locate and open the Settings app on your computer. The app can be accessed via the Start icon or by searching it and typing the keyword: settings through the Search icon.
- Once in the app, click on Update & Security > Windows Update.
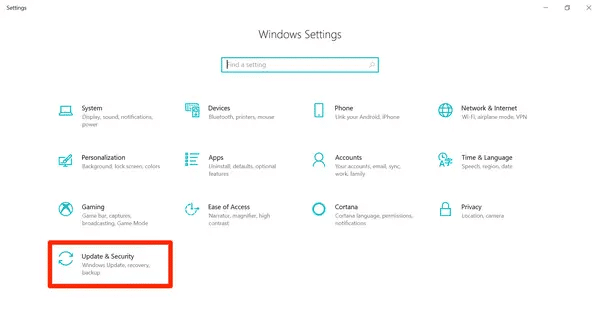
- Subsequently, click on the Check for updates button to allow the computer to fetch any updates available.
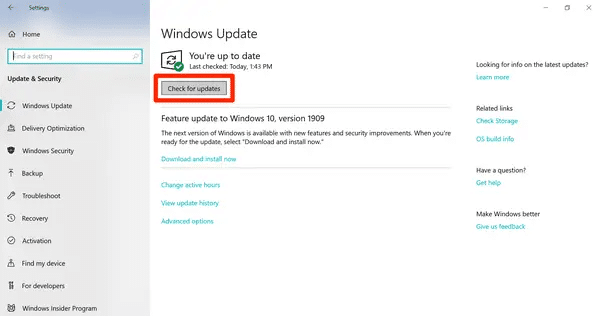
- Lastly, select Download and Install to begin the process if an update is available. Restart your computer to gain the newest version of Windows.
For macOS
Before you continue with the steps below, it is advisable to back up your computer to prevent any data loss.
- First, open the Apple menu from the corner of your computer screen and select System Preferences.
- Subsequently, once you’re in the System Preferences window, select Software Update to allow the computer to fetch any updates available.
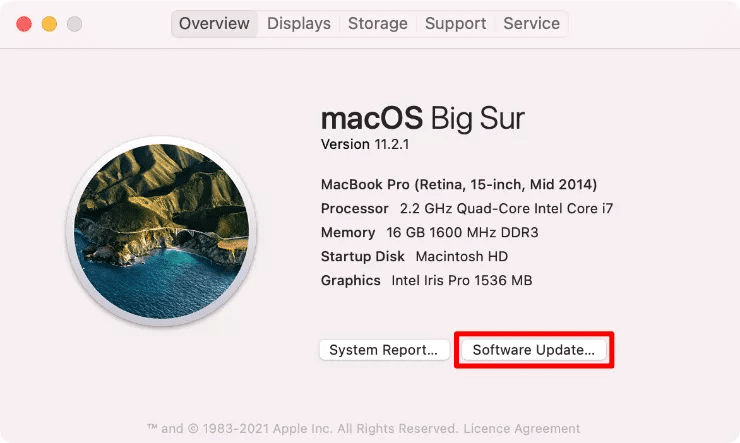
- Lastly, if an update is available, click Update Now or Upgrade Now to begin the process. Restart your computer to gain the newest version of Mac.
-
- Update Now: installs the latest updates for the currently installed version. For example, an update from macOS Big Sur 11.5 to macOS Big Sur 11.6
- Upgrade Now: installs a major version with a new name, such as macOS Monterey. If you’re concerned about software compatibility, Software Update will only show upgrades compatible with your Mac.
For Smart TV
There are also software updates for intelligent televisions. Installing the latest software version is recommended to prevent issues from occurring. Nonetheless, bear in mind that your video and audio settings might automatically be reset to default.
There are two ways for us to check and update our television software. Do take note the methods below are specific to Samsung Smart TV users. However, if you are using other television brands, the process is similar.
First Option: Update Automatically
When your TV is connected to the internet, software updates are installed automatically while you are watching a show or movie. During the initial setup of your television, you may have come across an agreement for you to approve. This will cause Auto Update to be set as On automatically.
If you don’t recall whether agreeing to such terms, it can be checked through Settings. Here’s how:
- First, on your television, navigate to Settings and select Support.
- Following after, tap into Software Update.
- Lastly, switch Auto Update to On. If the setting has already been set to On, leave it as such.
Second Option: Update Over the Internet
Follow the steps below to install a software update manually:
- First, on your television, navigate to Settings and select Support.
- Subsequently, select Software Update and then tap on Update Now.
- Lastly, new updates will be installed for your TV and it will take a few minutes to complete. Once the process is completed, your television will restart automatically.
For Android
We can update our device using either one of two ways.
First option
If you get a notification stating a new update is available for your device, open it and tap the update action.
Second option
If you cleared the notification or your device is offline:
- First, open the Settings app on your phone.
- Subsequently, near the base of the screen, tap on System > System Update. The checking process for software updates will begin.
- Lastly, you’ll see your updated status. Follow any steps on the screen to continue and complete the update installation if there are any.
For iOS
There are two ways we can update our iOS device, either manually or automatically. Here’s how:
Manual way
- First, locate and open the Settings app on your phone.
- After you’re in the app, tap on General > Software Update.
- Subsequently, the phone screen will display your current installed version of iOS and whether there is an update for you.
- Lastly, follow any steps on the screen to continue and complete the update installation if there are any.

Automatic way
- First, locate and open the Settings app on your phone.
- Subsequently, once you’re in the app, tap on General > Software Update > Automatic Updates.
- Lastly, turn on Download iOS Updates and Install iOS Updates. Next time there is a new iOS version released, the phone will automatically install it for you and it will be the most compatible version.
For Fire Tablet
- First, connect your Fire tablet to a computer using the included charging cable when you first bought the device.
- Afterward, swipe down from the top of your Fire tablet screen and select the USB charging notification.
- Next, tap on Transfer files.
- After that, locate and open a device driver titled Fire, and drag and drop the software update file into your Internal storage folder.
- Subsequently, open the Settings menu on your Fire tablet and tap on Device options.
- Lastly, select System Updates > Updates. The latest software version compatible with the device will be installed. Restart your device to gain the newest version of Fire.
After you’ve installed the latest updates for your device, head to the app store to check whether a new Netflix release suddenly appears available. Installing the latest version of Netflix is best, as doing so may likely lead to your buffering issue being fixed in the patch.
20. Find Solutions on a Help Forum
Unfortunately, Netflix doesn’t provide a dedicated platform for users to search for the problem they’re facing with Netflix. However, websites act as a help forum for users to interact and provide a fix for one another.
One website example you can use is OTTFORUM. By clicking on the link, you’ll be redirected to a Netflix forum page where users post their issues and users comment on ways to help solve each one’s issue.
Considering the millions of users worldwide, the issue you’re experiencing is most likely encountered before by someone else, and a solution was provided. It would help if you looked for the answer by scrolling through the posts or searching for the fix through a search filter.
Having said that, if you’re unable to find the solution you’re looking for, you can always start a discussion yourself by clicking the Ask a Question button.
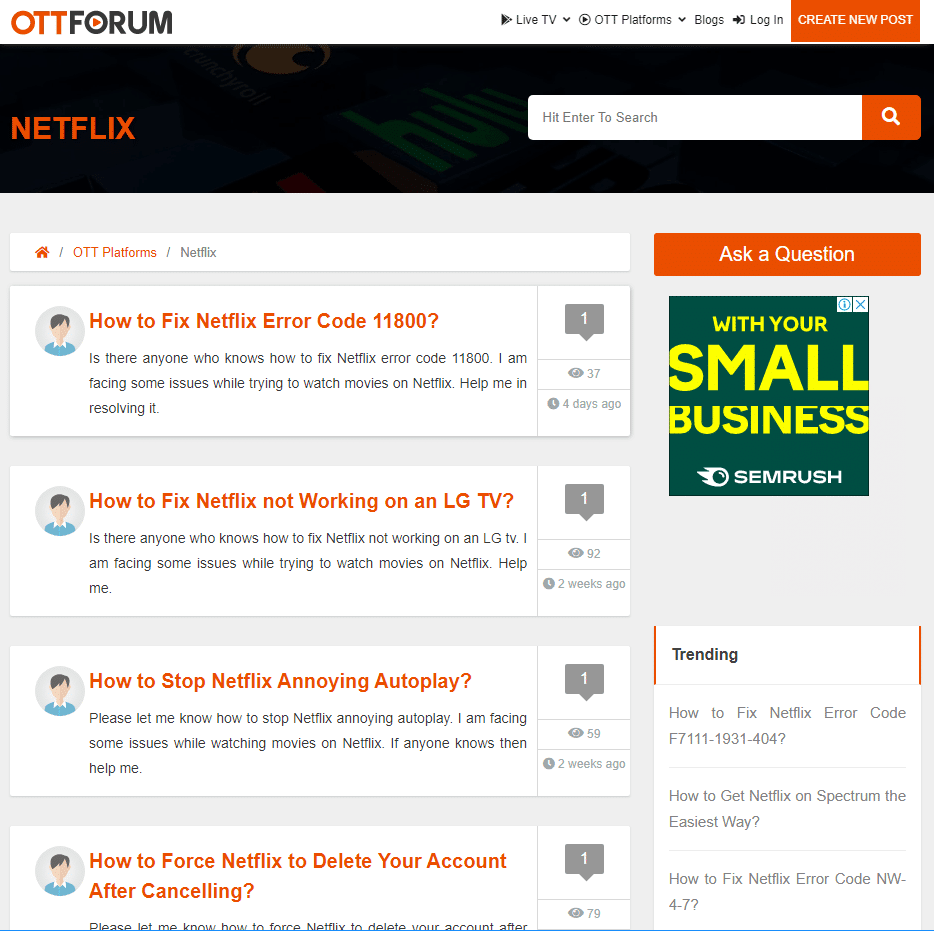
Based on your issue’s challenge, the time taken for someone to reply to you would range longer. In the meantime, you can always check out our other fixes for a potential solution.
21. Find Help Through Netflix Help Center
Although Netflix doesn’t have its help forum for users to interact with each other, they do, however, have its own Help Center. On this platform, you’ll have access to many articles that target common questions asked by users.
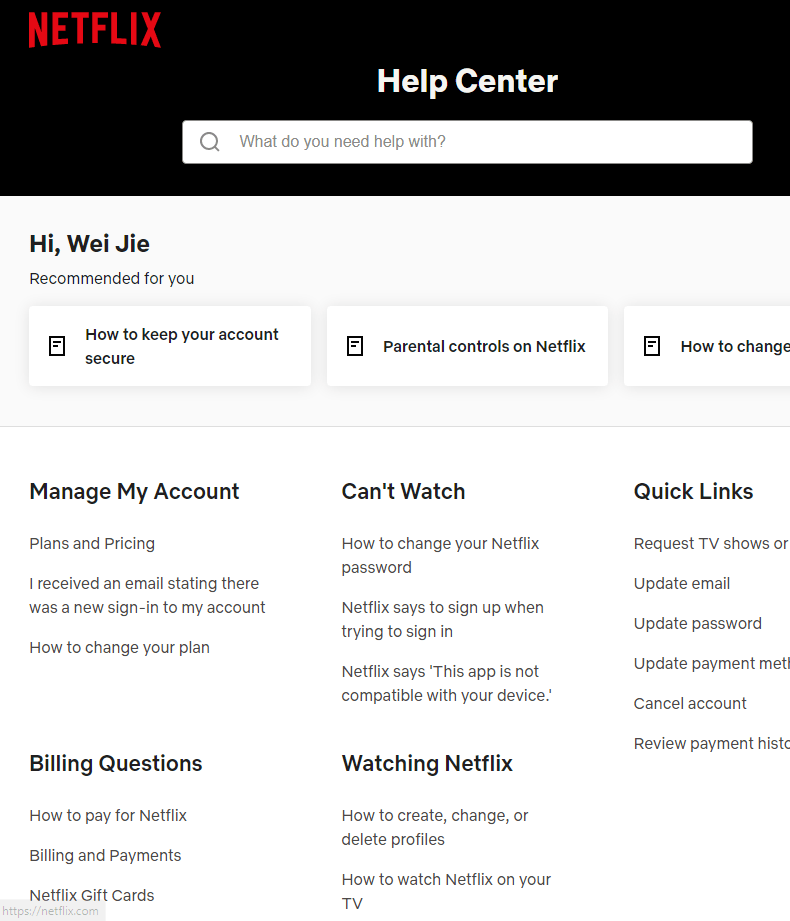
Moreover, a search engine is attached to the website, so any questions you want answers to may be found by typing the keywords. Netflix is a large platform that has dealt with many questions or issues users face. Hence, a search filter is the best way to obtain what you want.
Netflix Help Center also has a helpful feature where you can insert the error code from your Netflix. Doing so will give you solutions to your problem, thus making customer service better.
22. Find Help Through the Netflix App
If you’re streaming Netflix on your mobile device and encountering an issue, the app provides a way to contact Netflix. This includes convenience as we don’t need to open our computer to file a complaint or conduct extensive research on our issue.
Follow the steps below to contact Netflix on their mobile app:
- First, launch the Netflix app on your device and sign into your account.
- Following after, tap on More or your Profile icon.
- Subsequently, locate and tap on the Call or Chat button.
- Lastly, follow the instructions given by each option, and you should reach Netflix Customer Service.
23. Contacting Netflix Customer Service
After trying all the above fixes and you still face an issue, the final resort you can turn to is Netflix Customer Service. Customer service support is available around the clock, and you can contact them via 1-800-889-027.
Netflix’s Help Center also provides a way to contact customer service. Here’s how:
- First, head over to the link above and scroll to the bottom of the page.
- Subsequently, tap on the CALL US button, where a popup should appear.
- Afterward, the popup should display a button that links you to their contact number. It is advisable to select the contact number on your mobile device to perform a call from there.

- Lastly, for faster service by Netflix, enter a 6-digit code given to you on the Help Center website.
If you find calling to be a bit much, you can always opt to start a live chat with them. Here’s how:
- First, head over to the link above and scroll to the bottom of the page.
- Next, tap on the START LIVE CHAT button.
- Subsequently, there will be a popup where you will talk to an AI chatbot. There are some common issues listed for you. Check to see if your case falls into any of the categories.
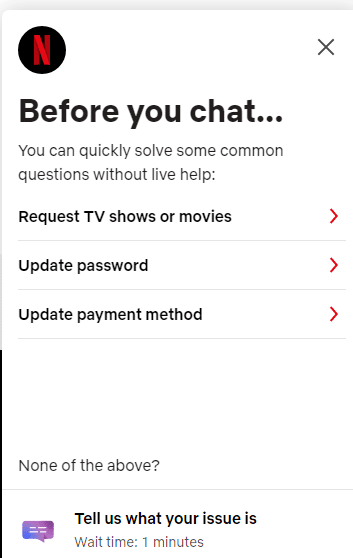
- After that, if your issue does not fall into any, click on Tell us what your issue is and enter your issue there. The waiting time to receive a reply is typically 1 minute.
Note: 1-800-889-027 is Netflix’s only number for customer service. Be vigilant of any other lines calling you stating they are from Netflix, especially if their contact number differs from the one above. Most likely, the call is a scam.
24. Check the Availability of the Netflix Title
Sometimes, there are cases where the video title you’re watching is revoked as the license for it has expired. Hence, it is always good to check the video availability by searching for the title on your web browser and digging into whether it is still showing on Netflix.
Conclusion
We’ve discussed potential fixes for when Netflix keeps buffering, freezing, or stops loading. From these fixes, we can piece out a few reasons why Netflix isn’t working well as you might expect. Examples include your Netflix account losing subscription, the internet connection you’re using facing issues, or your Netflix application is not up-to-date.
After identifying why your Netflix stream isn’t working as it should, we provided potential solutions to counteract each issue. The most familiar and successful fixes people have used and suggested include updating our Netflix app, testing our connection speed and following methods to fix a slow connection, and testing the video title on a different device.
Once we’ve started our binge-watching session for our favorite show, we can go for hours on end without stopping. When Netflix buffers, it is frustrating and understandable as we’re left at a cliffhanger on our favorite show, and the craving for more content could be satisfied in the next episode.
If your Netflix stream is constantly buffering, follow our guide of 24 fixes to resolve your issue.
From all that was said, make sure to examine the Netflix server status before deciding to try out fixes intended for yourself. You may have regrets when you realize the problem doesn’t come from your end. Additionally, ensure a few criteria are checked before continuing with the fixes, such as Netflix subscription is active, Netflix server status is up and running, and your device software is updated to the latest version.
One solution to curb this frustration is using Netflix’s download option to obtain the episodes we want to watch offline. Doing so allows you to observe without any buffer issues and care in the highest quality you’d like. However, remember that once you start watching a downloaded title, you’d need to finish it quickly, as most titles expire within 48 hours. If you’re encountering issues with Netflix downloads, you can check out our guide catered for that here.
To close off this article, let us know in the comments below:
- Is Netflix your go-to platform for streaming? Why is that so?
- Were any of the fixes above helpful in solving your issue? What was the issue you faced, and which fix worked best for you?
- Was there a fix that you’ve tried but we missed out on it? Let us know in the comments below, as it may help others solve the same struggle.
- Which other platforms do you face issues with, and would you like us to provide some fixes for them? Let us know in the comments below!
Feel free to share this with a friend or family member struggling to solve buffering or freezing issues on Netflix! 😊
