Feel as if Netflix isn’t working or playing when using a VPN? Or do you find that Netflix is blocking access 🚫 to your favorite shows, all because you’re using a VPN?
Using a VPN whenever you’re on the web is a great idea not just for your privacy 🕵️♂️, but also for enhanced internet connection speed. Essentially, all your data is encrypted and put through a “tunnel” into usually another country. Hence, masking or hiding your real IP address to any prying eyes.
In the case of Netflix, you also get access to a different library of shows depending on which country you’re connected to through your VPN. This is because shows usually have different distribution rights to different streaming services in various countries. Thus, it’s not exactly legal for Netflix to be streaming certain content in a country where they don’t have the rights to be streaming it.
As a result, Netflix has cracked down on VPN users who wish to view other countries’ shows on their platform. They have done so by blacklisting any VPN IP addresses to prevent users from bypassing the geo-restrictions.
Hence, many Netflix users report getting the following proxy error message, when using a VPN:
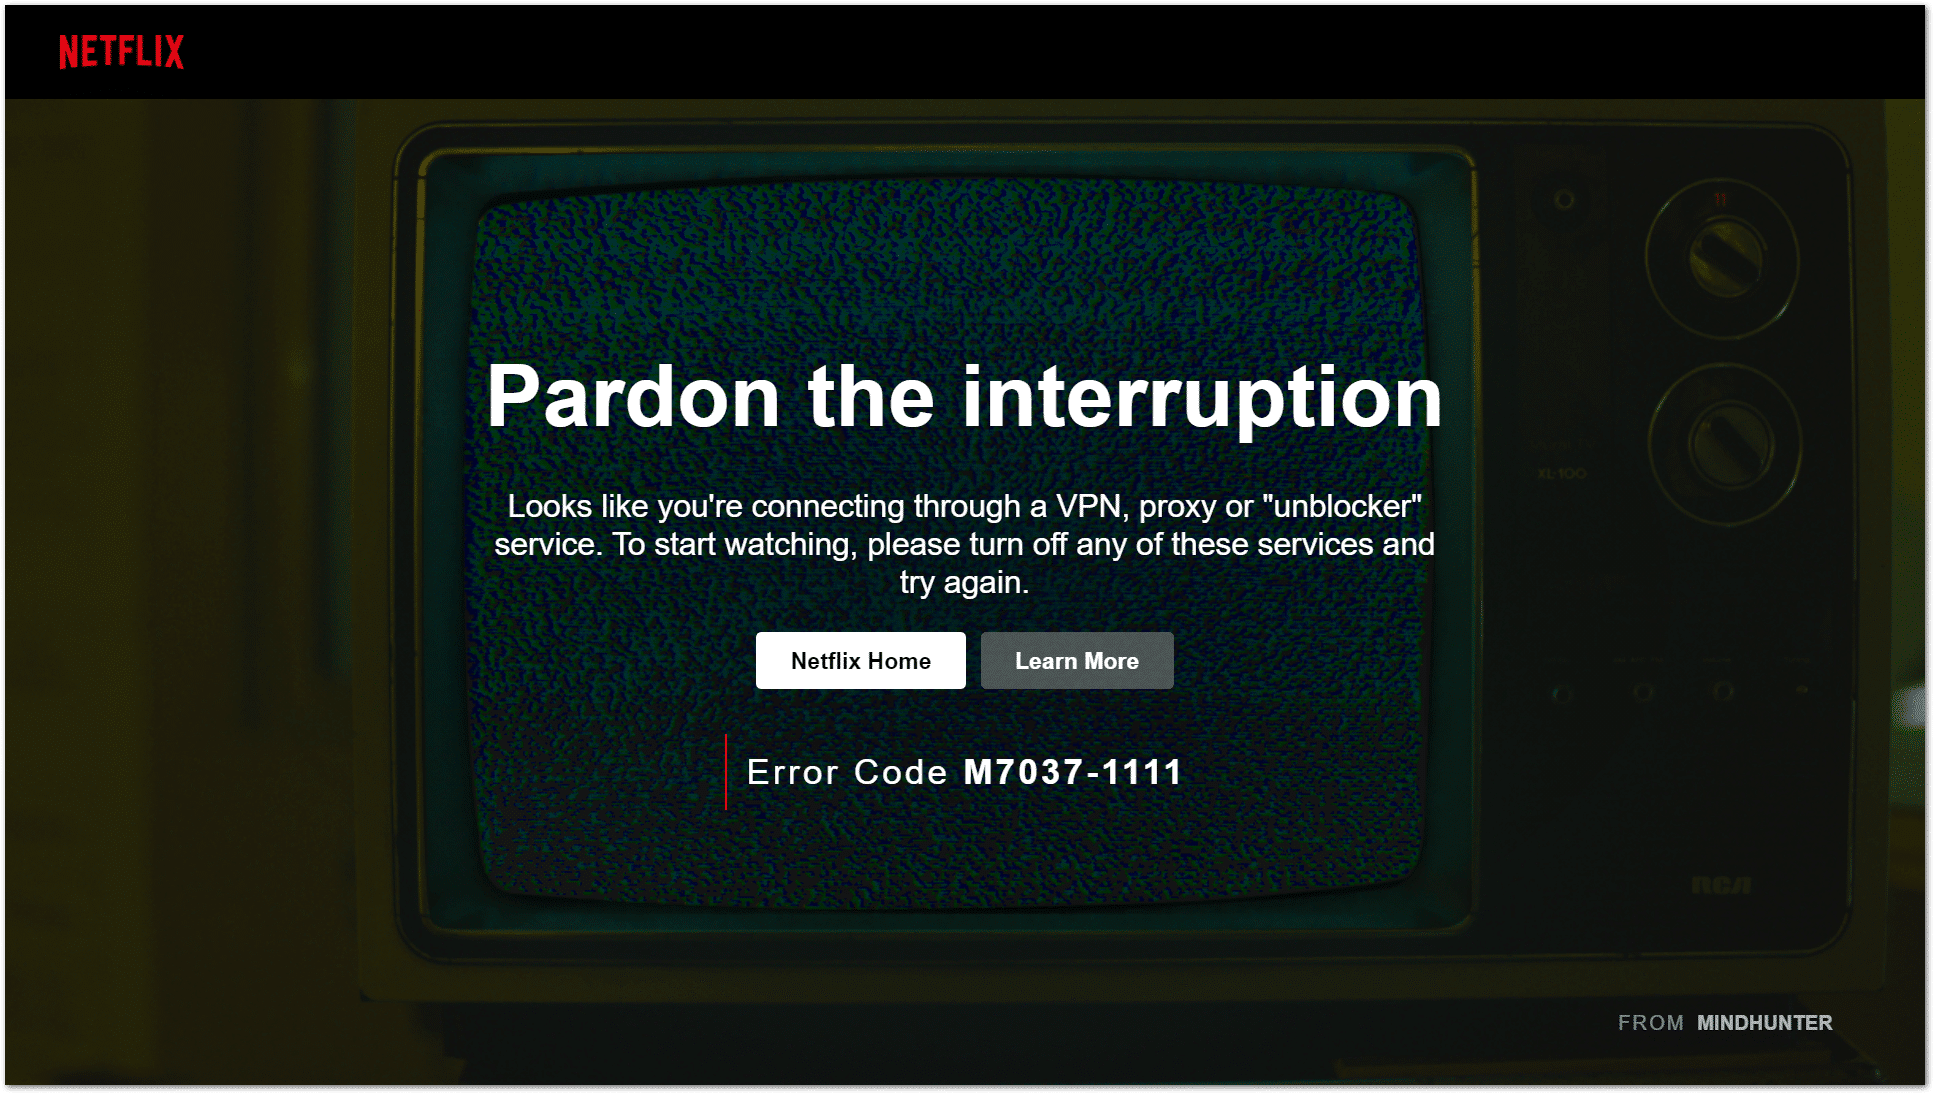
However, there’s no need to fear! We’ve put together 13 fixes so that you can get back to watching your favorite TV shows and movies, regardless of your location!
Note: This guide caters to whichever device you’re using to access Netflix, namely Windows and macOS users. However, the steps work effectively and similarly for other streaming devices, including mobile devices (Android, iPhone, and iPad) , game consoles (PS4, PS5, Xbox, Nintendo 3DS), Smart TVs and set-top boxes (Roku, Firestick, Apple TV).
With that being said, let’s get started!
Table of Contents
- Reconnect Your VPN or Use a Different VPN Server
- Change Your VPN Region
- Restart the VPN App
- Update the VPN App
- Try Watching Netflix on an Incognito Window
- Use a Different Web Browser
- Try a Different VPN Service
- Check for VPN Leaks
- Disable Location Tracking in Your Web Browser
- Disable WebRTC in Your Web Browser
- Clear Your Web Browser’s Cookies and Cache
- Use a Dedicated IP Address on Your VPN
- Contact Your VPN’s Customer Support
1. Reconnect Your VPN or Use a Different VPN Server
To start off simple, we recommend reconnecting to a different VPN server. This is because there’s a chance your VPN hasn’t established a connection fully or correctly. Thus, you might even see a major drop in your Internet speed. 📉
Plus, by reconnecting, you can also aim to obtain an IP address that hasn’t been blacklisted by Netflix. Thus, your VPN app might be assigning you an IP address that’s been used by multiple different users. As this raises suspicion at the Netflix backend 🤨, they may proceed to bar access for users with that address.
Hence, we recommend completely disconnecting from your VPN, and try reconnecting or even using a different server altogether.
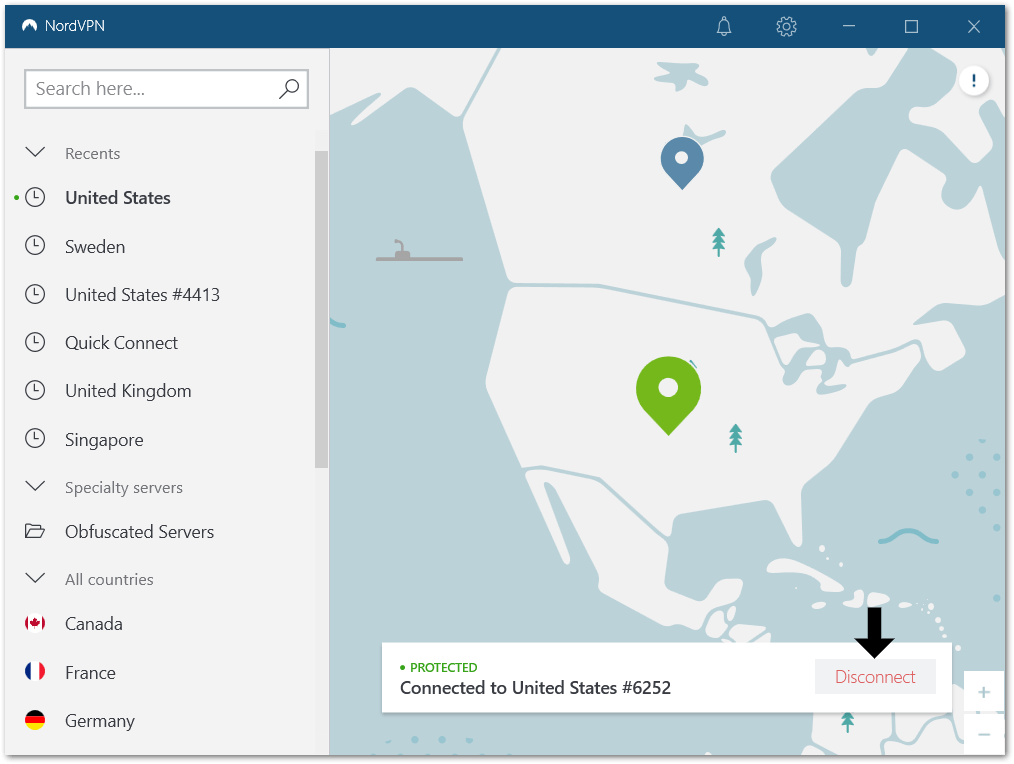
You may have to try reconnecting a few times before giving in, to obtain an IP address that hasn’t been blacklisted
Also, it helps if you try connecting to a server of a different country (Step 2) as well.
2. Change Your VPN Region
In most VPNs, you’re given the option of choosing which country to connect to. Simply changing the server region may be enough to bypass Netflix’s IP blacklist.
A quick Google search for “(show name) netflix countries” should give you a list of countries where Netflix has licensing rights to that show. Thus, when changing your VPN region, you should choose a country in that list to ensure you have access to it.
We can even go a step further and change the region within that country if your VPN service has multiple servers in different locations in a single country. Since different server locations within a country likely have different IP addresses, it also has the potential of bypassing the IP blacklist.
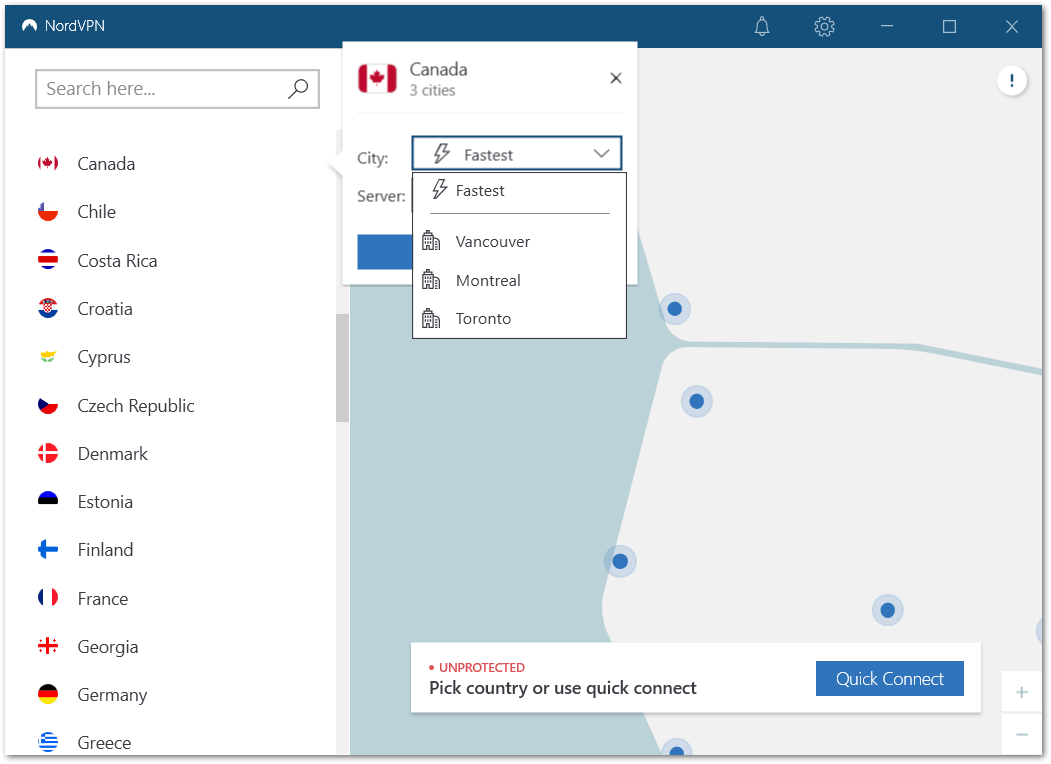
If you’re still having issues finding a server that doesn’t block you, you can actually contact your VPN’s customer support (Step 13) and ask them for a server recommendation. Chances are, they know which servers work with Netflix, so it doesn’t hurt to try.
3. Restart the VPN App
We know this may sound cliché, but sometimes there may be errors in your connection to the VPN server. Hence, rendering your VPN connection unstable and unreliable.
Therefore, a quick restart of your VPN app should ensure that your connection is functioning properly. Regardless, this should be among your first steps as not only is it the most simple, but it also refreshes your connection.
Chances are merely clicking the X button on the VPN app window, won’t close the app entirely.
So, to completely end the VPN process:
For Windows
For starters, we recommend right-clicking the VPN icon at the Windows Tray, and selecting Quit App.
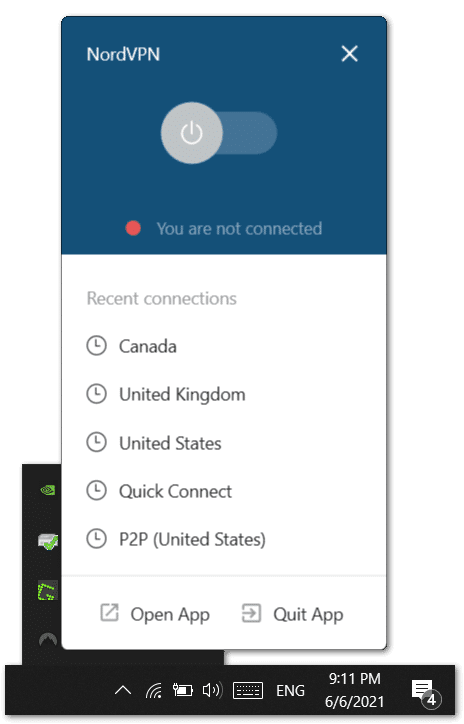
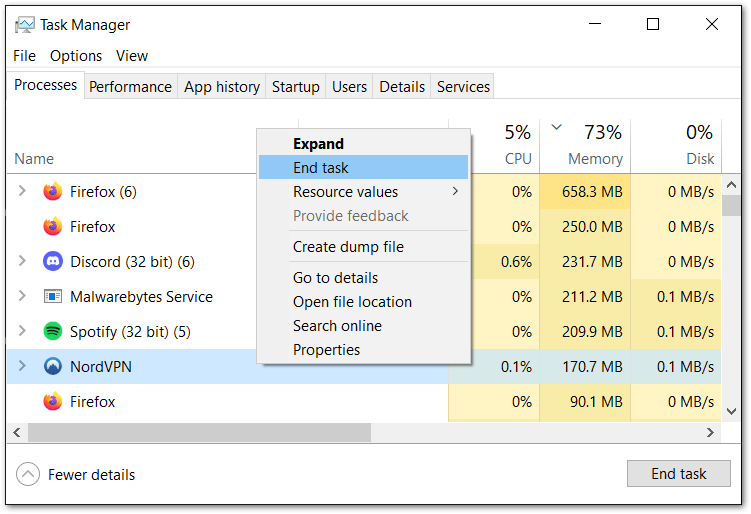
Besides that, you can also end the VPN app process through your Task Manager:
- First, open the Task Manager, by right-clicking the Taskbar and selecting Task Manager.
- After that, from the list of processes, select and right-click your VPN, and choose End Process.
For macOS
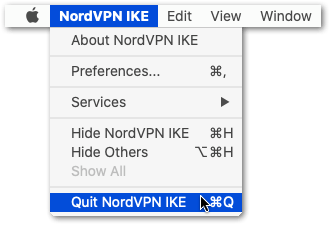
The equivalent step would be to select the VPN app from the App Menu. Then, select Quit from the drop-down.
Finally, for both Windows and macOS users, we also recommend restarting your PC once the VPN app is closed completely. This ensures all the background processes are ended. Finally, you can try reconnecting your VPN, and accessing the Netflix platform again.
Hence, your VPN connection may get established correctly this time!
For Mobile Devices and Set-Top Boxes
If you’re using the installed VPN app on your mobile device, set-top box or Smart TV, the steps are fairly straightforward:
- First, disconnect your VPN connection.
- Then exit the VPN app and remove it from your Recent Apps.
- Finally, relaunch the app and reconnect your VPN.
4. Update the VPN App
As we mention in our other guides, it’s paramount that you keep your applications updated, as there are likely new features and bug fixes to improve your experience. For example, a bug 👾 in an old version of your VPN app, may prevent you from securing a connection with the VPN’s servers.
Moreover, in a new VPN update, there may be a workaround for a Netflix VPN block. So, before you try anything else more involved, you should give your app a quick update if it does have one.
Typically, regardless of which VPN service you’re using, you should find the Check for Updates button available in the settings.
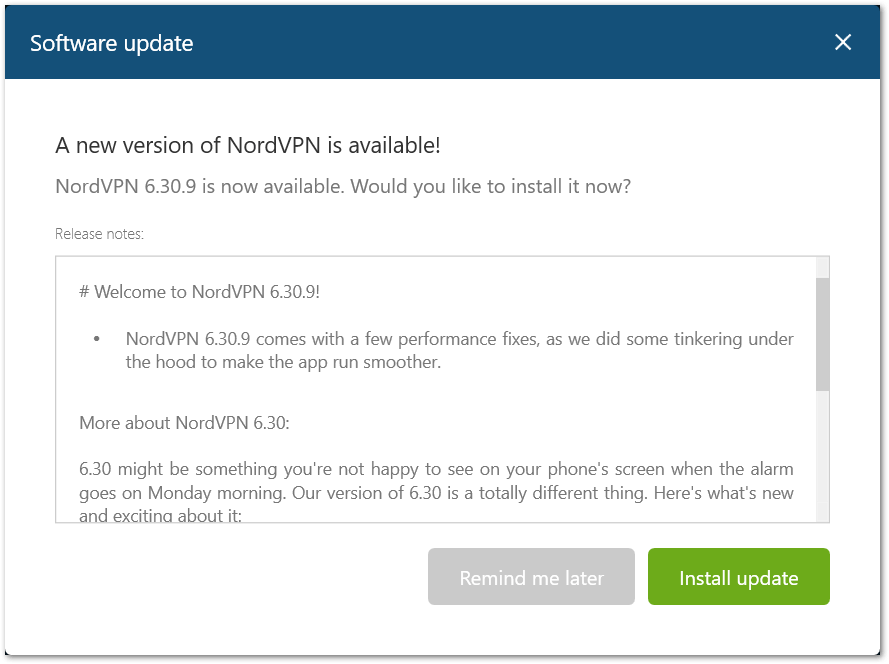
After that, if updates are available, proceed and the app will begin downloading and installing the update.
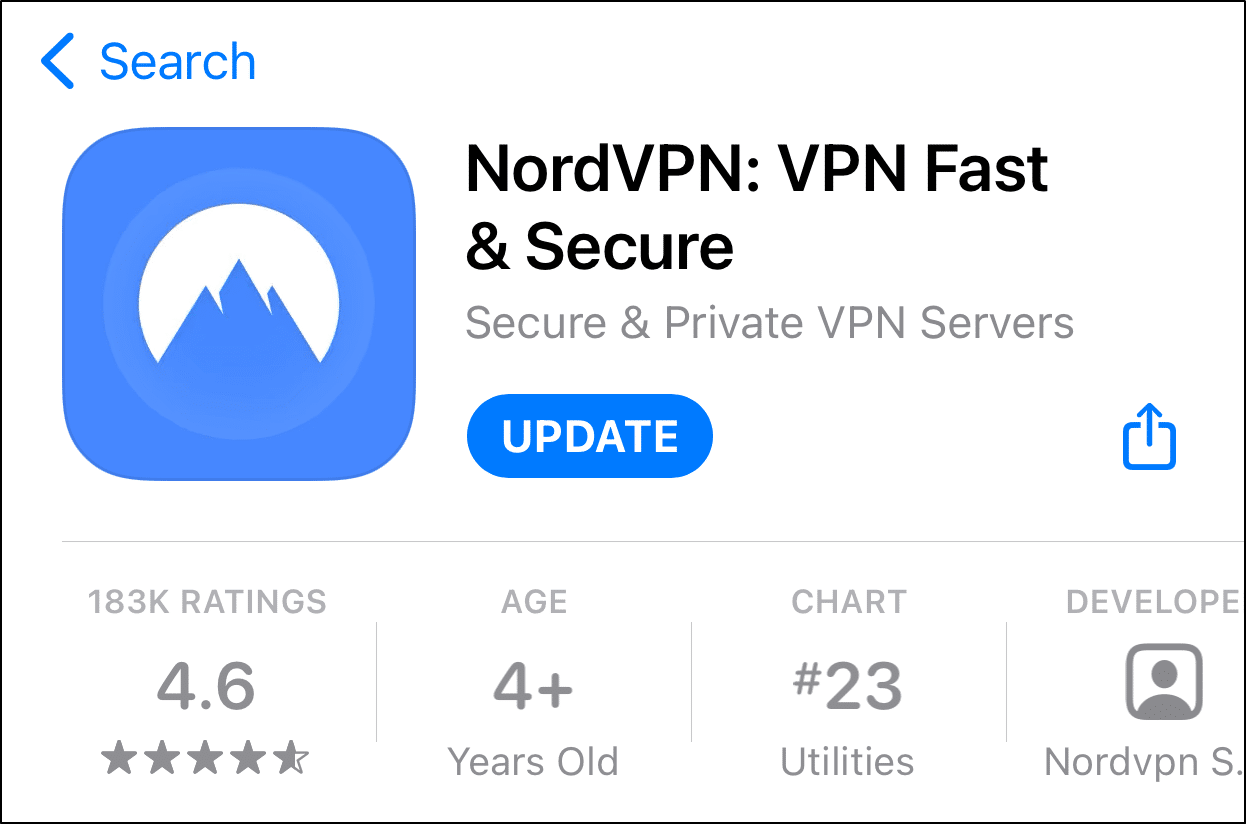
Whereas for mobile devices or set-top boxes, go to your App Store and visit the VPN app page. Then, if pending updates are available, select the Update button.
5. Try Watching Netflix on an Incognito Window
By visiting the Netflix web page in incognito mode 🕵️♂️, you can be sure that no browser extensions or plugins are interfering when loading the website. Thus, this helps us identify if these browser add-ons are the cause for when the Netflix platform isn’t working when using a VPN.
After that, you can individually disable extensions on your browser, to troubleshoot the cause for the Netflix proxy error.
Additionally, in incognito mode, your web browser cache, cookies 🍪, and site data won’t affect the Netflix web page either. Hence, this cache could be the culprit giving away your true location to the Netflix security algorithm.
If you find this step effective, you can also try clearing the web browser data (Step 11). So, you no longer have to stick to incognito mode!
Having said that, the following are steps to open an incognito window on the major web browsers:
Google Chrome
Shortcut keys: Ctrl + Shift + N
- Click on the kebab menu
 on the top-right corner of the browser.
 - Select New incognito window.

Mozilla Firefox
Shortcut key: Ctrl + Shift + P
- First, click on the hamburger menu (三) on the top-right corner of the browser.
- Then, select New Private Window.

Microsoft Edge
Shortcut key: Ctrl + Shift + N
- First, click on the meatball menu icon
 on the top-right corner of the browser.
 - Then, select New InPrivate window.

Safari (macOS)
Shortcut key: Command + Shift + N
- First, click on File. It is on the top-left corner of the browser.
- Then, from the drop-down menu, select New Private Window.

6. Use a Different Web Browser
Moving on, we’ve seen multiple reports of users saying that changing their web browser resolved their Netflix proxy error. This could be due to a multitude of reasons ranging from different approaches to establishing a connection to bugs in the current browser version you’re using.
Hence, as this is one of the simplest fixes we have for you, it’s definitely worth a try.
Typically, your VPN should work with Netflix, on any of the major web browsers you’re using. This includes Google Chrome, Firefox, Edge, or Safari.

7. Try a Different VPN Service
With so many VPN services available on the market, there’s bound to be some disparity between the features and services that each offers. As a result, one may be better than the other for your Netflix viewing experience.
It doesn’t hurt to try a different VPN service as that may actually be the solution to this pesky Netflix problem.
If you ask us, we personally recommend NordVPN as we can vouch for it. In our testing and daily use, we’ve found it works wonders, not just for Netflix viewing, but also for general web browsing with its speed, security and reliability.
On top of that, they have various special features like dedicated IP addresses and obfuscated servers. These features can further mask your location from Netflix’s security system.

Get NordVPN with up to 68% OFF today!
8. Check for VPN Leaks
A VPN or DNS (Dynamic Name Server) leak test checks if there’s a mismatch between the country in which your IP is located and the DNS server you’re connected to. Hence, this is also another way Netflix determines if you’re using a VPN, and can block you from accessing there service.
Hence, connecting to a leaked IP address could be the cause for Netflix not working with your VPN. This is especially common for free or cheap VPN services that mass assign the same low-quality IP address to tonnes of users. Hence, they’re more prone to such leaks.
So, If you need a top-notch VPN, try NordVPN! 😉
Additionally, you can use a service like Astrill’s VPN leak test to determine if there are any leaks.
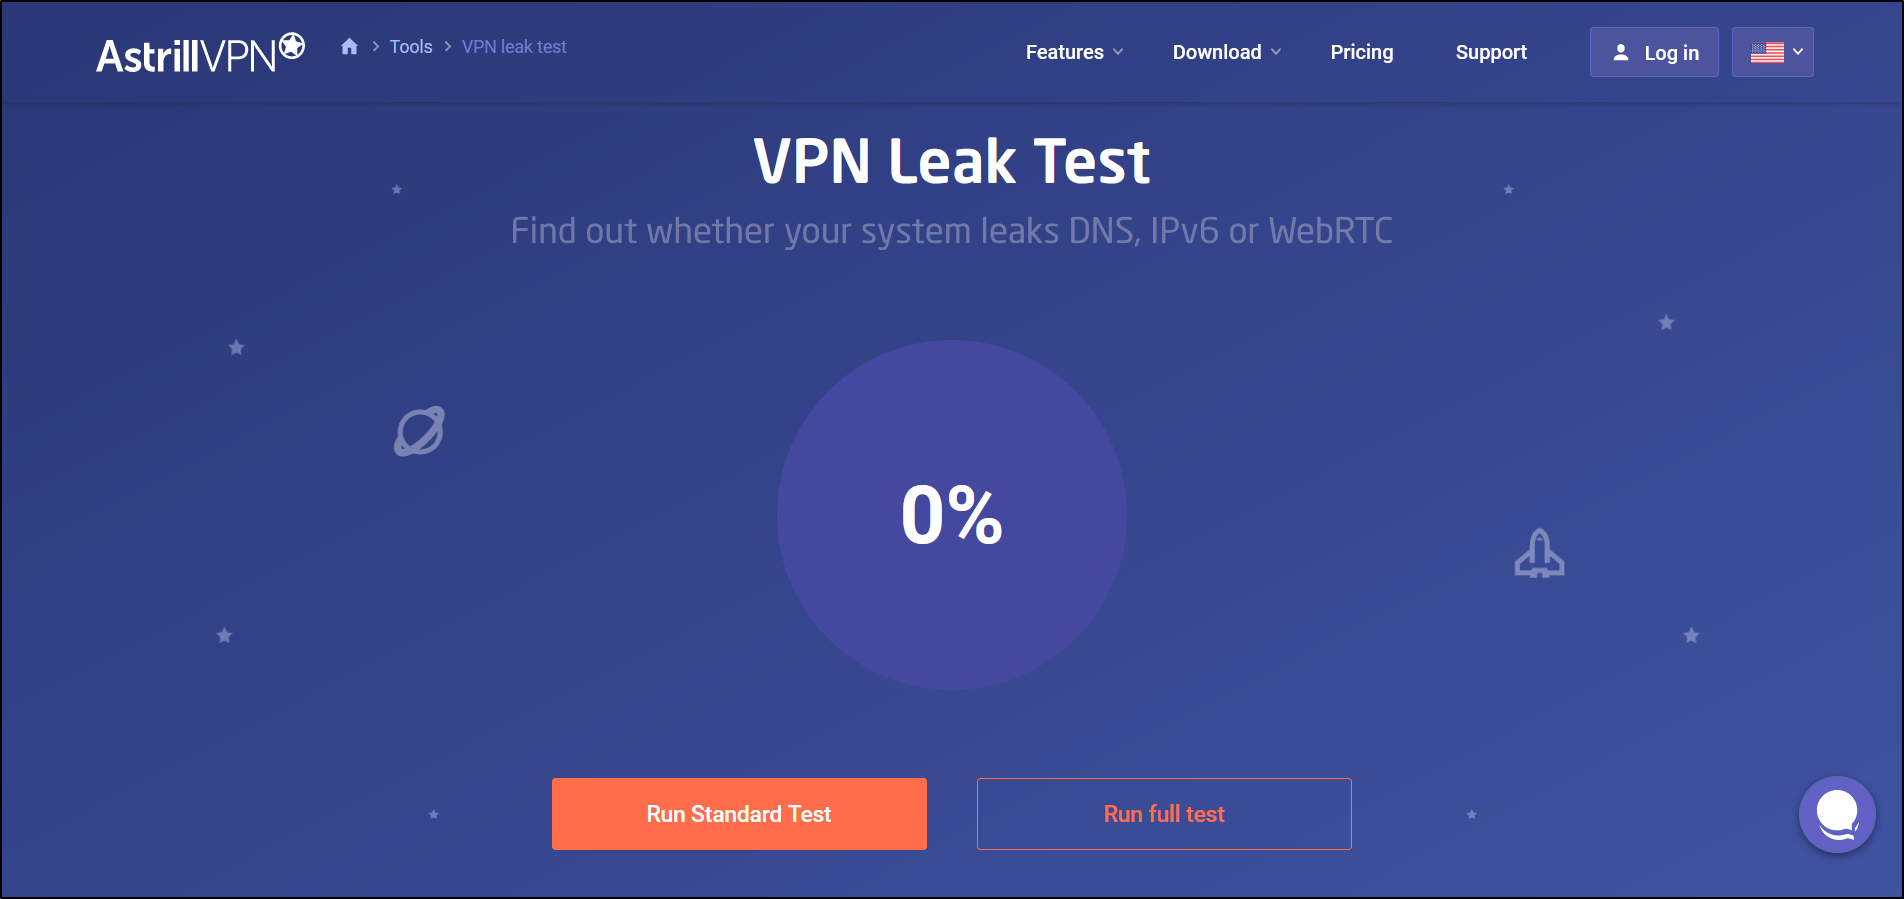
Should there be a leak, you should contact your VPN service’s customer support and explain the details to them so that they can resolve it. Once that’s done, follow Step 1 to reconnect and refresh your new VPN connection.
9. Disable Location Tracking in Your Web Browser
Netflix also cross-checks your browser’s reported location and your IP’s location to determine if there are any mismatches. Hence, this is another way they know if you’re using a VPN.
So, to mitigate this, we recommend disabling location tracking by the Netflix site on your web browser.
With that said, here’s how to do it for Google Chrome and Safari:
Google Chrome
- To start, open Chrome.
- Then, go to the Netflix website.
- Next, beside the URL, click the icon you see. It’s usually a lock
- In the newly-opened menu, click Site settings.
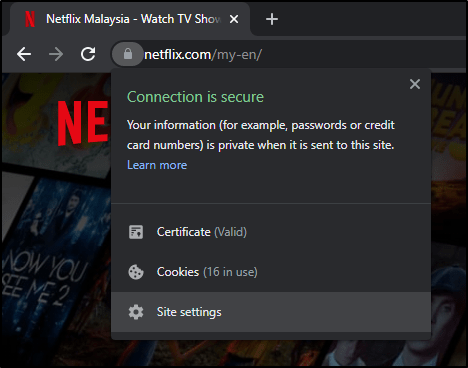
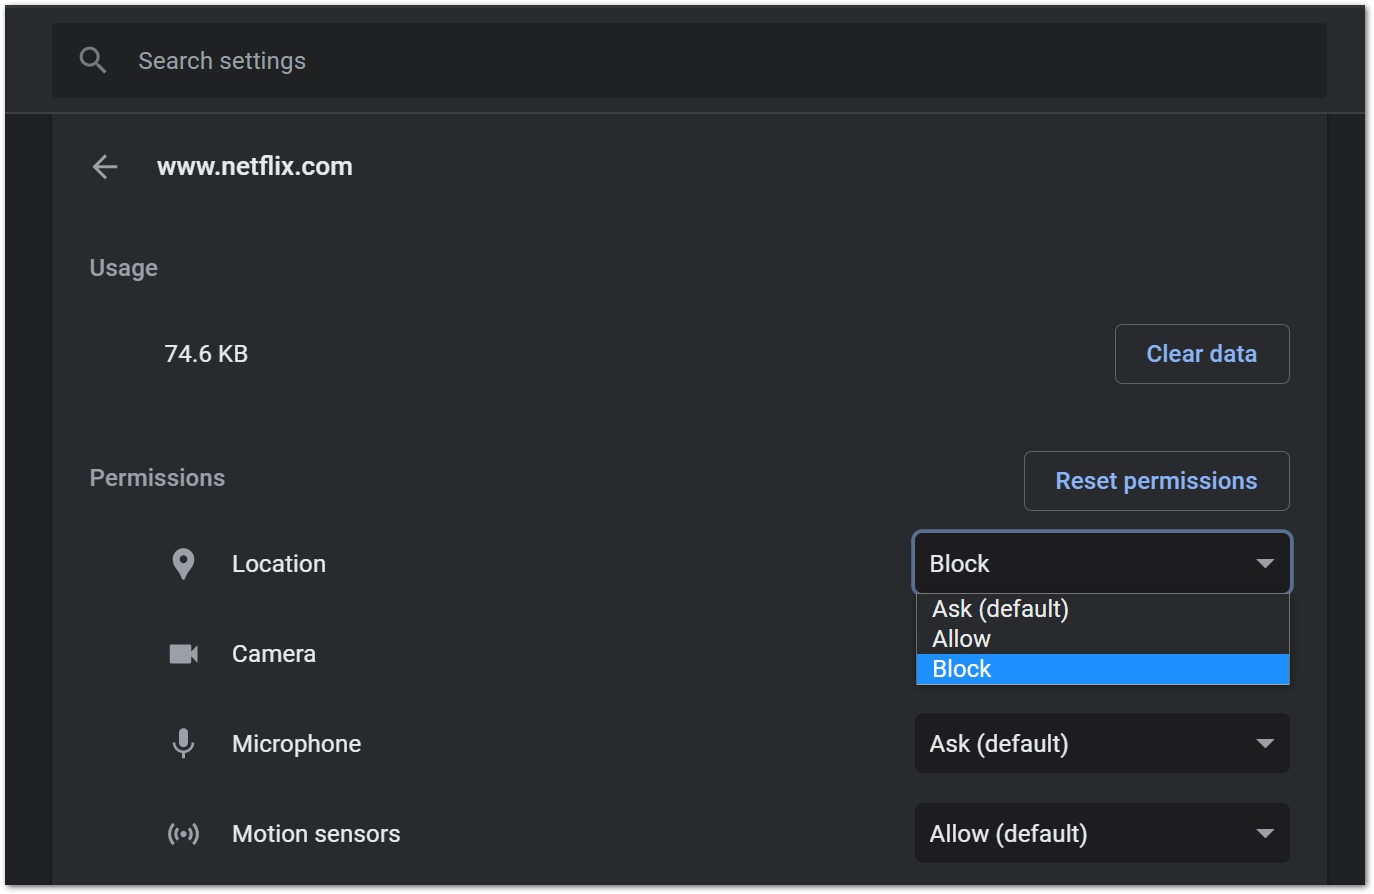
- A new tab should open with all the various site permissions. Change the Location permission to Blocked. Your changes will automatically save.
- Finally, refresh your Netflix tab.
Safari
- Firstly, have Safari open.
- Next, navigate to the Netflix website.
- In the top menu, click on Safari.
- Then, in the newly opened menu, click on Settings for this website.
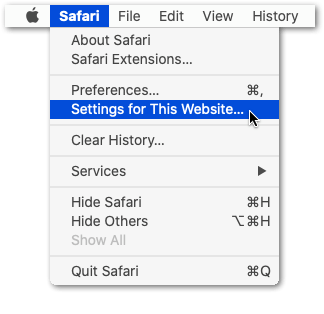
- A new menu should open with various options. Look for Location and in the drop menu beside it, set it to Deny.
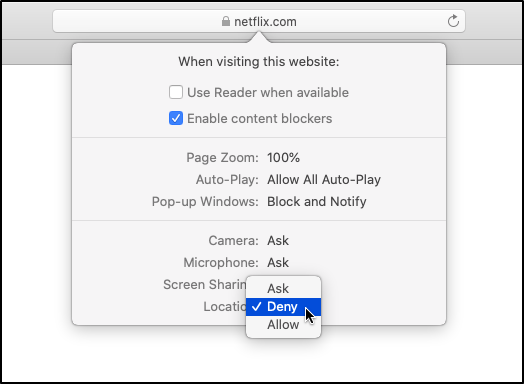
- Finally, refresh your Netflix tab.
Alternatively, this can also be achieved by using Netflix in Incognito mode (Step 5). Incognito mode practically gives you a clean slate so websites will not have any information on you.
However, as it is incognito mode, all your saved cookies and browsing data are absent which may prove to be troublesome for regular use. Thus, we still recommend blocking location tracking for normal use.
10. Disable WebRTC in Your Web Browser
WebRTC is a set of technologies for websites to communicate with other websites to improve web app performance. Additionally, it also requires web browsers to reveal their true IP address.
Hence, Netflix could be exploiting this part of WebRTC to weed out any VPN users. Thus, this minor browser setting could be the reason your VPN isn’t working for Netflix.
Therefore, we recommend disabling WebRTC on your web browser. Having said that, here’s how to do it on Google Chrome and Safari:
Google Chrome
- First, open Google Chrome.
- Then, navigate to the Chrome web store for extensions.
- Next, search for WebRTC Control.
- Then, add the extension for your Chrome browser.
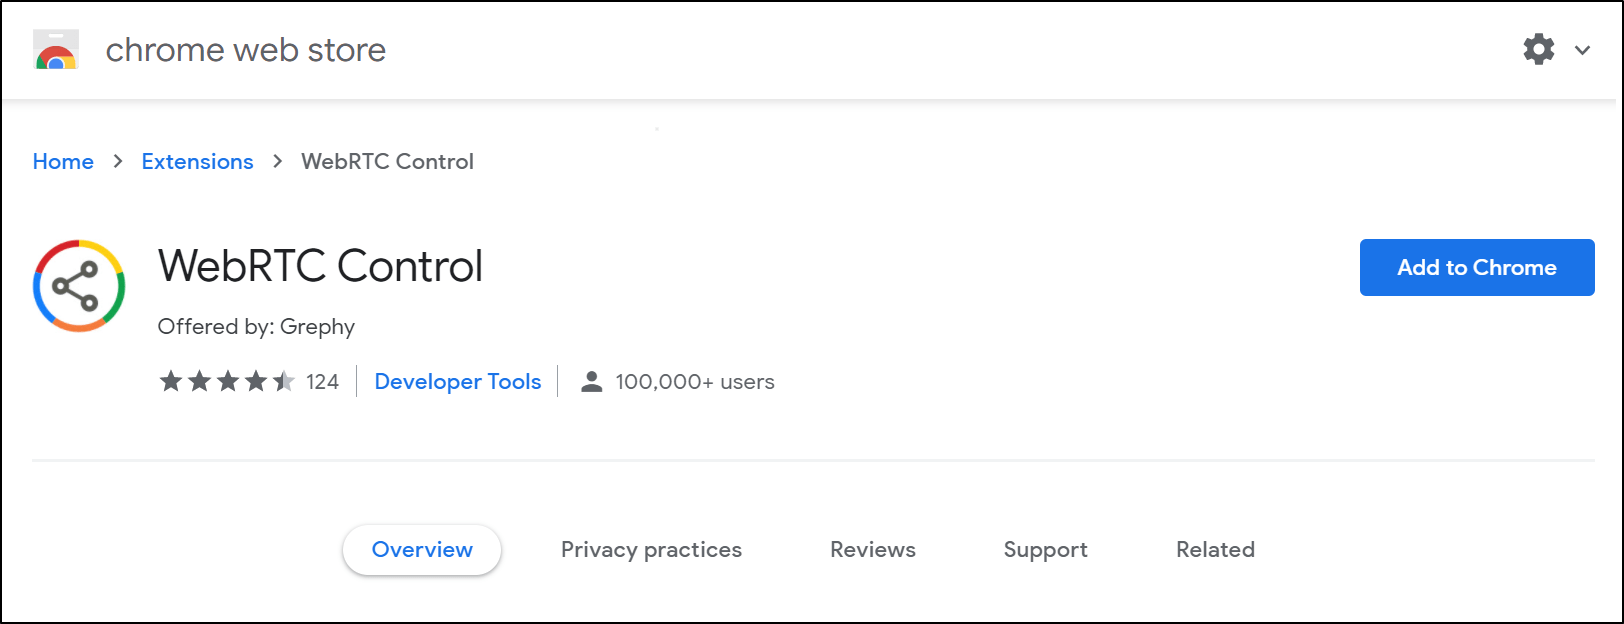
- After that, on Netflix, go to the upper right corner of the browser and ensure that WebRTC Control is colored and not greyed out. This means that WebRTC is disabled.
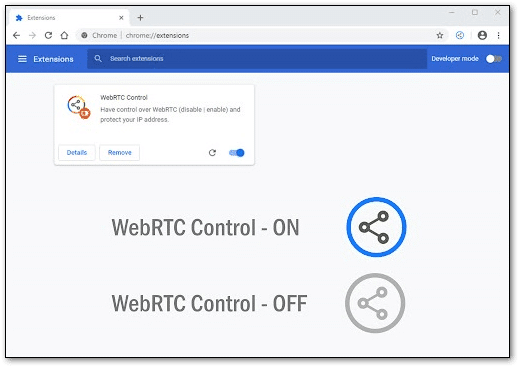
- Finally, refresh the Netflix tab.
Safari
- First, open Safari.
- Next, in the top menu bar, select Preferences.
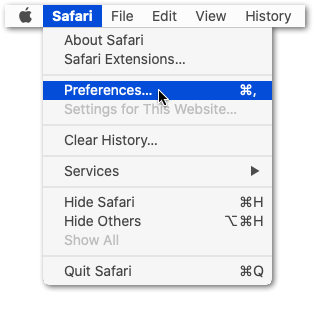
- Then, select the Advanced tab and tick the option that says Show Develop menu in menu bar.
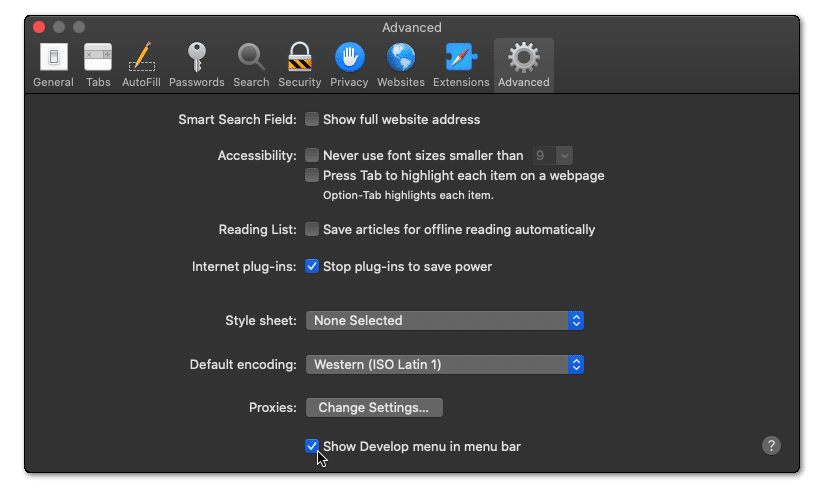
- After that, click the new Develop option on the menu bar, then hover over Experimental Features.
- You should see an option named Remove Legacy WebRTC API. Click on it to ensure it’s ticked. Else, ensure all the WebRTC options are unticked.
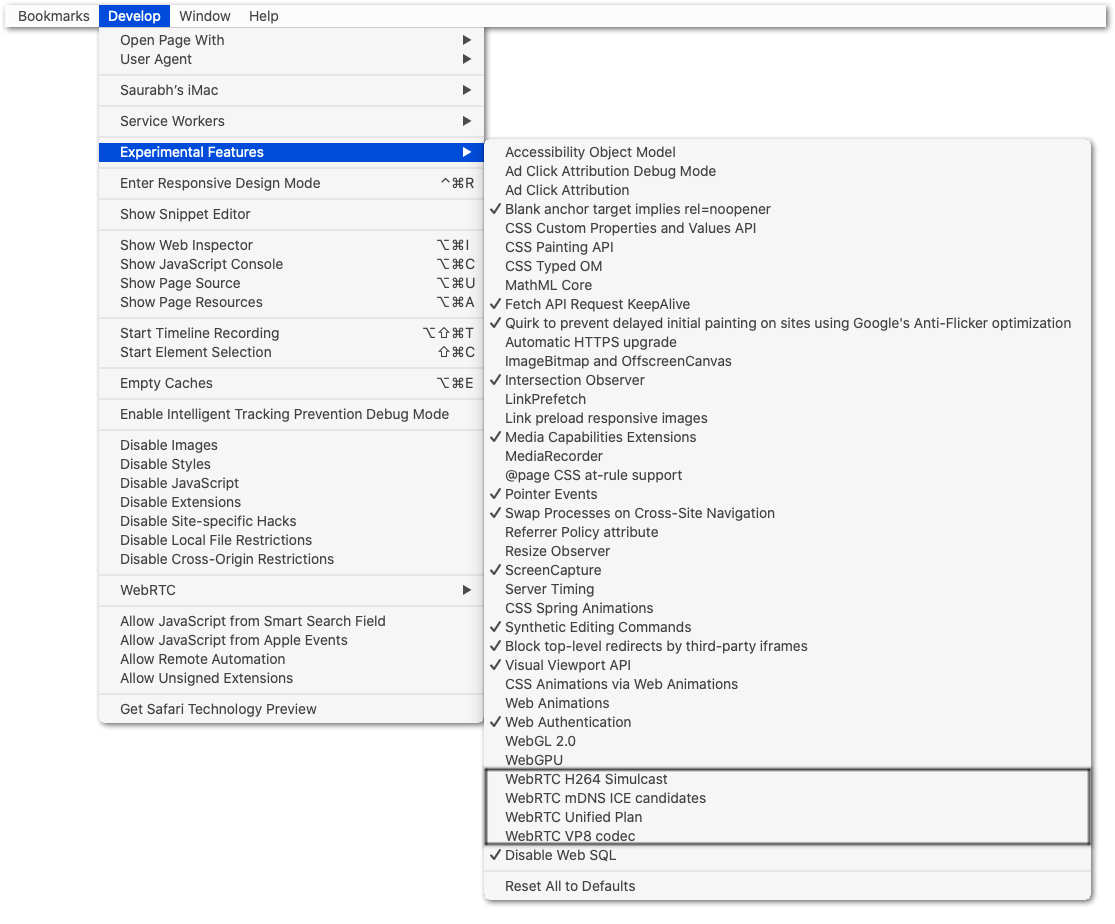
- Finally, refresh the Netflix tab.
11. Clear Your Web Browser’s Cookies and Cache
Cookies 🍪 are small pieces of data that your browser keeps locally to help improve your browsing experience. For example, they can be used to auto-fill form fields or remember that you’re already logged into a specific website, especially for Netflix.
On the other hand, your browser regularly saves portions of the websites you visit as cache. This is so that when you visit that website again, it doesn’t have to load the whole website from scratch. As a result, your browsing experience will be faster overall.
However, cookies and cache in your browser may be interfering with your connection to Netflix. Plus, they can give away your true location, rendering the VPN connection useless and Netflix showing you the proxy error.
Thus, clearing or deleting them may be just the right solution when your VPN isn’t working with Netflix.
Also, it’s important to note that you’ll have to log in to all your accounts again after clearing your cookies and cache. In our opinion, it’s a small price to pay if it means you can finally watch Netflix!
On that note, Here’s how to do it for Google Chrome, Safari, and Edge:
Google Chrome
- First, access your browsing history by pressing Ctrl + H keys together. Or click the menu button at the top-right and choose History at the drop-down.
- On the following page, click the Clear Browsing Data button. For Google Chrome, that’ll be on the left.

- Next, under Basic, check all options. Plus, you should select a time range of All time, since we’re deleting everything. Then, click Clear Data.

Safari
- First, with Safari launched, from the Menu Bar, click Safari and select “Preferences….”

- At the following window, choose Advanced from the top bar, and tick the box next to “Show Develop menu in bar”.

- Subsequently, from the Menu Bar, click Develop, and select Empty Caches.

- After that, you can clear your search history and even more Site Data and Cookies. To do this, from the Menu Bar, click Safari, and choose “Clear History…”.
- Lastly, click Clear History at the following window.

Microsoft Edge
Additionally, you can find specific steps to clear web browser data on Edge, in this guide by Microsoft Support.
12. Use a Dedicated IP Address on Your VPN
As we hinted earlier in the introduction, the way in which Netflix determines you’re using a VPN is if the IP it’s using is on their blacklist. Your VPN service likely has a feature where you can subscribe to a private dedicated IP address that’s unique only to you. Hence, giving you an additional layer of anonymity and security. 🔒
Therefore, we can use that feature to bypass Netflix’s IP or proxy block. So, you no longer have to worry about your VPN not working with Netflix. However, please note that it’s likely going to be expensive.
Nonetheless, good quality and premium VPN services (like NordVPN!), freely offer these features under different names.
For example, in the case of NordVPN, it’s under the option of Obfuscated servers.
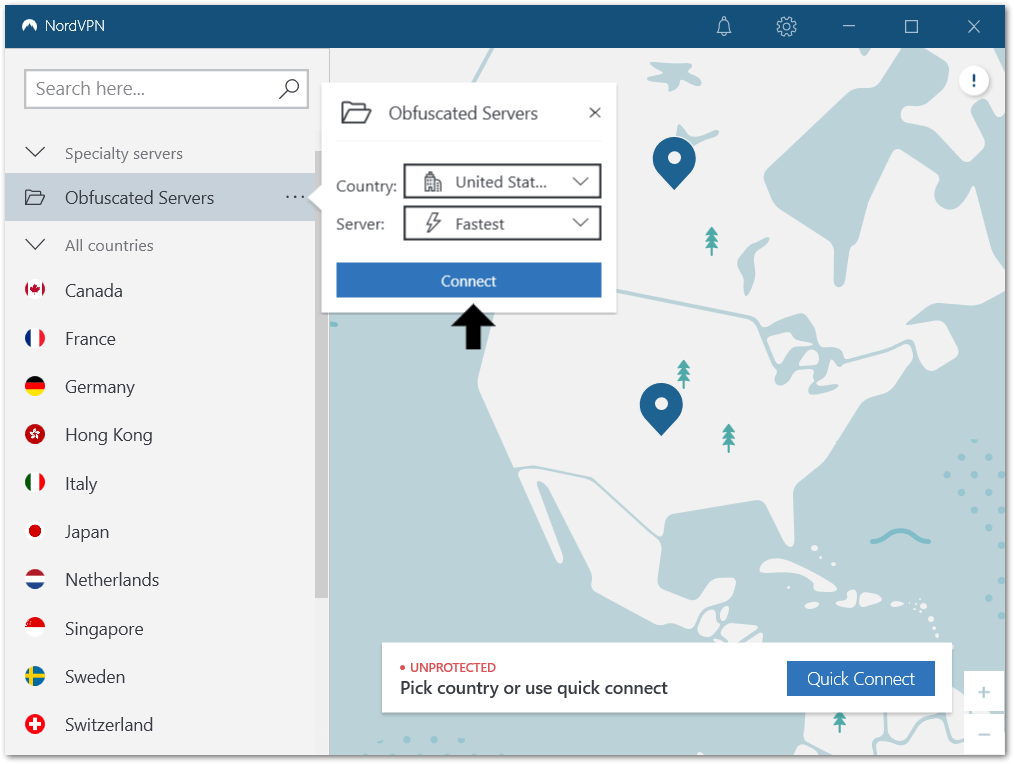
13. Contact Your VPN’s Customer Support
Still out of luck? Chances are that you’re not the only one who wants to watch some Netflix while maintaining your privacy with a VPN.
Thus, it’s common for VPN services to have servers that are specifically used to bypass Netflix’s VPN restrictions.
So, it doesn’t hurt to contact them to see if they can let you connect to one of these special servers.😉
Conclusion
Well, that brings us to the end of our guide! VPNs are a great way to keep your Internet surfing activities privatized and should be used by everyone. When it comes to Netflix and other streaming services, using a VPN opens up a wider range of shows and movies, which previously you could only dream of watching! 🤩
However, as we’ve explained earlier, it’s understandable why Netflix would try to block VPN users with all the legalities involved. Unfortunately, those using it without malicious intent also get caught in between.
Nevertheless, this guide of 13 fixes should help you resolve issues where your VPN isn’t working with Netflix.
Hopefully, this guide has managed to get you back to watching all your favorite shows again!
Be sure to comment down below:
- Are you encountering VPN issues not working with Netflix?
- Have another fix you think we can add on to this guide?
- What other Netflix issues are you encountering or need help with?
Feel free to share this post with someone you know whose VPN isn’t working with Netflix. Happy streaming! 🤗


It’s either vpn working or not working, that’s the scenario. residentials ips are the most important work in these cases, if the ip pool is blocked then I doubt that they will be able to access it, big providers such as nordvpn, expressvpn, purevpn and surfshark have those pool and can afford it, not everyone can though.