Do you keep finding that notifications from the Microsoft (MS) Teams app is missing or not working on your mobile device? We have 17 fixes for your iOS or Android device!
As companies around the world adopt the work-from-home approach during the pandemic 😷, remote work tools become more integral to work environments. Developed by the modern tech titan, Microsoft Inc, MS Teams is a team collaboration platform that’s designed for enterprise use.
It offers a multitude of features that are essential to a remote office environment, such as document sharing, video conferencing, built-in instant messaging, and document collaboration features. Compared to its competitors such as Slack and Facebook Workplace, MS Teams tends to stand out because of its seamless native integration with the Microsoft ecosystem.

While MS Teams is a great tool for coordinating team efforts, there are a number of quirks with the platform, as pointed out by many users. One such complaint is that users can sometimes miss notifications from the mobile app.
In today’s fast-paced work environments, I think we can all relate to how serious it can be to miss out on important notifications 😫. So, by having the Teams mobile app, ideally, you should be receiving notifications instantly even if you’re away from your desktop. Nonetheless, this isn’t always the case, as users find these mobile notifications often get delayed or don’t show up at all!
However, especially considering the MS Teams’ settings UI isn’t the most intuitive, it can get slightly frustrating trying to navigate the endless sea of configuration menus and privacy settings. You might also miss an important setting that has been hidden at the bottom of a page or concealed inconspicuously in a corner of the UI. In a nutshell, it can get really annoying trying to figure out what’s really wrong with the settings.

Therefore, we at Pletaura have compiled this list of 17 fixes just for you 😉! In this article, we’ll look at the various possible causes and fixes for when the Microsoft Teams mobile notifications are not working on your iOS or Android device.
Without further ado, let’s get into the fixes!
Note: For more suitable fixes for Microsoft Teams desktop notification issues (on Windows & macOS), we highly suggest checking out our other guide here.
Table of Contents
- Temporarily Sign Out of MS Teams
- Do a Hard Reboot on Your Device
- Ensure That Silent Mode is Disabled
- Ensure That “Do Not Disturb” Mode is Disabled
- Disable Battery Saving Mode
- Enable Auto-Start for MS Teams
- Install Pending Updates for MS Teams
- Enable the Device Notification Settings
- Check the MS Teams App Notification Settings
- Check the ‘Block Notification’ Rules in MS Teams
- Customize the Channel Notifications
- Enable Background Data Usage for MS Teams
- Switch Between Mobile Data and Wi-Fi or Turn Off “Low Data Mode”
- Clear the MS Teams App Cache and Data
- Reinstall MS Teams
- Free Up Internal Storage Space on Your Device
- Report the Notifications Issue to Microsoft Support
1. Temporarily Sign Out of MS Teams
In this step, we’re starting off with a simple fix by signing out of MS Teams and then signing back in again.
While this may seem like a pointless step to some, re-logging in is a quick and easy fix, which has been proven effective in resolving various irregular app glitches for many users. Plus, through this, you can ensure your account login information is refreshed and your custom configurations are synced with the device’s settings.
That being said, here’s how to sign out of your MS Teams account:
- First, open the MS Teams mobile app.
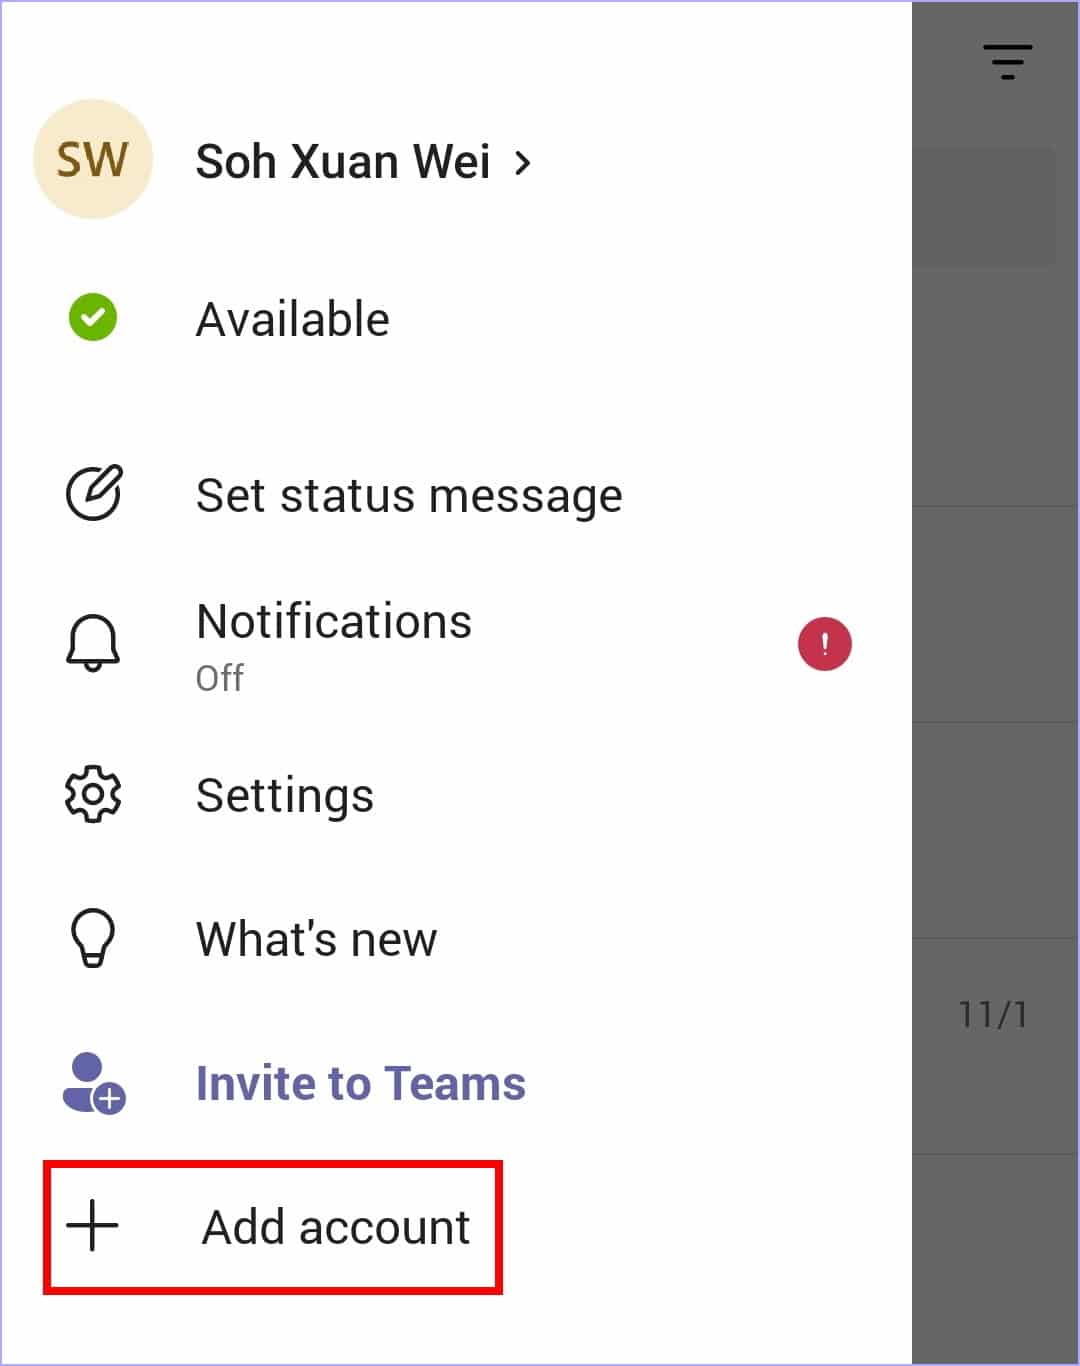
- On the top-left corner of the application, tap on your profile picture. Alternatively, swipe right from the left side of the application
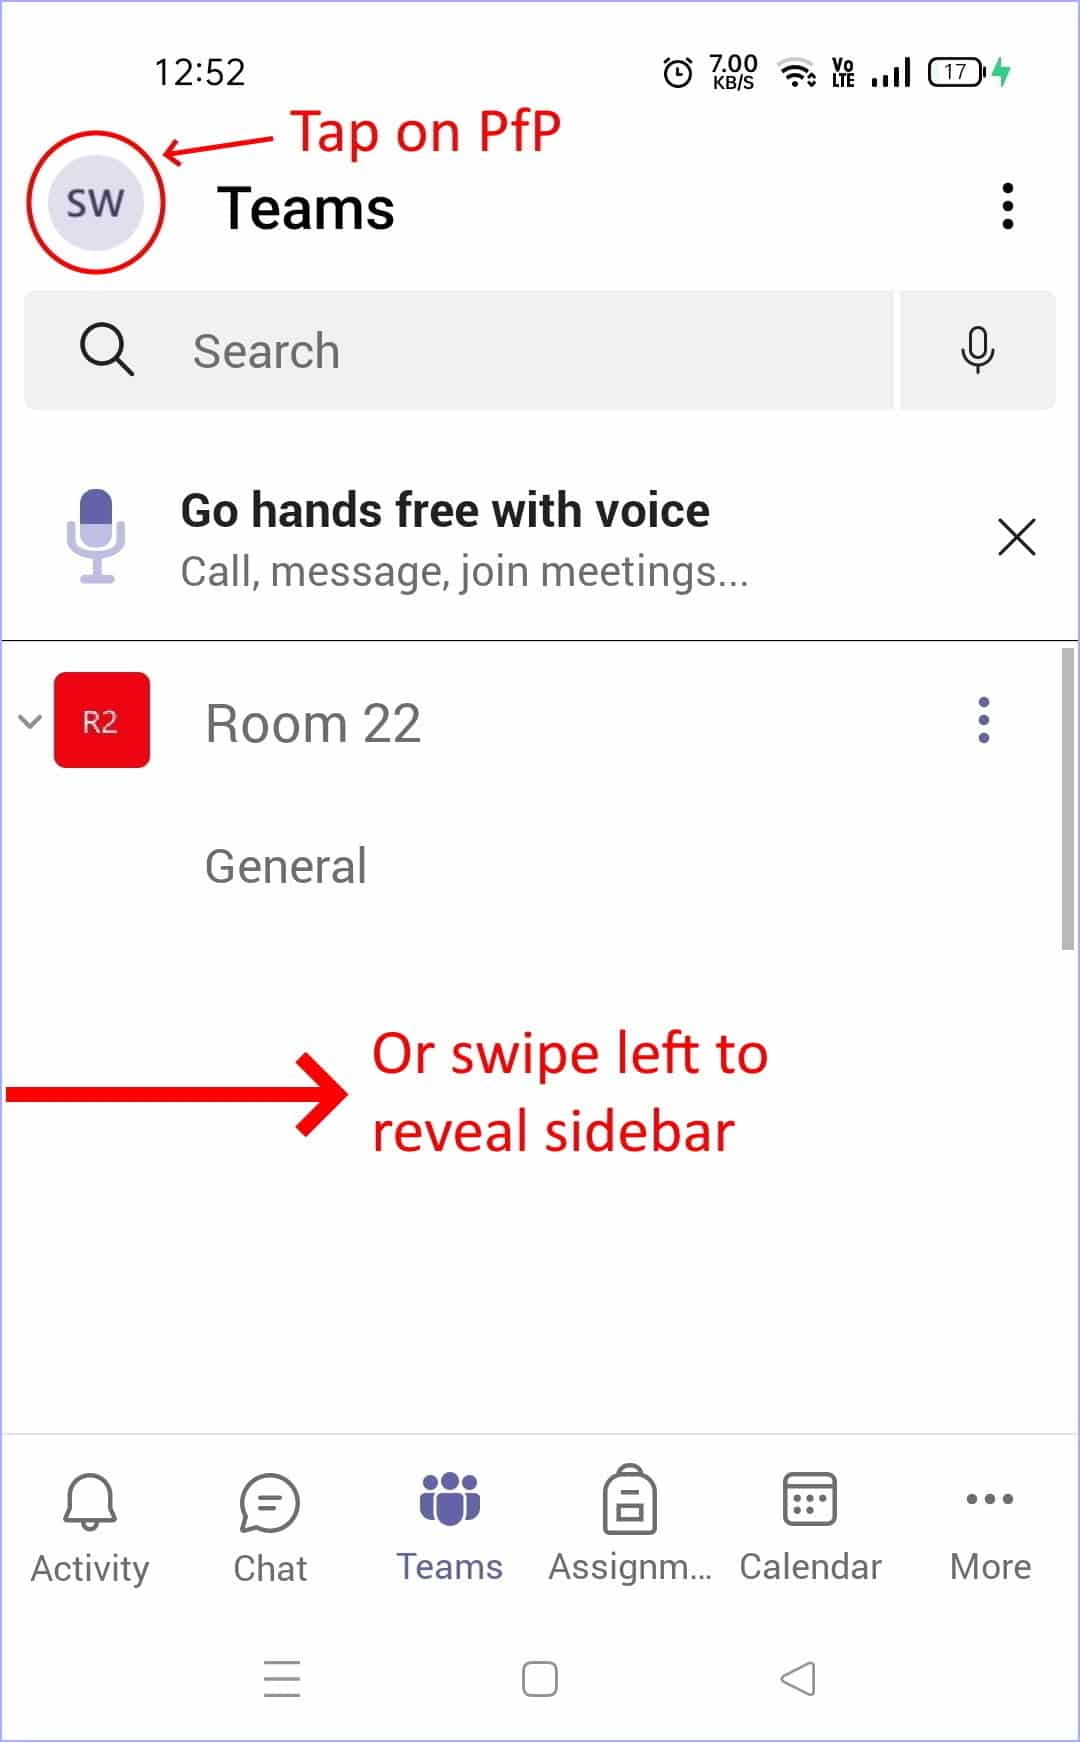
- After that, the sidebar menu should appear. Tap on ⚙️Settings.
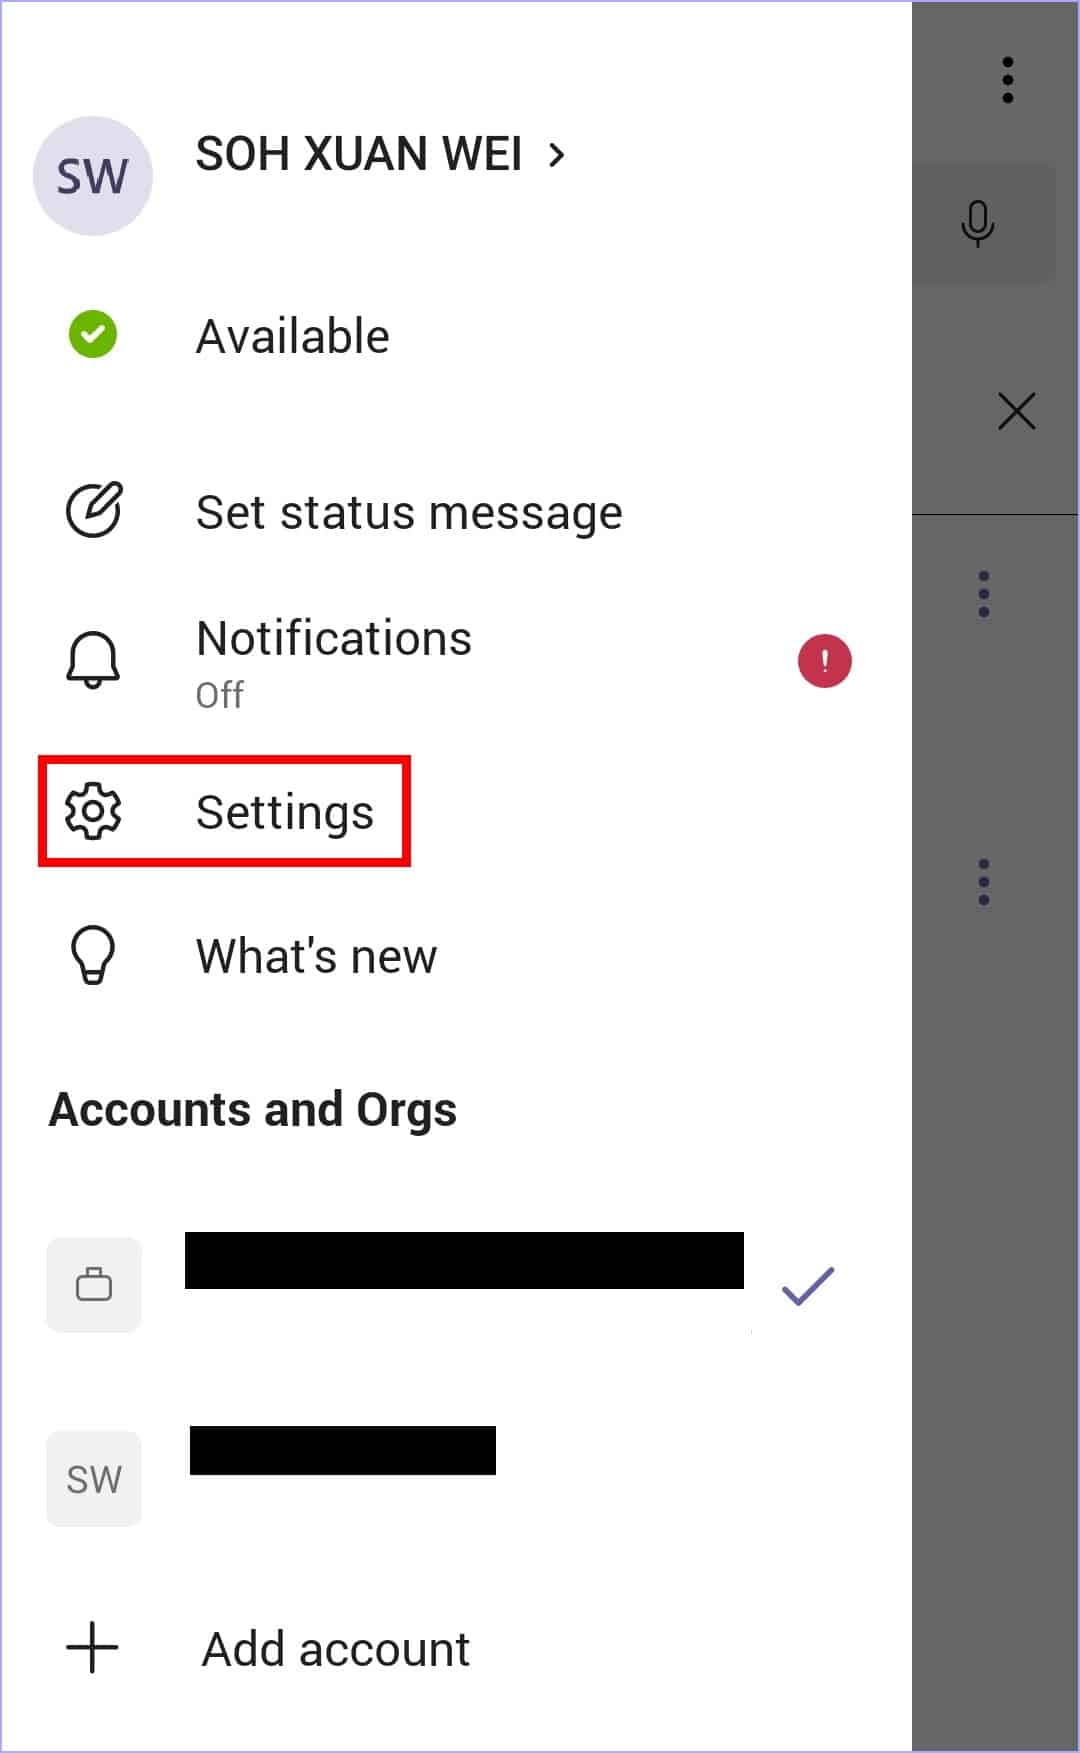
- Next, in the list of Settings, scroll down until you see an option to Sign out.
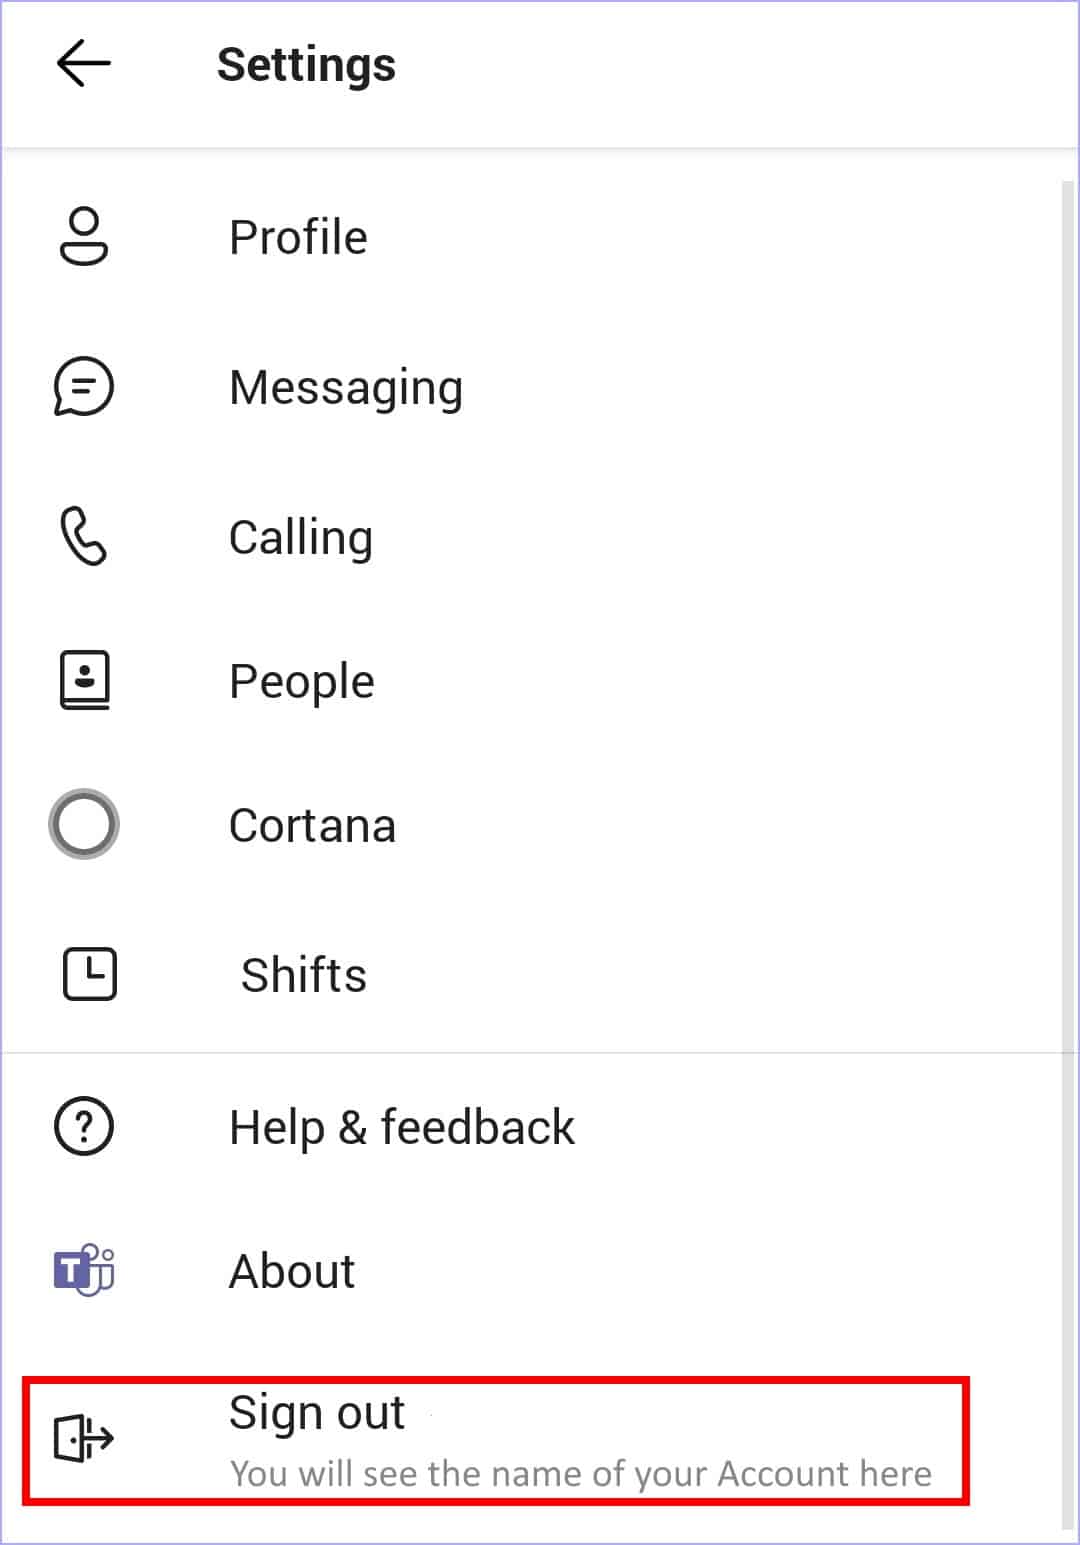
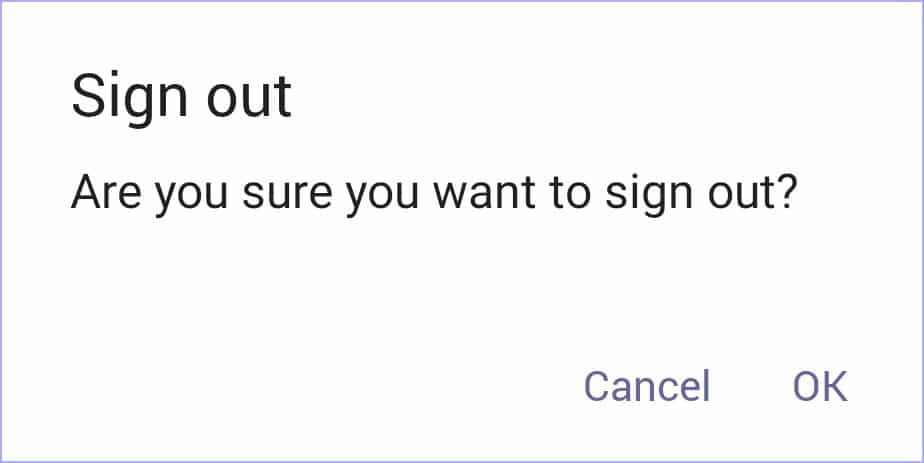
- Finally, select the option to Sign out and tap OK confirm when prompted.
- You are now temporarily signed out of MS Teams. You can sign back in using the Add Account option located in the sidebar.
- Depending on your privacy settings, your previously signed-out account may or may not show up in the sign-in page. If it doesn’t show up, you will need to re-enter your account credentials to sign-in again.

2. Do a Hard Reboot on Your Device
Another quick way to resolve glitches on your mobile device is to give it a quick reboot. This can often fix any temporary glitches with the device’s processes such as the push notification service which can lead to missing app notifications.
Rebooting the device also shuts down any background processes that might be inhibiting the notifications from the MS Teams app. From there, you might notice that your device performs better after a hard reboot too!
Similar to the previous step, this is a relatively simple fix to rule out the possibility of any temporary glitches. If it works, it’ll save us a considerable amount of time instead of going on a wild goose chase. 😁
All things considered, here’s how to conduct a hard reboot on your mobile device:
For iOS
- First, hold down the power button for a few seconds.
- Next, slide the power off switch. 📴
- Then, wait for your device to shut down.
- Finally, turn on your device again, by pressing and holding the same power button.

For Android
- First, firmly hold down on the Power Button for a few seconds.
- Next, tap on Restart when prompted.

Note: Depending on your device’s specifications, the restarting process may take anywhere from 30 seconds to 5 minutes.
3. Ensure That Silent Mode is Disabled
Silent mode 🤫 is a feature that can be found in most modern-day mobile devices, Android and iOS alike. For readers who aren’t already familiar with this feature, silent mode does not block notifications from reaching you, but it instead mutes the sound of all incoming notifications.
Granted, it doesn’t directly interfere with MS Teams’ notifications, but it is still a potential cause for the notifications sound issue 🤔.
Thus, in this step, we will make sure that silent mode is turned off on your iOS or Android device:
For iOS
Push the Silent/Ringer switch towards the screen till it clicks. If the orange line is visible from the side, the device is still in Silent mode.

For Android
- First, press the Volume Up button at the side of your phone and make sure that silent mode is not enabled.
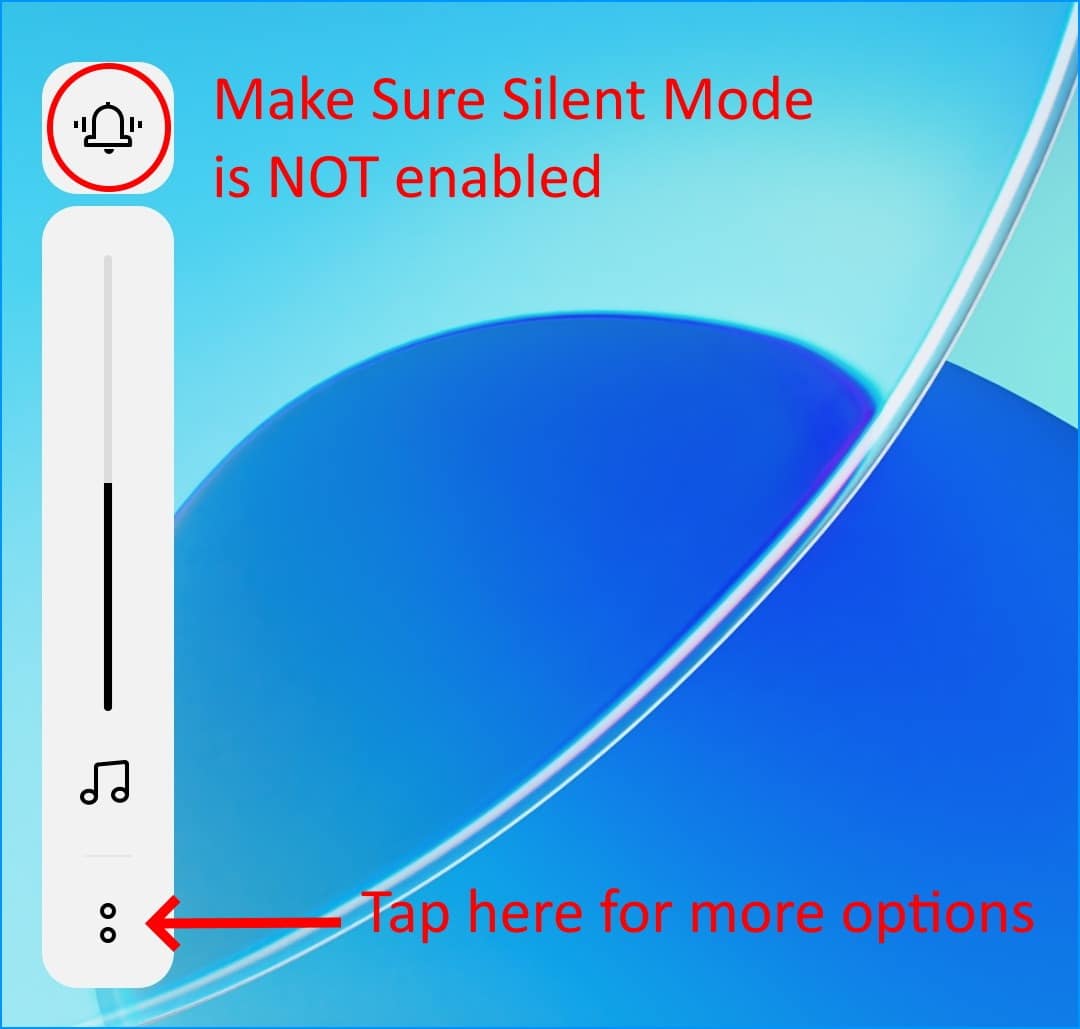
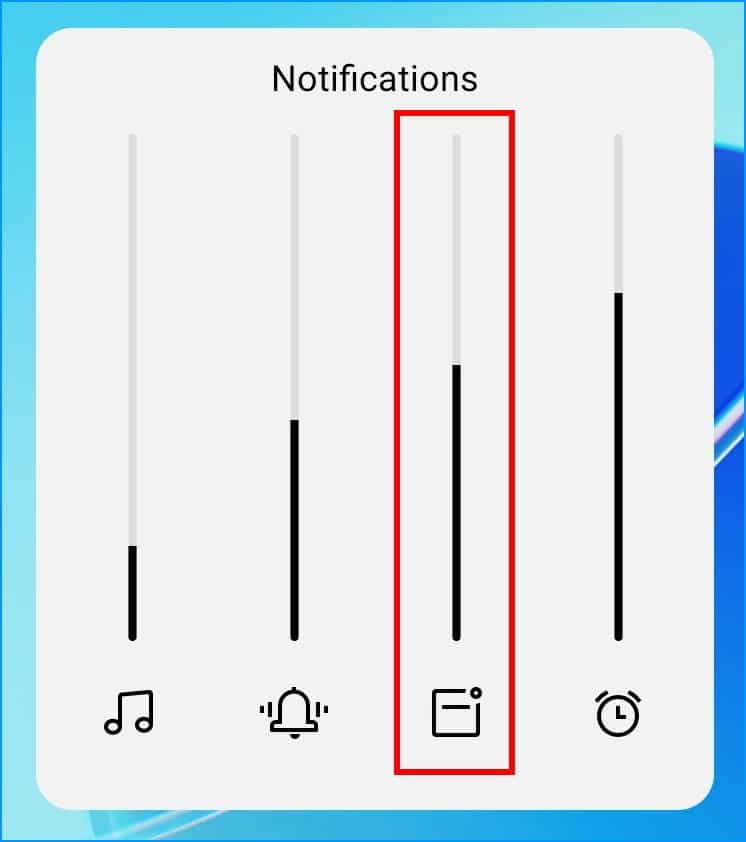
- Next, expand the menu bar and make sure that the Notification Volume has been set to an audible value.
4. Ensure That “Do Not Disturb” Mode is Disabled
Similar to the silent mode feature discussed earlier, the “Do Not Disturb” mode is another common feature in mobile devices nowadays. This feature is also known as Quiet Time in iOS devices. Essentially, when this feature is enabled, it directly blocks all incoming calls and message notifications so that users don’t see them.
While this feature can be very handy for users who are trying to focus on work 🖥️, or simply need to have some undisturbed alone time 😴, accidentally leaving the “Do Not Disturb” mode / Quiet Time enabled will cause you to miss all notifications. This could include notifications and messages from the MS Teams app as well.
Thus, we can quickly check whether the “Do Not Disturb” mode / Quiet Time has been accidentally left on through the Control Center (iOS) or Status Bar (Android).

5. Disable Battery Saving Mode
Battery Saving Mode 🔋, also known as Battery Saver or Power Saving Mode in some devices, can be toggled on to reduce power consumption in your mobile device. While the battery capacities of mobile products have seen substantial improvements in recent years, Battery Saving Mode is still very much necessary for prolonged periods of mobile device usage without charging.
In most devices, Battery Saving Mode is automatically toggled on when the battery percentage drops to a certain threshold (e.g., 20%, 10%, or 5%). Sometimes, users can also enable Battery Saving Mode and forget to disable it afterwards.
This causes issues with MS Teams’ notifications because Battery Saving Mode essentially limits background app activity to reduce the power consumption in the device. As such, MS Teams won’t be able to refresh to get the latest updates and push notifications from the background.
Thus, in this step, we will take a quick look 👀 to make sure that Battery Saving Mode is not turned on in your device:
For Android
- First, open the Settings app. ⚙️
- Then, select Battery or Battery Optimization.
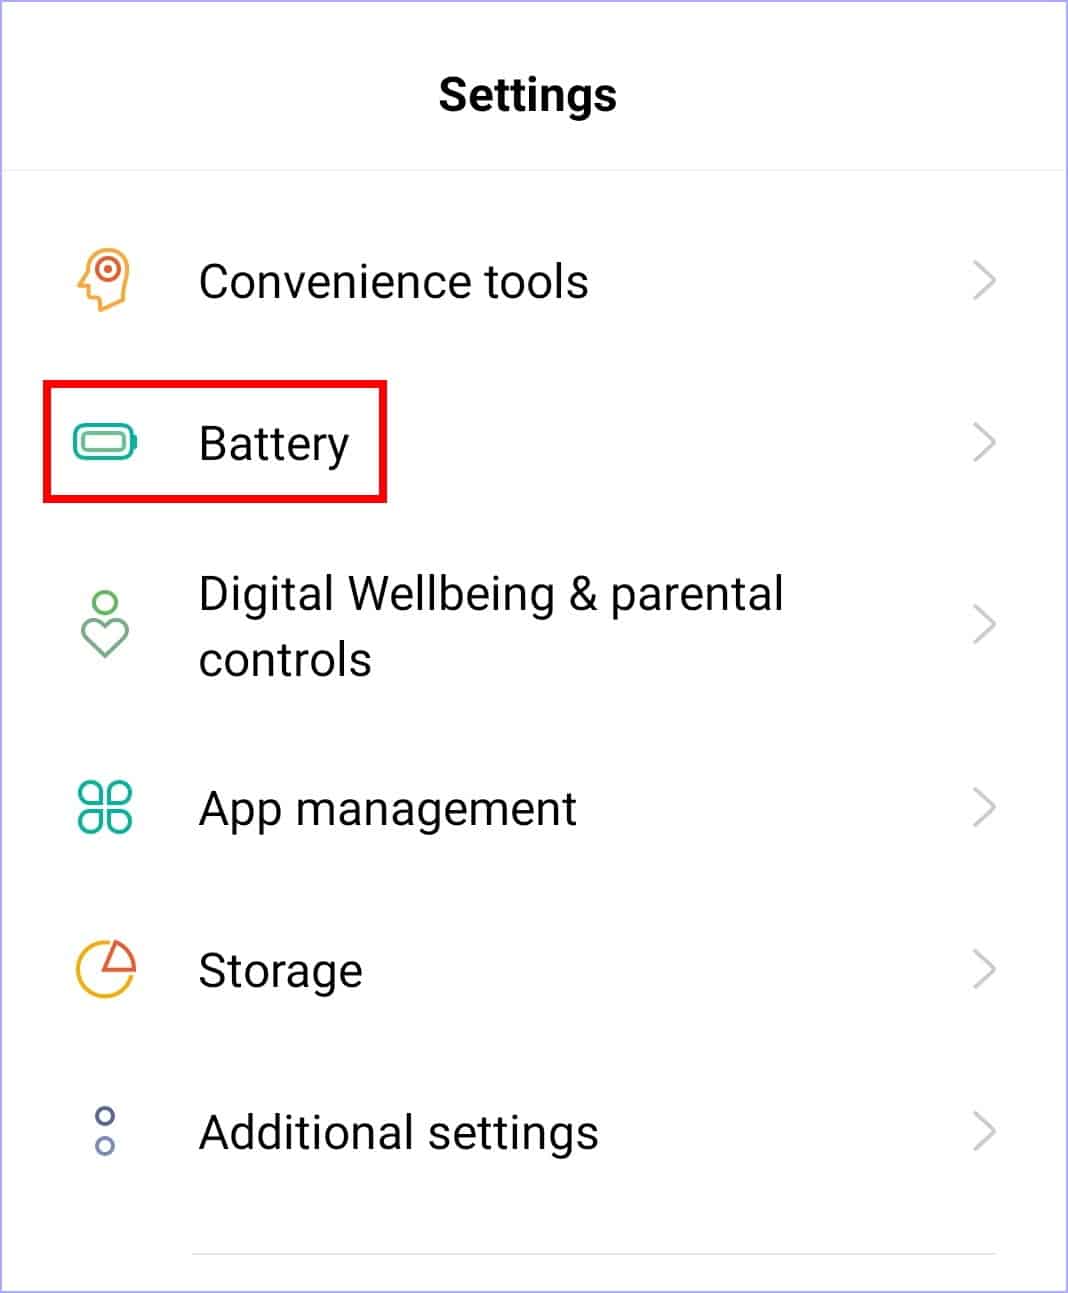
- After that, make sure that Power saving mode is turned off, and tap on App battery management for more options.
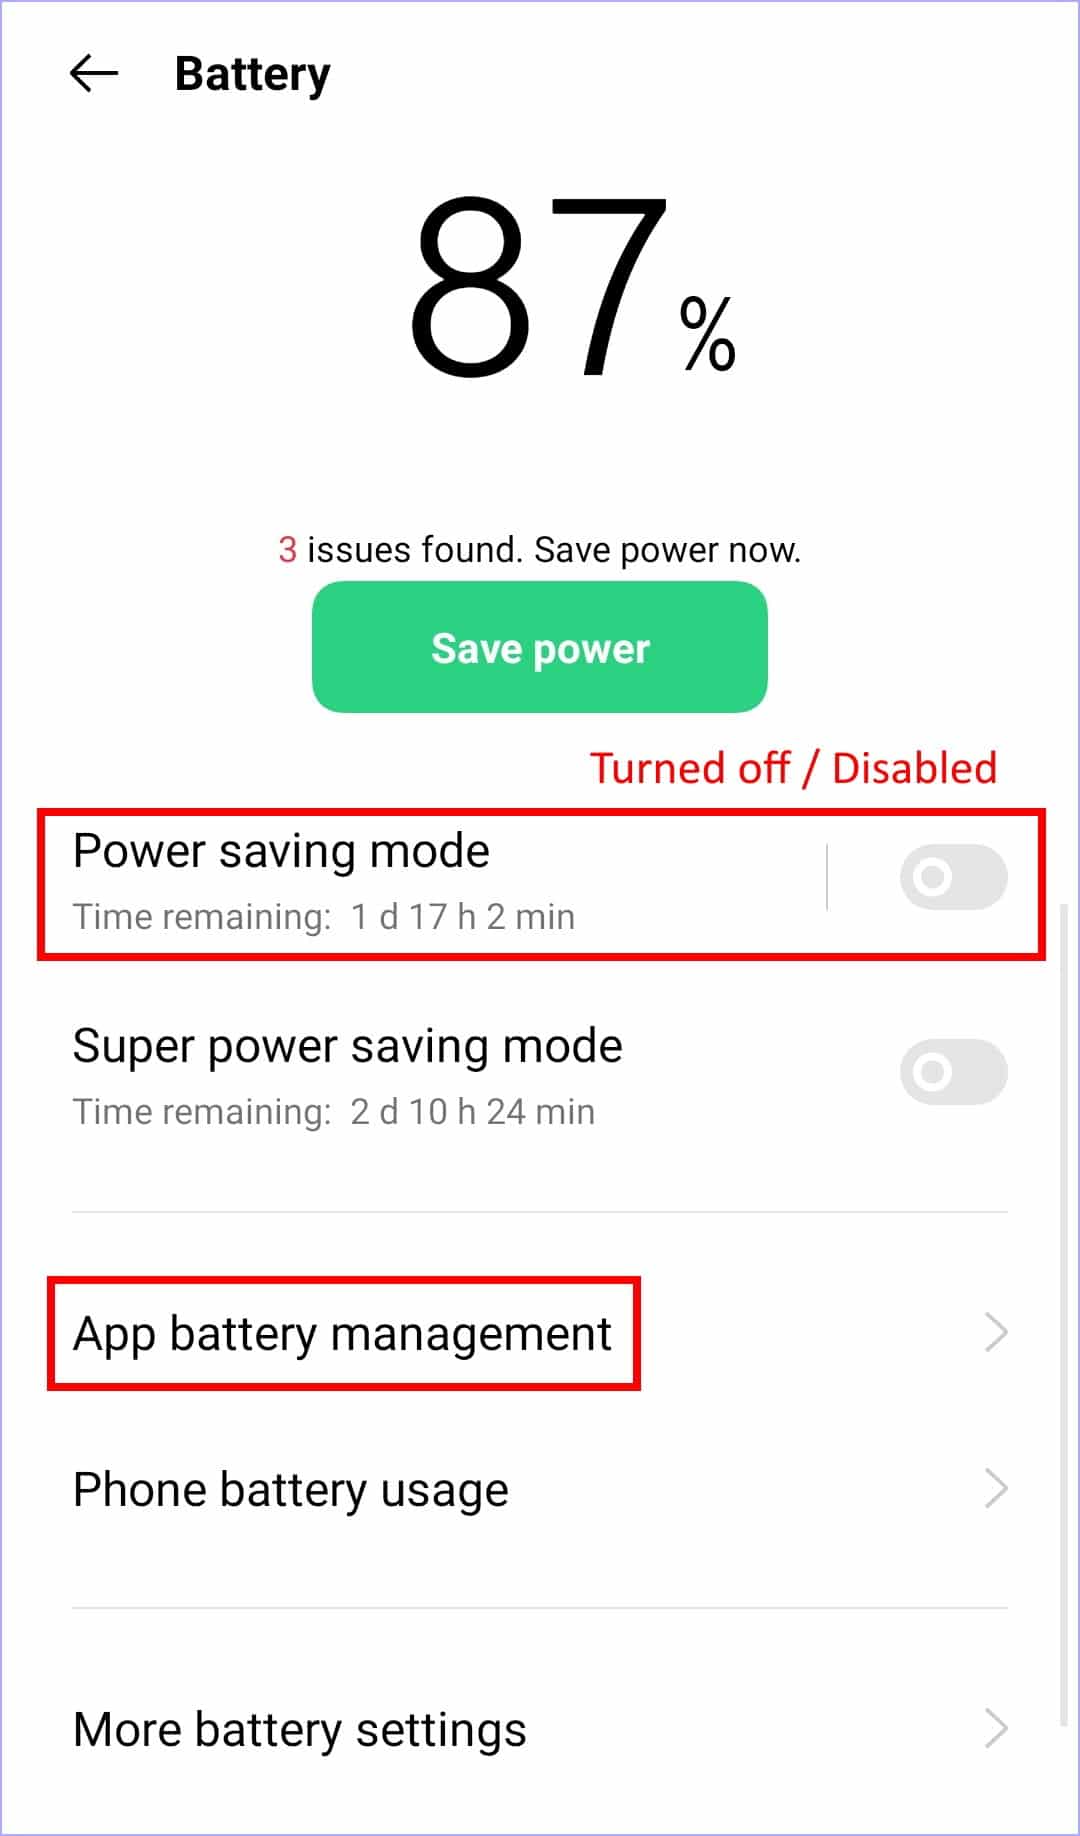
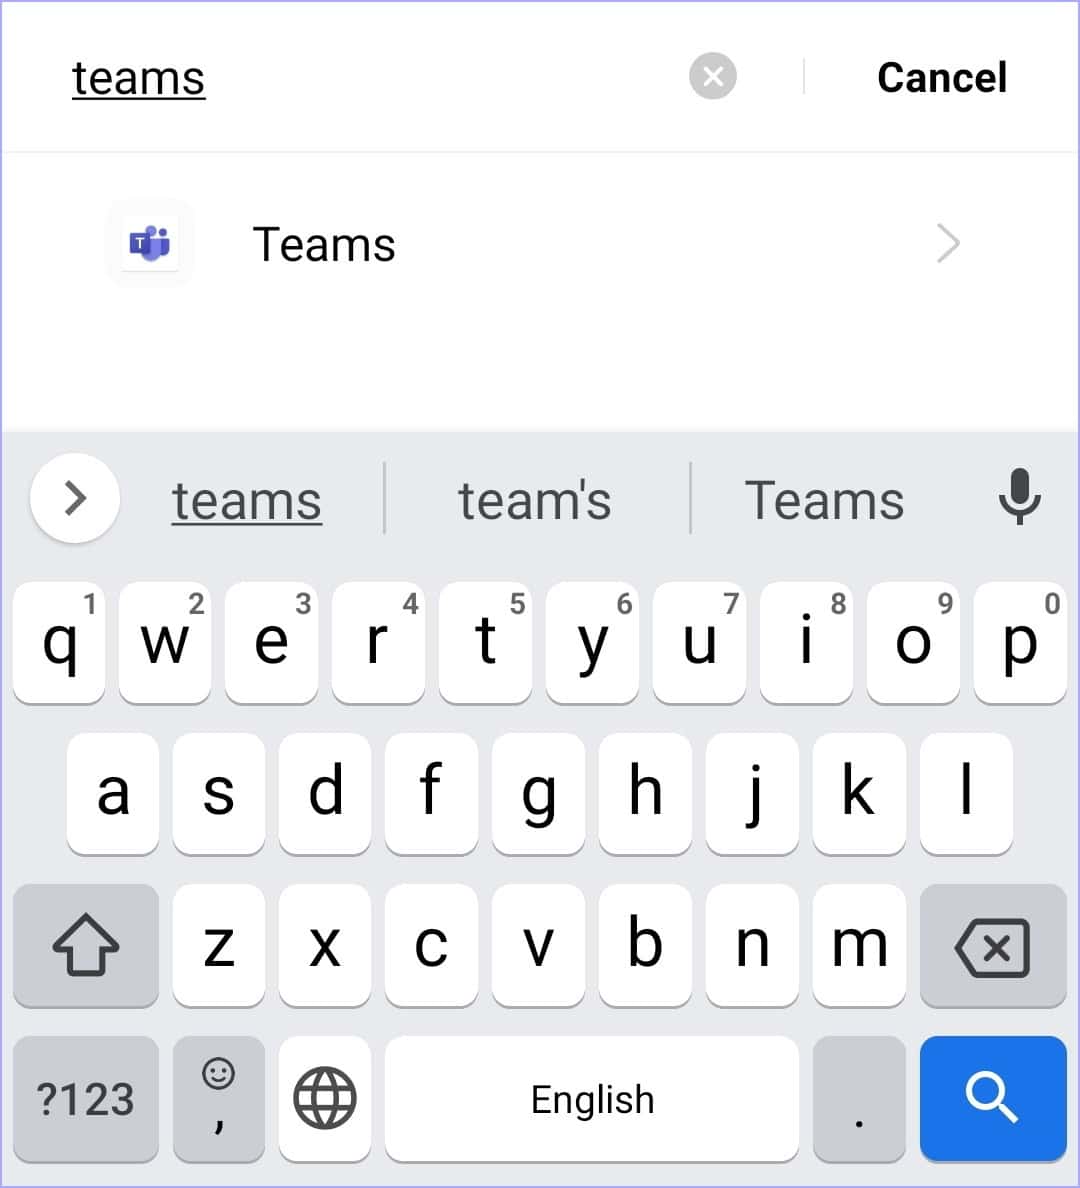
- Next, search for Teams from the list of apps using the search bar. Alternatively, you can scroll through the list to look for MS Teams.
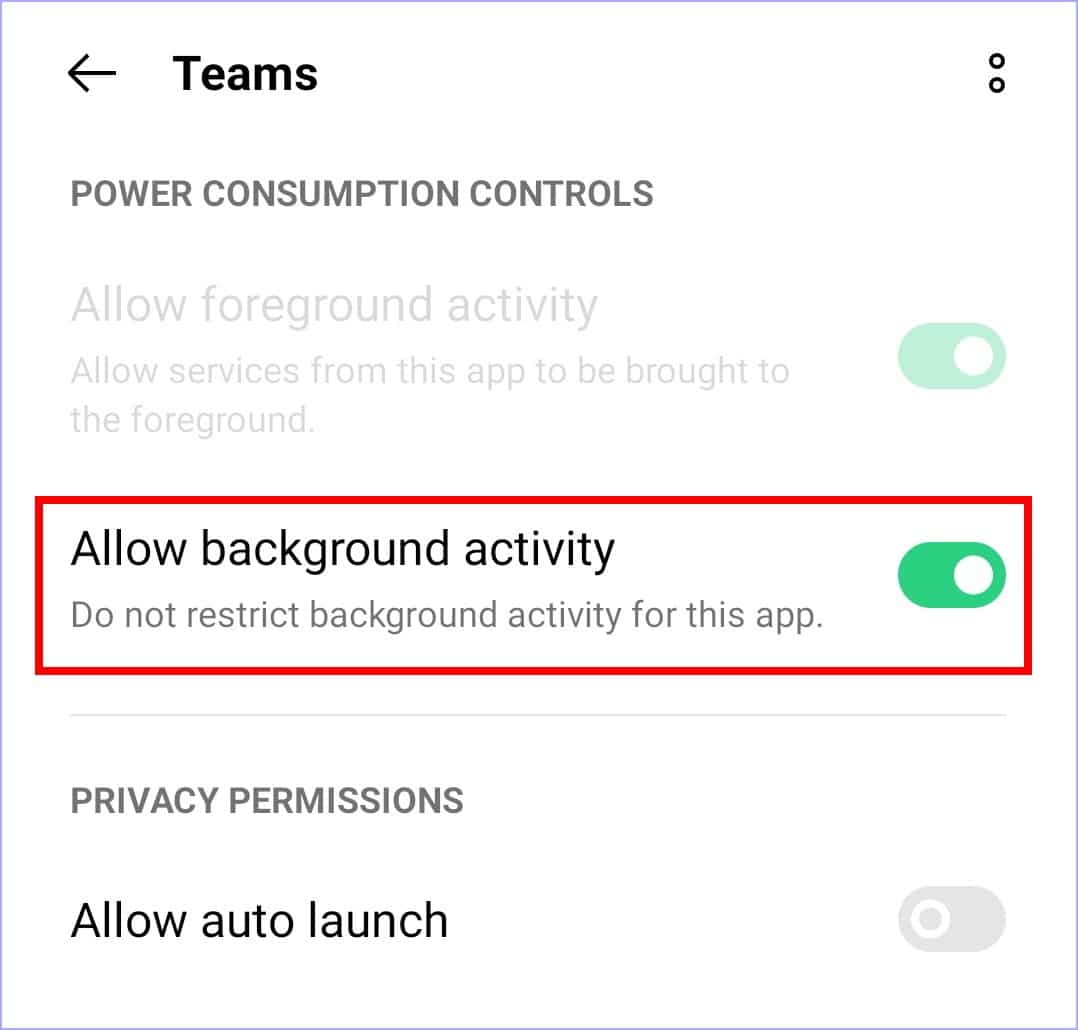
- Finally, turn on the switch next to Allow background activity for the Teams app. Depending on your device’s firmware, you may also disable any battery optimization options for the Teams app.
For iOS
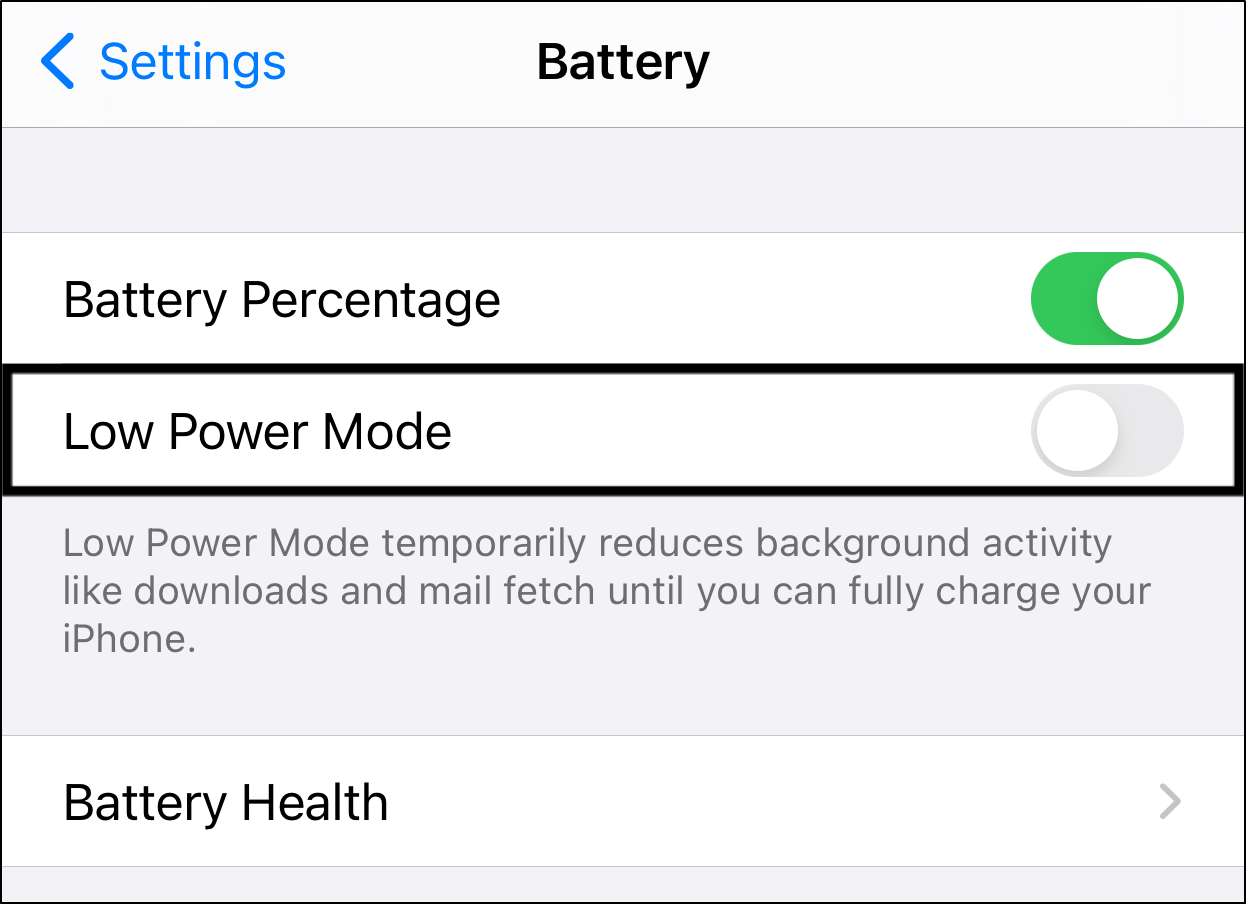
- First, open the Settings ⚙️ app.
- Then, select Battery.
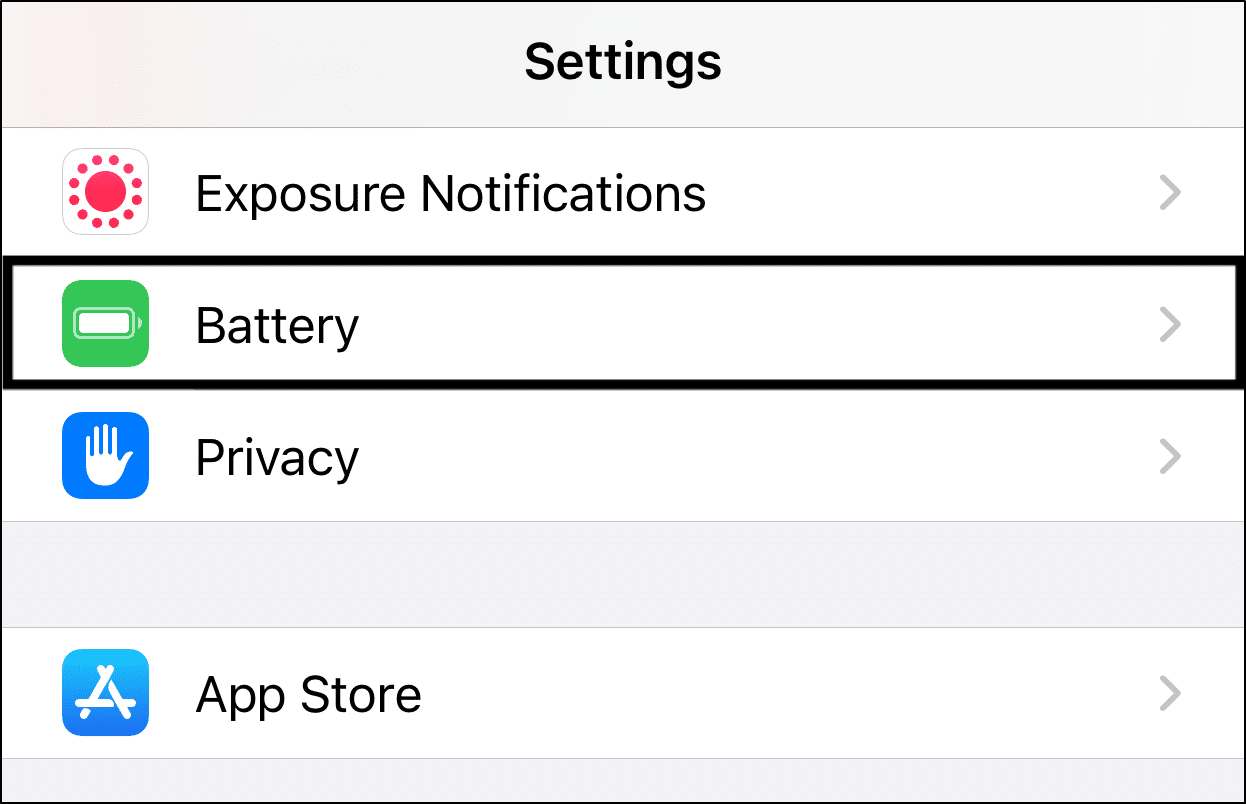
- After that, turn off the switch next to Low Power Mode.
6. Enable Auto-Start for MS Teams
This step is only applicable to specific Android device models:
- Asus Zenfone,
- Huawei P8,
- LeEco,
- Lenovo,
- OnePlus (Android 7.0 and earlier),
- Oppo
The device models listed above have been known to have issues with MS Teams notifications due to the Auto-start option being disabled. Basically, the Auto-start setting allows the application to start up automatically in the background after the device has been rebooted. In the specific device models listed above, you need to enable Auto-start for MS Teams in order for the app to push notifications properly.
Depending on the OS firmware being used, the Auto-start / Auto-launch option can be found in the Auto-start management, Startup Manager, or Battery Management menu of your device.
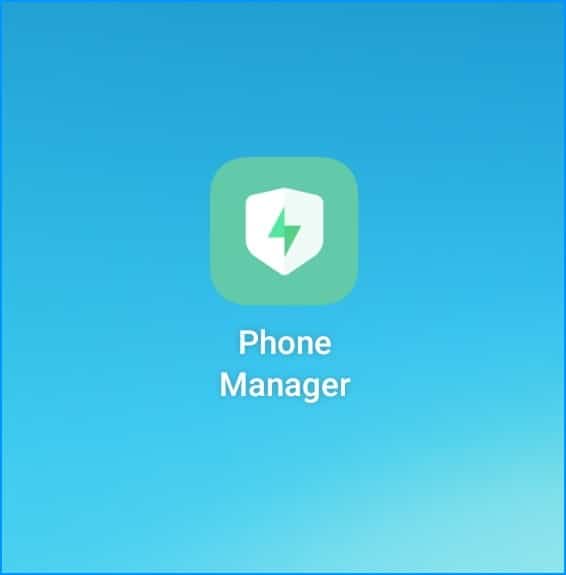
While the steps for configuring the Auto-start option may differ in different models, generally, the option can be found by accessing the Settings ⚙️, (built-in) Phone Manager, or (built-in) App Manager.
Additionally, you may follow the steps listed in step 5, and check if there’s a Auto-start option in the Battery section of Settings ⚙️.
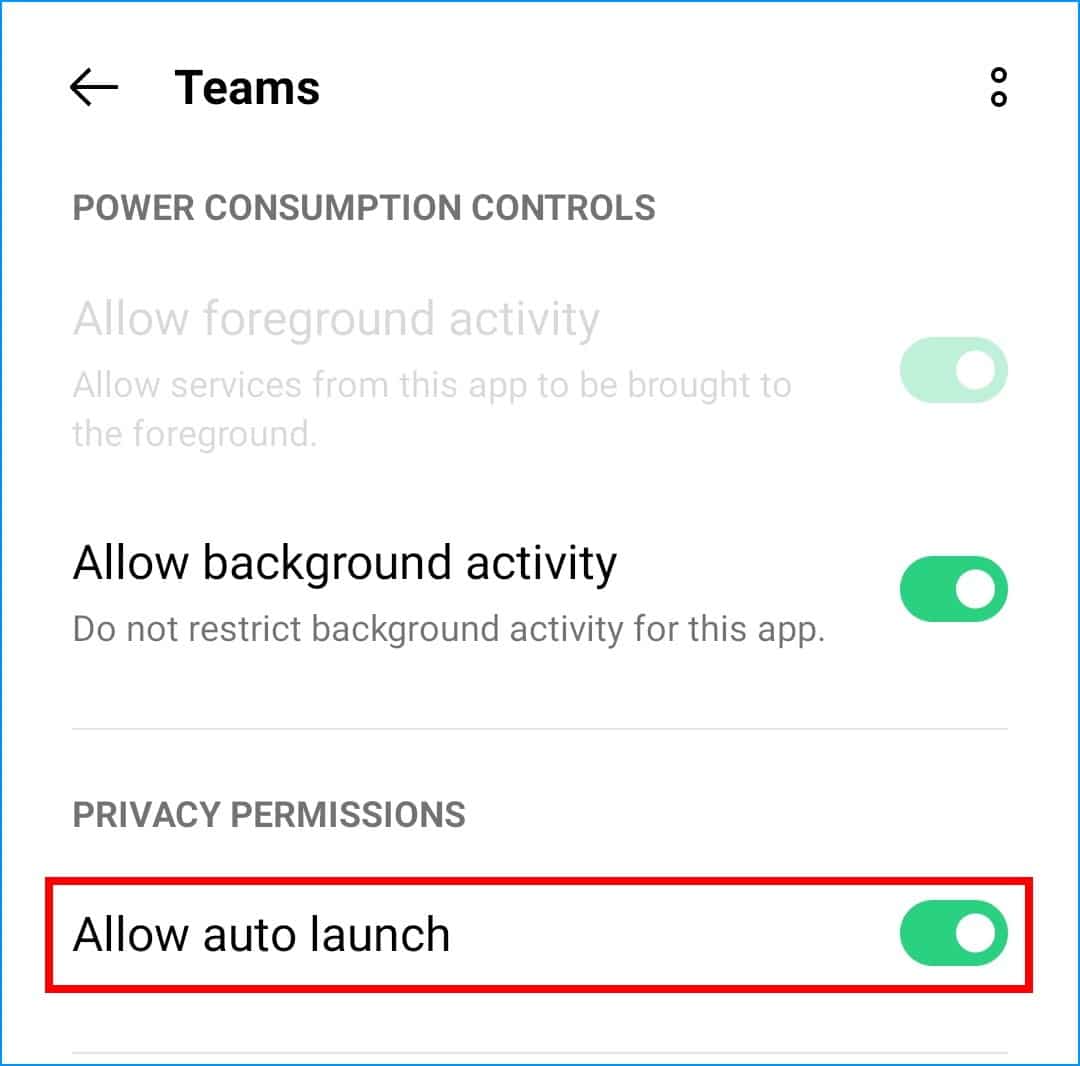
Alternatively, you can check your built-in Phone Manager / App Manager settings menu:
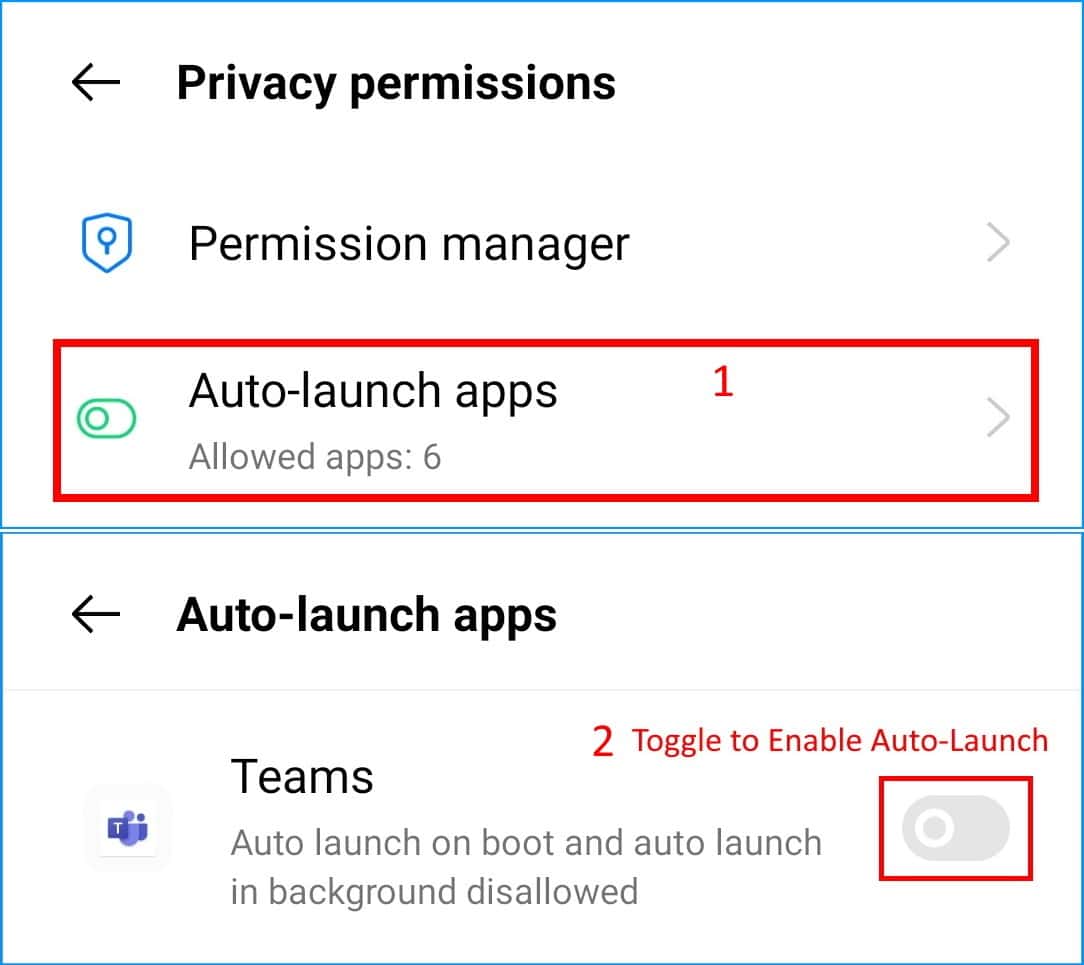
- First, open your Phone Manager / App Manager application.
- Generally, the option can be found under Privacy / Privacy permissions, but depending on your device’s OS firmware, it may be located elsewhere.
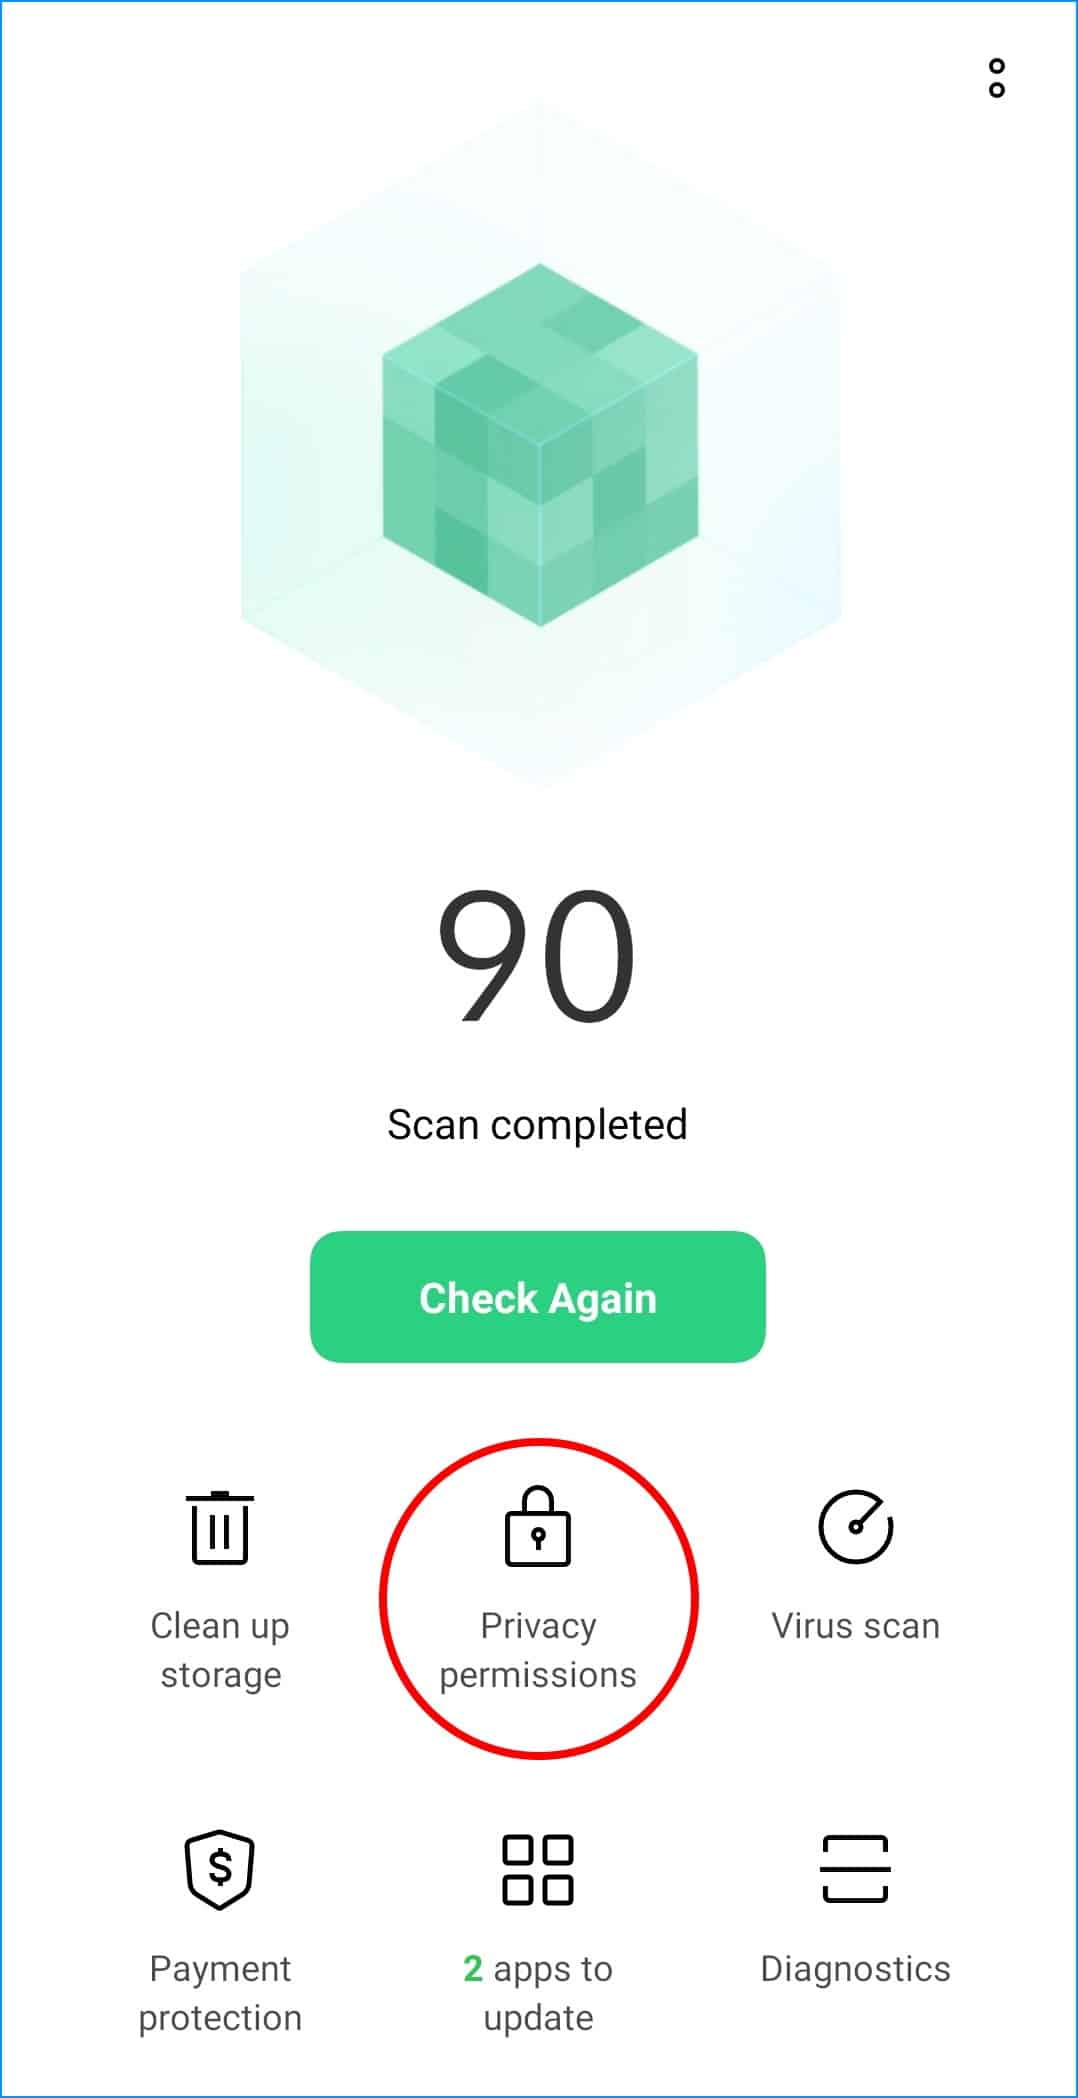
- Finally, locate the Auto-launch option, and make sure that the option is enabled for MS Teams.
7. Install Pending Updates for MS Teams
If you haven’t installed an update for MS Teams for a long time, chances are that the glitch is a result of an outdated app version. App developers regularly publish updates to their apps, which fixes minor glitches and bugs, on top of making incremental improvements to the app. 👨💻
There is also the possibility that the notifications problem only exists on the version of the MS Teams app that is installed on your device. Thus, in this case, installing an update for MS Teams on your device may fix the problem of notifications not working.
Therefore, to install updates to the MS Teams Android/iOS app:
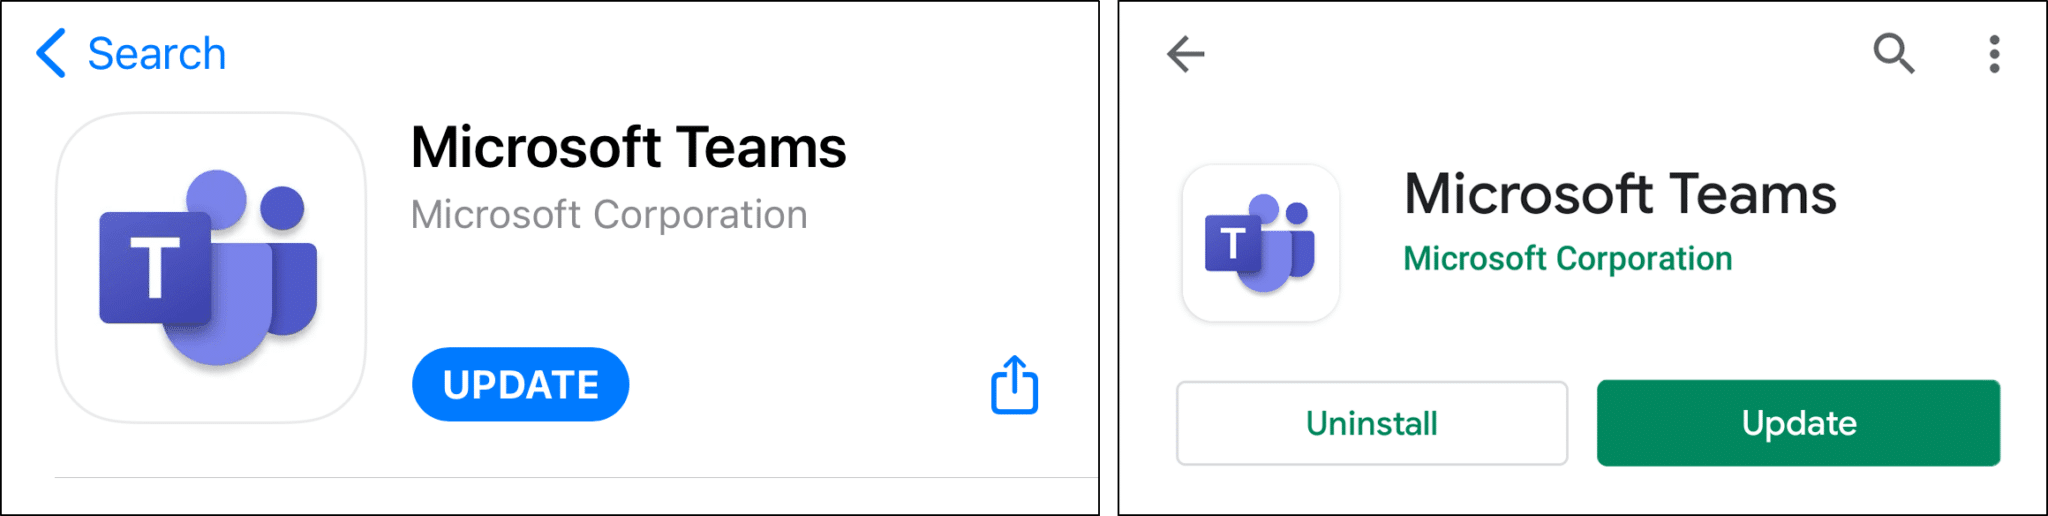
- First, open the App Store (iOS) or the Google Play Store (Android).
- Next, search for MS Teams. Alternatively, here are links to the Teams app page on the App Store and Play Store.
- Finally, tap the Update button if updates are available.
8. Enable the Device Notification Settings
There are a set of controls for the Teams app notifications within your mobile device’s system settings. Typically, these settings need to be enabled before you’re able to continue customizing them through the in-app settings in the following fixes.
Besides that, these settings are used to customize how your incoming Teams app notifications appear, their sounds, etc. Overall, this could be an area of misconfigured settings, which can prevent your incoming Teams notifications.
That being said, the following are steps to enable the notification settings within the system settings:
For iOS
- First, open the Settings app ⚙️.
- Next, scroll down and select Teams. Tap on it to reveal more options.
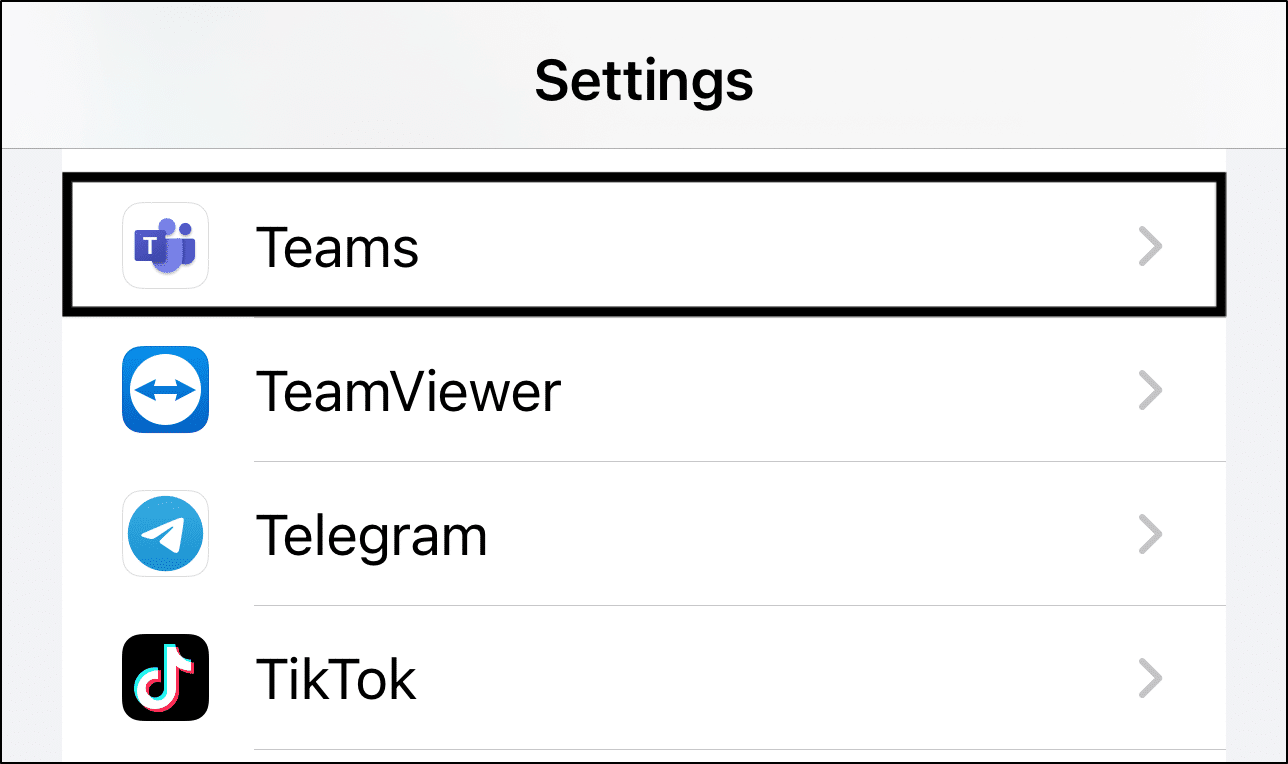
- Then, tap on Notifications.
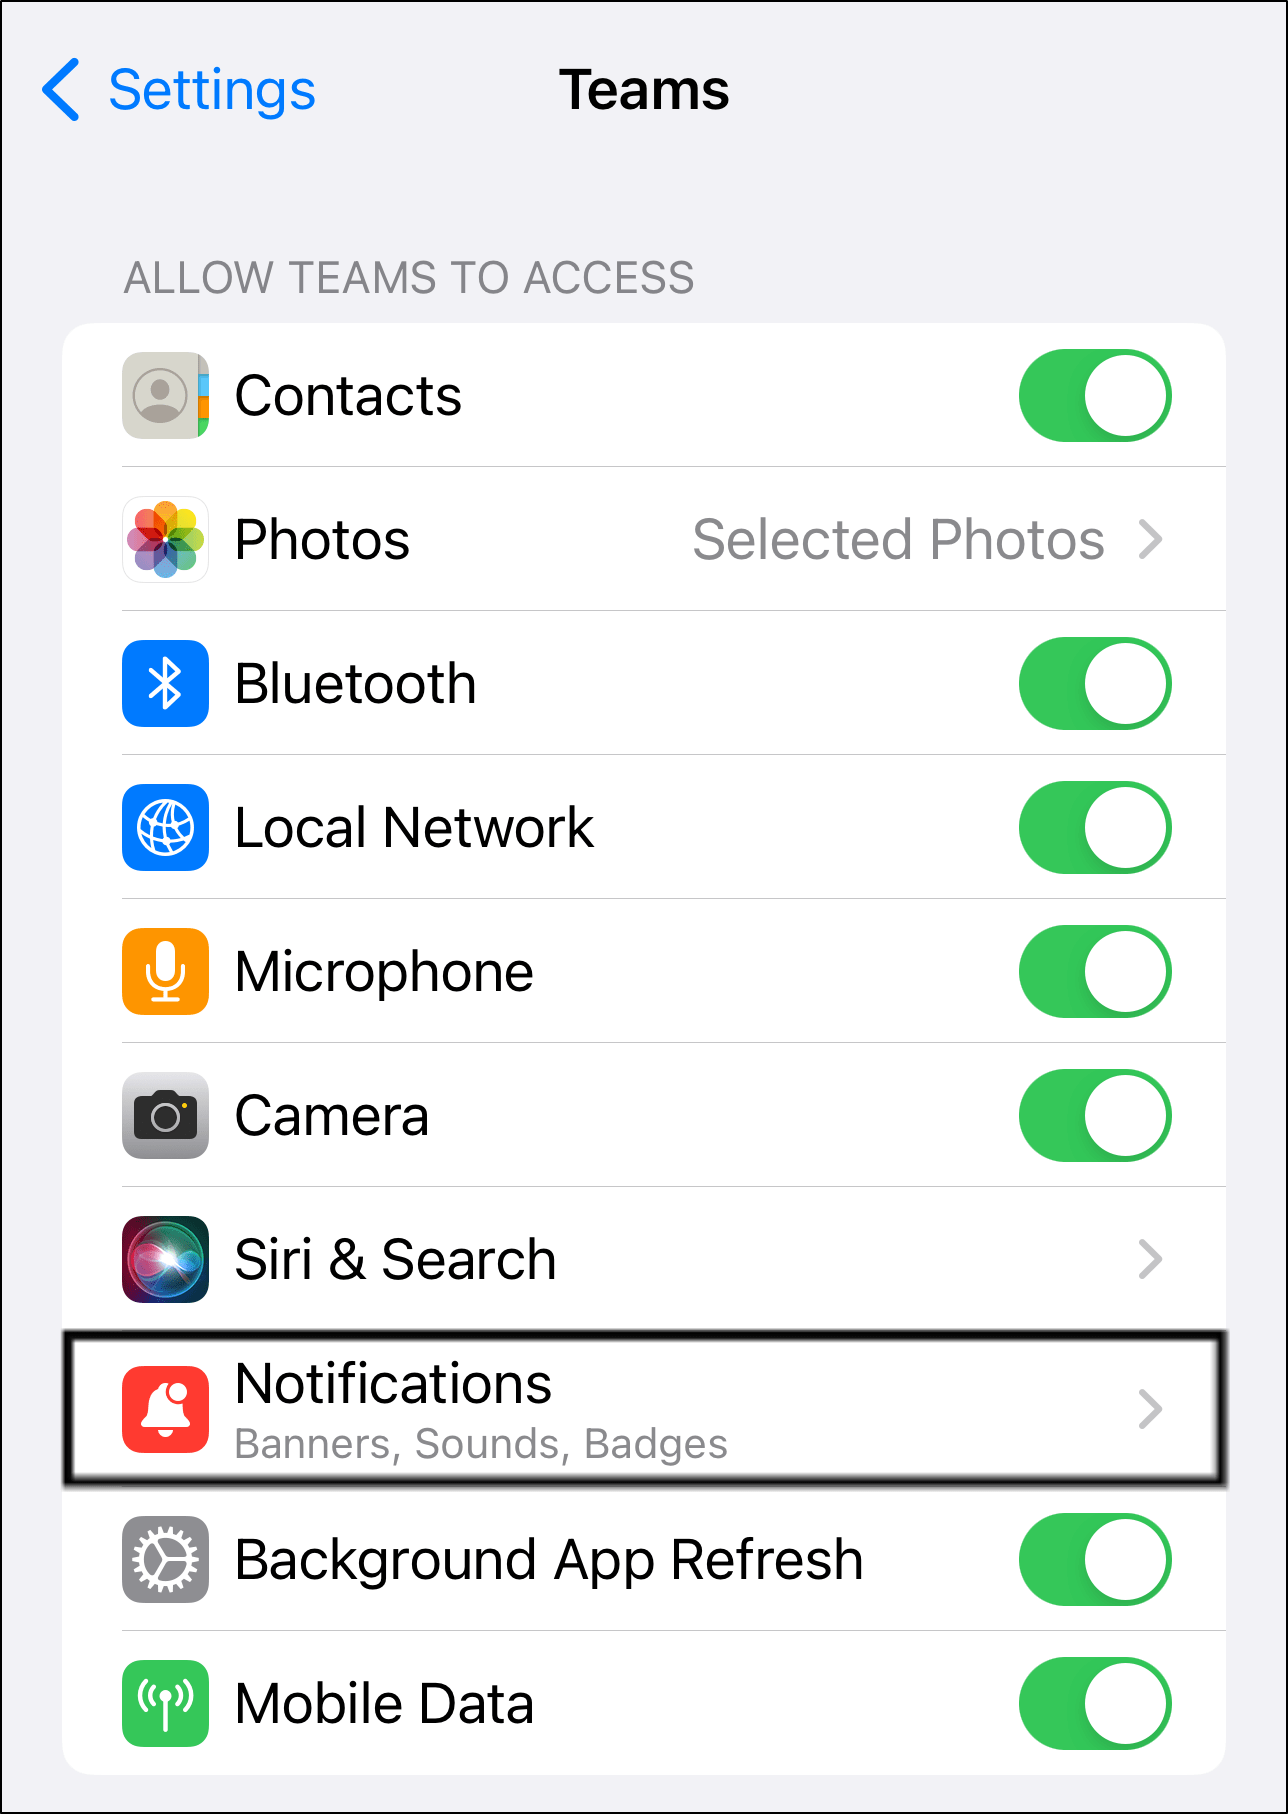
- We recommend switching off Allow Notifications, waiting about a minute, and turning it back on again to refresh this setting.

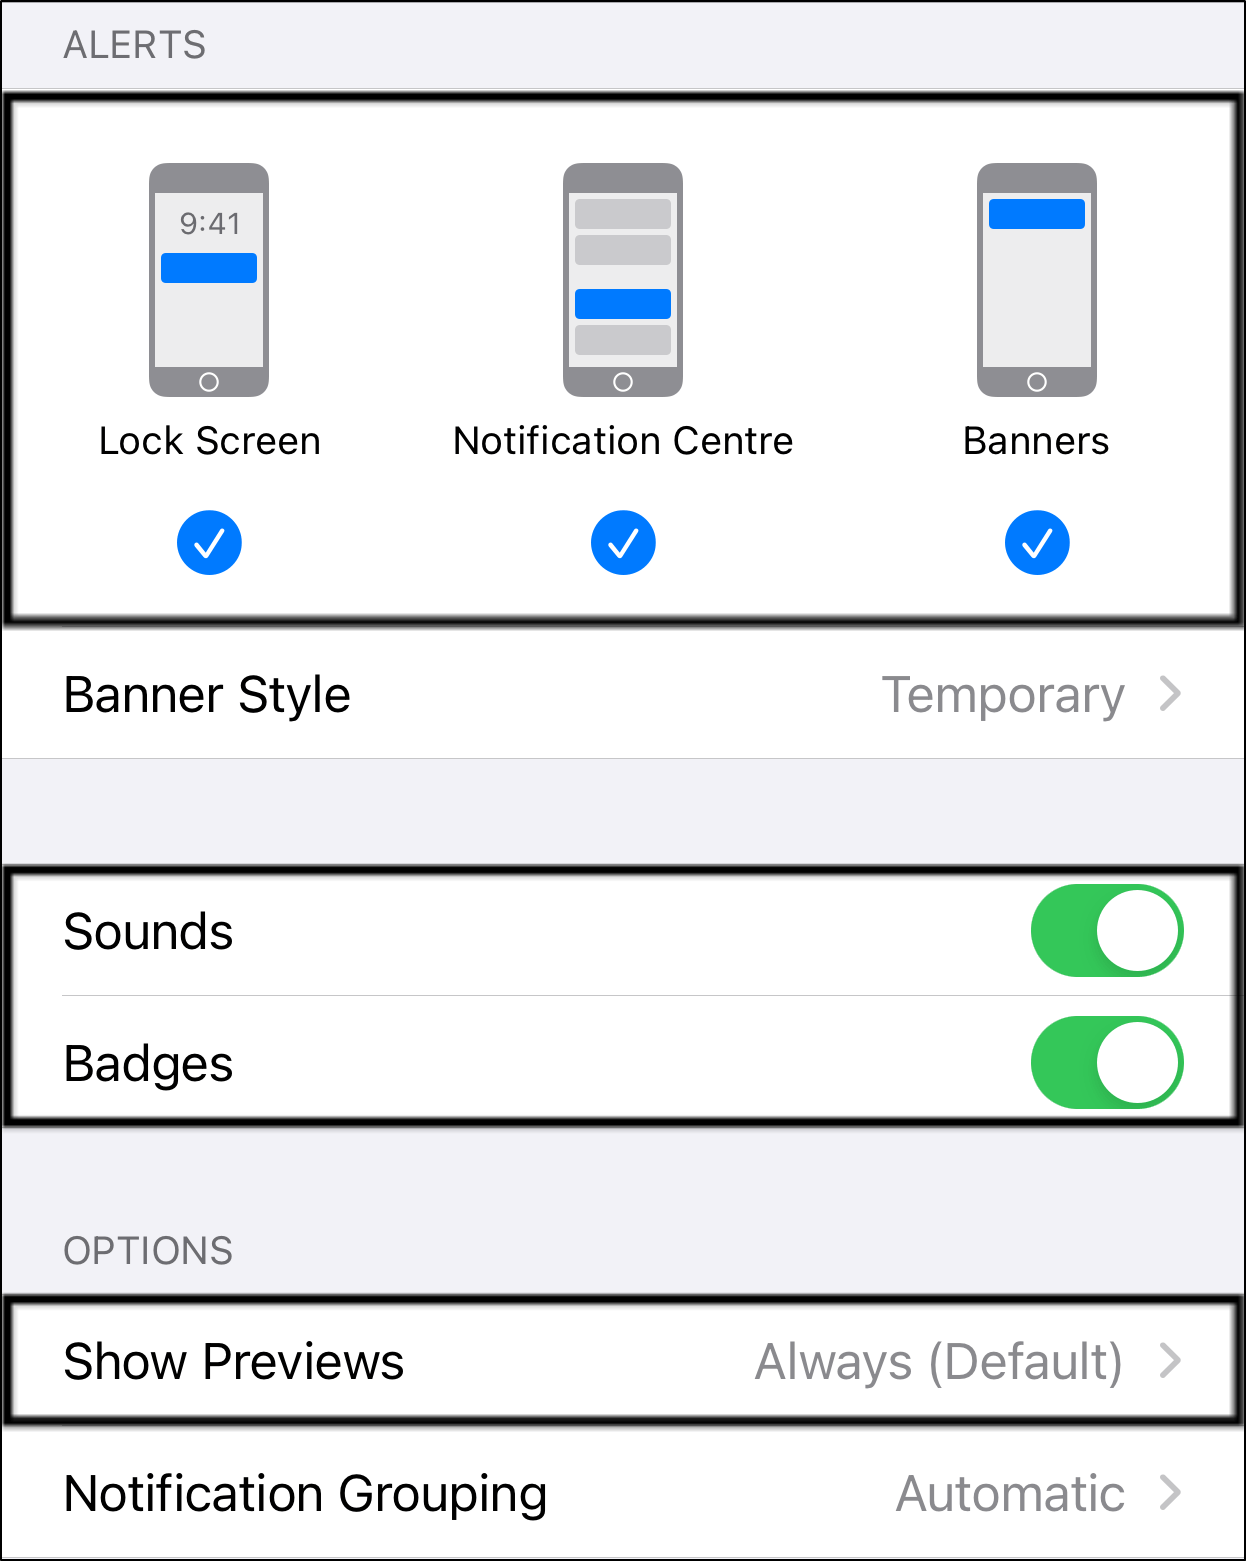
- After that, under Alerts, tick all the alert options (i.e. Lock Screen, Notification Centre, Banners).
- Also, ensure that Sounds and Badges are switched on, and Show Previews is set to Always.
For Android
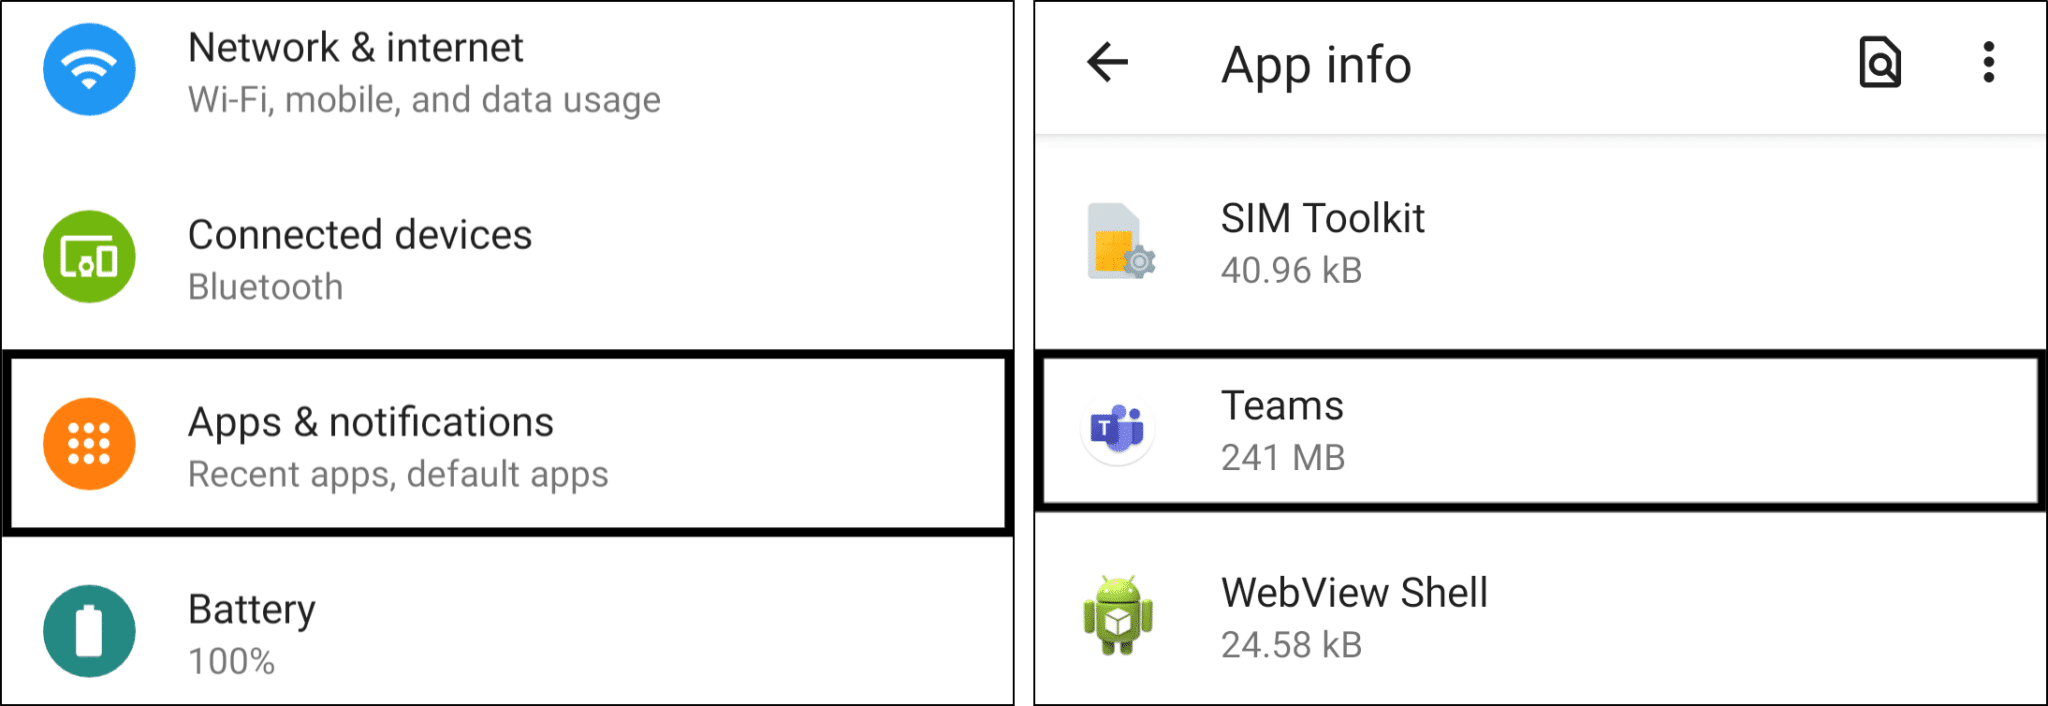
- First, open your Settings app ⚙️.
- Then, go to Apps & notifications or App Management.
- Next, select Teams from the list of apps. (usually listed alphabetically)
- After that, select Manage Notifications or Notifications.
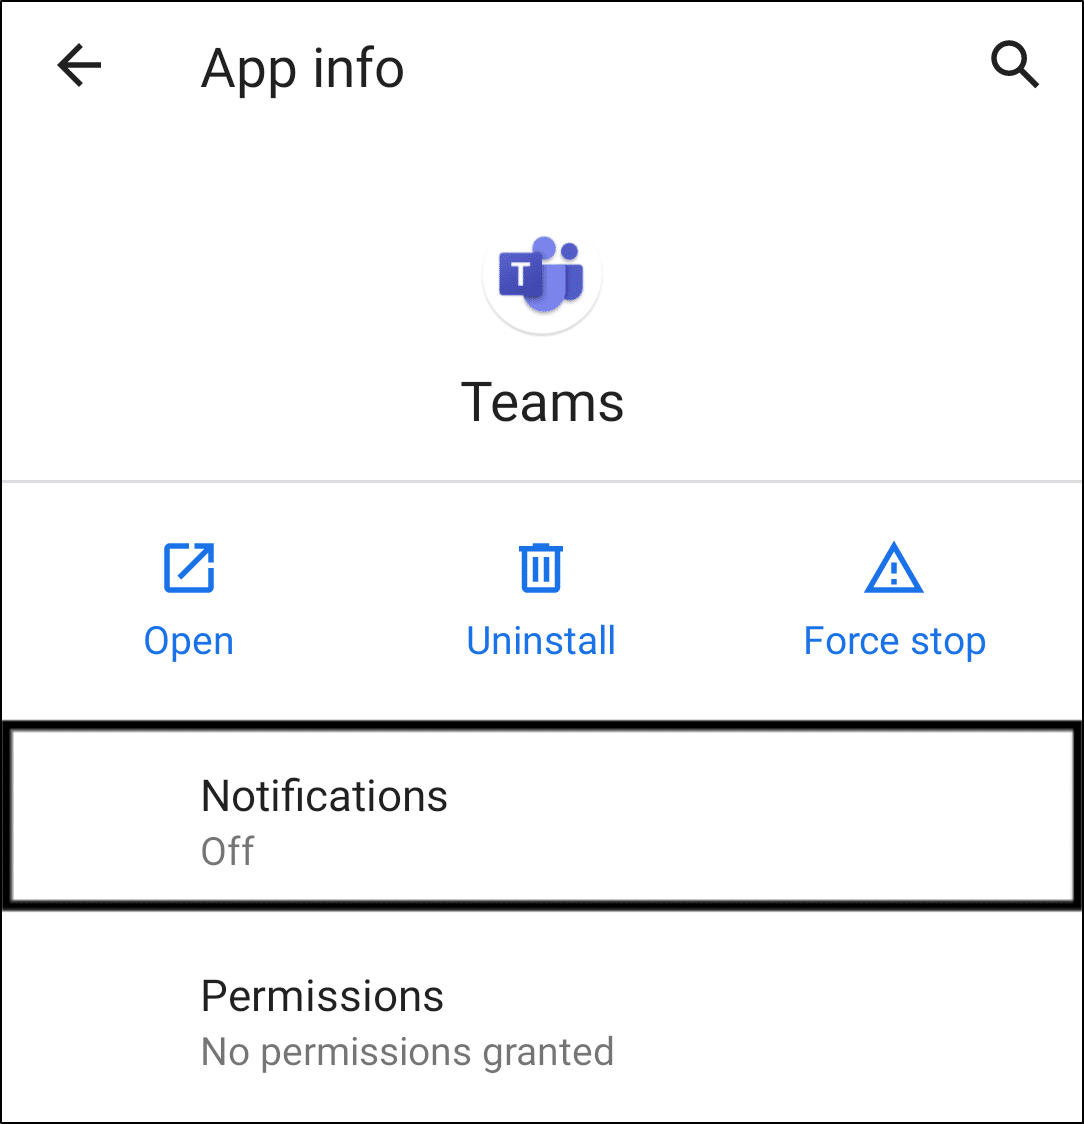
- Here, we recommend switching on all the notification settings, at least for the time being. Also, we suggest switching off Show Notifications, waiting about a minute, and turning it back on again. This is to reset the device notification settings.
9. Check the MS Teams App Notification Settings
In this step, we will inspect and reconfigure the notification settings in the MS Teams app to address any configuration errors. The Teams mobile app offers a variety of customization options for mobile users, which includes how you want your notifications to be sent, which notifications to send, and when to send them. 😮
While these notification settings can be accessed via the Settings app of the mobile device as well, it’s easier to access these settings from the UI provided in the MS Teams mobile app, which will be shown in this step. 👇
With that said, let’s look at MS Teams app’s notification settings:
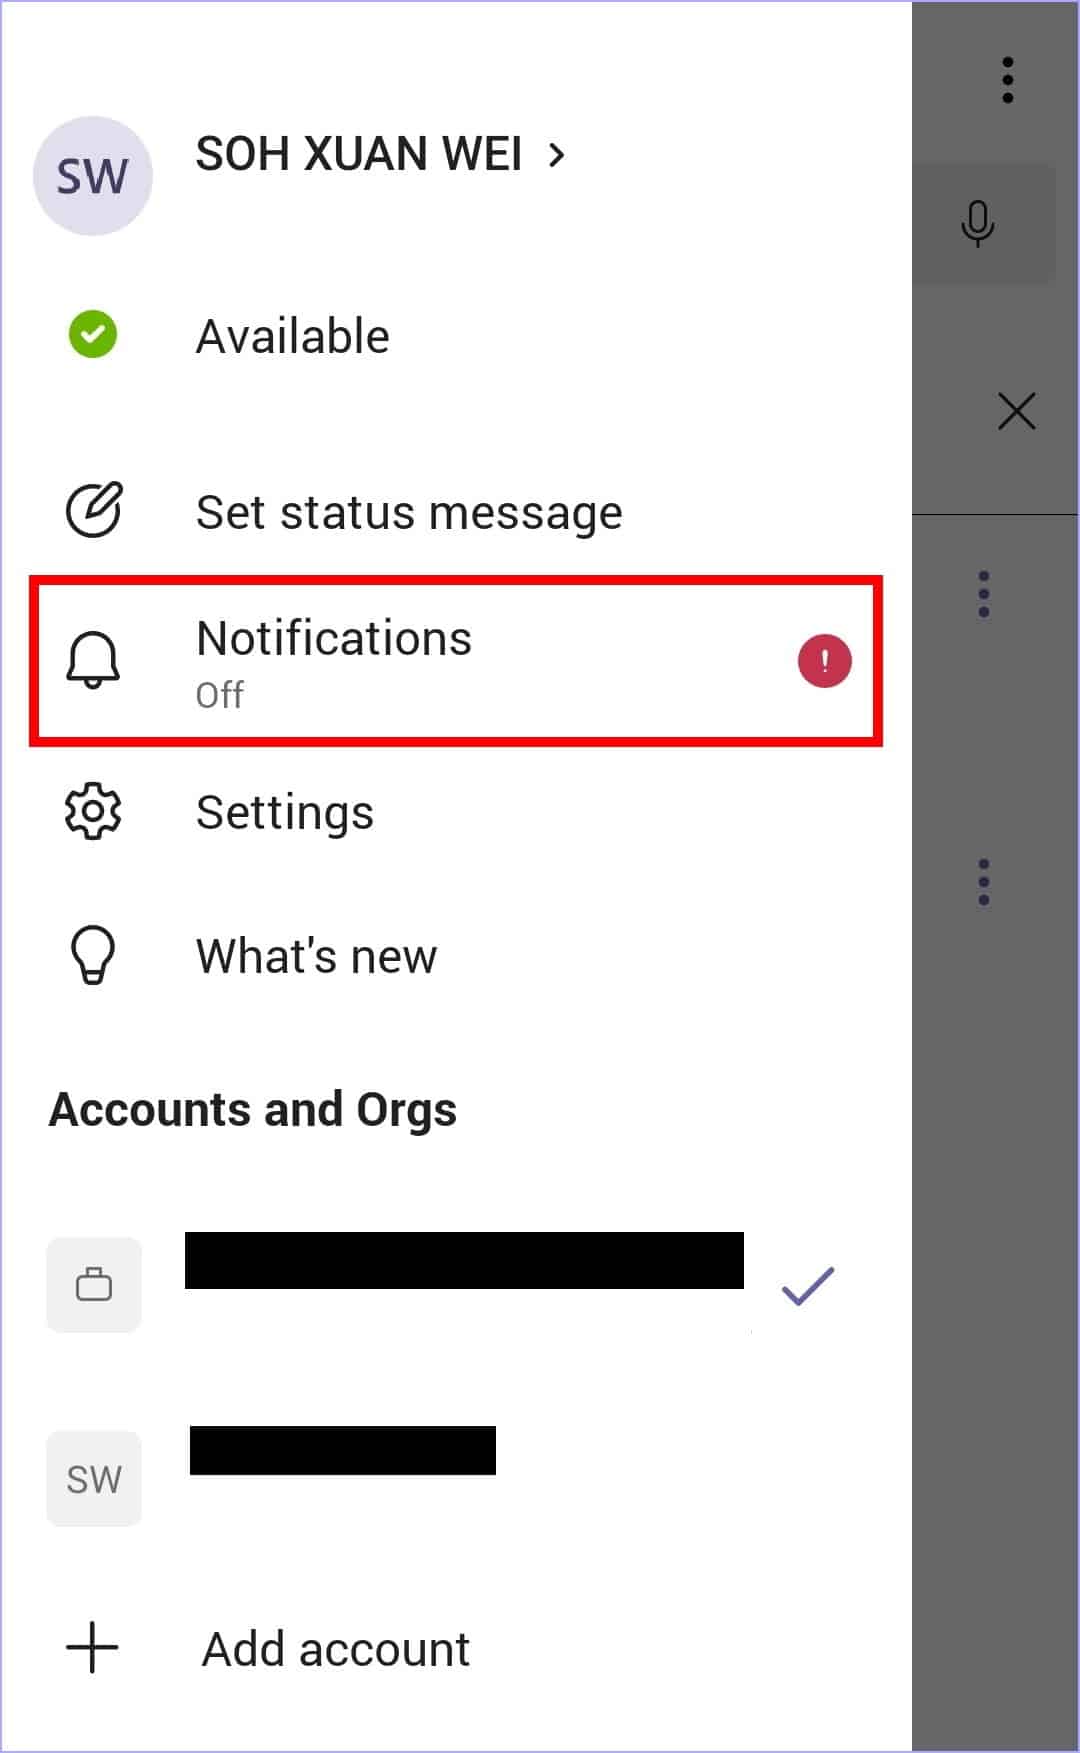
- First, open the MS Teams mobile app and access the sidebar.
- Next, select Notifications to access more settings. Else you can also access them through Settings > Notifications.
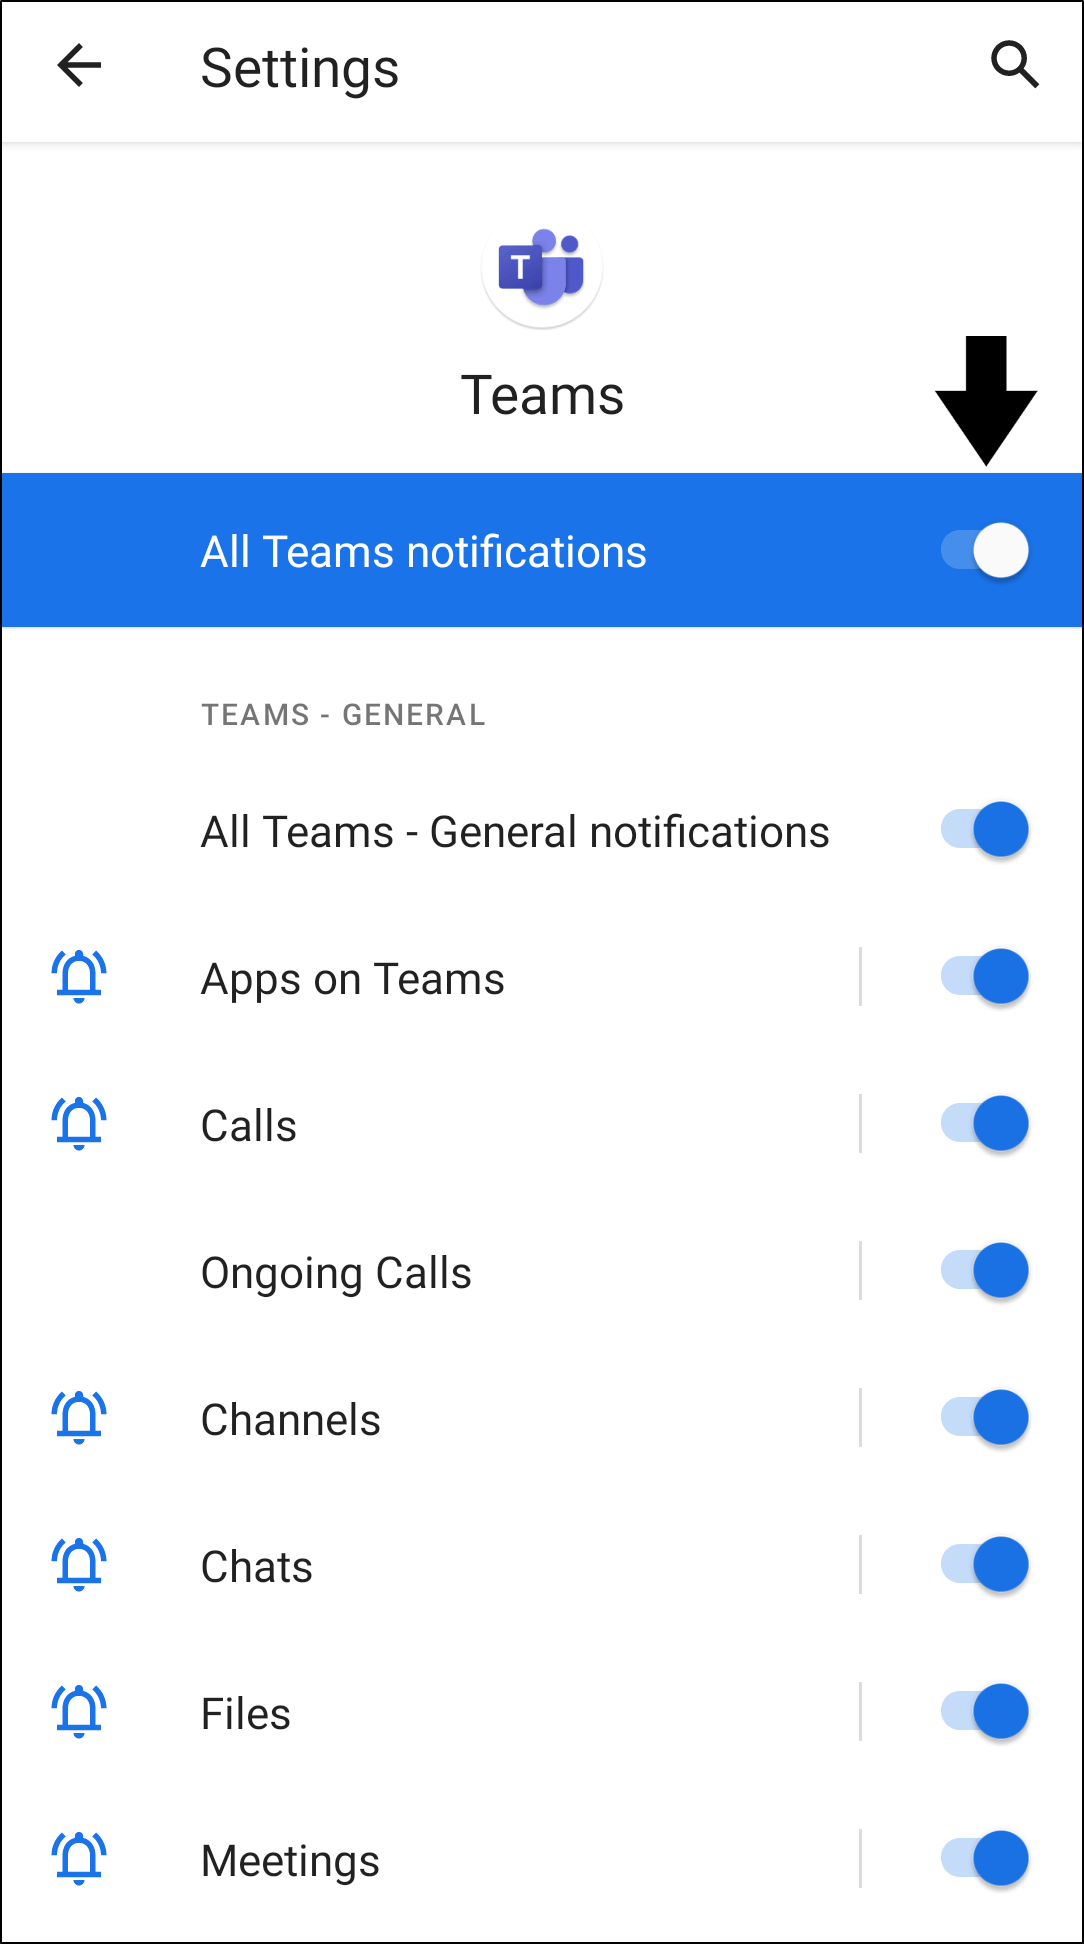
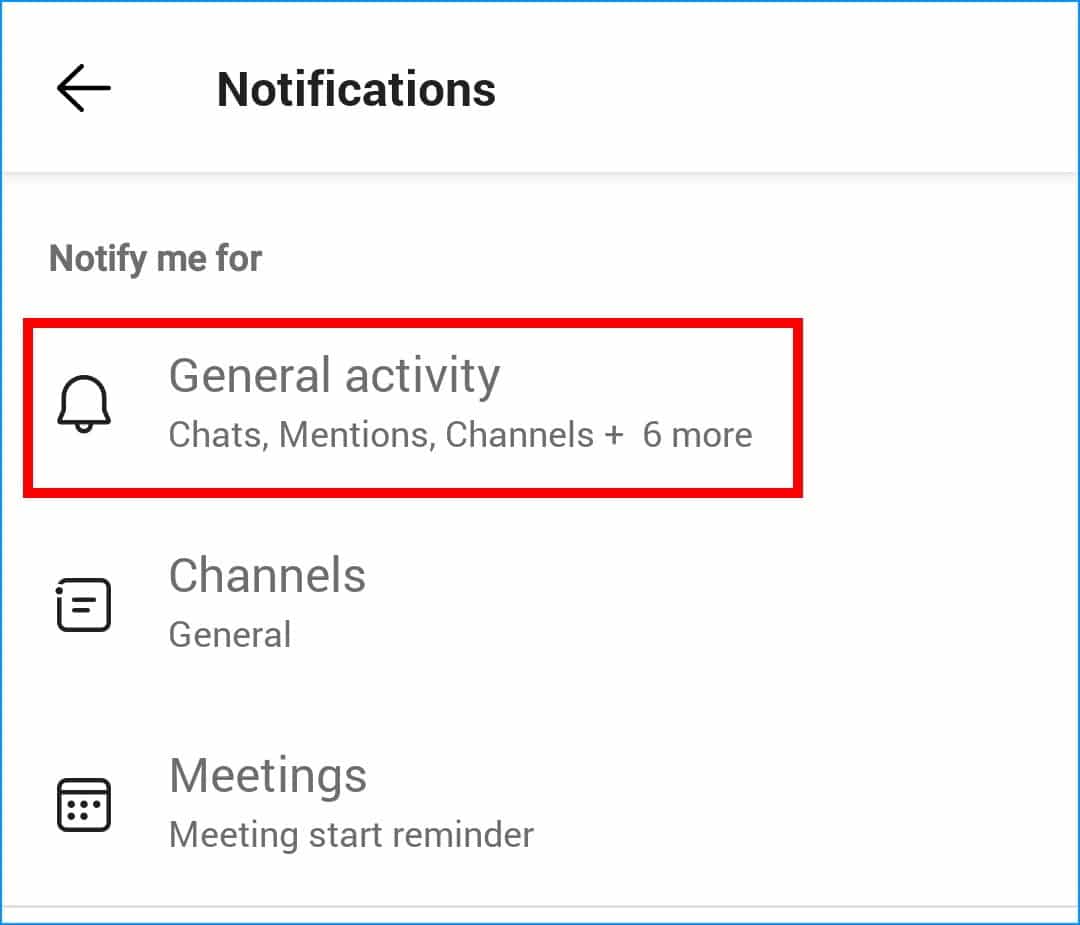
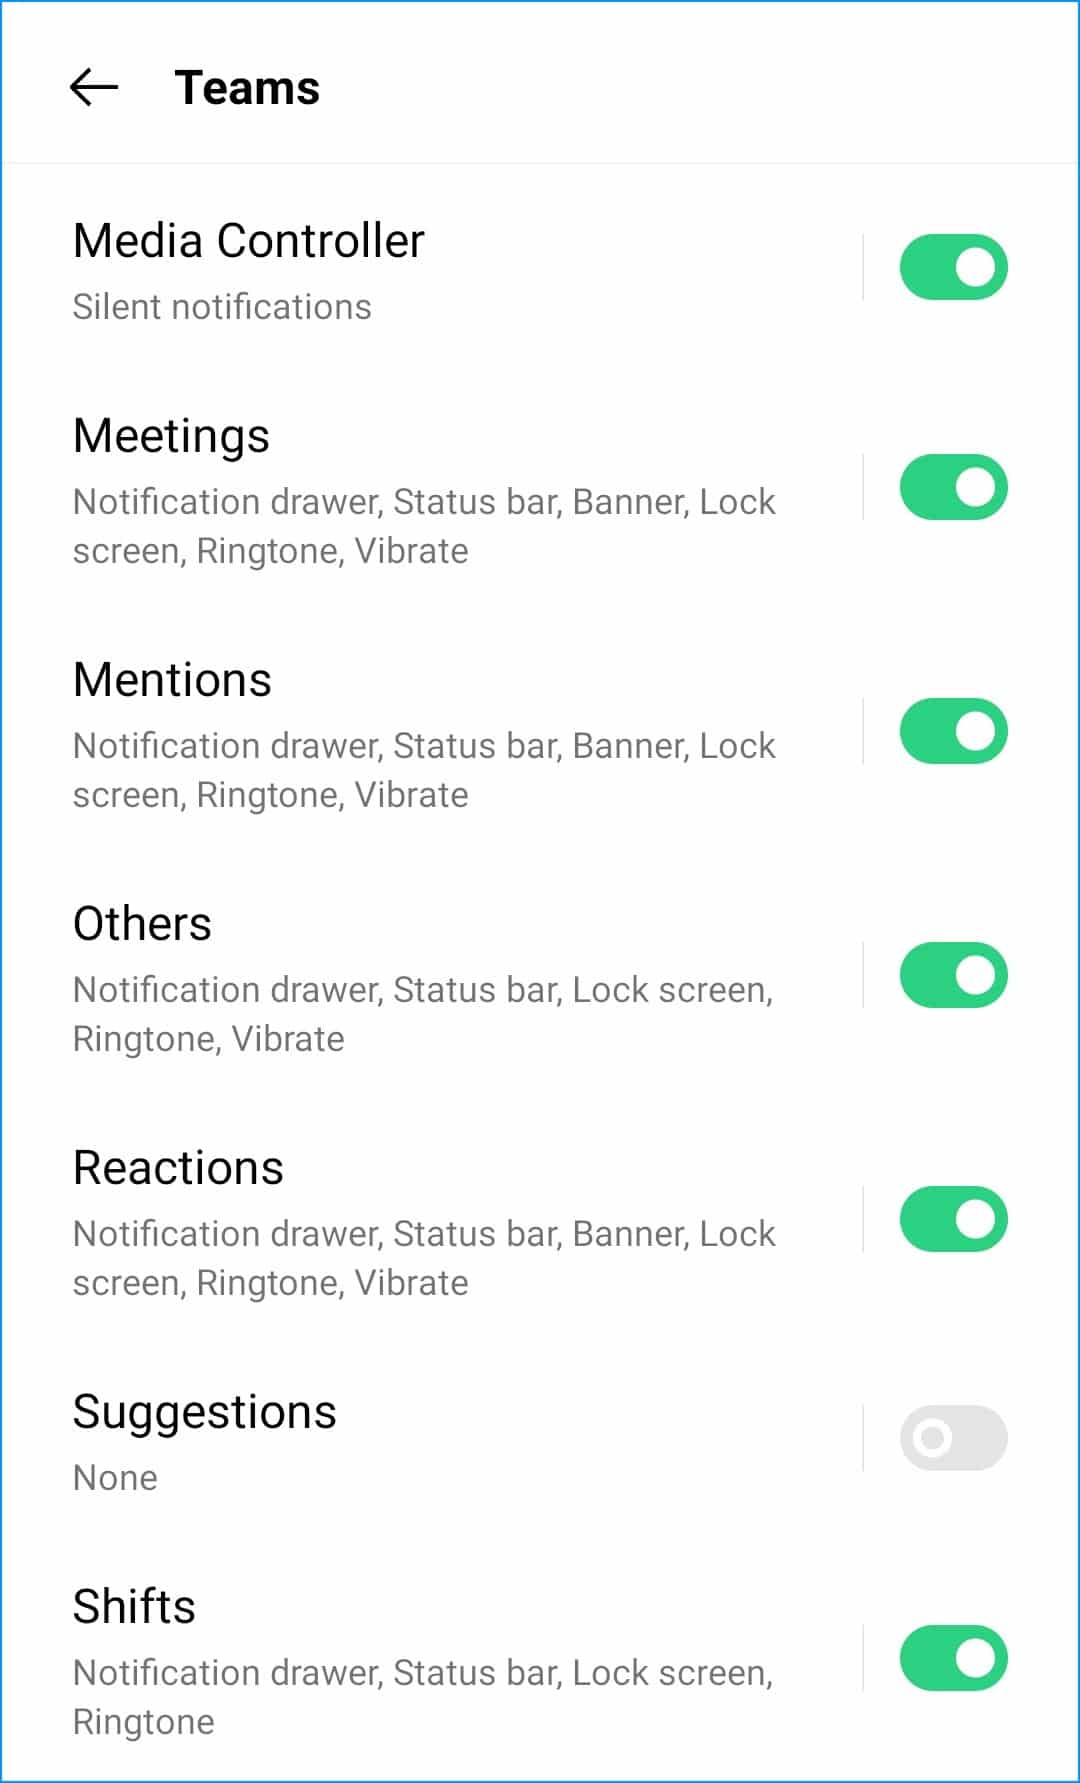
- After that, select 🔔 General activity.
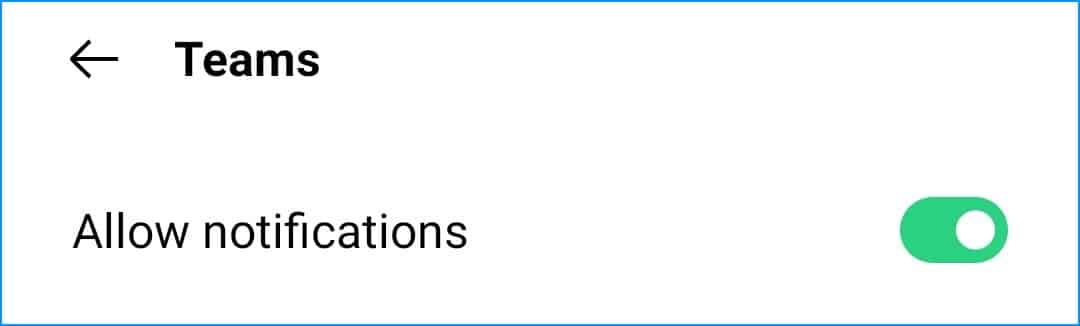
- Selecting this option will bring up your device’s notification settings menu for MS Teams. From here, you should look for an Allow Notifications switch and make sure that notifications are enabled for MS Teams.
- While we are here, make sure to scroll down and go through all the other options to make sure that notifications for those are enabled too!
- Next, return to the menu shown in step 3. This time, select Meetings.
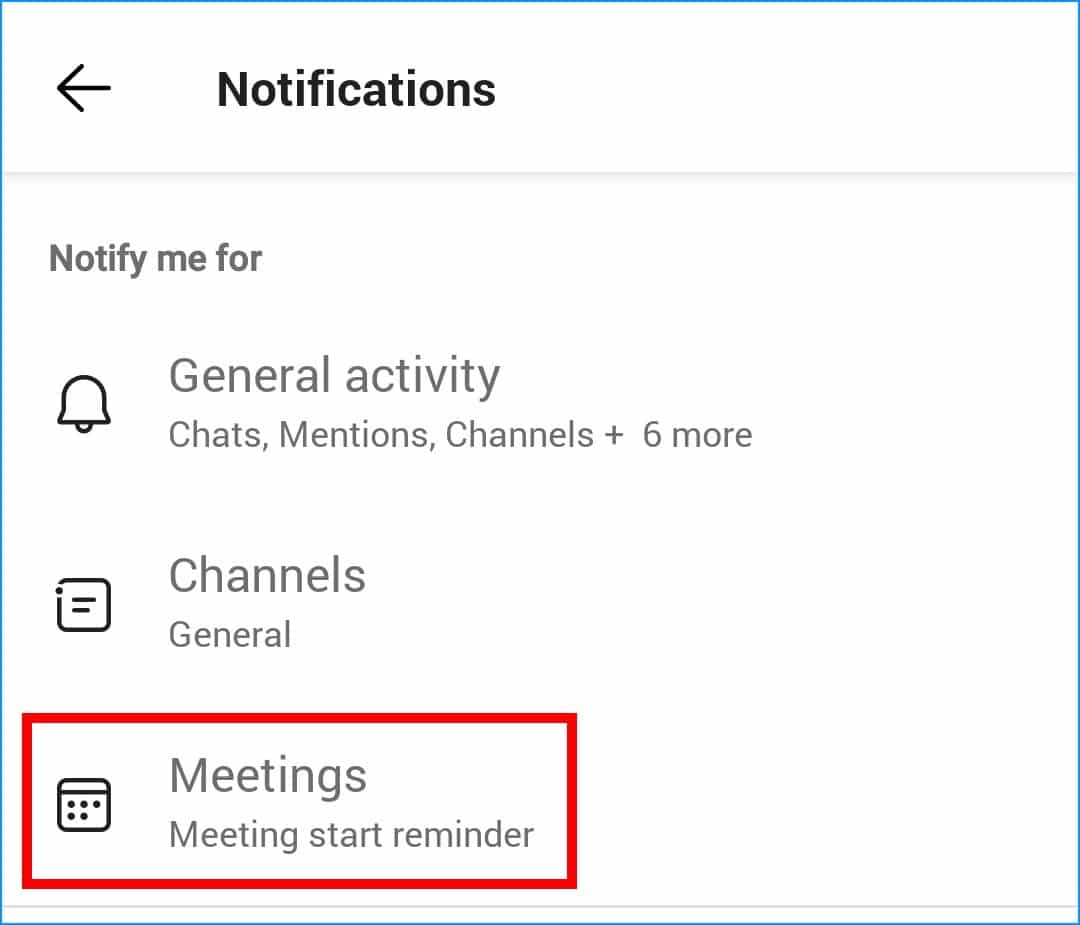
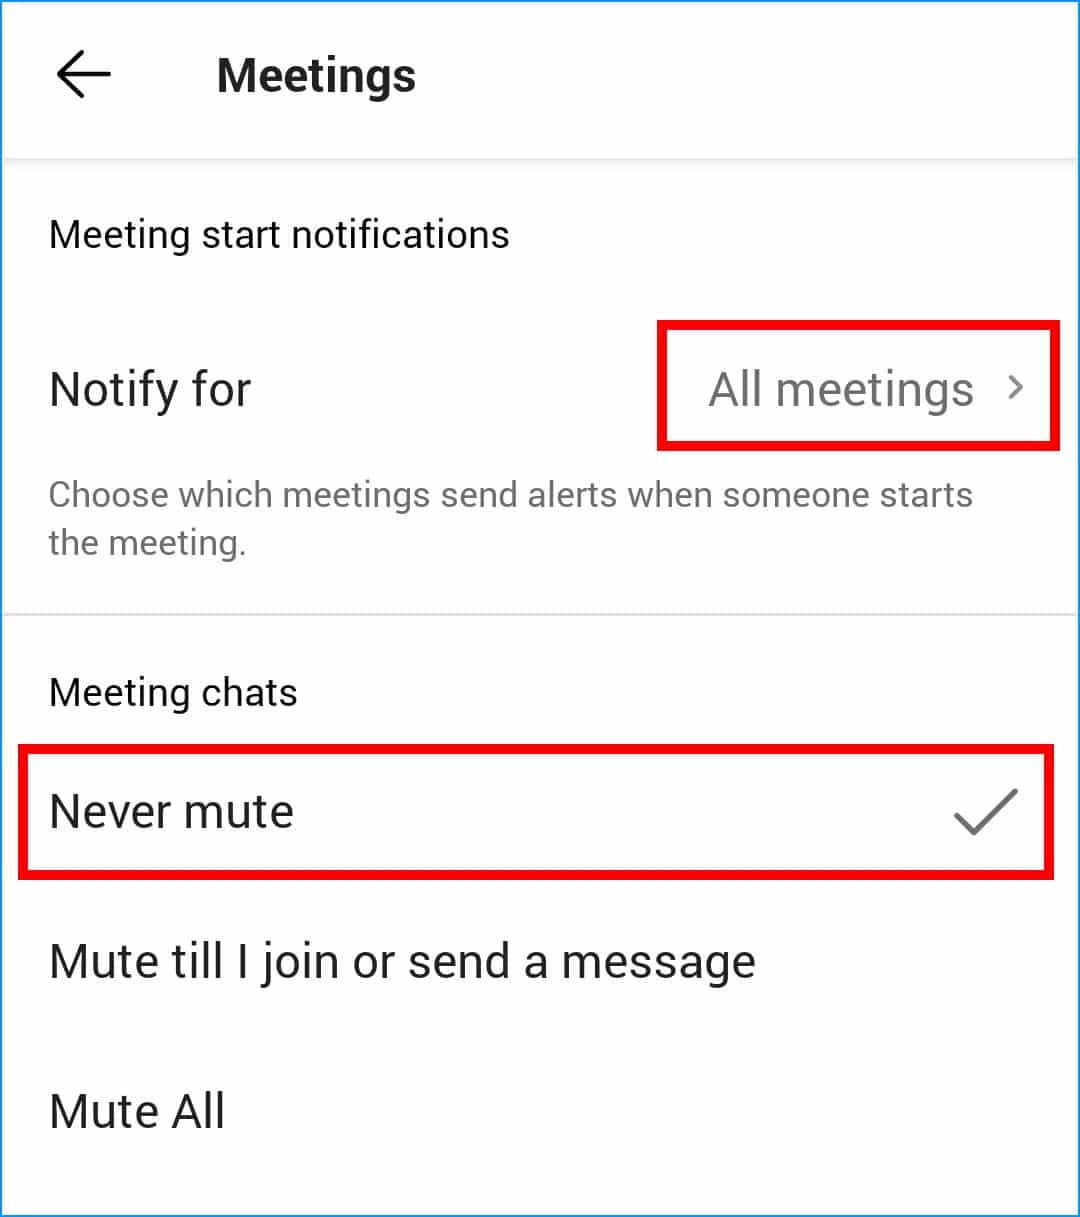
- In this menu, you can configure your notification settings to receive notifications for scheduled meetings, as well as notifications of chat messages made during meetings.
10. Check the ‘Block Notification’ Rules in MS Teams
Apart from the notification settings which we have visited in the previous step, MS Teams also allows its users to block notifications under specific scenarios 🔕. So, this is yet another set of in-app settings that can possibly prevent you from receiving push notifications.
Thus, in this step, we will look at the ‘Block Notification’ rules in MS Teams’ notification settings:
- First, open the MS Teams mobile app and access the sidebar.
- Next, select Notifications to access more settings. Else you can also access them through Settings > Notifications.
- Then, scroll down to the Block notifications section.
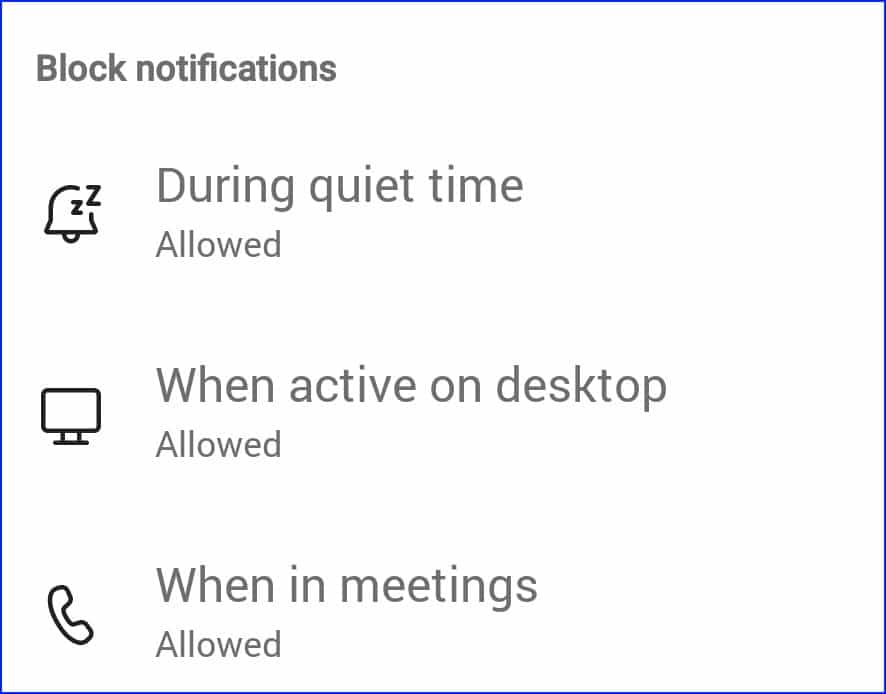
There are 3 items here, so let’s look at them one-by-one:
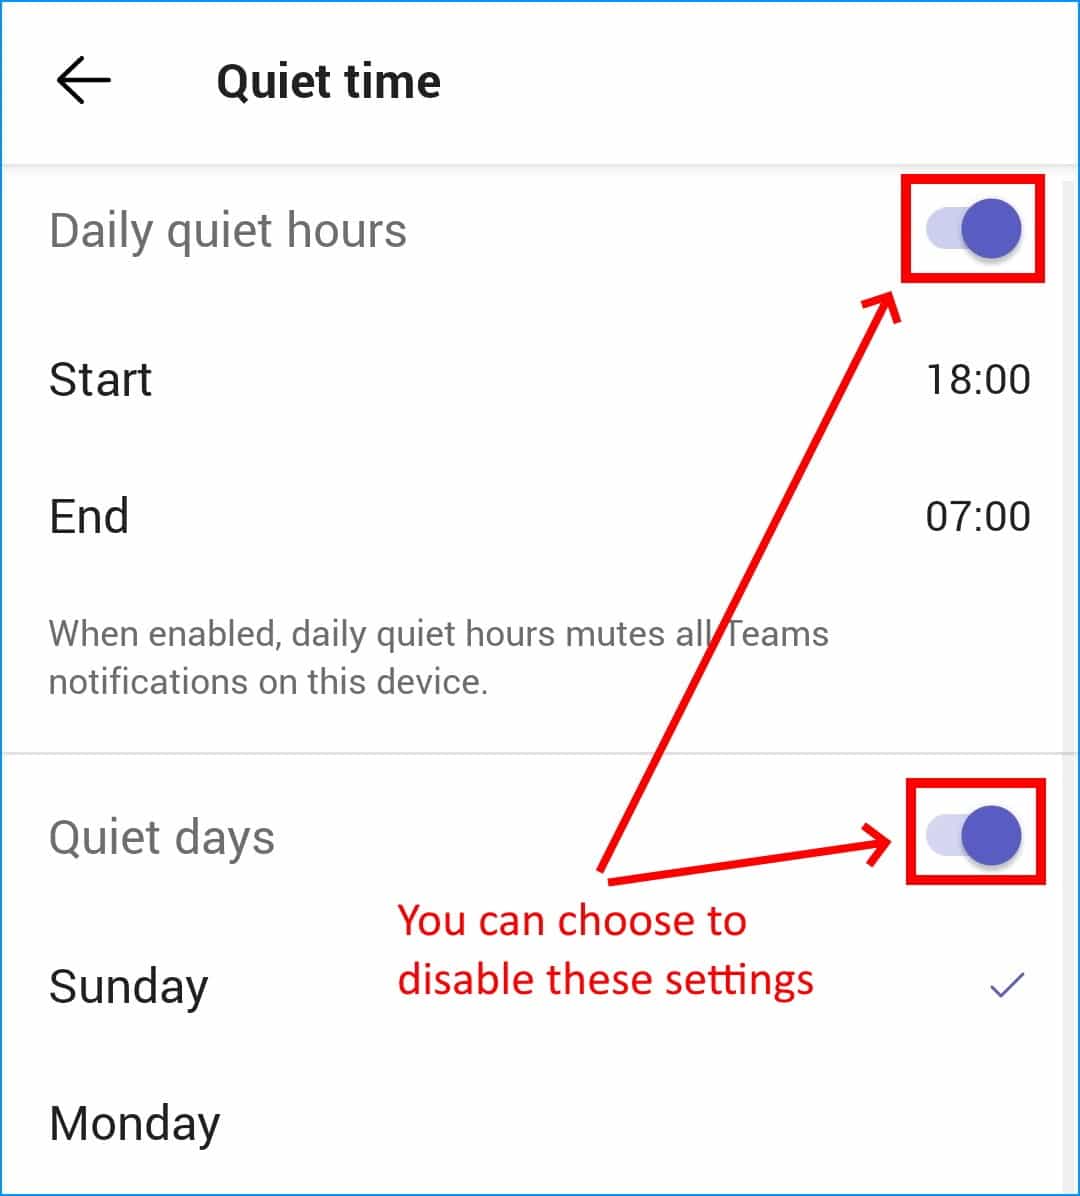
Block notifications during quiet time
This option will allow the user to set a time period (i.e., certain hours of the day, or certain days of the week) where notifications from MS Teams will be blocked.
You may choose to disable this setting entirely, or make sure that the quiet hours don’t overlap with your working time.
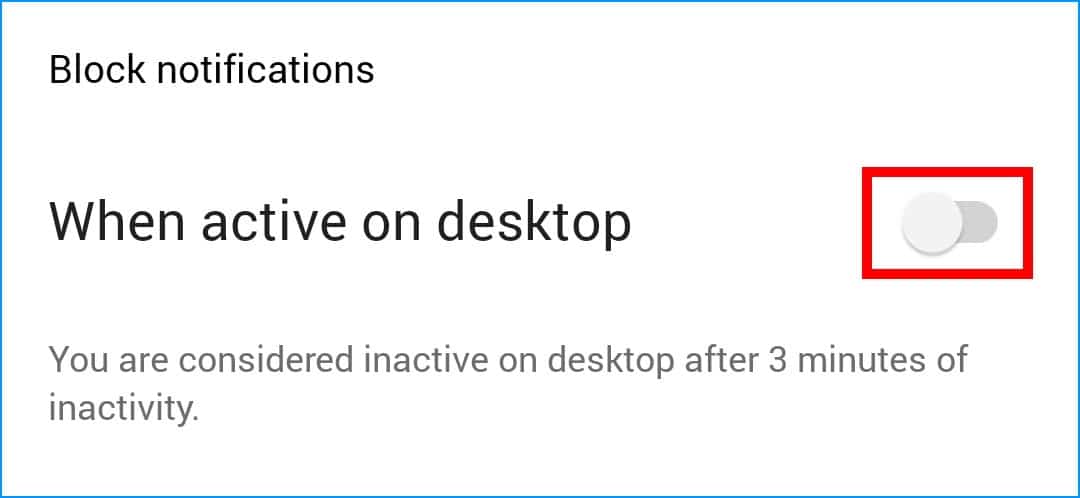
Block notifications when active on desktop
This setting blocks notifications on your mobile device when the desktop version of MS Teams is active.
It is recommended to disable this setting if your Desktop client of MS Teams is often active but you still want to receive notifications on your mobile device.
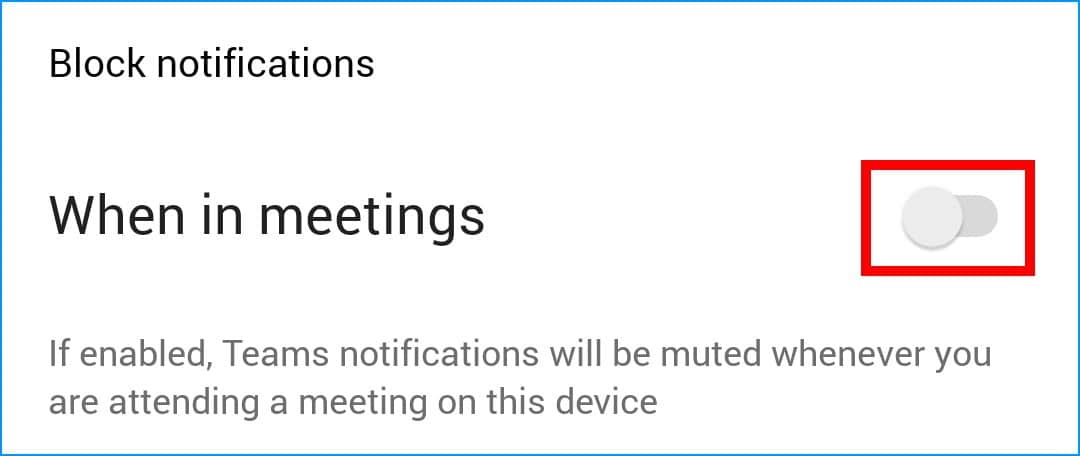
Block notifications when in meetings
This setting blocks all notifications from MS Teams when you are attending a virtual meeting on Teams. Depending on your preferences and needs, you should decide whether or not to enable this setting.
Generally speaking, it is best to disable all three of these settings in order to make sure that they aren’t interfering with the notifications. However, you should also consider balancing your needs and choose the best middle-ground for yourself.
11. Customize the Channel Notifications
Apart from the various customizable notification settings which we have seen in the last 2 steps, MS Teams also allows its users to customize the notifications for each individual channel. This means that users can choose to receive notifications for all new messages in certain Teams groups, and even choose which Teams channels to apply this rule to. 🤔
Sometimes, users may have accidentally disabled notifications for certain channels, resulting in them not receiving important announcements from those channels. Therefore, in this step, we will look at the Teams channel notification settings, and how to enable all notifications for a particular Teams channel:
- First, open the MS Teams mobile app and access the sidebar.
- Next, select Notifications to access more settings. Else you can also access them through Settings > Notifications.
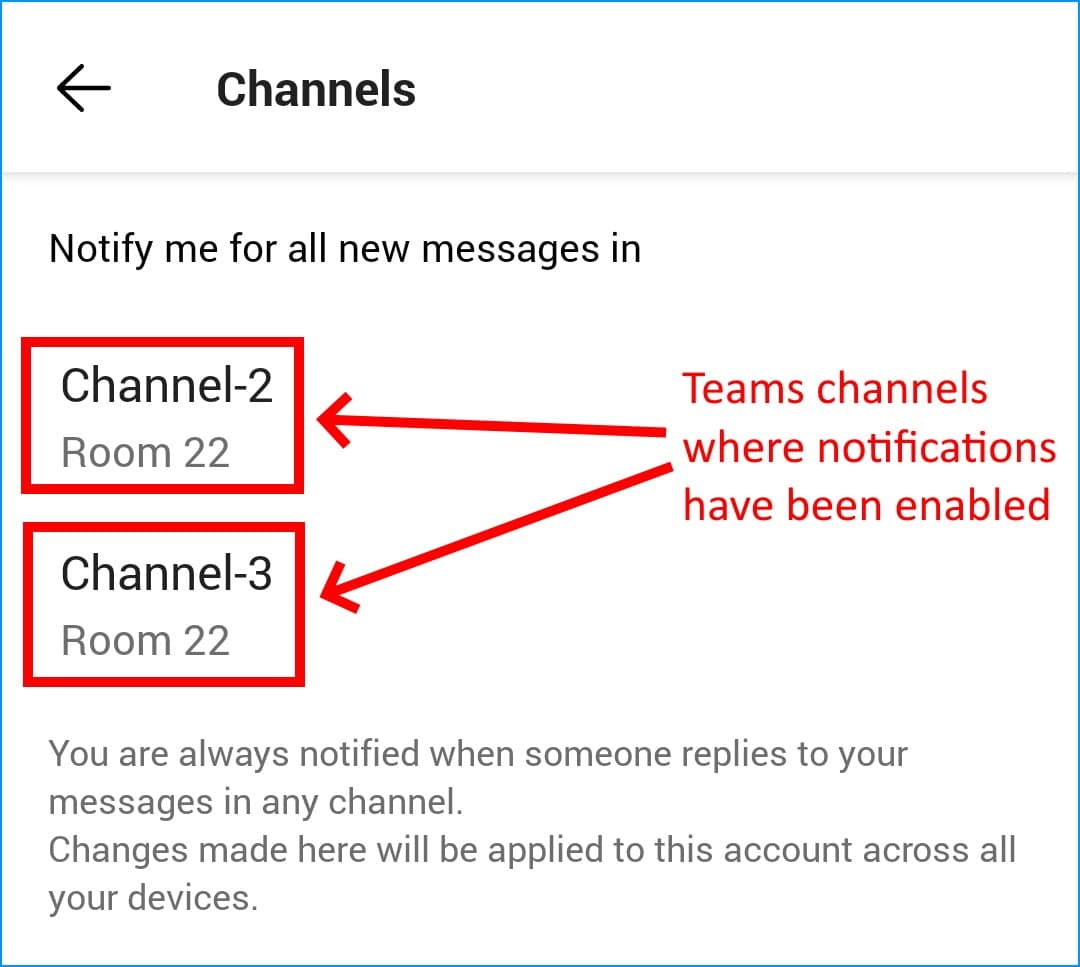
- Next, select Channels.

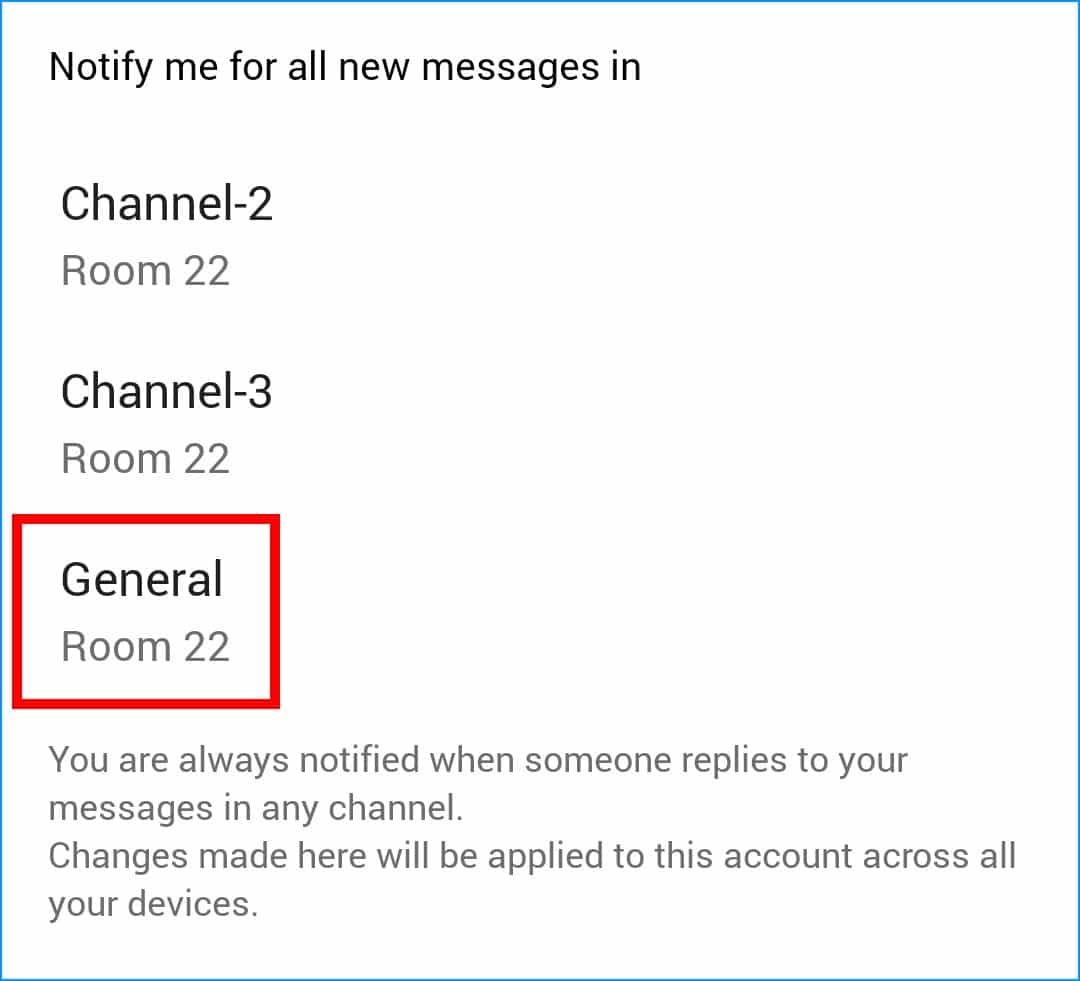
- Here, you will see a list of all channels that have notifications enabled. In the particular example below, Channel-2 and Channel-3 of the Teams group Room 22 are listed.
- Next, we will look at an example of a Teams channel where notifications have been muted: In the General channel of Room 22, the notifications are muted, as indicated by the slashed bell icon 🔕.
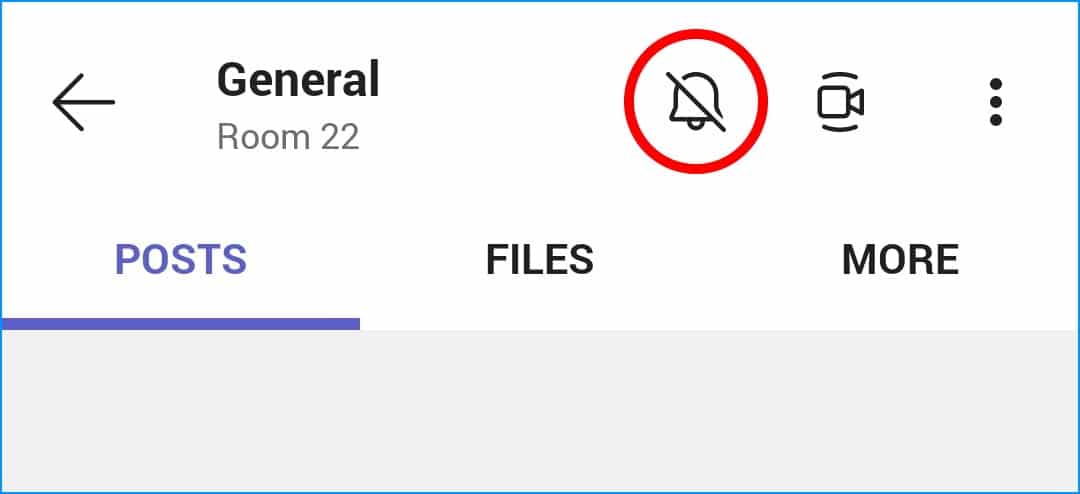
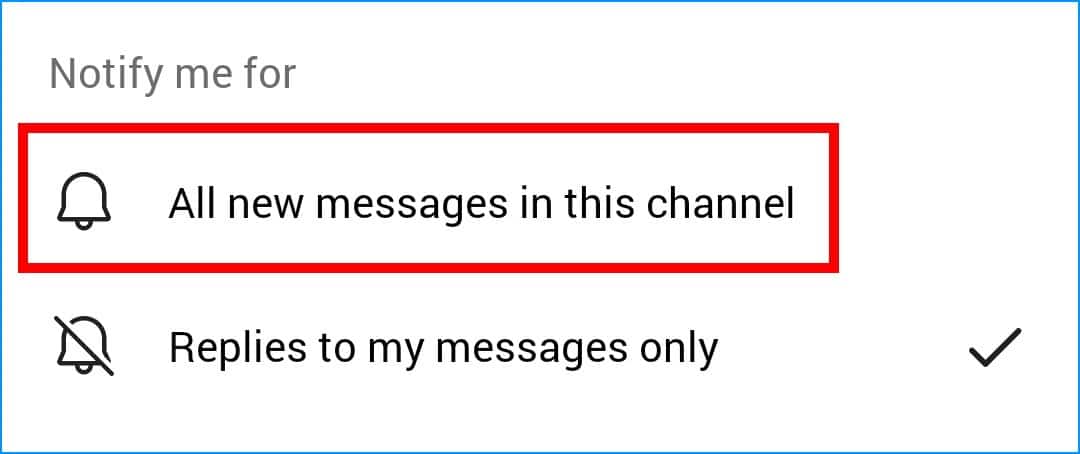
- To enable notifications for a particular channel, simply tap on the slashed bell icon 🔕, and select All new messages in this channel 🔔.
- After returning to the channel notifications settings, we observed that the General channel of Room 22 has been added to the list.
- Finally, you may repeat steps 5-7 for all channels for which you want to receive all notifications.
12. Enable Background Data Usage for MS Teams
Most mobile devices 📱 have the feature to restrict background data usage for certain applications. The purpose of this feature is to conserve your mobile data by limiting its usage by applications such as MS Teams. These apps consume mobile data in the background to constantly refresh and check for any updates, announcements, or new messages.
Users tend to disable background data usage for apps such as MS Teams. As a result, notifications will not be received by your mobile device when the device is using mobile data for an Internet connection. However, notifications will flood in the instant when the device switches to a Wi-Fi connection. 😵
In this step, we will ensure background data usage is enabled for the MS Teams app for Android and iOS devices:
For Android
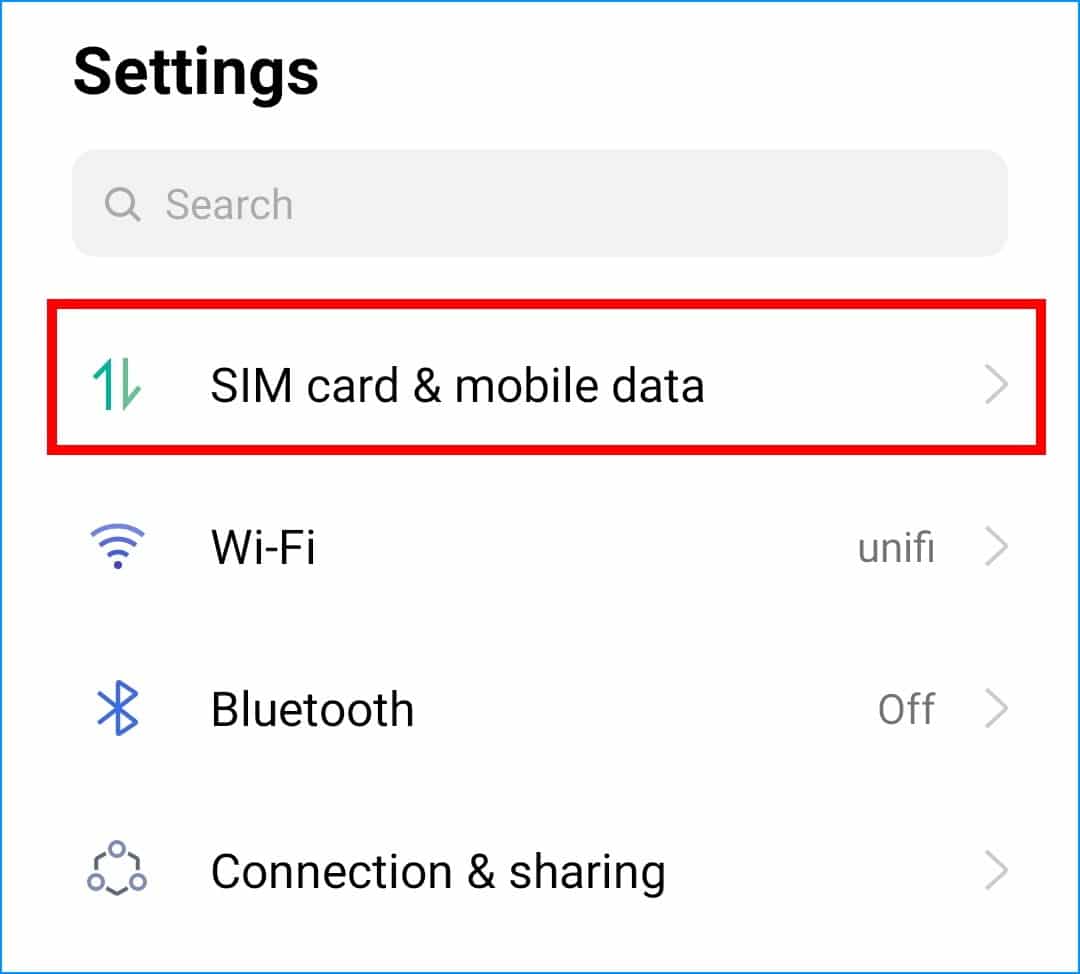
- First, open your Settings app ⚙️.
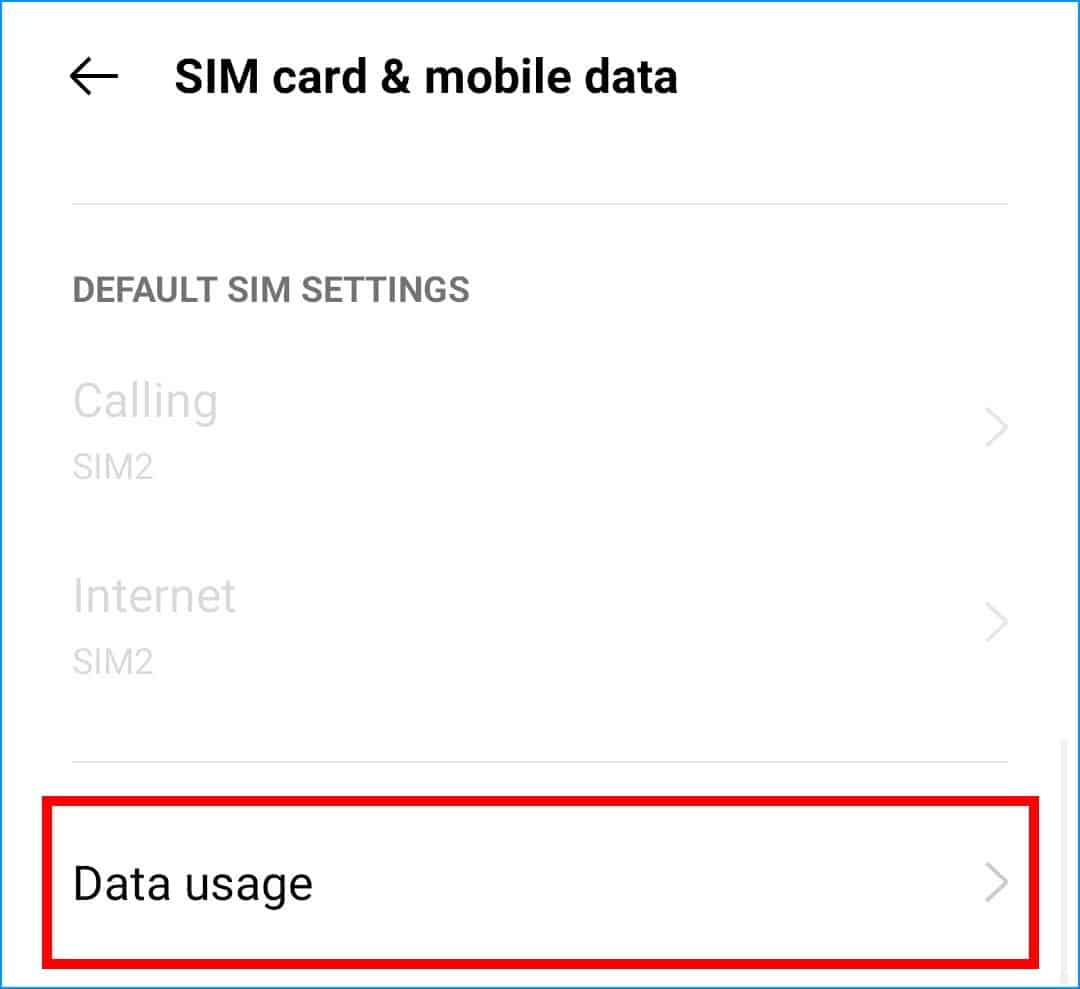
- After that, select Cellular Data or SIM Card & mobile data.
- Next, look for and select Data usage. You may need to scroll down in the settings for the option.
- From here, tap Mobile data usage.
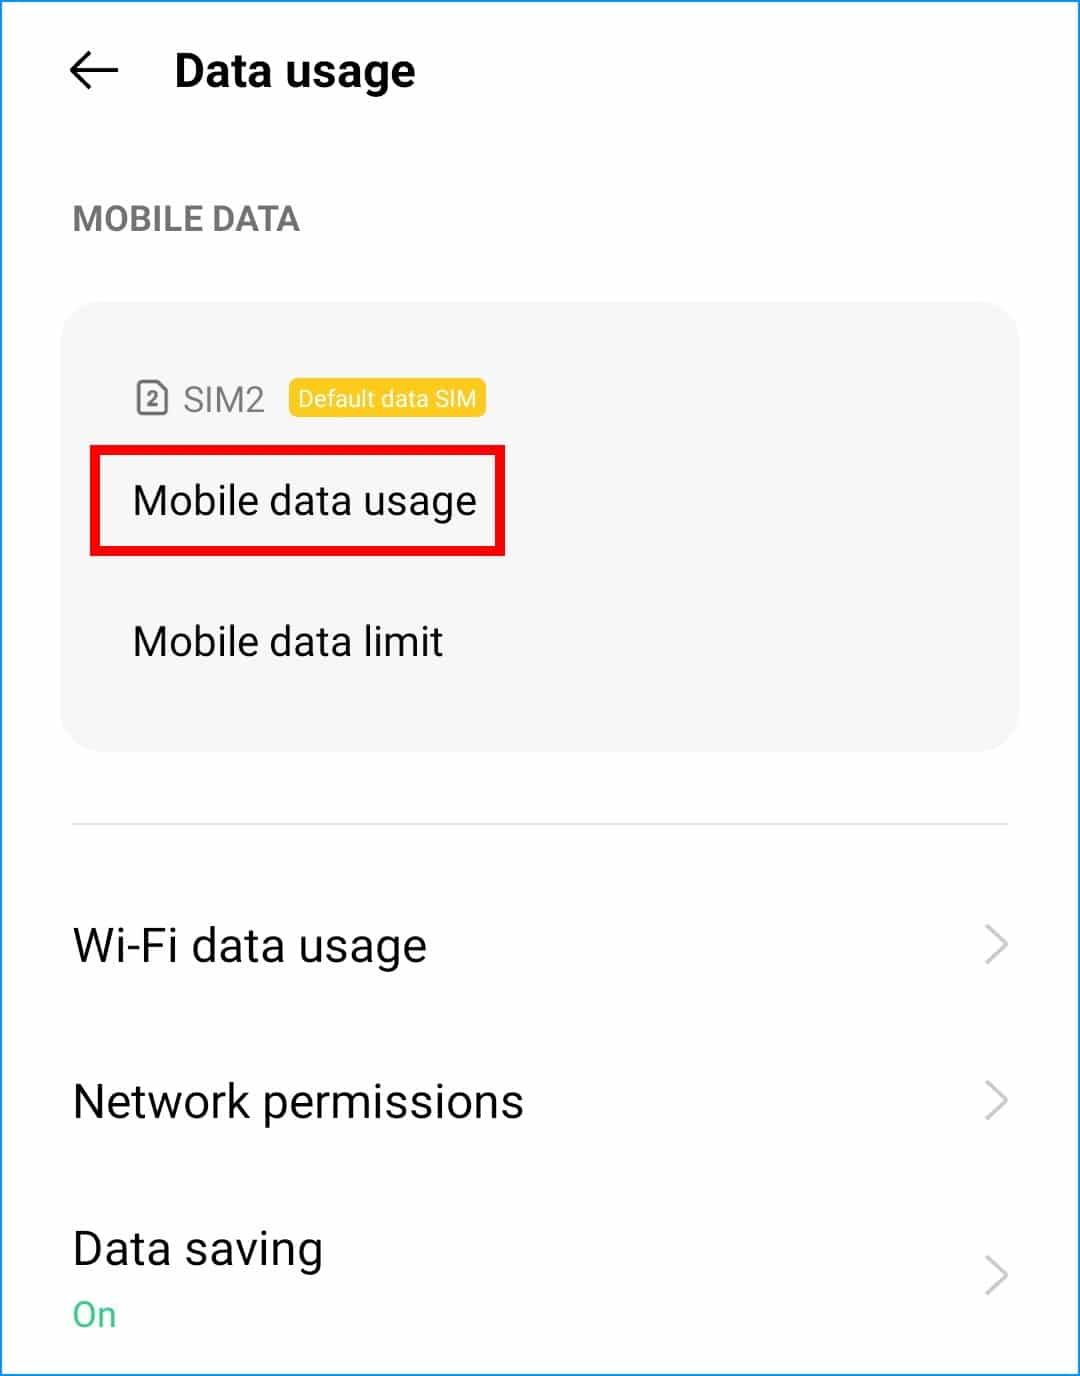
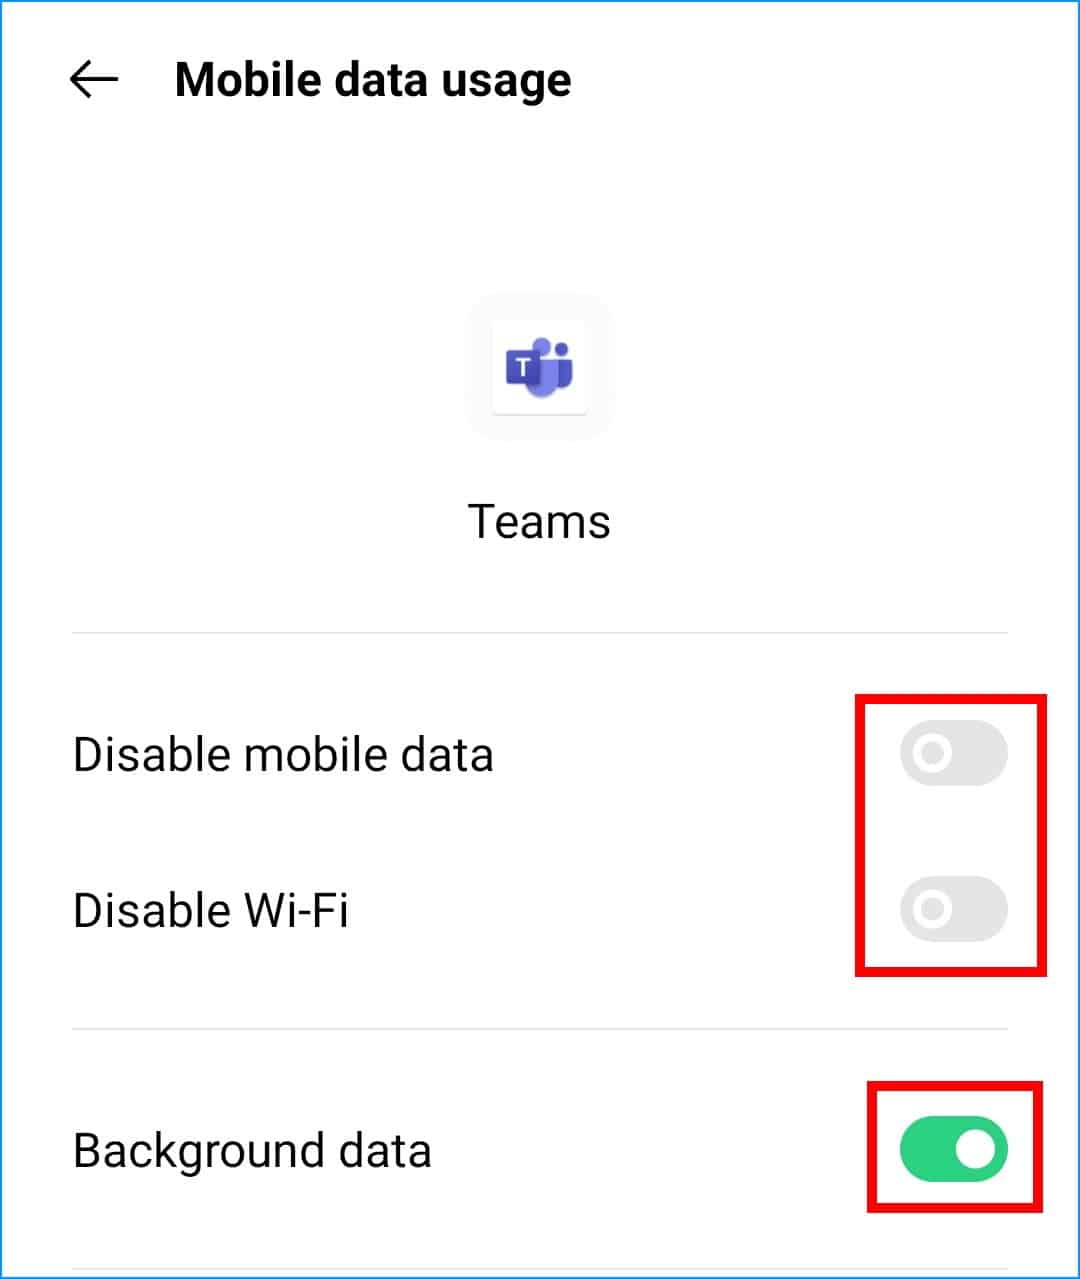
- Following that, find Teams from the list of applications displayed. Tap on it for more options.
- Next, make sure that background data is enabled for Teams, and both mobile data and Wi-Fi are not disabled.
For iOS
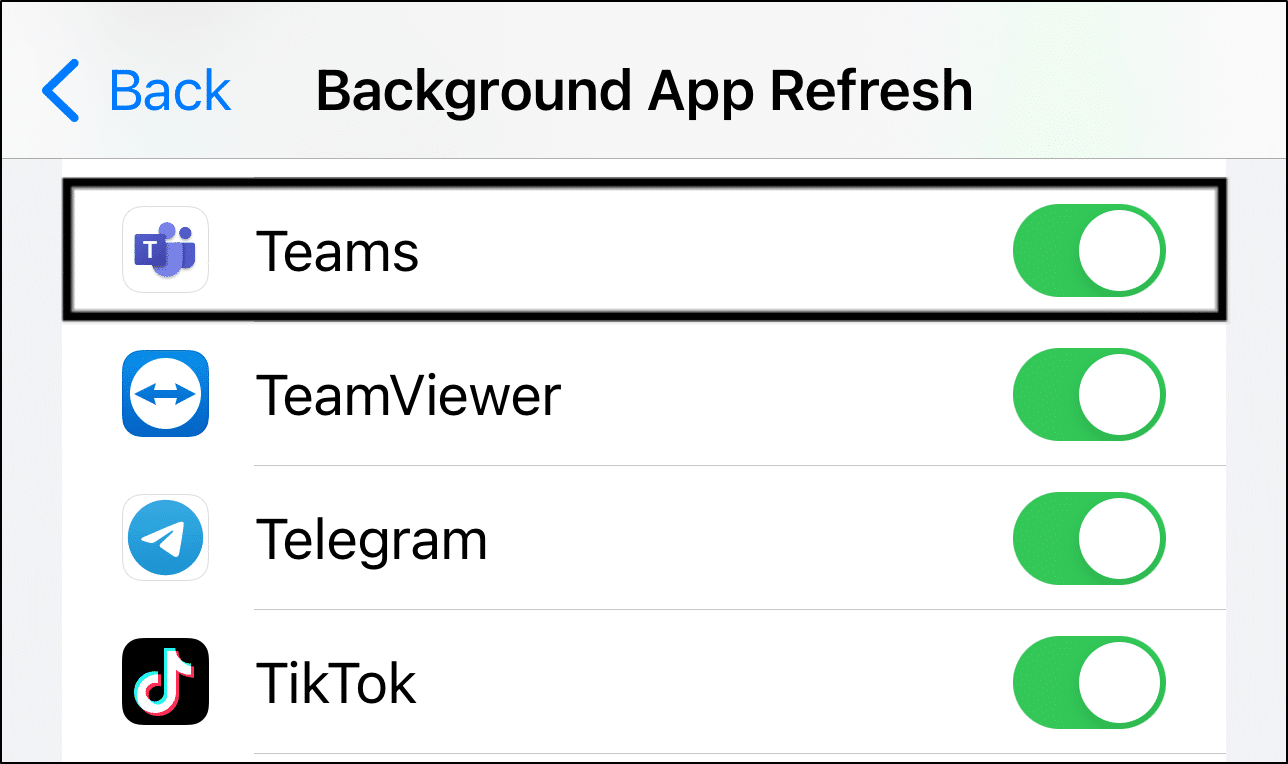
- First, open the Settings app ⚙️.
- Then, select General, and tap Background App Refresh.

- From the list of apps displayed, look for Teams, and make sure that the switch next to it is turned on.
13. Switch Between Mobile Data and Wi-Fi or Turn Off “Low Data Mode”
When the Low Data Mode or Data Saving Mode is enabled, your mobile device will restrict mobile data usage for all applications, including MS Teams.
This will result in the MS Teams client not receiving notifications until you connect to a Wi-Fi source, as it’s unable to access the Internet. Similar to what we have discussed in the previous step, users will notice an influx of notifications the moment they switch from Wi-Fi to mobile data. 📶
A simple step to test this theory is to alternate between a Wi-Fi and mobile data connection to test for any connectivity issues. Usually, this can be done through the Control Centre (iOS) or Status Bar (Android).
To fix the issue of MS Teams notifications not working when using cellular data, we will need to go into device settings to make sure that Low Data Mode or Data Saving Mode is disabled:
For Android
- First, open your Settings app ⚙️.
- After that, select Cellular Data or SIM Card & mobile data.
- Next, look for and select Data usage. You may need to scroll down in the settings for the option.
- Here, tap Data Saving.
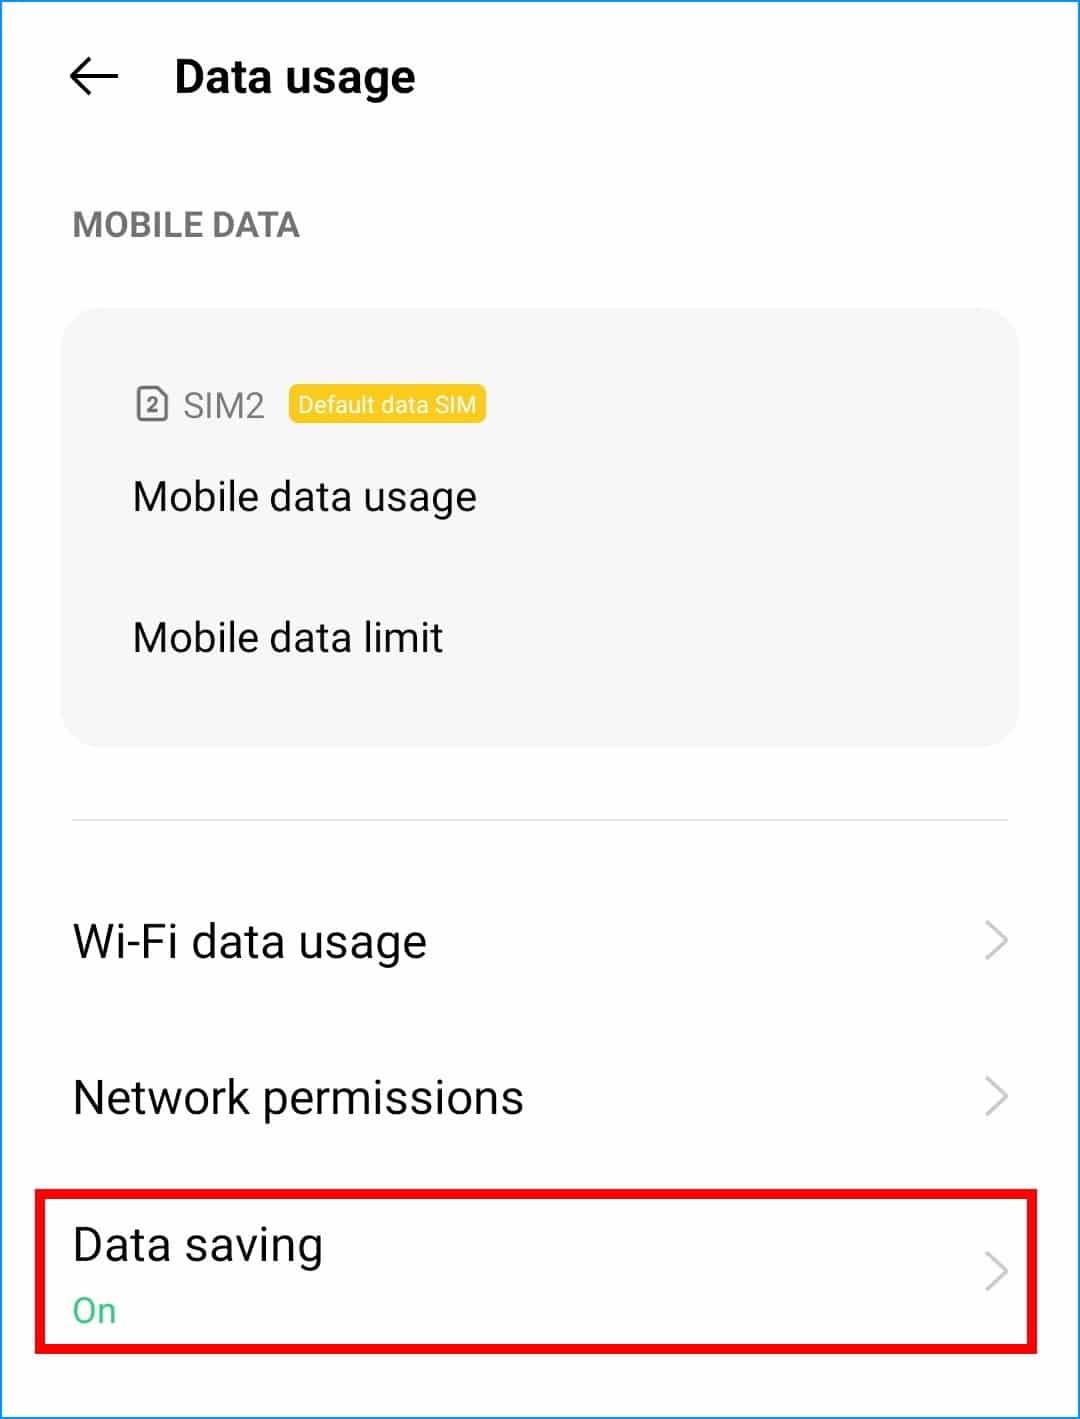
- Next, you can choose to either disable data saving mode completely or give MS Teams permission for unlimited data usage.
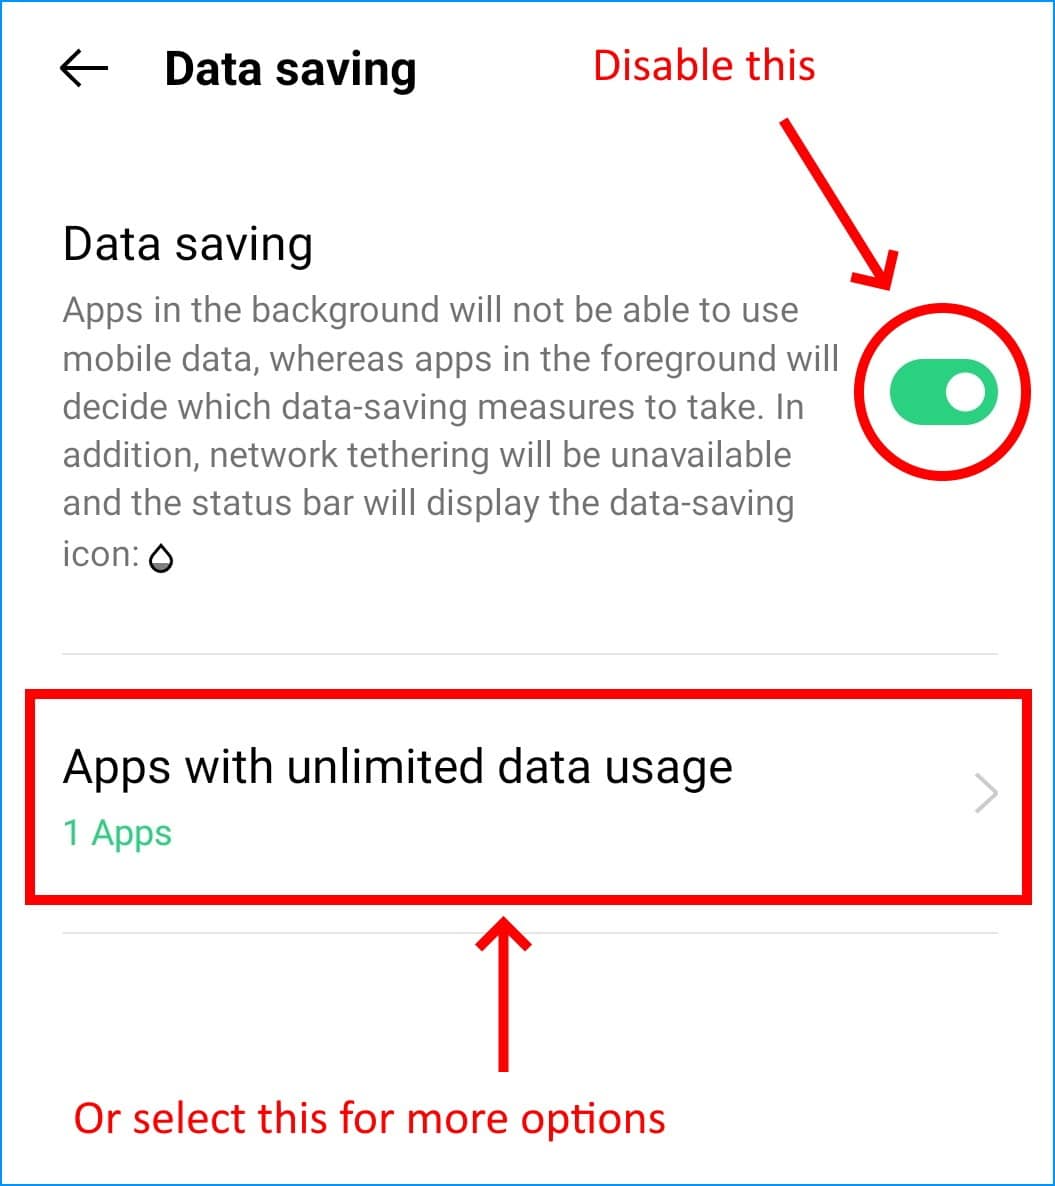
For the second option, on the Apps with unlimited data usage page, make sure to enable the switch next to Teams.

For iOS
- First, open the Settings app ⚙️.
- Next, select Mobile Data and choose Mobile Data Options.
- Finally, ensure that Low Data Mode is turned off.

14. Clear the MS Teams App Cache and Data
Mobile devices typically store information in the form of cache so that it can be accessed, retrieved and reused quickly. Examples are images, videos, and text that are sent to your device. By using cached data, the app doesn’t have to download the picture again when you want to view it for a second time.
However, the more you use an app, the cached data inevitably builds up, which may result in app glitches and bugs that might affect your user experience 😓. While the chance of the cache build-up directly causing issues with the notifications system isn’t exactly 💯%, it is still worth giving it a shot.
Unfortunately, this step is not so applicable for iOS users, as iOS does not allow its users to manually clear cached data of apps. Instead, you can try reinstalling the app (step 15), which is believed to be more effective!
Therefore, in this step, we’ll guide you through clearing the MS Teams app’s cached data on Android devices:
- First, open the ⚙️ Settings app.
- Then, go to Apps & Notifications, App, or App Management.
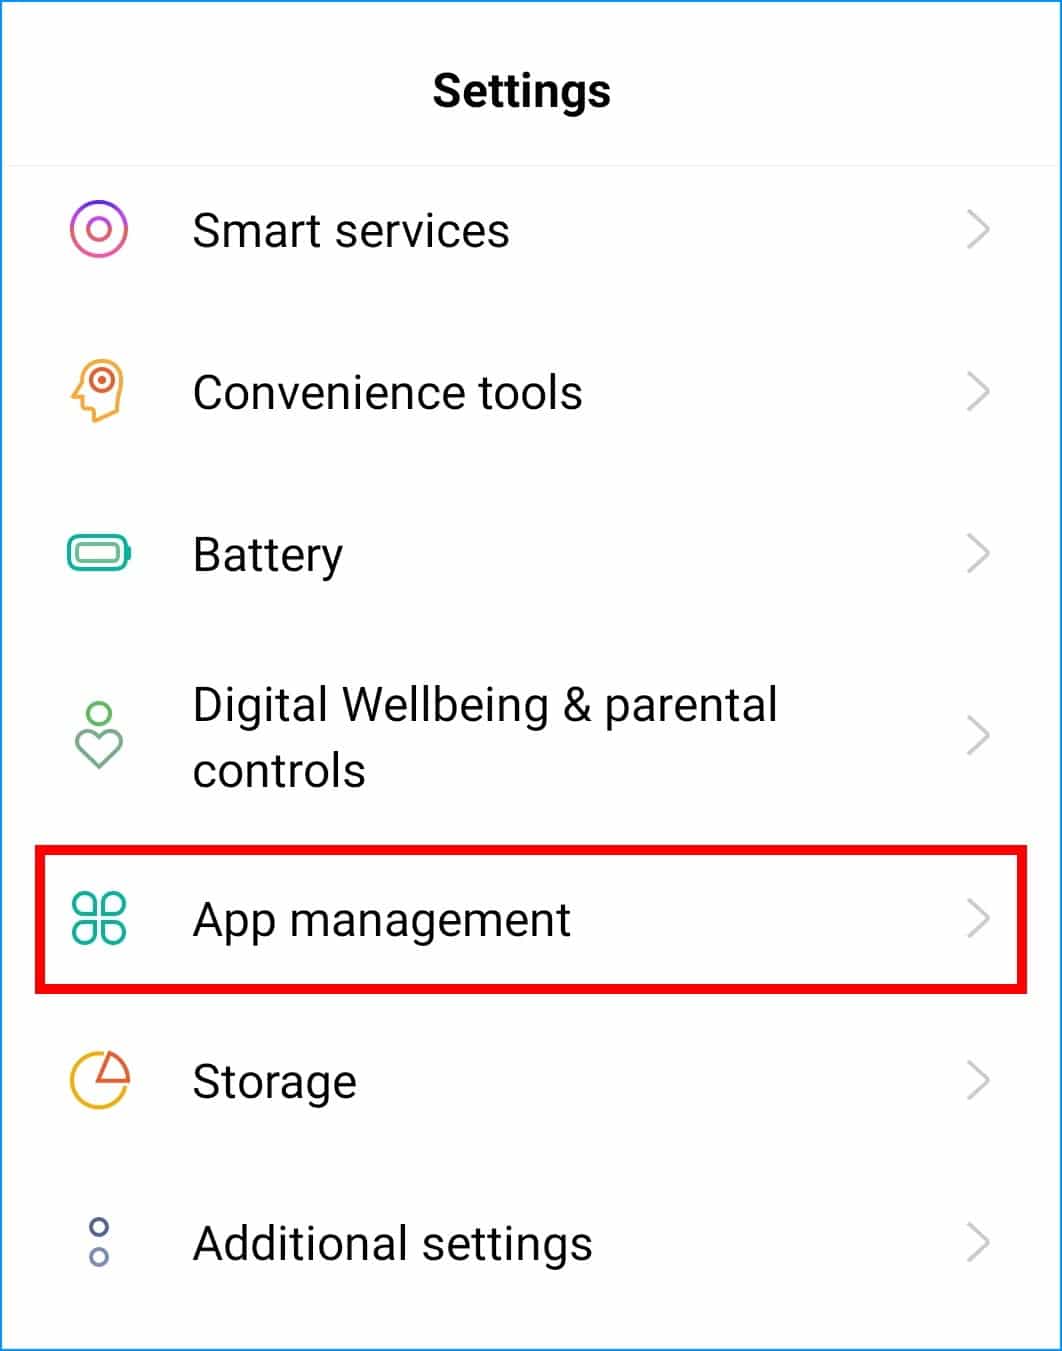
- Next, from the App List, look for Teams.
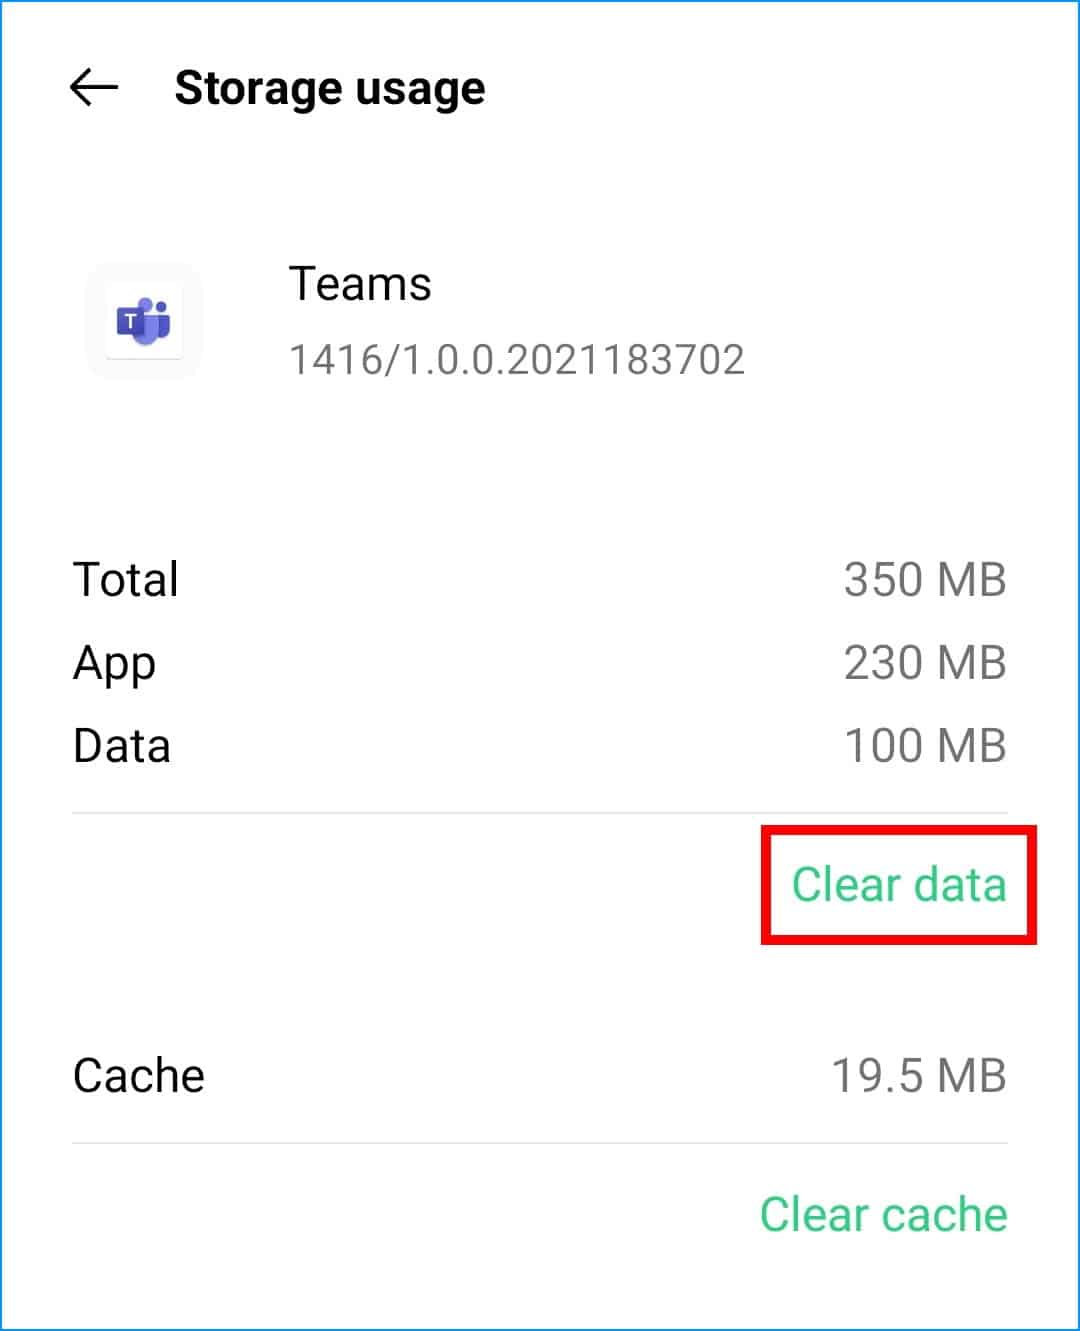
- After that, on the Teams app settings page, select Storage or Storage and Cache.
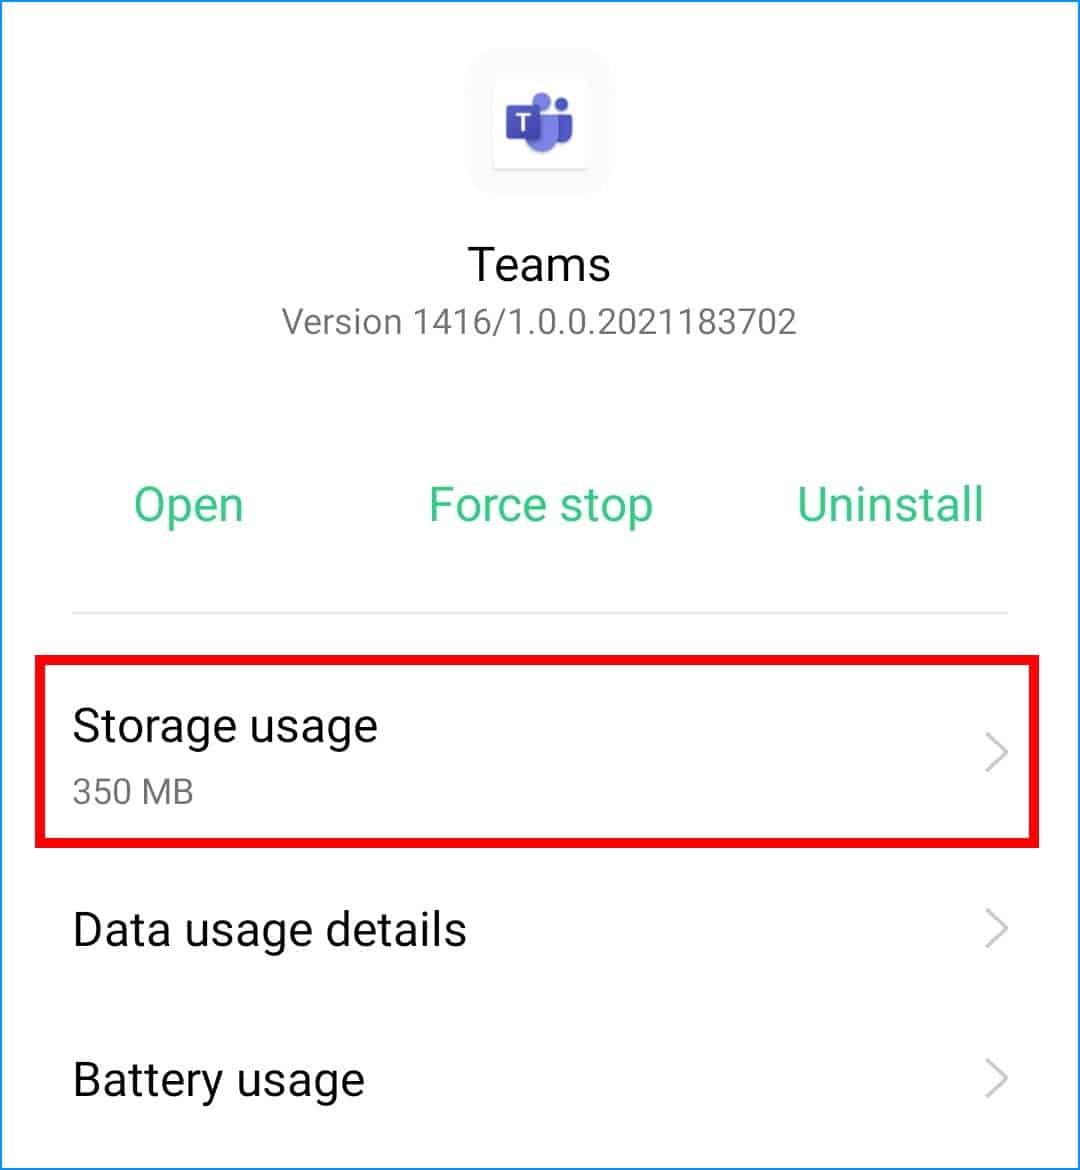
- Finally, tap the Clear Cache button.

- (Optional) You may also select the Clear data option, but note that this option will clear all data of the app on your device, including account information, settings, and credentials. So, you’ll need to log in again using your Microsoft credentials.
15. Reinstall MS Teams
If you were unable to clear the Teams app’s cached data on your device, uninstalling and reinstalling the app will also give a similar effect. This is because when we reinstall the app, a lot of settings are reset to default. Thus, it may resolve any settings-related issues that may be causing the MS Teams notifications problem. Besides that, reinstalling can address any corrupted installations of the Teams app as well.
Also, you should take note that doing this clears all data previously stored by the app, which includes your login credentials. As such, you should make sure that you know your Teams account email and password for logging in once you’ve installed the new version of the app.
That being said, the steps to reinstall the Teams app is generally similar on all mobile devices:
- First, long-press for the selection menu or head over to Settings to uninstall the app.
- Then, select 🗑️ Uninstall or Remove App.
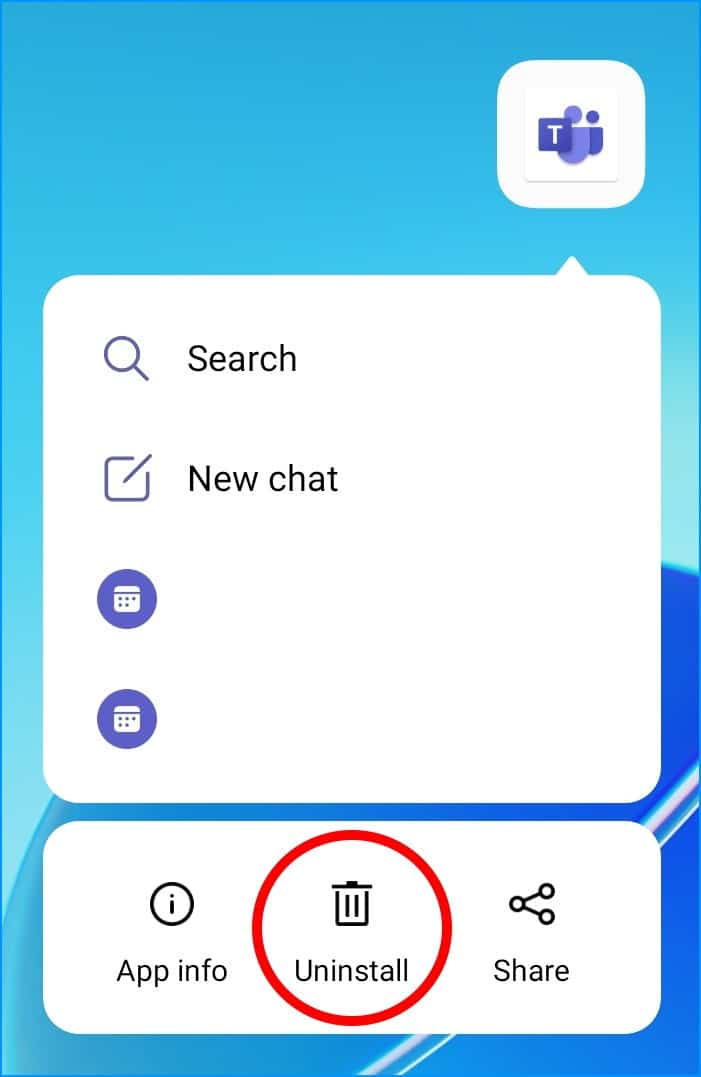
- Next, you can head straight to your App Store or Google Play Store to install the Teams app again.
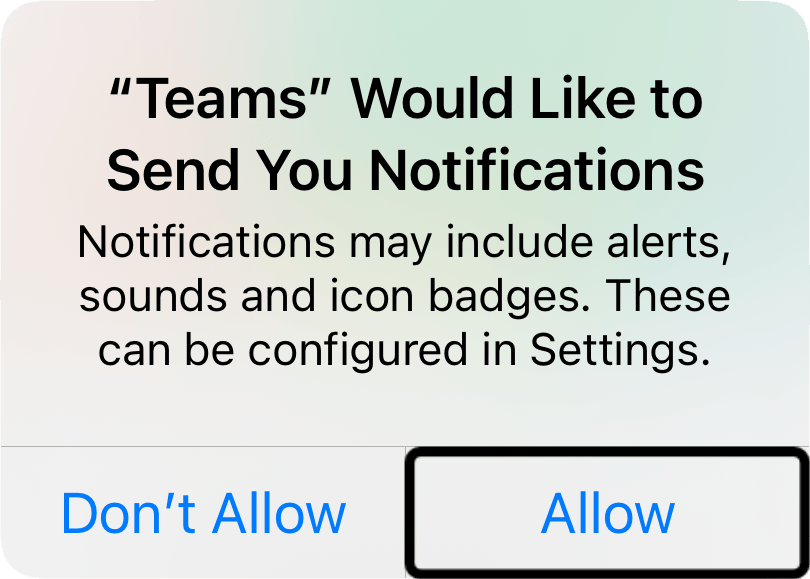
- Finally, relaunch the newly-installed Teams app. If prompted, select the option to allow all notifications.
16. Free Up Internal Storage Space on Your Device
Some users may encounter the “Storage Almost Full” alert 😱, which is a result of your device running out of digital storage space for apps, files and media.
While it may not be directly related to the push notification system on your device, running out of internal storage space may indirectly cause complications with various system functions, which includes notifications.

Therefore, if you are facing this issue, and have received the notorious “Storage Almost Full” alert, you should try freeing up storage space on your device. There are various ways to go about this:
- Uninstall apps that you may not need.
- Move media, such as pictures and videos onto a secondary storage device, such as a microSD card, which is often supported by modern mobile devices (Android).
- Move large files to an external storage device, such as a hard disk drive or a thumbdrive.
We have put this step near the end of this guide, as this will require more time to perform some spring cleaning 🧹 on your device. Plus, you’ll have to make some tough decisions on what to keep and what to remove. Also, be sure to make backups for important files just in case!
17. Report the Notifications Issue to Microsoft Support
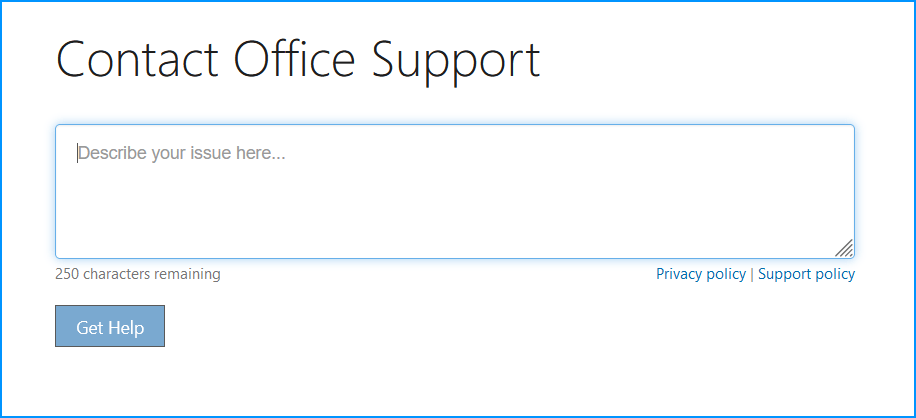
If you have had no luck with all of the 16 steps listed above, it is likely that the problem is unique, or first of its kind 😬. In this case, you should consider getting in touch with Microsoft Support on their support page.
It’s likely someone else has encountered a similar issue before. Hence, the support team might just have the exact fix suited to your situation and device.
To report the issue to Microsoft Support, simply head over to their support page and fill in the details. By giving them supporting details on the notifications issue, it will assist the help desk to better identify your issue and provide more suitable solutions for the problem. 🙂
Aside from that, here are some links to their official support channels:

Conclusion
In short, this article offers 17 different fixes that you can try out if you’re having trouble with MS Teams’ notifications on a mobile device. Hopefully, by now, you have resolved the issue and have returned to full productivity! 🙂
Also, if you are having issues with Teams’ notifications on Desktop, be sure to check out this post.
Finally, don’t hesitate to let us know in the comments:
- Did we miss a fix that you know about?
- Are you facing similar issues with MS Teams?
- What other problems are you encountering on Teams? We might just be able to help!
Feel free to share this post with others whose Teams notifications are not working.